
In this tutorial we will setup running E2E tests in React Native app on build pipeline / AppCenter with Cavy framework. We will cover:
- what is Cavy and how to write E2E tests for React Native
- how to run Cavy tests in a build pipeline
- how to run iOS simulator / Android emulator in CI pipeline in MS Appcenter,
- intro to basic shell scripting
As a bonus, we will also cover:
- running Jest coverage tests and catching Jest coverage output to the file,
- collecting device logs (for iOS and Android) + also with logs from the JS side
- reporting: sending all zipping all these data and sending it to your mail using Sendgrid Mail API (the perfect option for nightly builds)
Hi there! I am Stefan Majiros, senior React Native Developer working at my mobile MVP development studio at stefan-majiros.com and you are reading my another tech blog post.
Cavy, Appium, Detox
To start, Cavy is an E2E testing framework. As you could read in Cavy's docs here:
"Cavy is a comparable tool to Appium. The key difference is that Appium uses native hooks to access components (accessibility IDs), whereas Cavy uses React Native refs. This means that Cavy sits directly within your React Native environment (working identically with both Android and iOS builds), making it easy to integrate into your application very quickly, without much overhead".
Also, installation and setup are identical for both iOS and Android in comparison to e.g. Detox. Cavy is really lightweight, and is much easier to set up and get running quickly - but on the other side, this also means, that as Cavy runs only in a JS environment, you could not interact with native components such as permissions dialogs for the camera, push notifications, etc yet.
So, if Cavy is a go-tool for you depends on what you need to test.
1-min Intro to Cavy
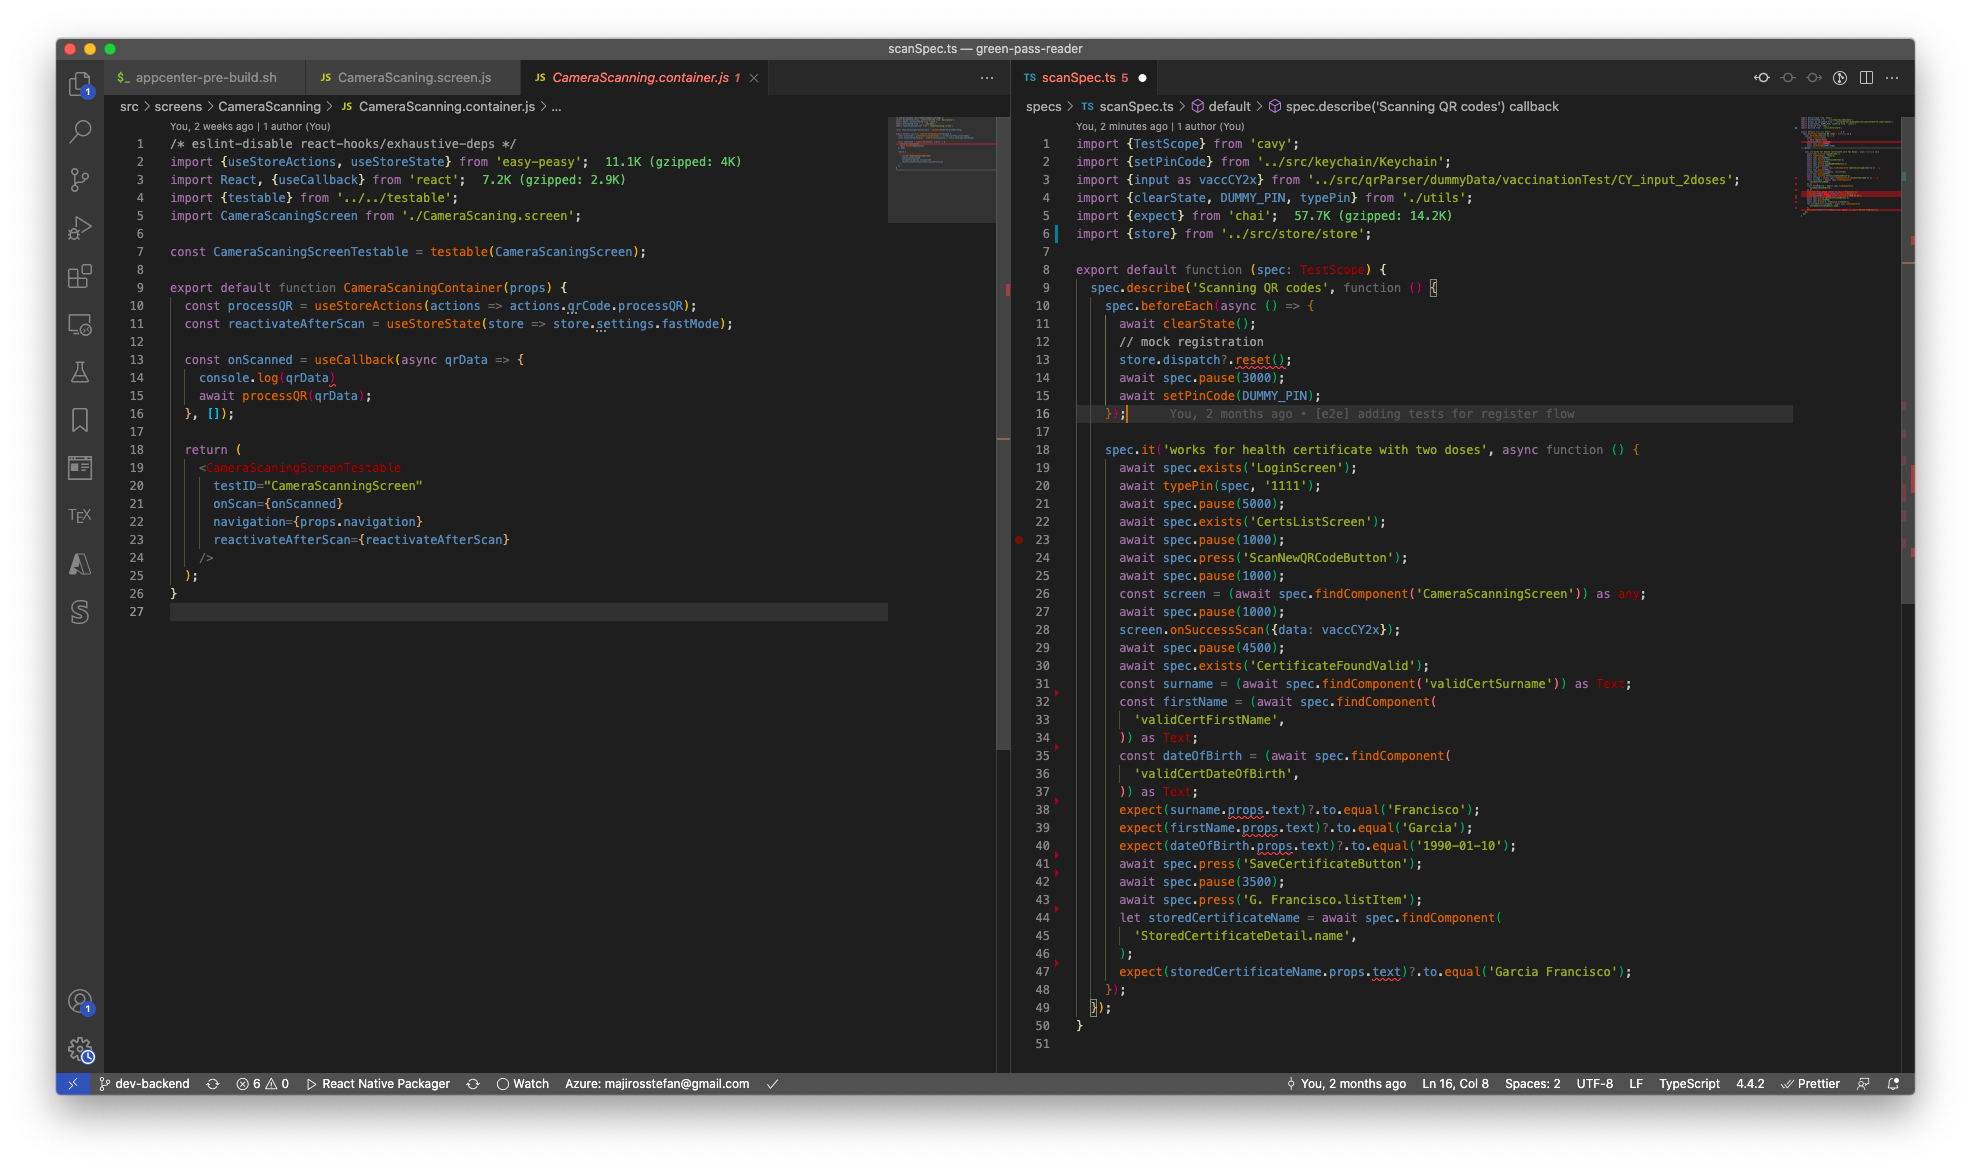
For example, even if you are using camera scanning in your app, there would be some kind of onScan/ onSuccessScan method in your camera component and you can still use Cavy for E2E tests. See 🚀 (rockets emojis) in the following code example below:
So if you need to test the flow that is executed by calling onScan / onSuccessScan method, you only need to:
- give parent component (CameraScaningScreen) Cavy's testID
- and then in test definition, use the same testID for accessing component and call onSuccessScan method directly (thanks to Cavy's findComponent method). See the example for findComponent code below:
As you have already seen 1 React component above (that uses a camera to scan QR code and then calls custom business logic), just to give you a full & brief example of Cavy, here are two/three other files:
- on the left you can see 'container pattern' - it's the wrapper component for the presentational component (few lines above where). I added testID for Cavy and connected the store (actions, dispatches, etc) there
- on the right, you can see an example of the Cavy test spec
• Following is the content of testable.tsx: a reusable functional component that could be used across your app to inject Cavy testID's for components you need to mark. The benefits are that Cavy dependency stays at single place:
Running Cavy E2E tests
To run cavy tests, you should install "@types/cavy", "cavy-cli", and "cavy" from npm - but please, do not forget to check Cavy's docs for new updates, right here.
Cavy also allows to pass few specific command-line options:
- "--xml" - so Cavy will output test results in JUnit compliant format
- "-t" -to specify boot timeout / time until which tests should start
To run Cavy tests, I am using these commands in npm scripts (in package.json).
NOTE: I recommend running E2E Cavy tests on release variant (it's because when using debug variant, the app would not always crash on errors and therefore your E2E tests will not give you 100% assurance that the app truly works.
If you are using multiple environments/product flavors/schemes, you need to specify --variant/schemes/configuration option that will be passed to metro bundler like this:
Running Cavy E2E tests in CI / Appcenter
Now let's continue to write code that will launch Cavy E2E tests in Appcenter.
Pre-requisites: Basic shell knowledge would be beneficial, but if you don't feel like shell / bash pro, do not worry - I added few explanations.
Folder Structure
In order you would not get lost while reading this article, this is a folder structure that I used:
package.json
ios/
android/
src/
...
appcenter-pre-build.sh
 	scripts/
 			e2e.sh
    		cancelBuild.sh
    		coverageReport.sh

 		cavyResultsParser/
			cavyResultsAsJson.js
			package.json
CI Provider Limits
When using CI services, you should take a look at the limits or the maximal allowed duration of the build, as when executing E2E tests you could exceed the allowed time very easily.
When I am writing this. the maximal duration of each build is limited to 60 minutes in Azure DevOps, or in Appcenter - so you may need to create a new app in Appcenter - just for running these E2E tests.
When using a self-hosted CI server, build time duration would not be a limitation.
Code
I placed all the following code into appcenter-pre-build.sh file, so Appcenter will detect and run it when needed. Docs for other Appcenter build scripts are here.
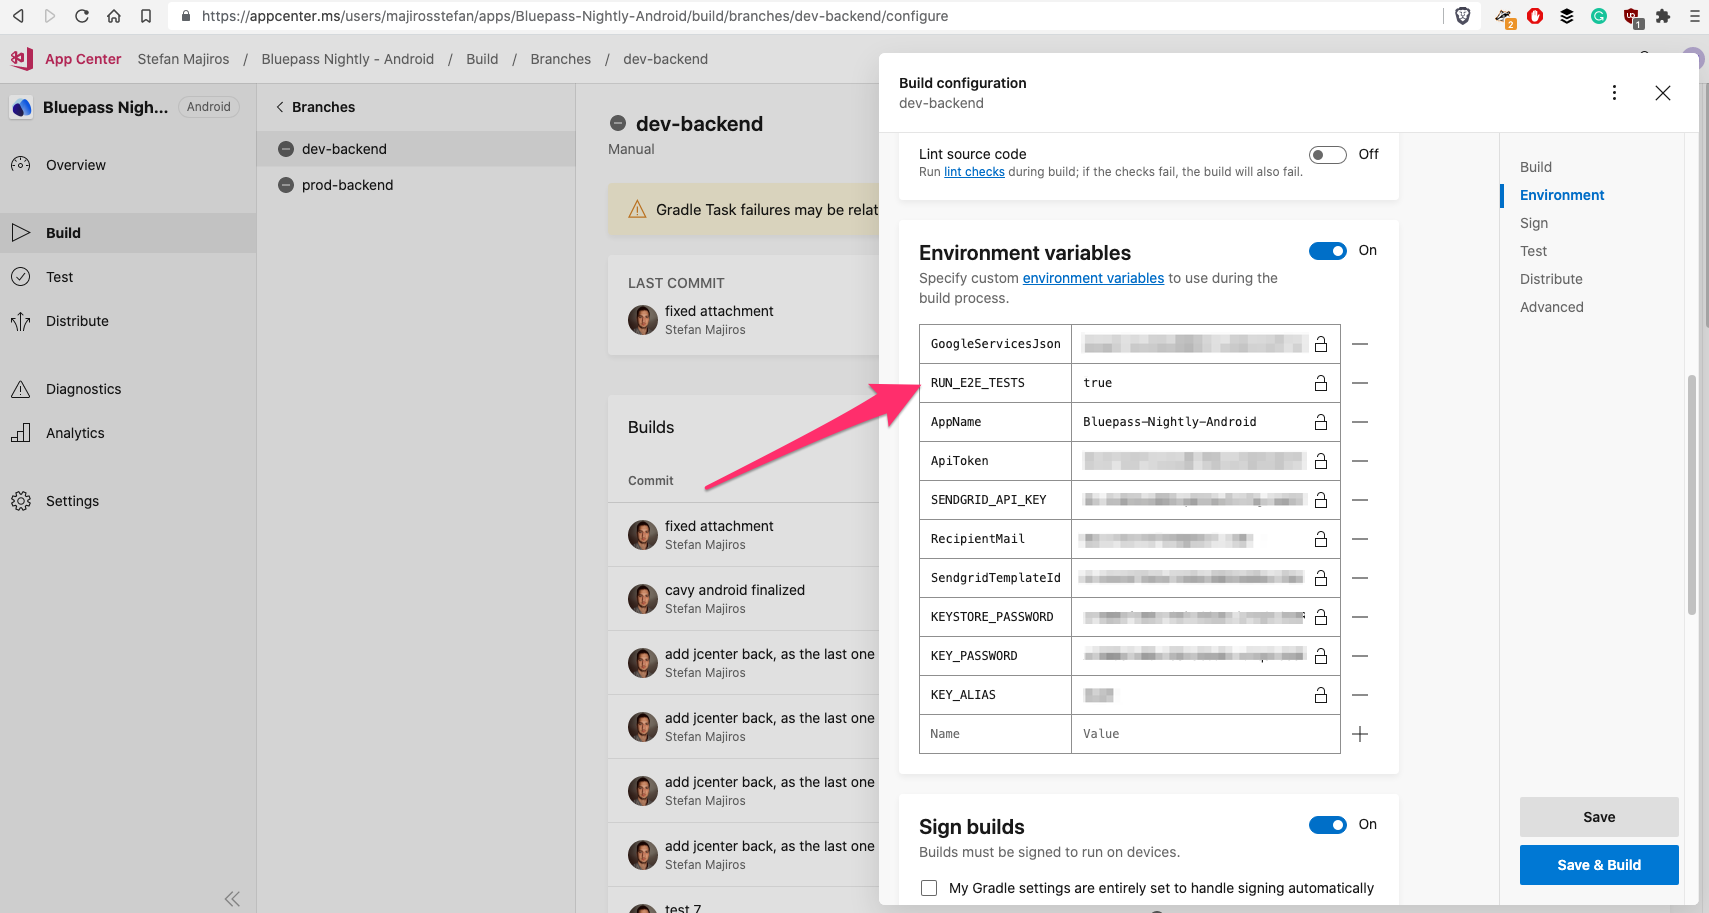
Usually, if you use react-native-env-config to handle sensitive API keys / credentials / Firebase keys, you would put something like this in appcenter-pre-build.sh:
and then in Appcenter, you would use environment variables and populate them with sensitive data:
Because I used Android product flavors, there was small change necessary in android/app/build.gradle, as I was receiving error like "installProdRelease not found" during build process - I later found it's a result of invalid signing properties.
Although, Microsoft recommends to use this (link here):
When I added Gradle logger into the end of my app/build.gradle file:
I always got printed "null" which led to an invalid signing and that strange error above.
To solve that issue, I:
- put KeyStore file into app code (I did not put Keystore into Appcenter UI),
- put Keystore information into environment variables into Appcenter ( KEYSTORE_PASSWORD, KEY_PASSWORD, and KEY_ALIAS in the Appcenter pic above) and not into Gradle section
- I used System.getenv instead of System.getProperty in android/app/build.gradle
NOTE: Also, if you use any Firebase services, I recommend you to use base64 encoding for GoogleServices.json file as there is no need to escaping the JSON file.
Skipping E2E Tests For Some Branches
However, the thing is that whenever you add appcenter-pre-build.sh file into your React Native project, this script will be executed upon each build and branch.
When you need to skip running E2E tests in some branch for whatever reason, you can always write the following code to read environment variable (e.g. RUN_E2E_TESTS) in appcenter-pre-build.sh build script.
Then, if for example, RUN_E2E_TESTS is not set for a given branch, you can exit the script gracefully and Appcenter will proceed to build your app as usual (without running E2E tests).
If you are not familiar with this syntax, -z is asking if the RUN_E2E_TESTS variable is zero (or undefined in terms of javascript). Just notice, we also did variable expansion using ${} syntax, so the condition will evaluate to true even when somebody set RUN_E2E_TESTS to a string of "false".
Replacing babelrc
Then, if you wish to read React Native logs from the terminal and you are using babel-plugin-transform-remove-console to remove console logs from production builds of your React Native app, you would need to turn this off.
The simplest way I found to this, is to create a copy of babelrc file named e.g babelrc_E2E and remove the inside part that tells to run babel-plugin-transform-remove-console plugin:
And then, when running E2E tests, you would just replace these files using the following code that you could add to your script (in appcenter-pre-build.sh):
Running Jest Coverage Tests
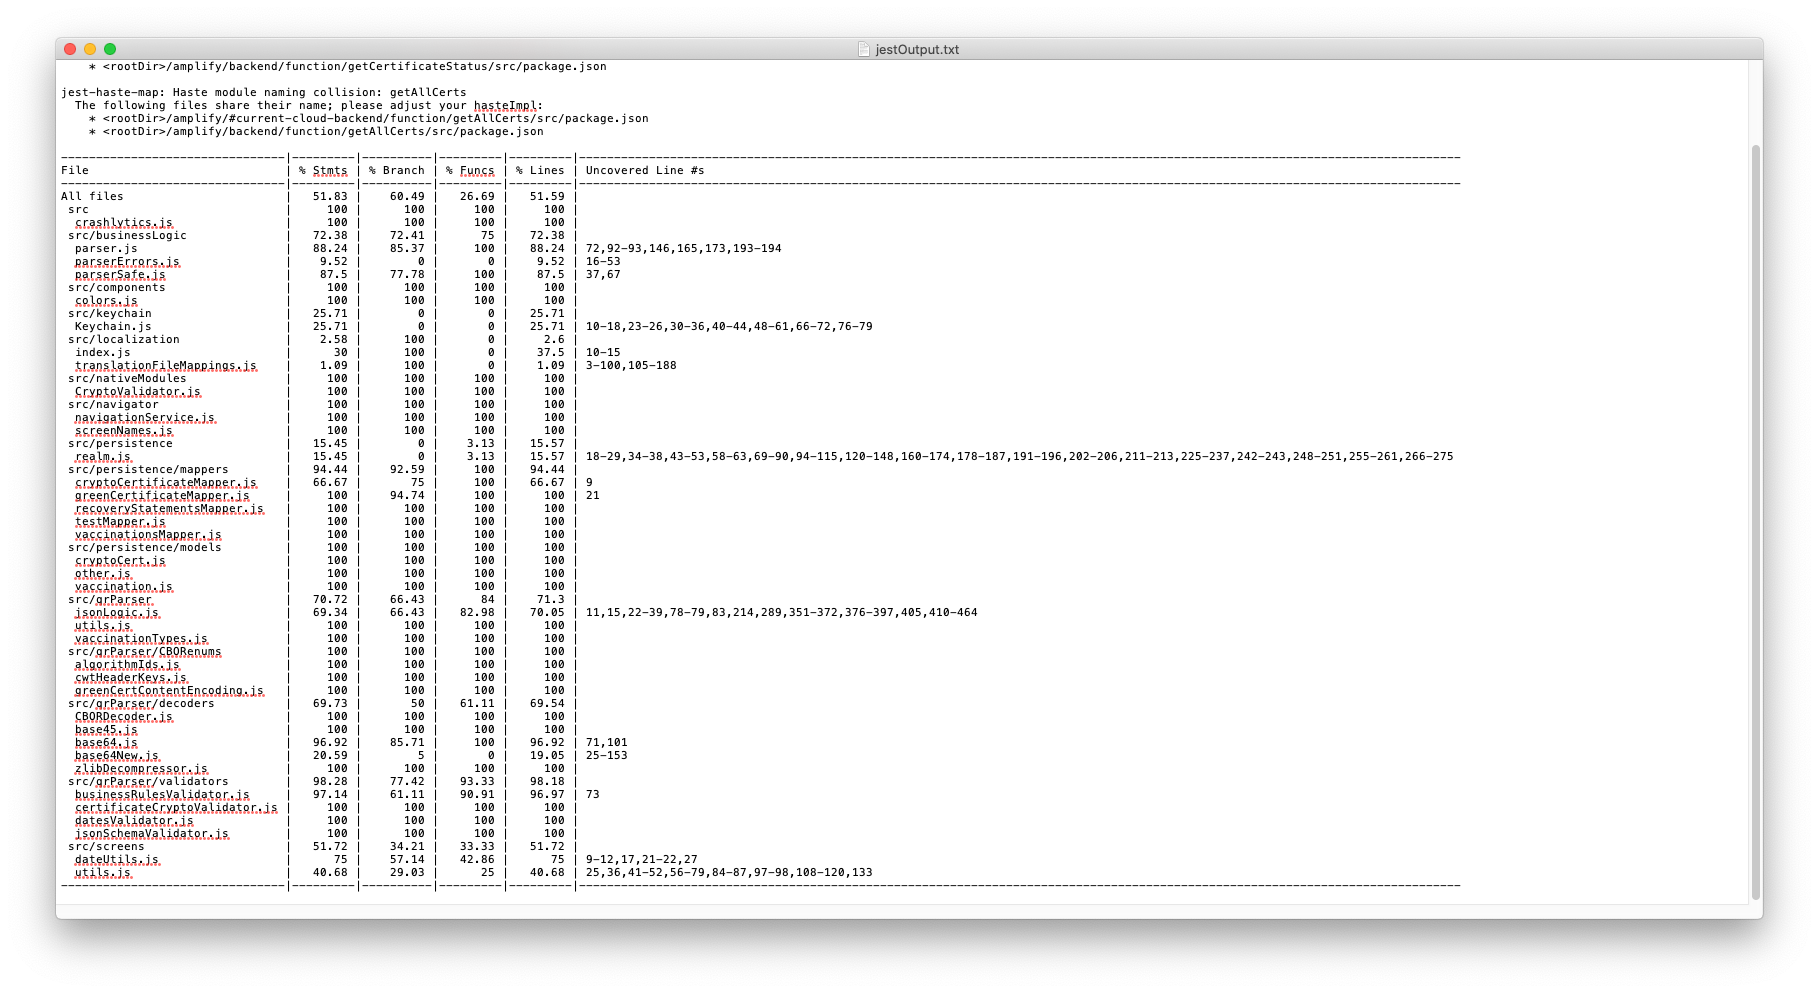
The next step is running Jest tests in coverage mode. Although Jest offers to pass "--json" parameter that will print Jest output in JSON format, by doing that you would lose this beautiful summary table below. So instead of using "-json" parameter, we will just redirect jest output into a file using '>' bash operator:
Then, after running jest coverage tests, we would have this table / jest coverage results in jestOutput.txt file:
Calling other scripts
NOTE: If you want to place a command to run coverage reports into the separate script, you should call it using the "source" command, so all variables from the calling script will be shared:
Running E2E Cavy Tests in CI pipeline: AppCenter
Now comes the part about running E2E tests with Cavy in build pipelines.
I use the code below to run E2E tests on a nightly basis. If you are interested in how to run Appcenter builds at the scheduled time (e.g. at night), please take a look at my another blog post here:
 Stefan Majiros: Mobile Development Agency w/ React Native, Serverless
To run Cavy E2E tests for React Native in Appcenter pipeline, I put all logic into a new file called e2e.sh. The skeleton of this code is pretty straightforward and in general looks like this:
Now, let's talk more about that "some stuff" part. We will start with Android.
How To Boot Android Emulator in CI Build Pipeline To Run E2E tests
We need to boot the Android emulator first. Let's start with defining some constants first in the e2e.sh file:
Finding simulator image name could be a little tricky (as it might change during the time), so this is how you will output all available Android simulator images:
After pressing enter, the commands above give you the following output to choose simulator name:
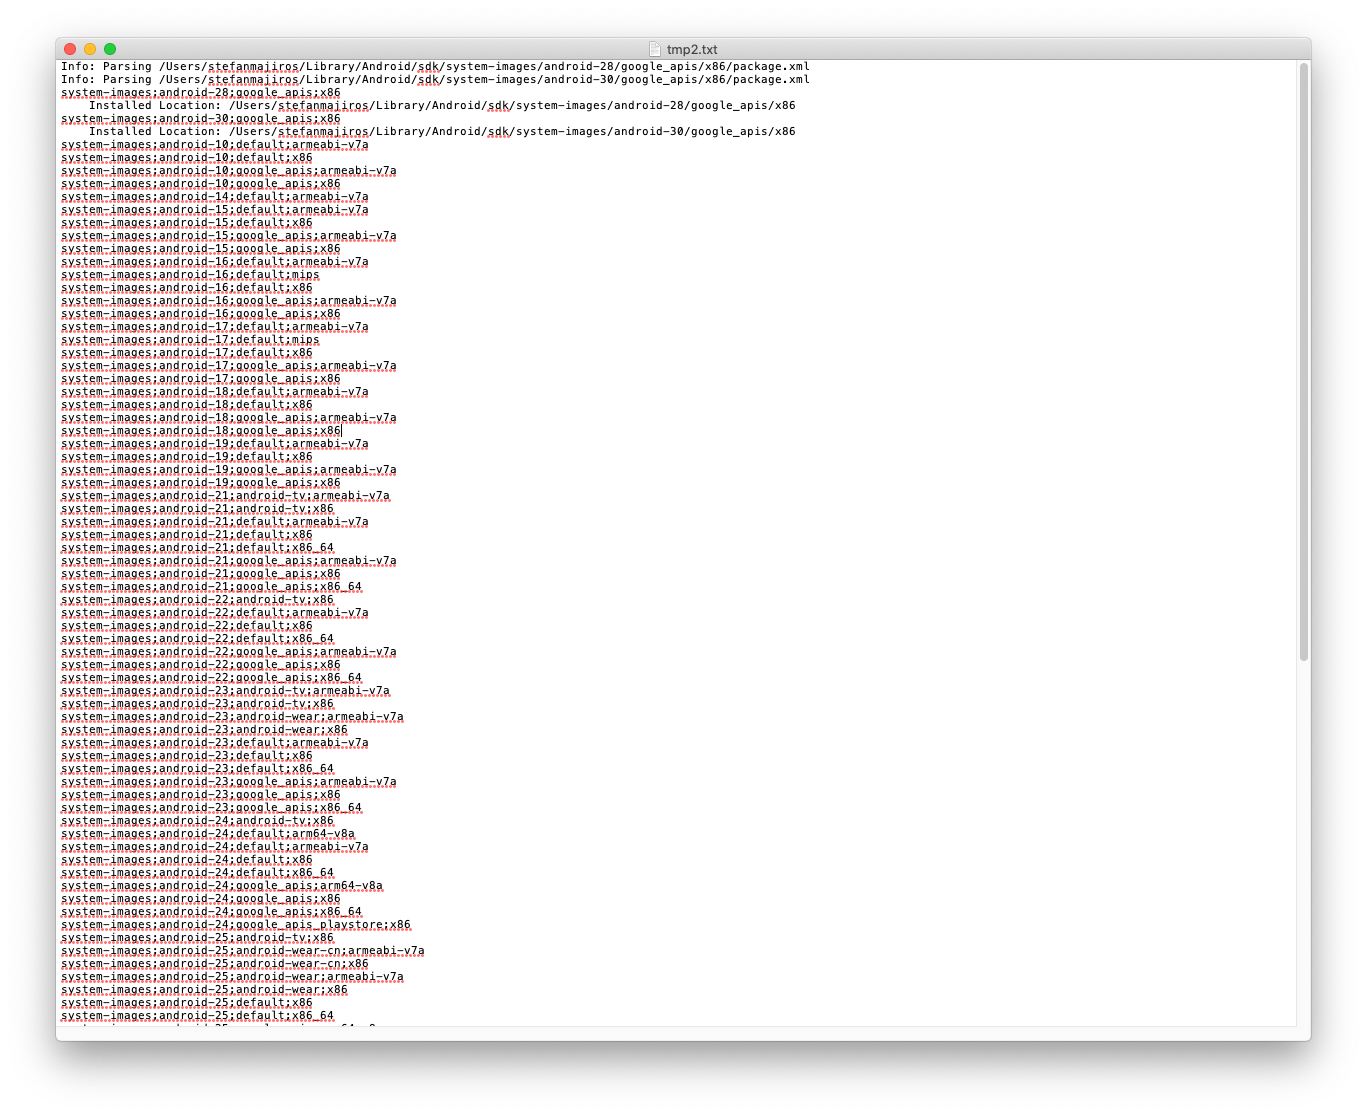
Then we need to modify PATH, to make sure all Android SDK commands are available:
Then we need to accept licenses, and download the simulator image that we need (by using simulator name from previous steps):
After downloading the image, we can create an Android emulator using the following command:
To boot the Android emulator, we need to use the command below and pass --no-window option together with "&" in the end (this allows the emulator to run in "background"). We will also need to store PID (process ID), so we can kill the emulator after E2E tests are finished, and the CI server will not keep hanging and wasting resources (money):
To wait until emulator is booted, we run this command:
Then, we just unlock screen, to be sure we can run our app:
Do not worry, we are reaching to end!
The last command that you might want to execute before running Cavy tests is to clear logcat and redirect its output into a file (so if Cavy tests fails, you can analyze all logs from device). We also store the PID of logcat process that was launched in the background too by using "&":
Now we can run a command that will build the React Native app and execute Cavy's tests. In my case I need to run "npm run e2e:android" that translates to npm script of "e2e:android": "cavy run-android".
Well, that's all for Android.
iOS
iOS is more simple. For brevity, I put all explanations into comments (hope you will understand what's going on).
The following script will boot iPhone 12 simulator running iOS 14.4 in the build pipeline on Appcenter to execute E2E tests written in Cavy:
Final code for e2e.sh (Android + iOS)
Here is the final code for e2e.sh file, which is responsible for launching the Android emulator / iOS simulator in the build pipeline on Appcenter, and runs E2E tests using Cavy:
Preparation for Sendgrid
Now, after we could boot the device in CI pipeline to run E2E tests, you may see that several files are created when Cavy tests finish execution:
- reactLog.log
- deviceLog.log
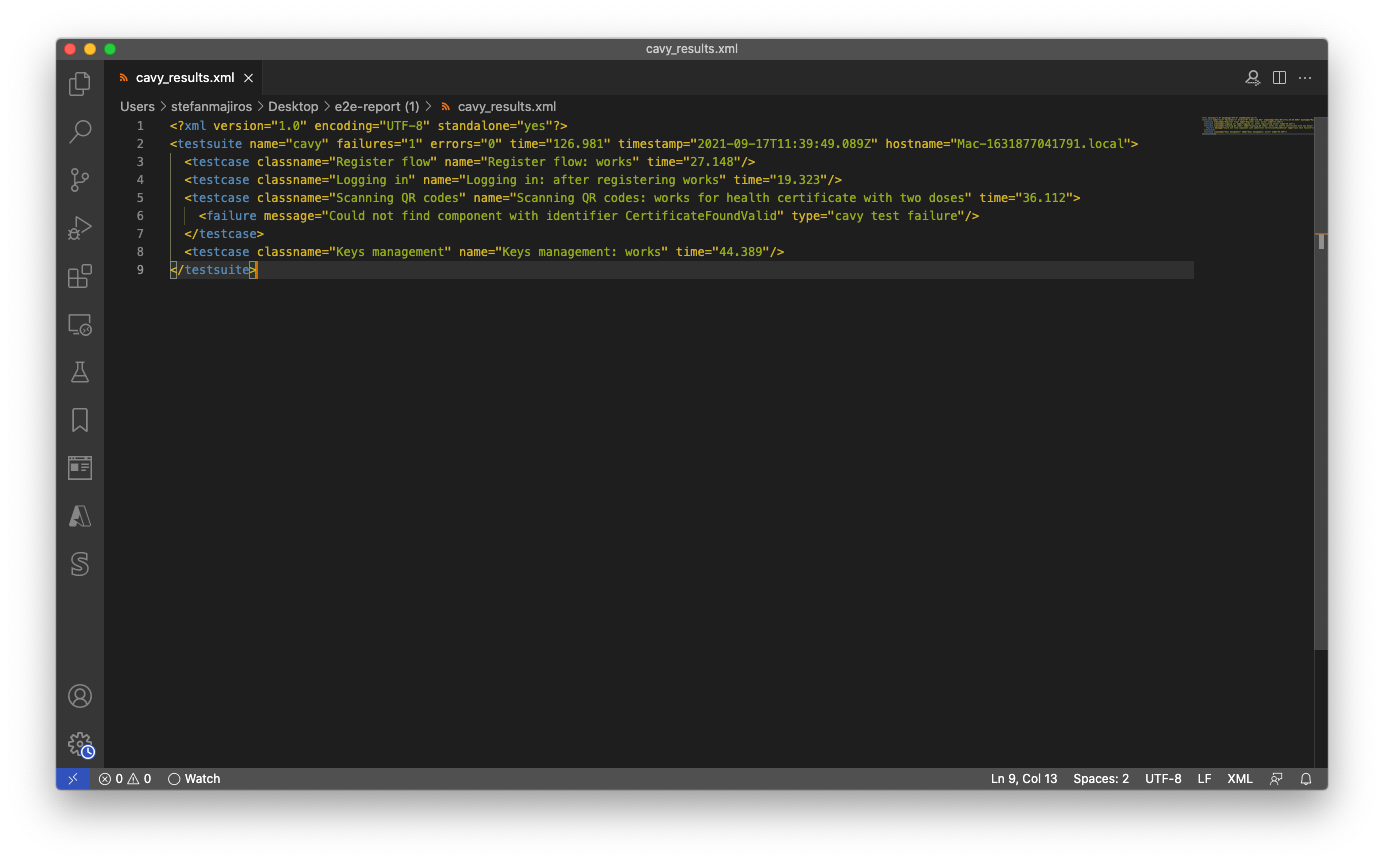
- cavyResults.xml
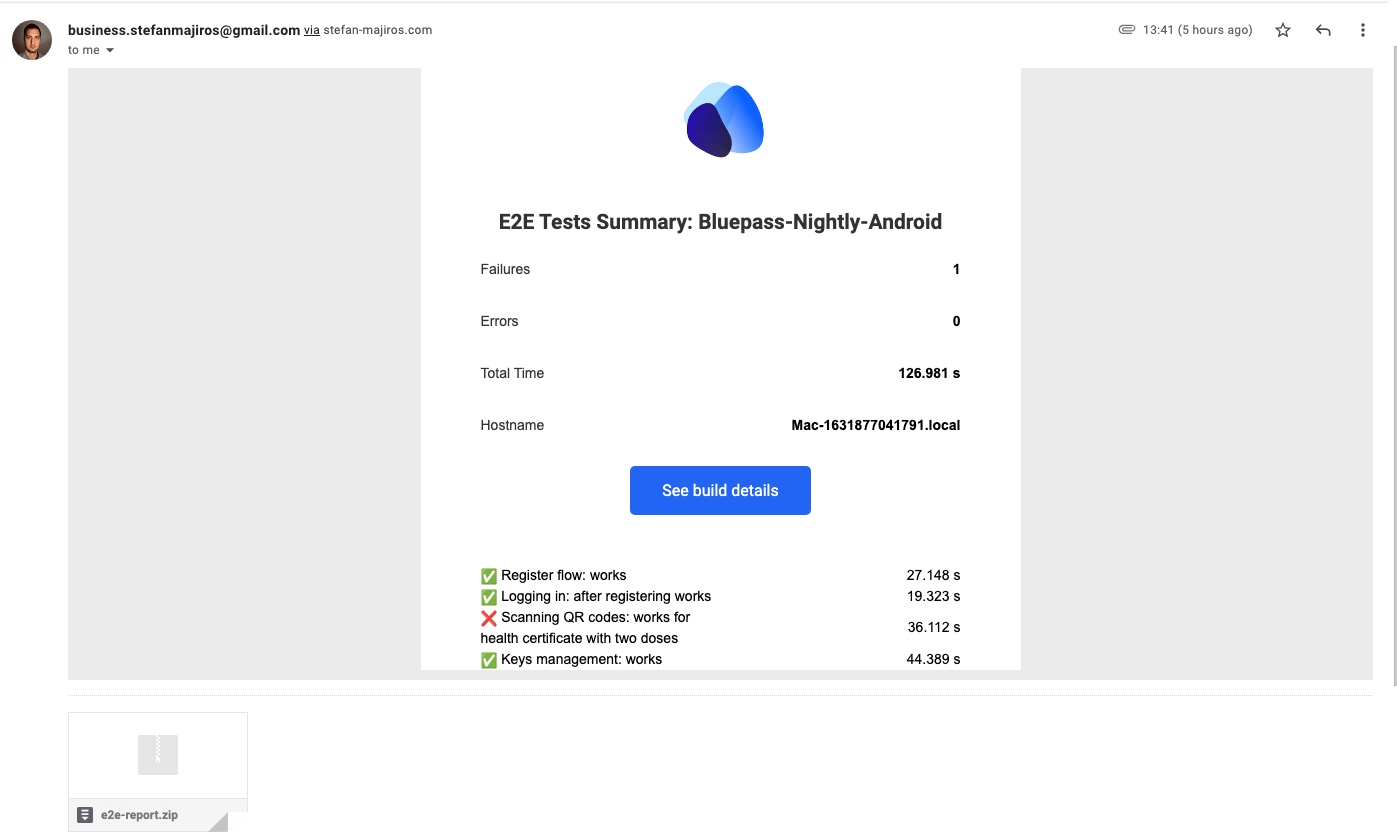
We will zip these files, and send them as attachments in an email of your choice using the cURL command and SendGrid API.
This is the screenshot of the SendGrid email in my Gmail - an example of what we want to accomplish:
Let's take a look at cavyResults.xml. They are written in JUnit compliant format:
The thing is, that as SendGrid API supports JSON only, we would need to convert Cavy XML results to JSON. So, here is the code in NodeJS:
We will run this NodeJS script from appcenter-pre-build.sh where we
- first, convert XML (cavy test results) to JSON (due Sendgrid requirements)
- then zip log files (above) and convert it to base64 (as Sendgrid requires that all attachments in the email must be base64 encoded)
- then, we will store the base64 string (containing email attachment) in shell variable:
Sending E2E Test Reports in Email With SendGrid
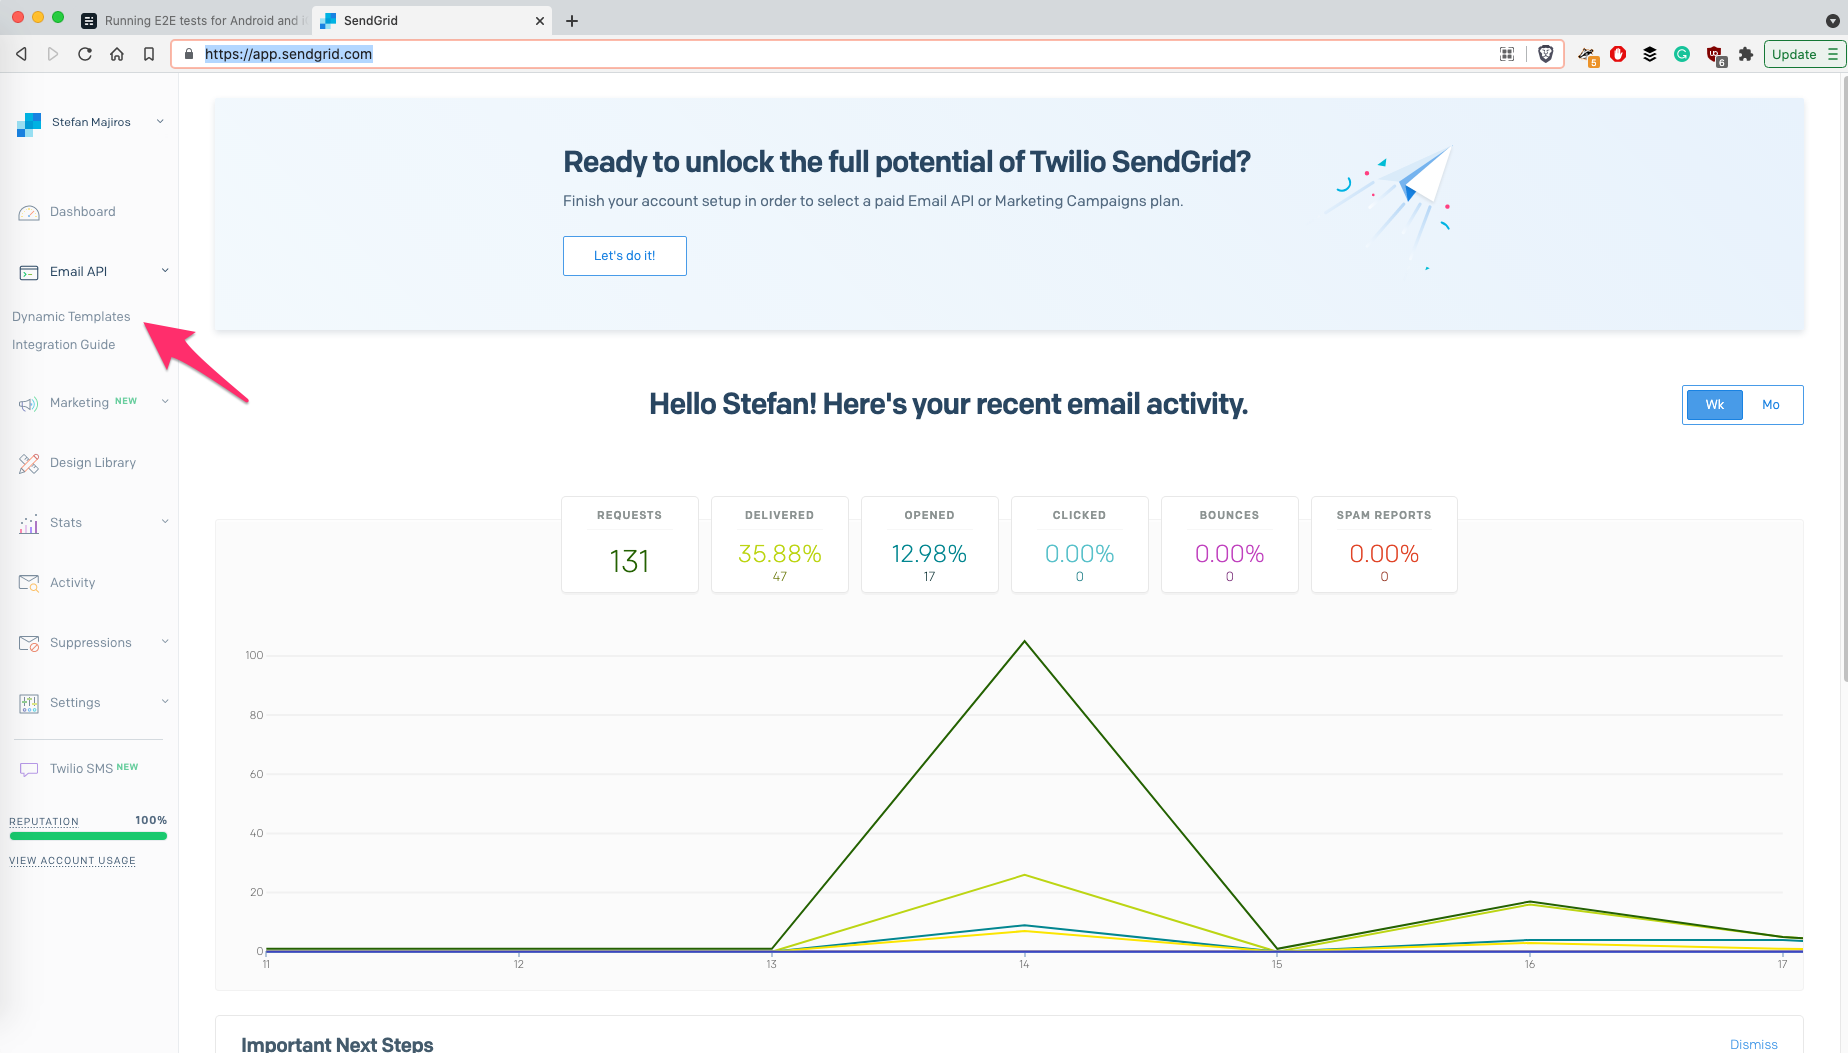
Now, we will need to create an email template in Sendgrid - I believe you can create Sendgrid account on your own (or you already did) - yes, it's free.
Here is the welcome screen you will see after creating your account:
The email template that we want to create, is in Sendgrid's world, called dynamic template - because when calling SendGrid API, we will specify templateID and pass some dynamic data for customization / personalization of the email.
Just to save you a few minutes, here is a quick walkthrough on creating a new dynamic email template in Sendgrid:

In short, you probably need to use "Blank Template" (or existing email design), then choose "Code Editor" and paste HTML code for your email. You should also remember templateID, as we will use it later in our cURL call to SendGrid.
Besides using pre-defined email templates offered by Sendgrid, you can also develop your own template - SendGrid uses Handlebars for templating.
Developing Custom Sendgrid Template
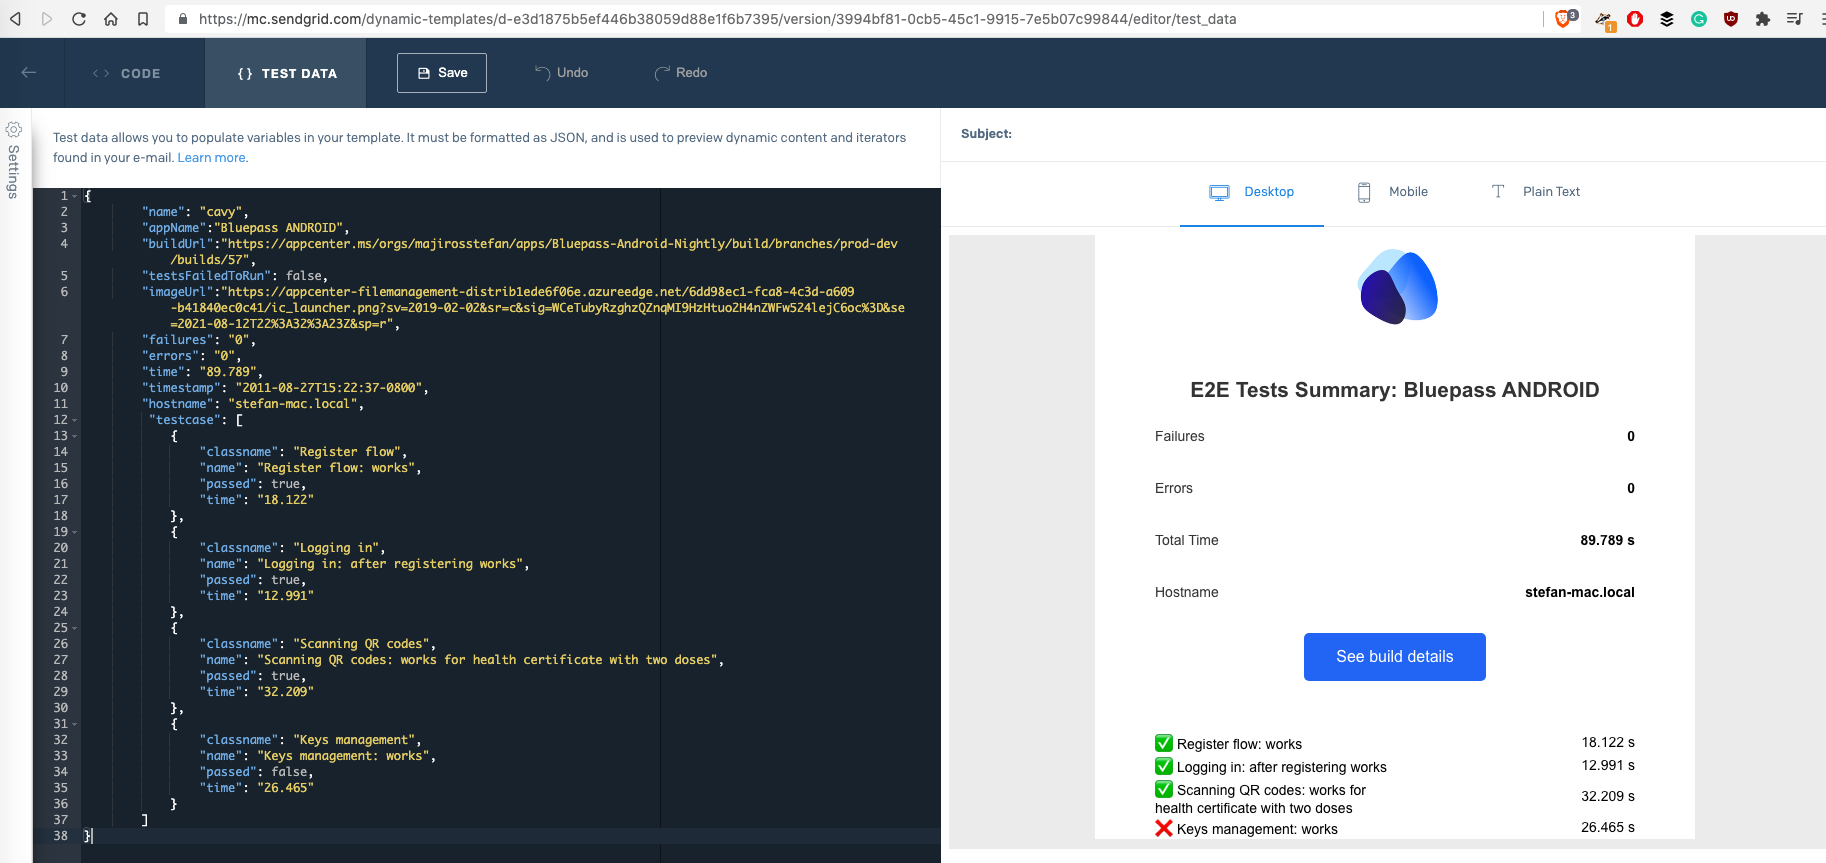
Using the Test-Data tab, you can see a preview of changes in email template (and input data) in real-time. Input in Test-Data tab accepts objects in JSON for email "personalization".
Here is an example (btw, data on the left is the output of NodeJS script that converts Cavy XML results into JSON, shared few lines above):
NOTE: If you want to use this design, feel free to find it here.
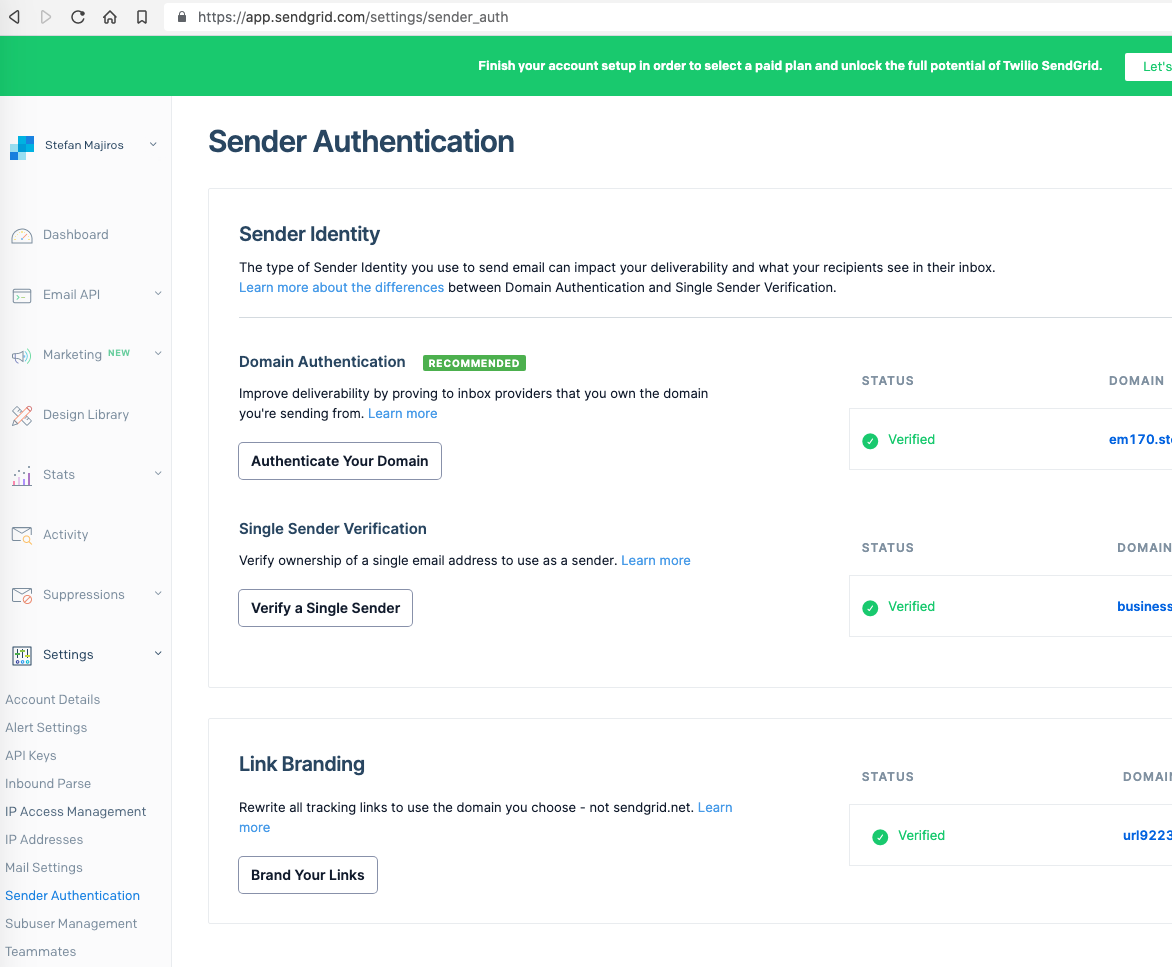
Verifying Sender
After you create your own email template, you would also need to verify one email address or web domain as a Sendgrid sender (you can also use @gmail addresses).
Sender Verification can be done in the Settings / Sender Authentication Tab in Sendgrid console:
The last thing with Sendgrid, is making sure, you have API keys. If not, you can create a new Sendgrid API key here:
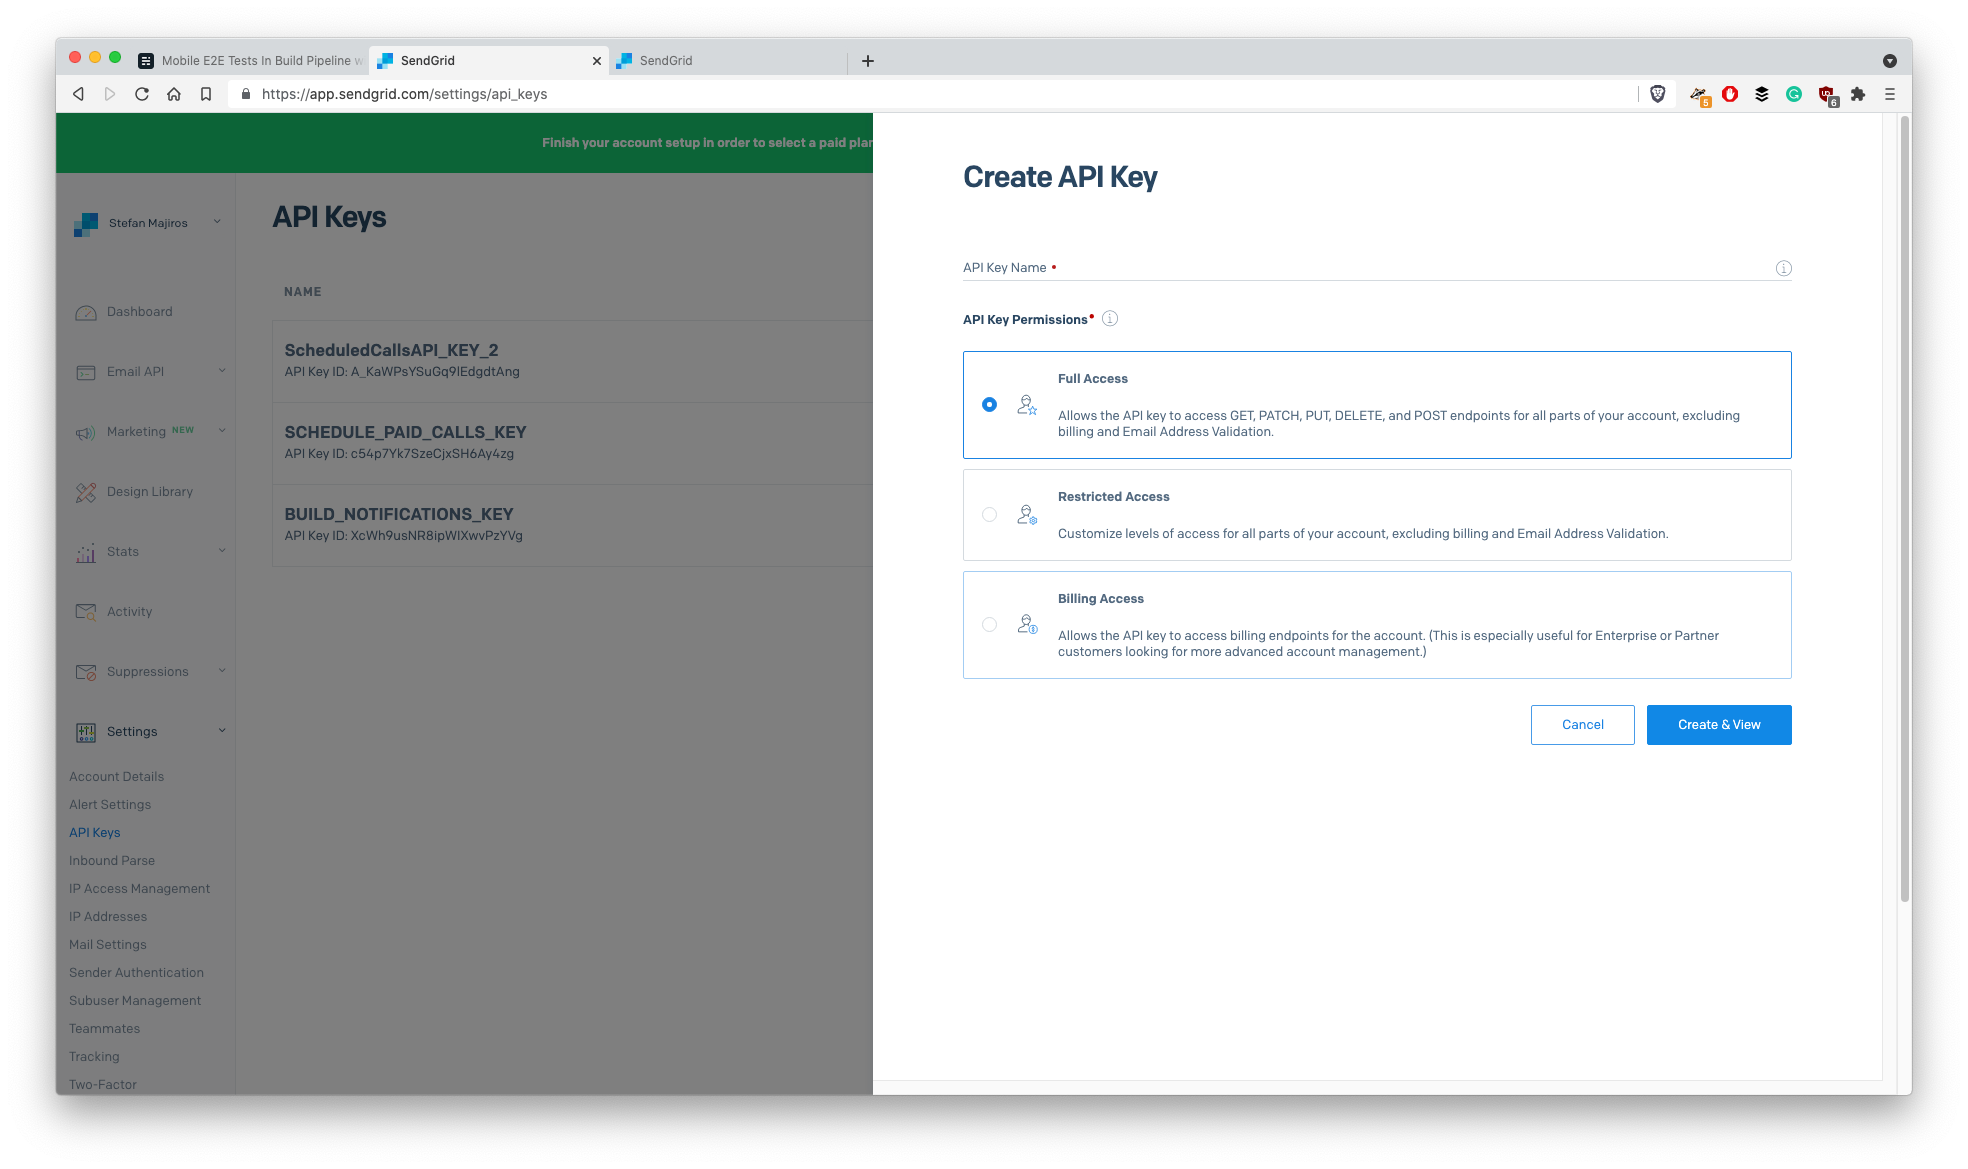
After we created Sendgrid account, dynamic template, API key and verified one email address we can continue to write code that calls Sendgrid's API.
Here we will create a SendGrid request, output it into sendGridRequest.json file, put proper SendGrid API key, and just call Sendgrid API using the cURL command:
By doing this, you should receive a new email in your mailbox (specified in TO_MAIL env variable) in just a few seconds after calling that script.
Canceling Appcenter Build
Finally, after you sent the E2E report to your email, you may want to cancel Appcenter build, so it will not try to build an app for publishing into stores.
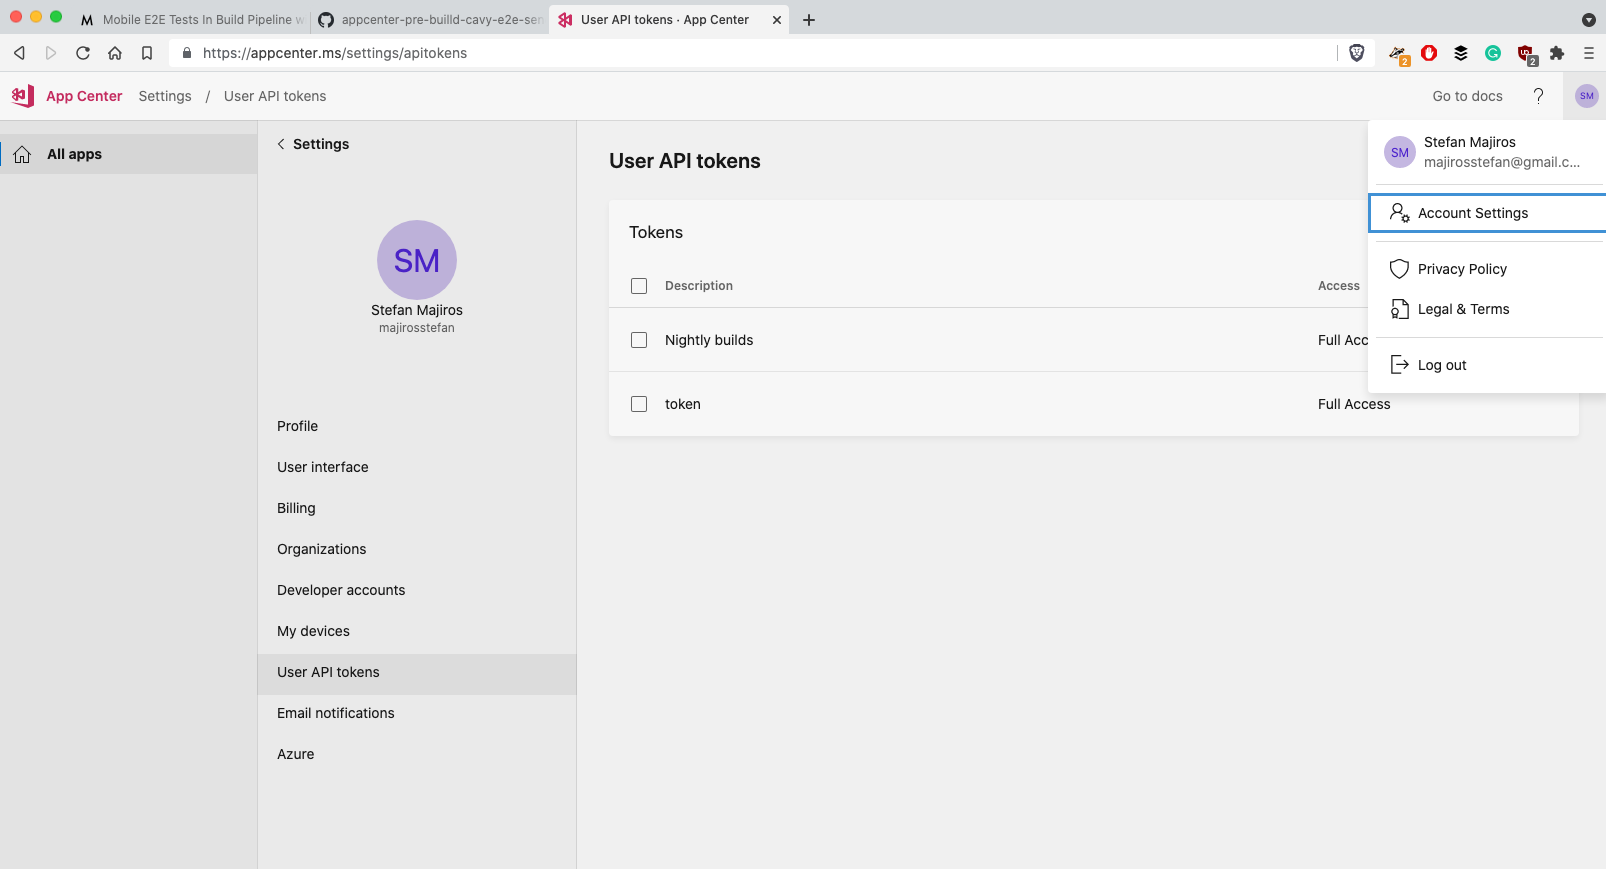
It's again very simple, as Appcenter has its own API. We need to add this cURL command at the end of "appcenter-pre-build.sh" file:
NOTE: API token for MS Appcenter can be created in your Account Settings:
Here is the final code for appcenter-pre-build.sh with some corner cases checks (e.g. if tests fail):
Final words
Also, I must say, that I used patch-package (check it out, it's very easy to use it) where I customized Cavy's behavior. I added --allTestRunTimeout CLI param so when Cavy tests cause app crash, CI will not keep hanging. Here is the patch file that you can copy and use with patch-package:
And yes, I acknowledge that some parts could be refactored - now you know all the dots for running E2E tests on Appcenter, which was the main aim of this article.