
+ my personal opinions
Intro
It was autumn 2019 when I decided to dive deep into waters of the React-Native. I had some previous experience with React, but no experience with native code and neither with cross-platform languages. To adopt React Native I decided to build the application for students at STUBA (Slovak Technical University). “It would be just another simple and typical client-server mobile application, it just cannot be that hard”, I thought - but by reading this article you can assume I was wrong.
If I should start again or advise somebody, the following would be the words I needed:
1. Find your “WHY”
“Why”, Noun: For what cause or reason, the reason for which, for what reason.
I have seen a lot of people just pass along their days without passion like they do not care about their jobs or future. Do you know Casey Neistat and his “Without Goal you can not score”? Without vision, you drift around and you never end up anywhere.
Why right "why" is important
When I had left my first full-time job it was very tempting to buy a flight ticket to Bali, Portugal or Spain and do nothing or just “explore”.
The thing is I start being bored with doing nothing. Without learning, challenging work, or growing in one or another way I start being deprived.

In wild and dangerous business waters, things can get tough. You may find something that you wanna try, but sooner or later you will need to solve some issues.
With more problems coming towards you, you are more likely to stop working on something that looked so important for you back in time. If you have your right, not-selfish or ego-driven "WHY", something so important or exciting that you can not wait to get up from your bed and continue working on it, you are in the zone where great things happen. You should find something that you like doing — with hate you definitely will not go very far. If you find your work to be exhausting, uninteresting or boring, maybe it is time for a change.
Sure, when I look back, I was often frustrated with some things in the beginning. But, I must also tell that what came later was one of my most creative times and - I was really happy.
These days freedom, challenging work, place to grow, great leadership, creativity are what catches the attention of people like me. It's not just about company name, your boss or team.
To sum it up you need to find your "WHY" to do things that:
- you will certainly be proud of completing
- drive you to create something bigger than yourself
- are not purely ego-driven
- allow you to learn (creativity over repetitive tasks)
- challenge you
- you will do even in tough times
- are in harmony with your character (just be yourself)
And remember that it takes on average only 4 attempts to succeed.

2. Get to know your customers
Do you know who is the primary target group for your app? The young students at high schools or skilled professionals in their 30s have different expectations. If you are building something with global impact/availability, did you incorporate all cultural do’s and dont’s ? Will they use it indoor/outdoor? Do you need to include heavy offline capabilities, optimize for slow network conditions, etc. ? If you are heavily relying on the camera/photo scanning, will it work also at night? If you are building something for a stable and big company, did you ask for their style guidelines? Do you know which devices and platforms do they use?
After identifying client needs you can very fast analyze what is currently at the market, see what the users do not like and what their real-world habits are. I recommend you to do the one or another kind of market-analysis that gives you the answers to the questions I mentioned.

3. Find your study-guide book or course
"Master Java in 3 Days", "Android in Nutshell" or "iOS Expert in 10 days" — are hot candidates for titles of books or video-courses. If you are a person working in the SW industry, you surely know it does not work like that - and to be honest, it took me definitely more time than 10 days to "understand" the RN ecosystem and its cons and pros.
When you want to learn about something you do not know, the solution is simple — read the book from somebody that knows more than you. Believe me, great books are made because somebody is trying to tell you something. Youtube videos will not give you view big enough.
Maybe you could find a better book but I can recommend you this one: Mastering React Native.
I have also found out that I did remember more from reading books, than from watching video courses only + I was able to find code snippets or problematic topics much faster than with video courses.
If you still insist on video-courses, there is no need to pay for them:
Stanford offers great React Native course for free: (was there any bad course on Stanford ? )
If you are convinced you do not need any upfront learning, it will come back to you in the future. Trust me, I have been there multiple times and I am sure you do not want to learn things “the hard way” like me and moreover, in between tight deadlines.
Decent RN Book / Course should make you understand the following:
 Stefan Majiros | Freelance React Native Developer
All of this knowledge will help you to properly estimate the effort required to build the RN apps.
Learn on your own too, but not to level you close your mind against the new
During the learning process, it is crucial not to be against any new unknown ideas — and it is purely up to you or your team to find out if something new is bullsh*t, anti-pattern, or something you could benefit from. Just keep your mind open to the changes.
4. Get or Make Design
After market-analysis and some theoretical technical knowledge (deep enough to allow you to estimate the complexity of your app), this is the place where designers come to the game (very often you just should go and find them). The created outcomes a.k.a fully-functional design should be agreed on with the client or product owner now! and not later. It is much, much easier to rework application UI prototype using designer tools, than to re-code already built application and associated business logic.
Why design matters
As you can see in the AppStore or Google Play, people love great UX and UI. The great UX works with emotion, makes you want to use the app once again, etc.
Moreover, the poor design looks unprofessional and it hurts also both your personal brand and new incoming clients. Just think about that sooner or later your client could realize that he wants something “nicer” just to be more market-competitive. Yes, you can do it, but you can also get stuck with this project and not be able to take a new one.
Make your design useful, easy to use, and desirable in a way that represents you and your personality.
If you do not want to hire a professional designer, you could still create the design by yourself.
You could use either:
- Figma (free for macOS and Windows)
- Sketch (only for macOS)
- Adobe XD
- Invision (mostly for publishing design)
To start quickly, you can find free Figma templates here or Sketch templates here and then just edit them: but be aware, that great UX/UI is more than just “redesigning” templates of someone else. UX / UI are deeply related to the specific problem you are trying to solve. And also be sure that the final design reflects you or your brand in one or another way.
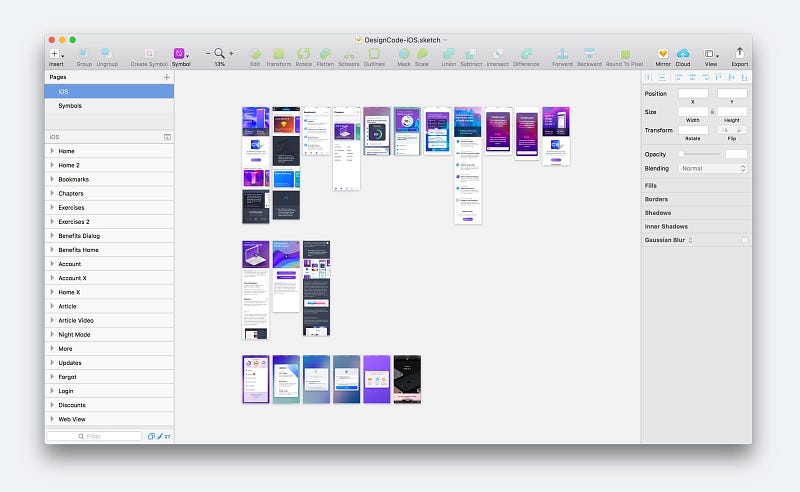
Finally, all built "sketches” will help you to create a clickable prototype that you could share with the client and discuss ideas. Yes, clickable and exportable. See example below - what could be built with Sketch (with no code):
Moreover, with a great design tool you should be able to export parts of delivered templates e.g. in SVG, PNG formats and use them directly in your code (I added it here because not many people know about this).
After I-have-design phase
With the all design files in front of you, you can analyze reusable components, identify how many screens you need, etc... Then you could distribute these independent screens between your whole UI team members to develop app faster.
5. Development
After planning, and design analysis the development is right ahead of us. Let’s go.
The later in time the bigger or more complicated changes come, the more dirty your code would be. And certainly more buggy. I definitely recommend you not to start without having any design upfront.
Read the docs (and continuously)
Whenever you start doing something, read the documentation. In this fast-paced world, things are changing almost with each new release and it is necessary to be in contact with RN developers. Put your ego aside, and do not think you already know everything.
Start with hello world
Make sure that you have installed all the stuff React Native needs for both platforms. If you are starting with nothing ( like I was ), make sure that you can run a simple application like "Hello World". Try to edit it, change texts, add more components and styling just to become familiar with the tools.

Develop UI with Storybook first
Then if you are brave, go and install StoryBook.
UI development is typically done with the help of the Storybook that allows you to transform the design from Sketch into code without the need to deeply integrate UI screens with external data fetching e.g. like API calls. Moreover, your components will be more isolated, reusable!!, your code will be cleaner and by running multiple emulators with Storybook-backed application you can fix screen-resolution-oriented problems early in the project phase. Start thinking about interactivity, hiding/showing components, inputs handling, etc.
Moreover, by using Storybook you will create the project, which is definitely much easier to maintain in the future.
Create your app-flows using navigation library
If you have read a great book or watched a video course, you already know that react-navigation allows you to compose navigators in a structure similar to a tree. After you have developed screens with StoryBook, connect them to navigation and create application flows (take a quick look below).
//screens, navigation and navigation-nesting example
import {  createStackNavigator,  createBottomTabNavigator} from "react-navigation";


const AppBottomTab = createBottomTabNavigator({
	firstTab:
 		{    screen: Home,
             navigationOptions:
             	{
             		title: "Home"
                }
        },
    secondTab:
    	{    screen: Profile,
             navigationOptions:
             	{
                	title: "My Profile"
                }
        }
 });

const RootStack = createStackNavigator({
	errorScreen: {
    	screen: ErrorScreen,
        navigationOptions: {
        	header: nullHeader,
            headerLeft: null
            }
        },
    appHome: {
             // navigators nesting example
             screen: AppBottomTab,
             navigationOptions: {
             	header: nullHeader
                }
             }
});// you should render this oneexport default RootStack;
Use state-management libraries
After you have introduced navigation, it is time to involve the state-management library (if it is needed). Model your state on the board without coding anything, just to see what you need to handle and where you need to handle it. Divide And Conquer.

Add more business logic / Handle side-effects
For asynchronous actions or more complex business logic, you may need to add Redux-Saga or Redux-Thunk. Although with both you can define business flows, by using Redux-Saga you will create much cleaner code - you will just need to understand JS-generators syntax. Just to give you a few examples, Redux-Saga can be used for calling APIs, handling OAuth authentication and tokens refresh or interacting with persistent layer -database.
If you choose MobX as your state management library there is a chance you will need neither Redux-Saga nor Thunk. So you could handle side-effects directly with MobX.
No matter which library you choose, be sure you read and can use also things written in advanced parts of the documentation. Everybody can do Hello World.
To keep your code clean, do not write spaghetti-code, too much-complicated code or invent your own wheels. Just NO.

Few library hints:
After you have mastered all of this, you can find a few more things about how to improve your application even further:
- caching images to save bandwidth /react-native-fast-image
- using gradient colors / react-native linear gradient
- using SVGs instead of PNGs / react-native-svg
- addind better calendar pickers / react-native-calendars
- considering using already build elements / e.g. react-native-elements
- using camera, adding QR / Barcode Scanning / react-native-camera
- improving splash screens
Summary
I wrote this article just to show you, what it takes to create great React Native application and what mistakes I made and - you do not have to. I have tried to share as much as I could and describe every resource that helped me.
Before you even start, you really need to find motivation or reason to create something valuable so that your application would not end like a side-project (unfinished). At least, I personally prefer not to end with just Hello-World applications.
If you have found your goal, you just need to start preparing to score. Know your market, users and their habits. Without failing to prepare for this you are preparing to fail.
Continue with the learning phase. By finding proper learning materials, you are one step closer to your goal. With all theoretical knowledge, you can start planning the development of your app. Involve UI / UX designing in the process, as it is very important and cheaper than rewrite your application later on the client's demand.
Continue with StoryBook development. After just add navigation, connect state-management libraries and you are almost done! If needed, install Redux-Saga or Redux-Thunk to handle complex business logic and confirm the final state with the client. And voila, your application is born and…
You have just scored the goal.
So far I did not write anything about testing, setting up your CI build and distributing your application to end-users. So, the next story will be about unit and E2E (end-to-end) testing, setting up CI, distributing the application to the end-users and maintenance of RN apps.