
by Stefan Majiros
NOTE: Link to repo is in the bottom of this article. But instead of cloning it directly, try first to understand what’s going on please.
Link to iOS part:
https://stefan-majiros.com/integrating-zoom-sdk-into-react-native-v-63-4-complete-tutorial-ios/
This is tutorial about how to integrate ZoomSDK into React Native app.We will cover how to initialize Zoom SDK, join meeting and start meeting from the mobile device.
Well, make yourself coffee(tea) and start reading.
First step: Scaffold RN app
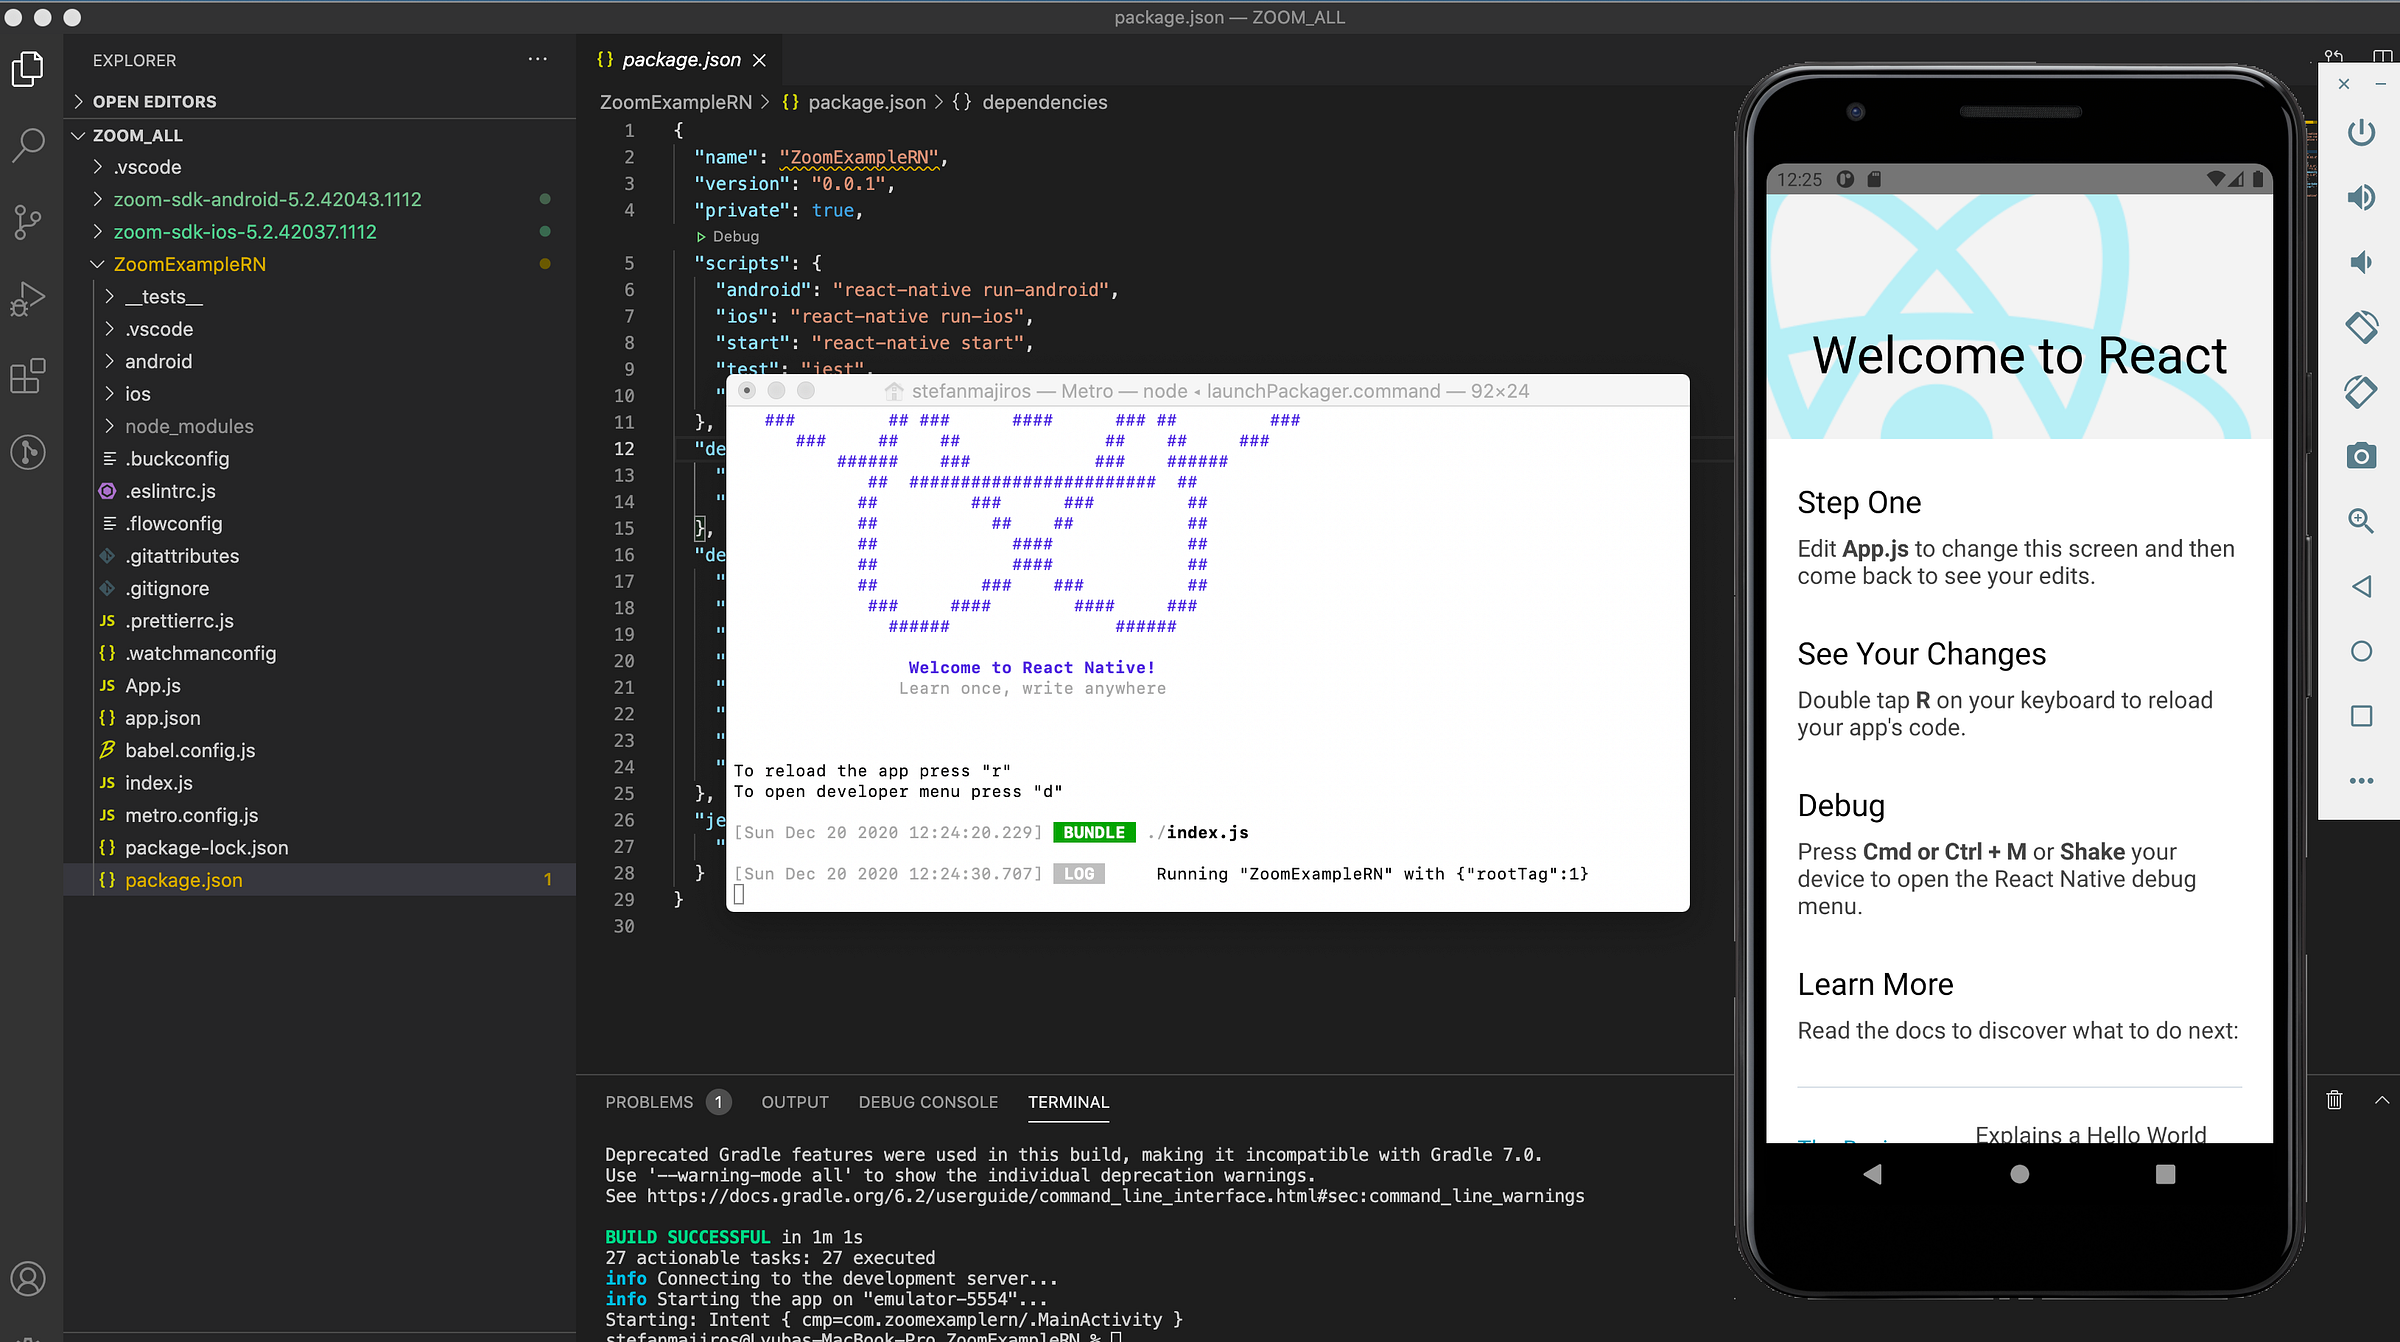
Let’s start from the scratch and create RN app by using “npx react-native init ZoomExampleRN” command. Then, we just run the app to validate that there are not any issues with environment.
Downloading ZOOM SDK for Android and iOS
Then we need to download SDK from ZOOM. The recommended way is to create account (register) at the marketplace.zoom.us.
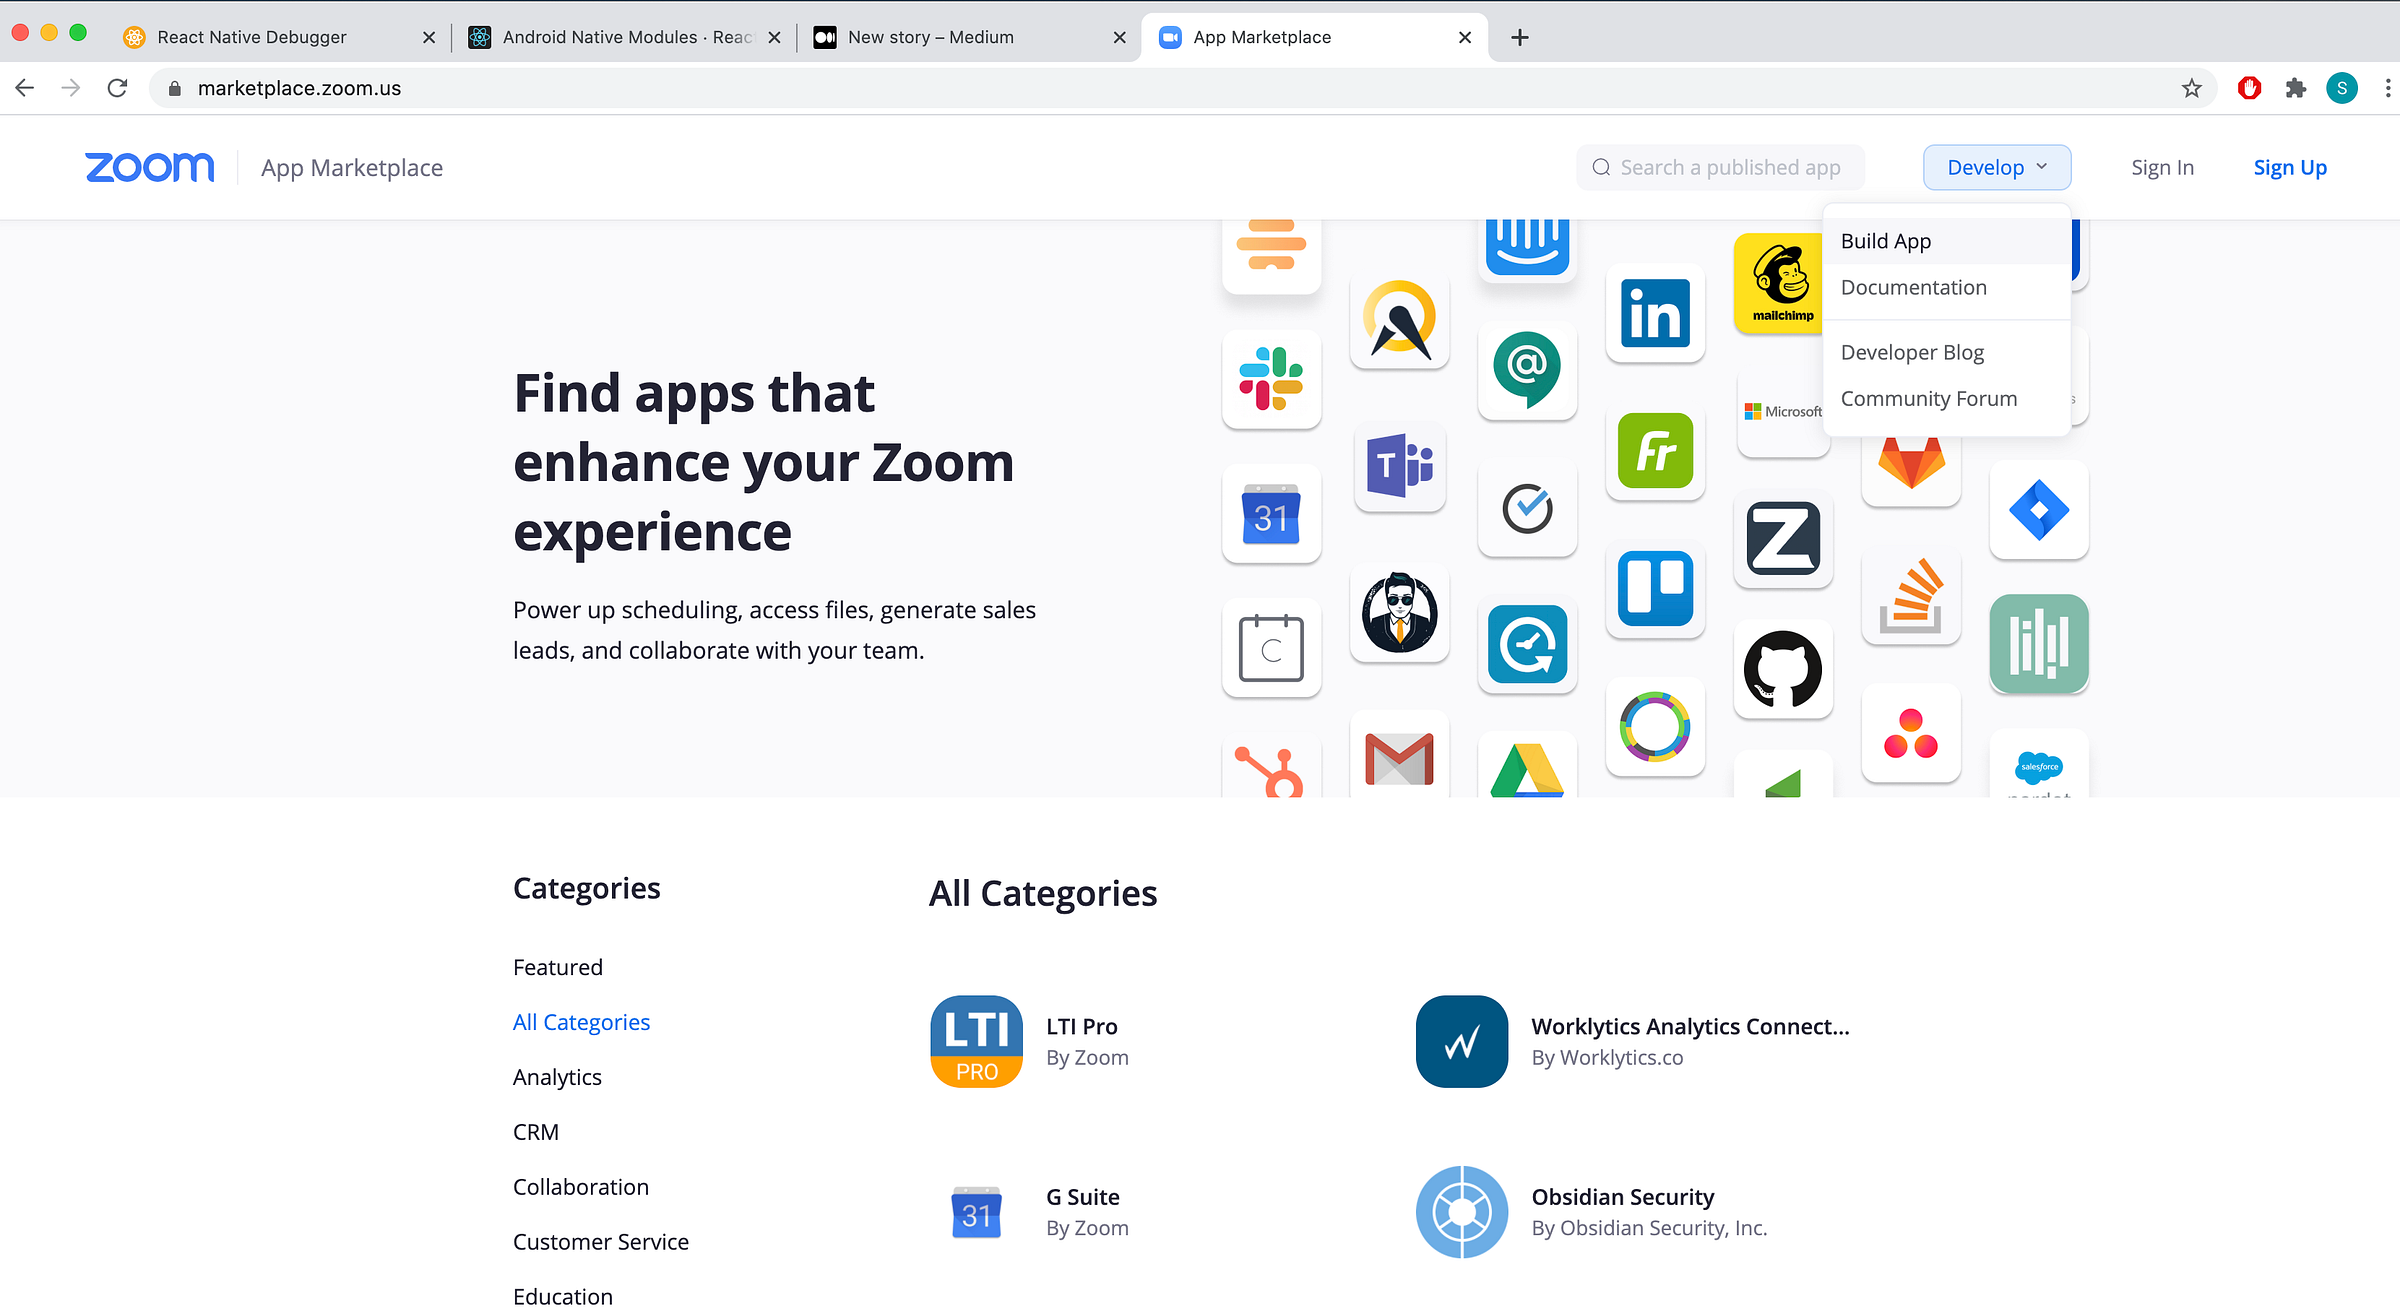
After clicking on the Develop button in the top right area, you will see similar screen (note - my screen looks a little bit different as I have already created apps):
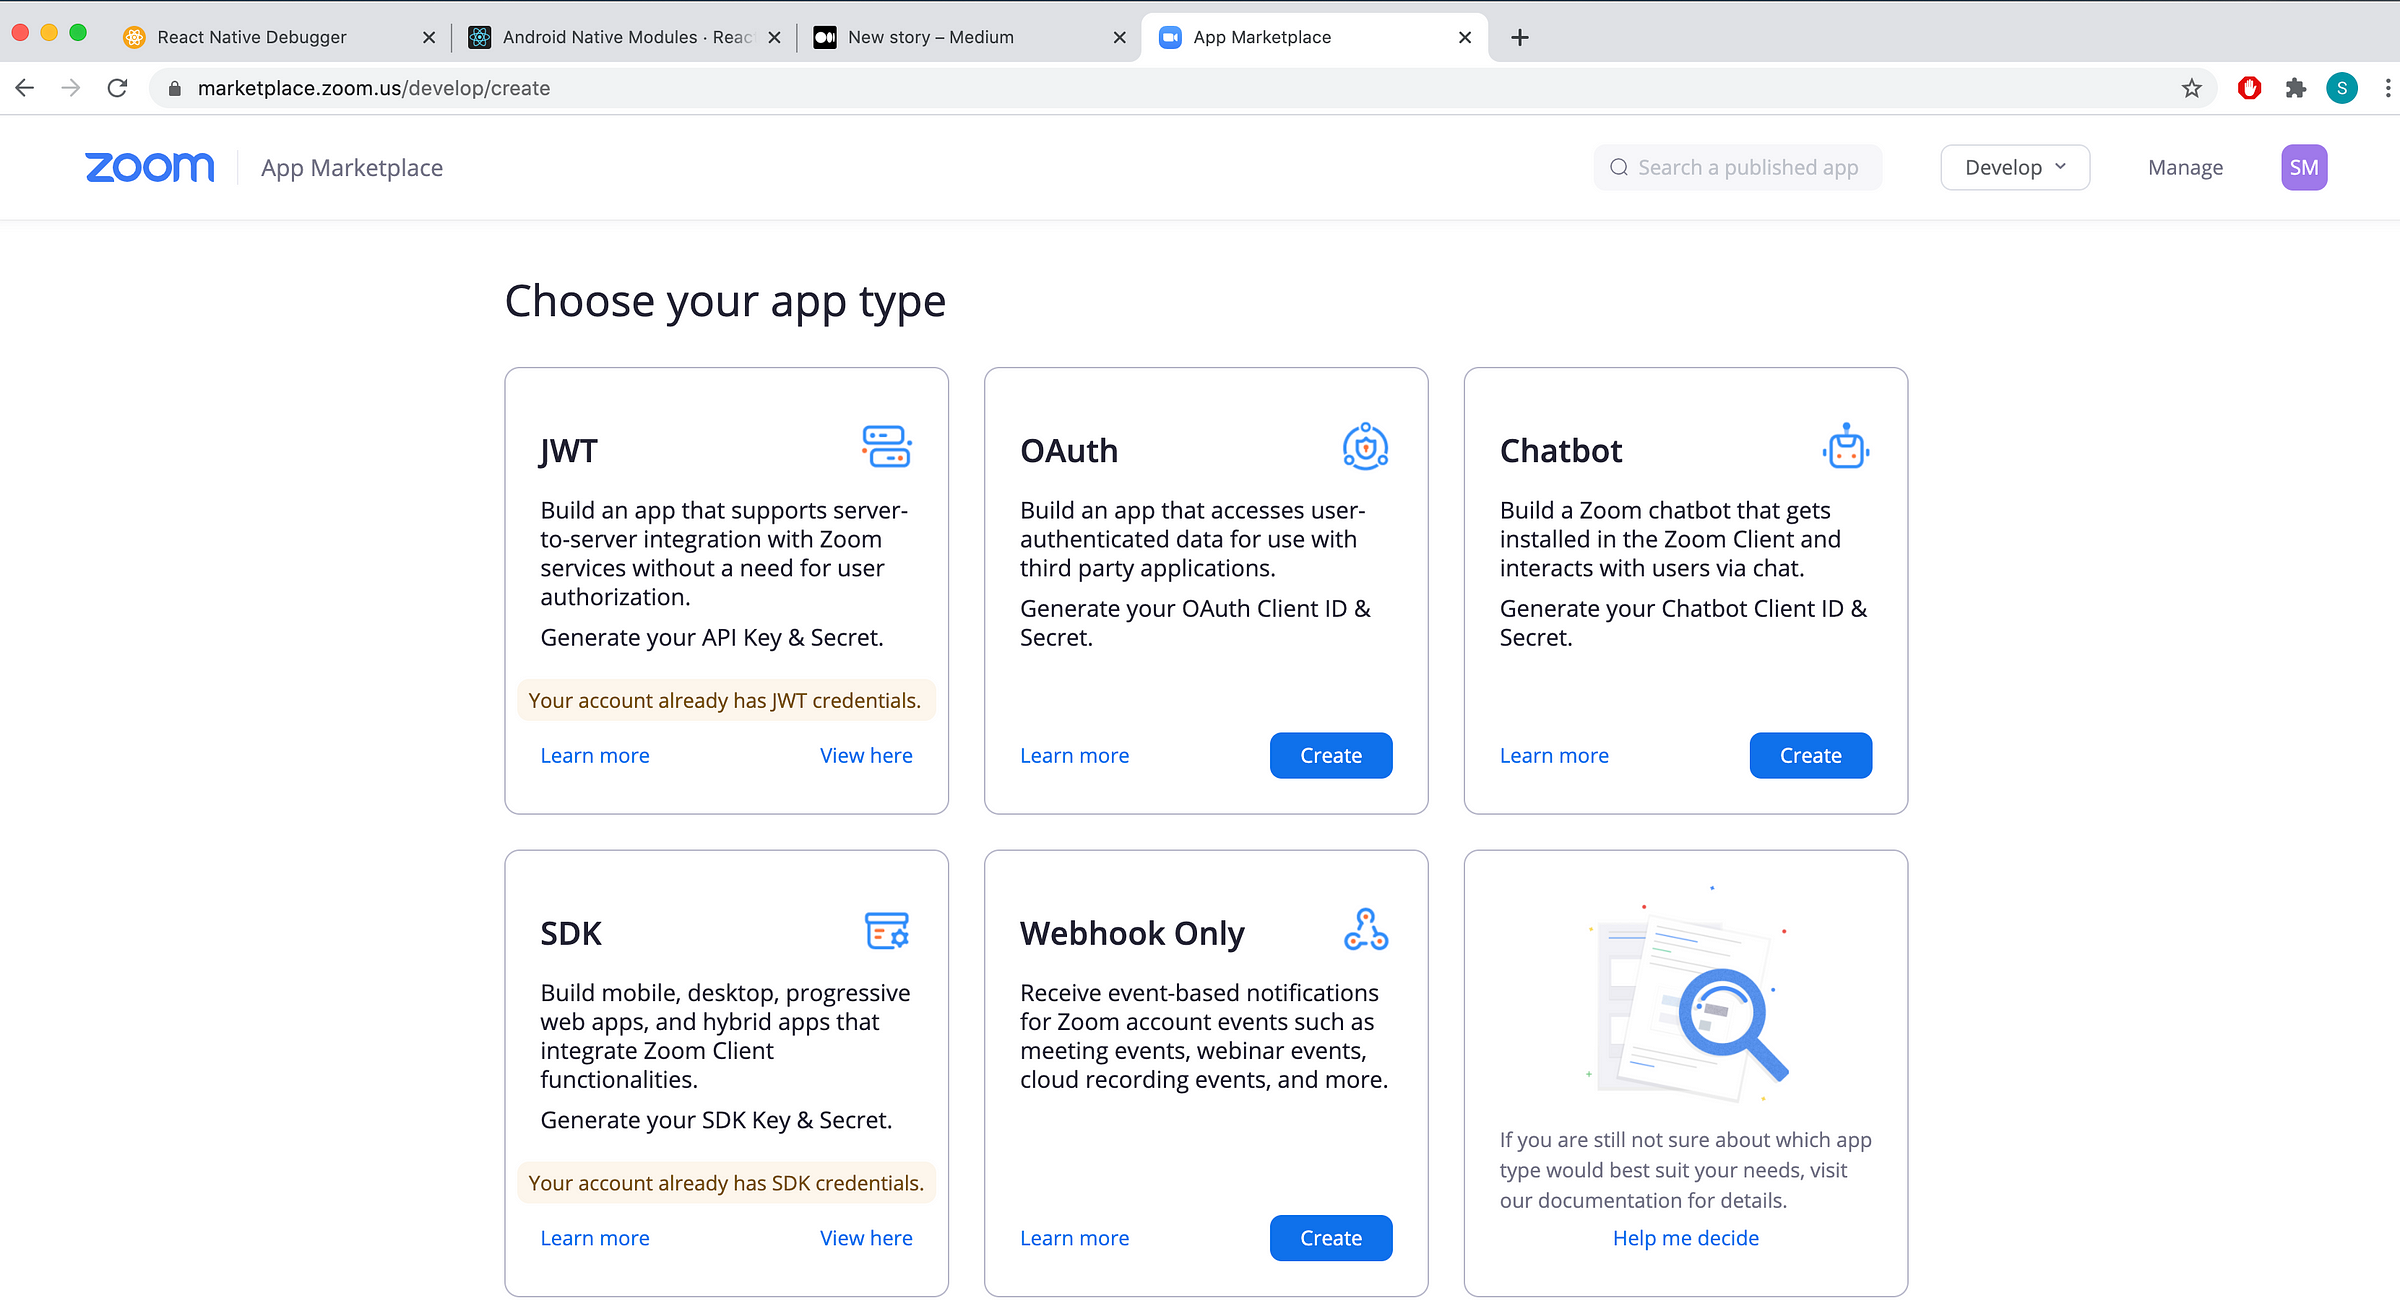
Remember, you will need to create the both API Keys — SDK and JWT keys.
So, let’s start with creating JWT API keys.

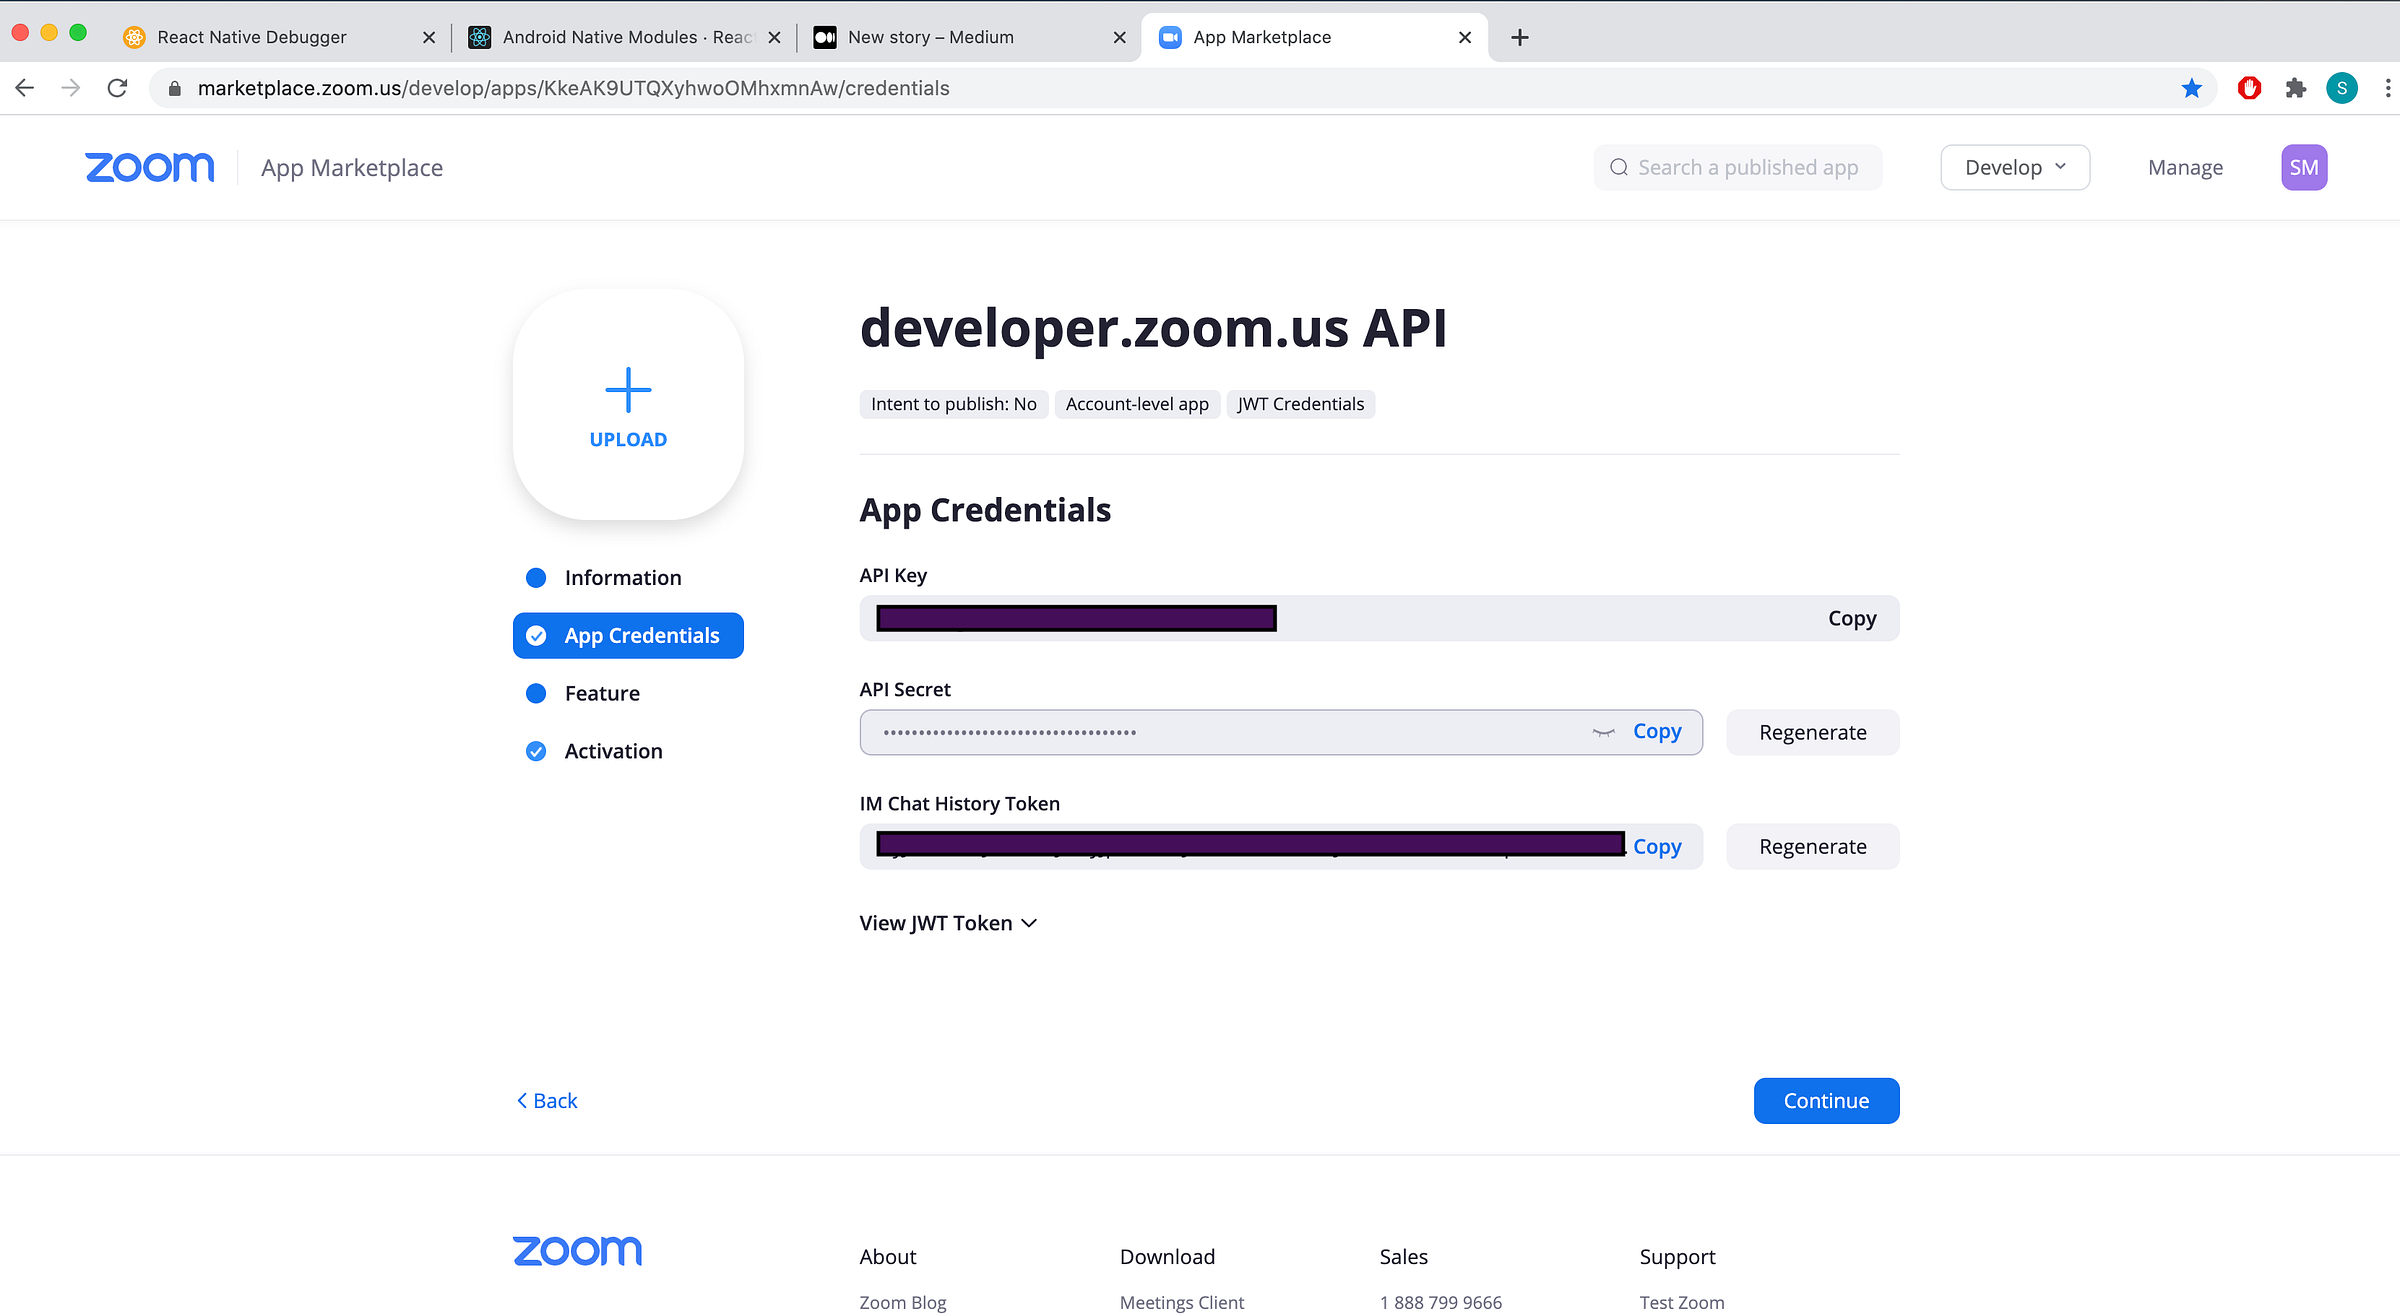
After clicking Continue, you will finally see JWT API keys you need to download.
Then, just click Continue again.
And voila, your JWT API keys are generated.
Now, let’s create SDK API keys.
Yes, SDK API keys are different than the JWT API keys you created few seconds ago. Click on “Develop” button, then “Build app” and choose “SDK”.
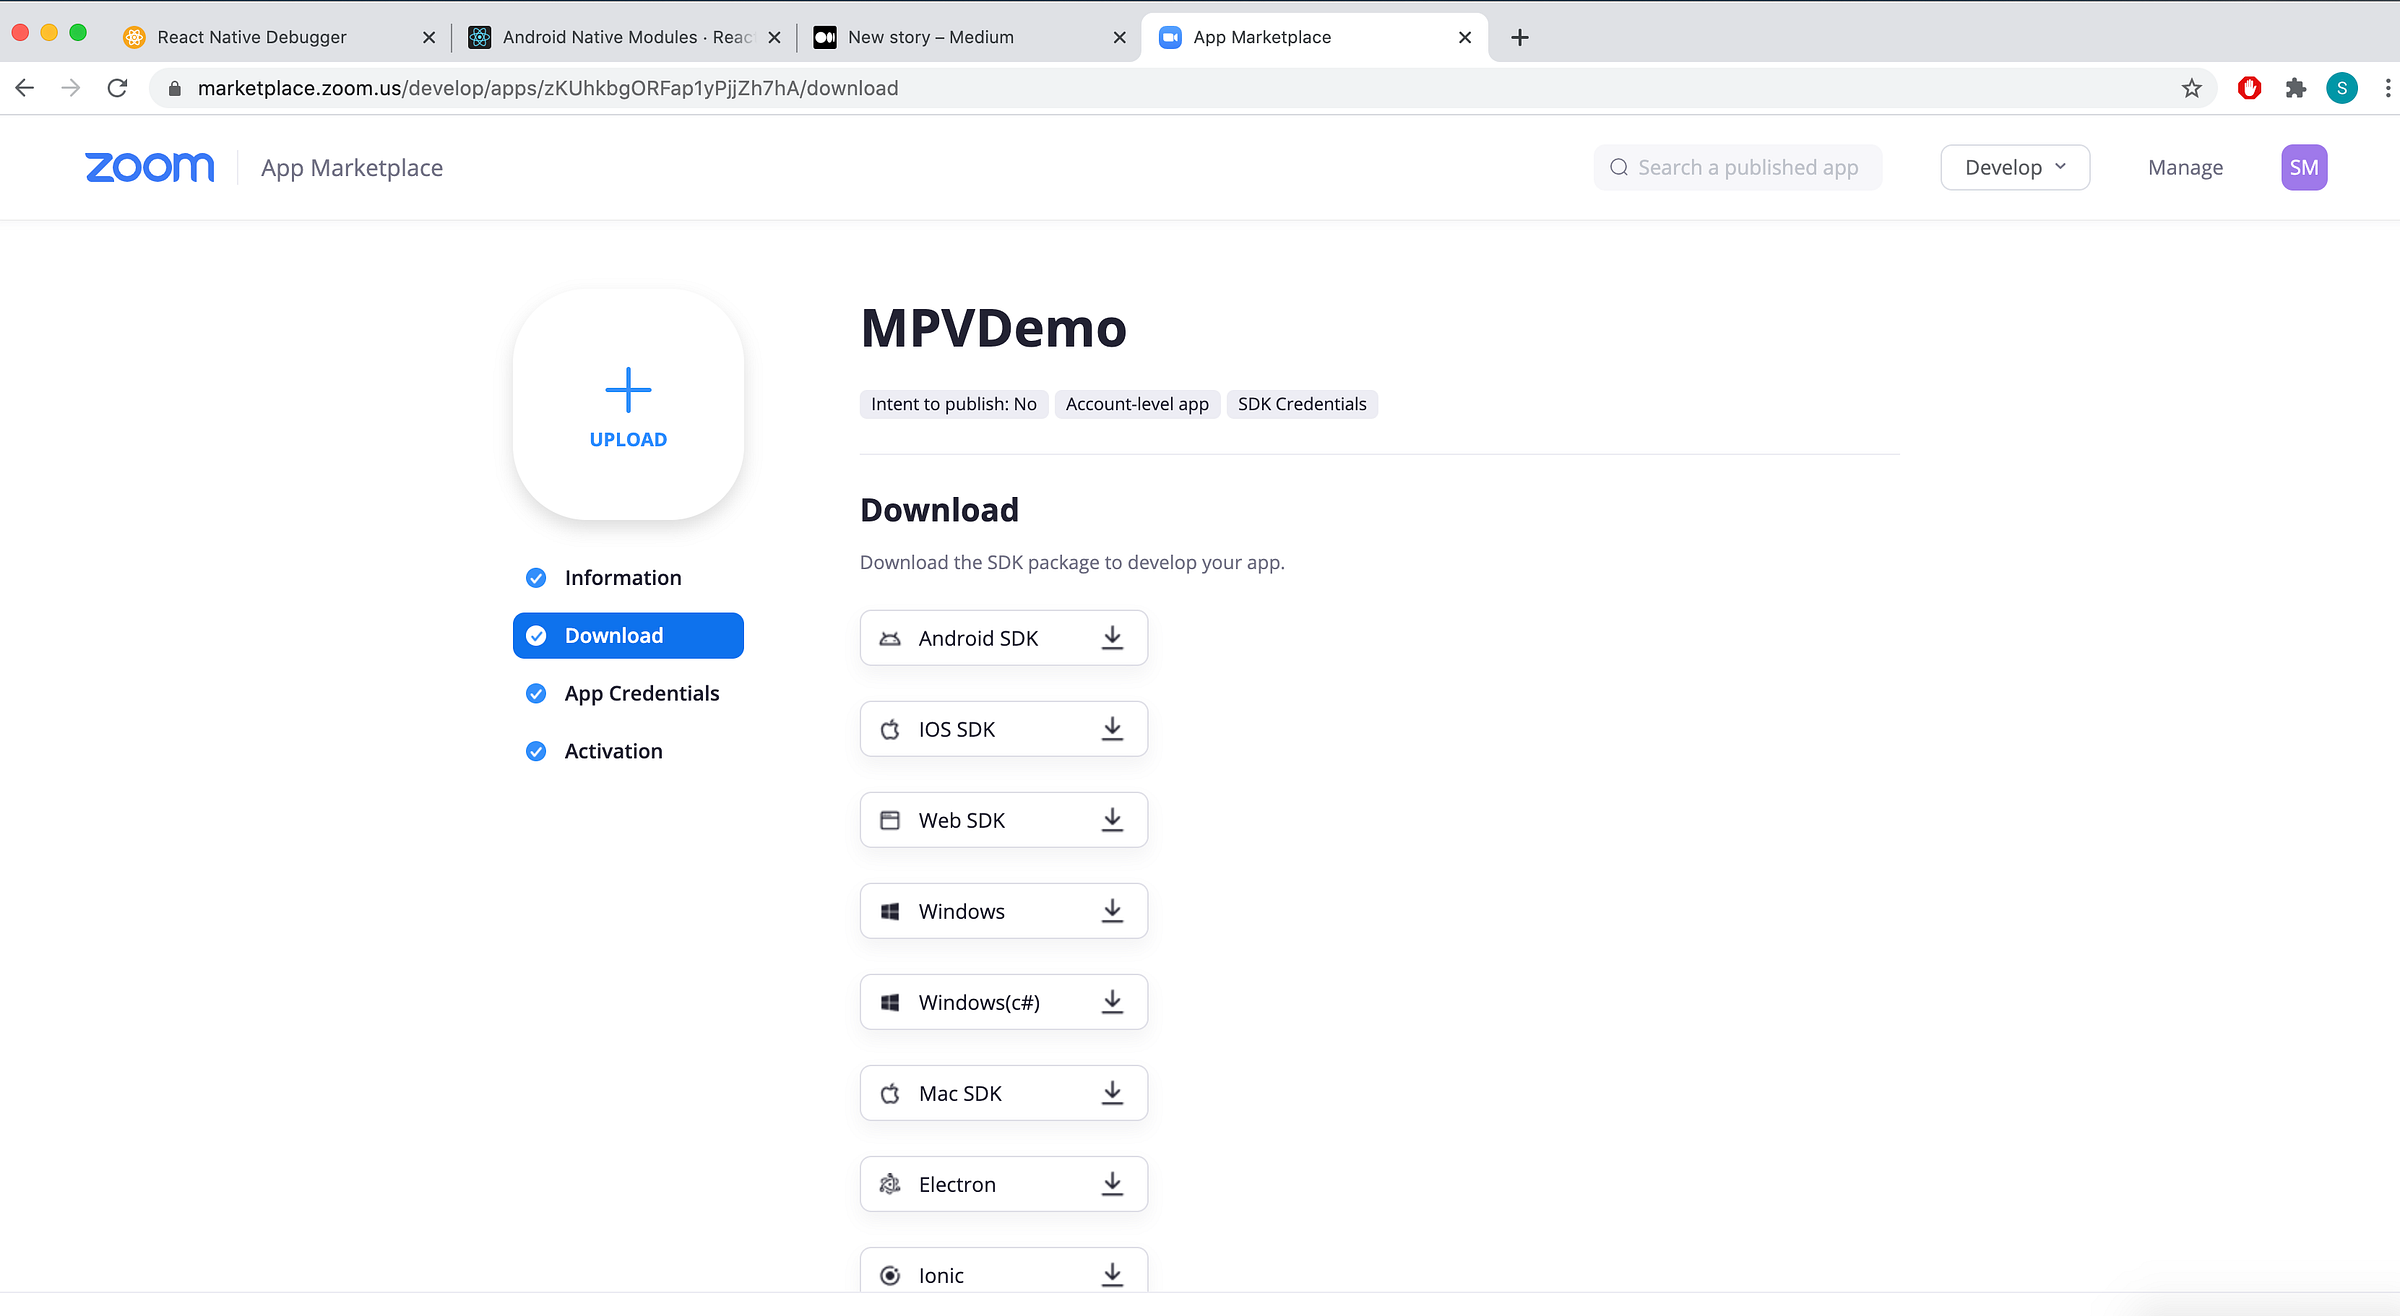
After filling basic information & clicking next, you can download the latest ZOOM SDK. Btw, I have added copy of the latest versions (in time when I was writing this article) into my Github repo.
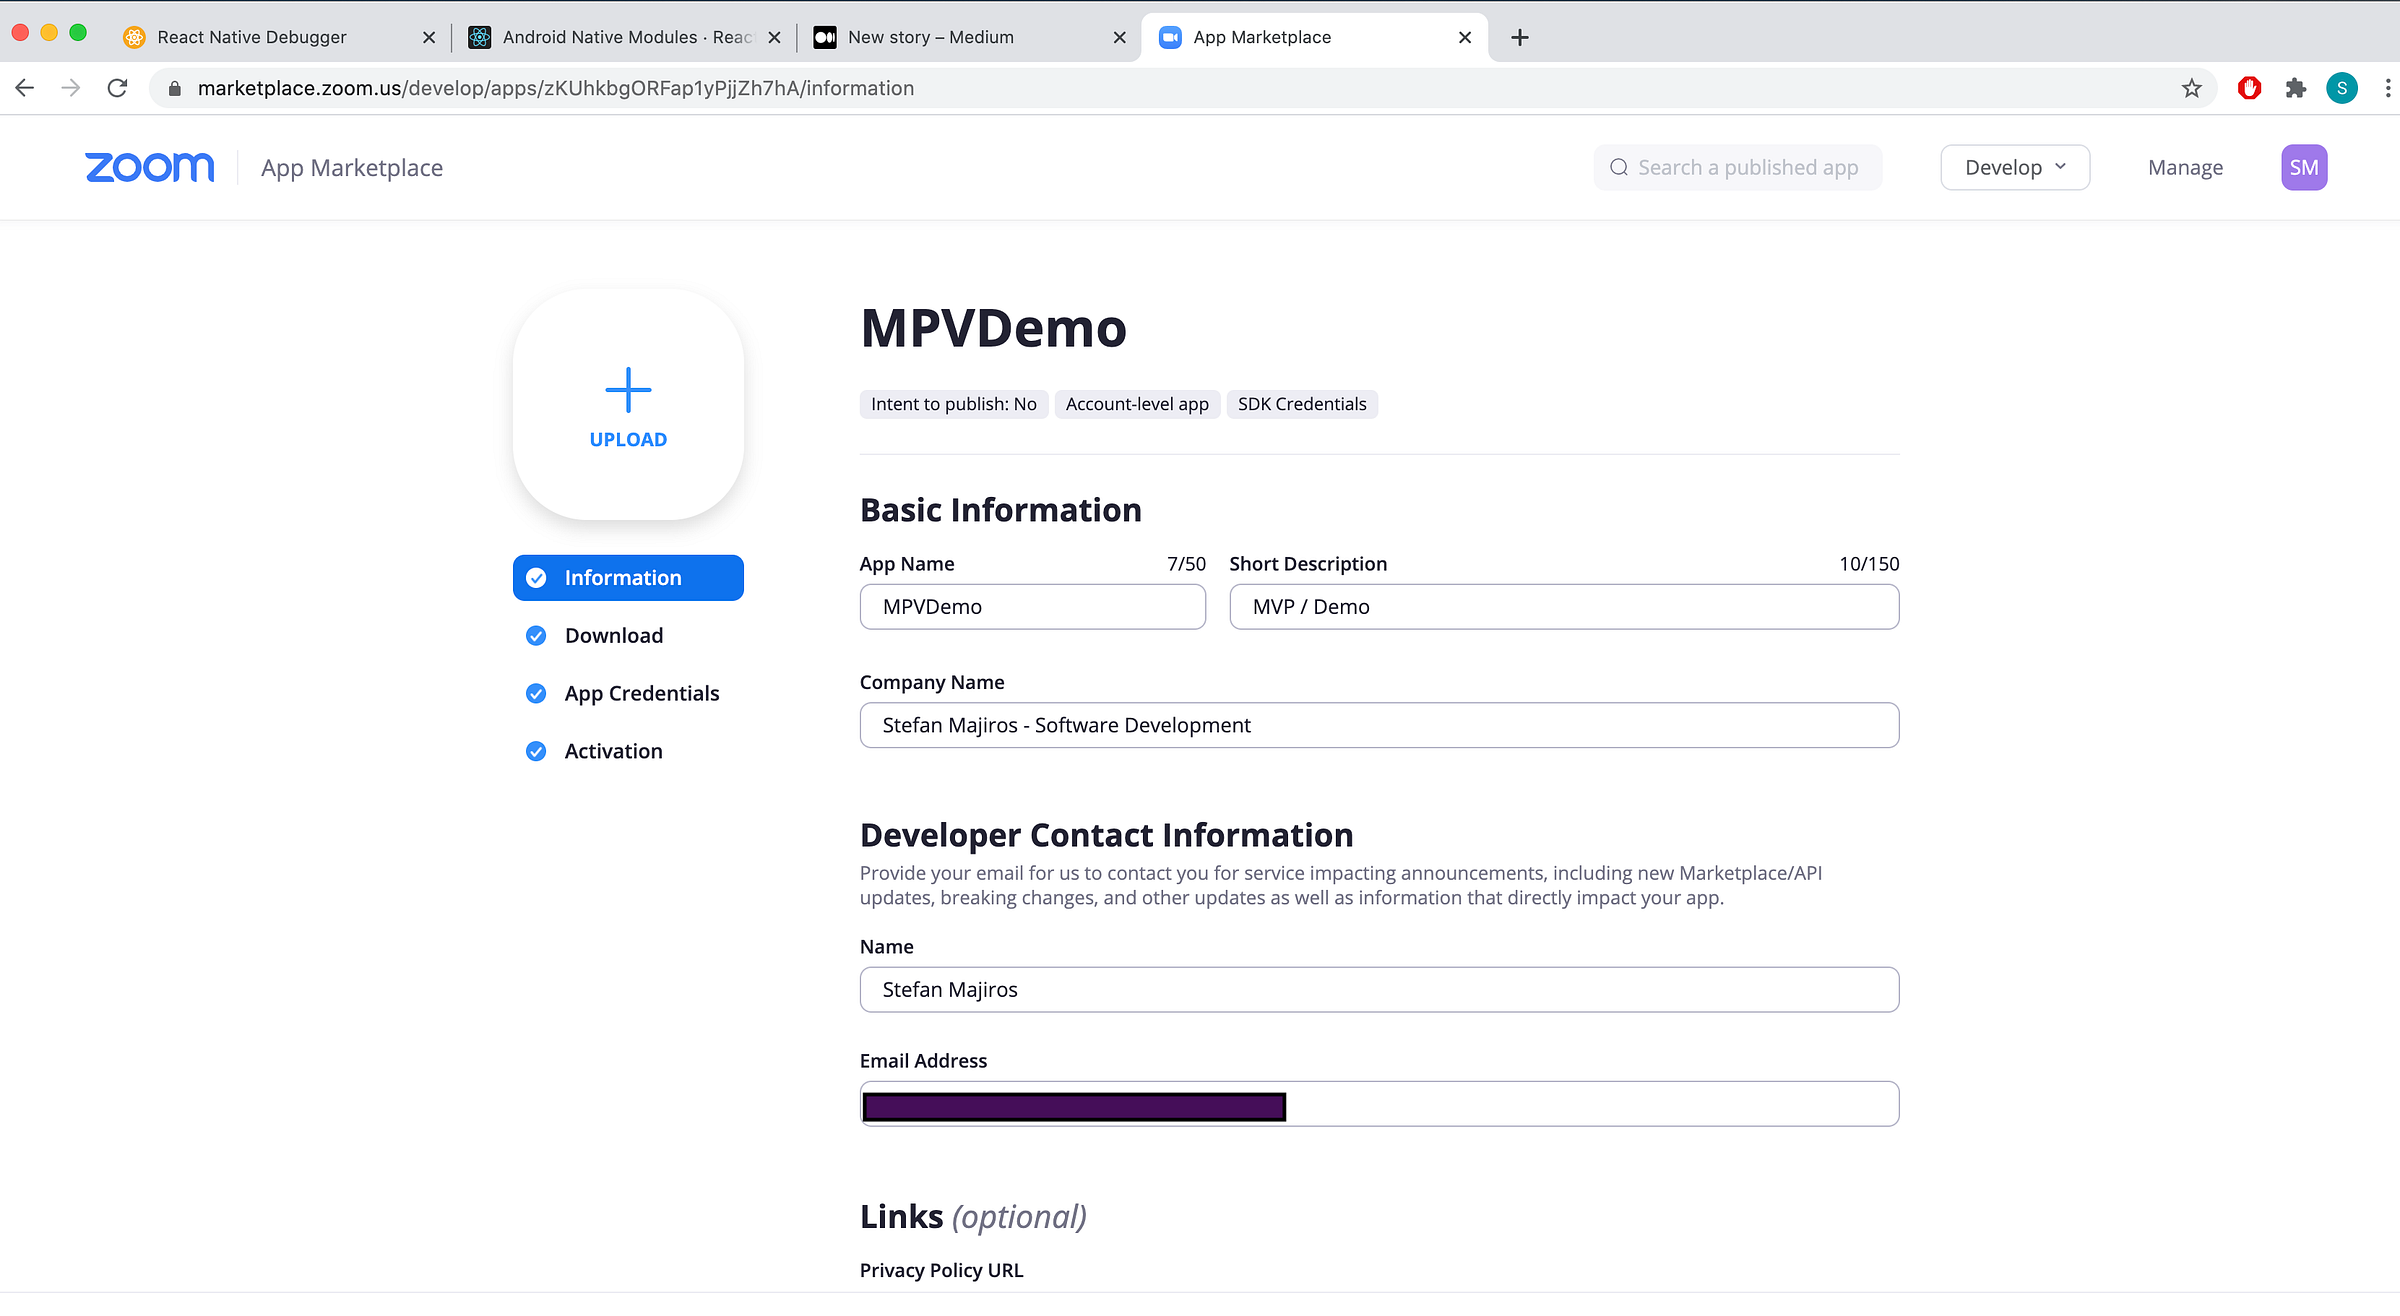
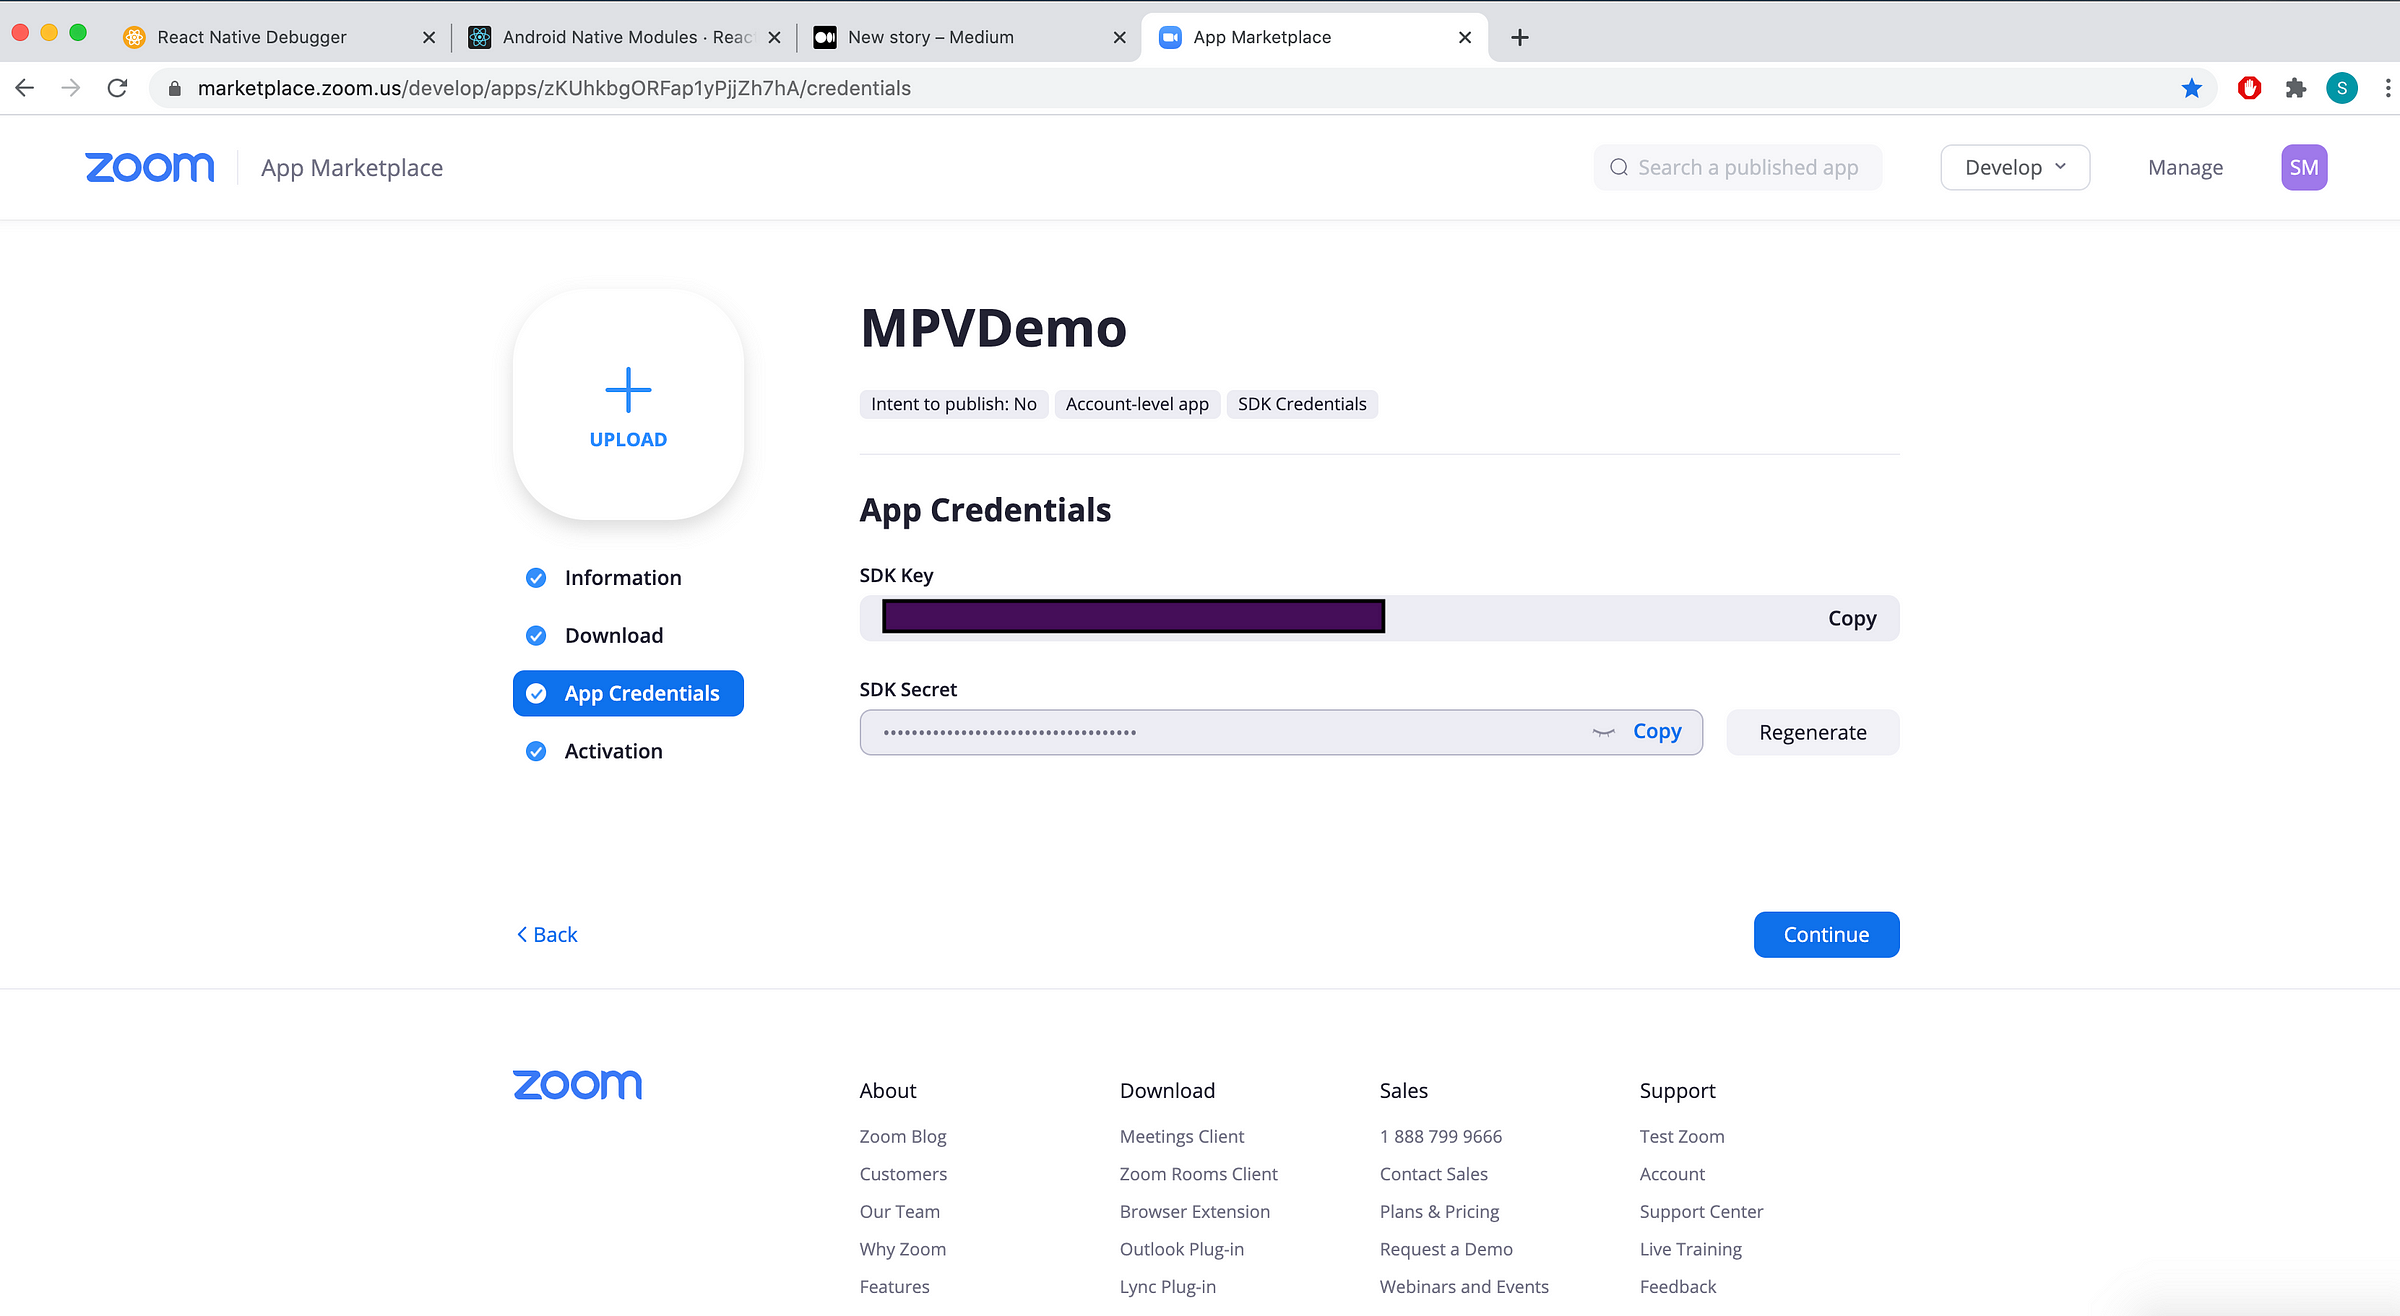
Download or skip for now. Next screen (for App Credentials) looks very similar to the screen for generating JWT API Keys. Again, you will need to download your “key” and “secret”.
And just click continue.
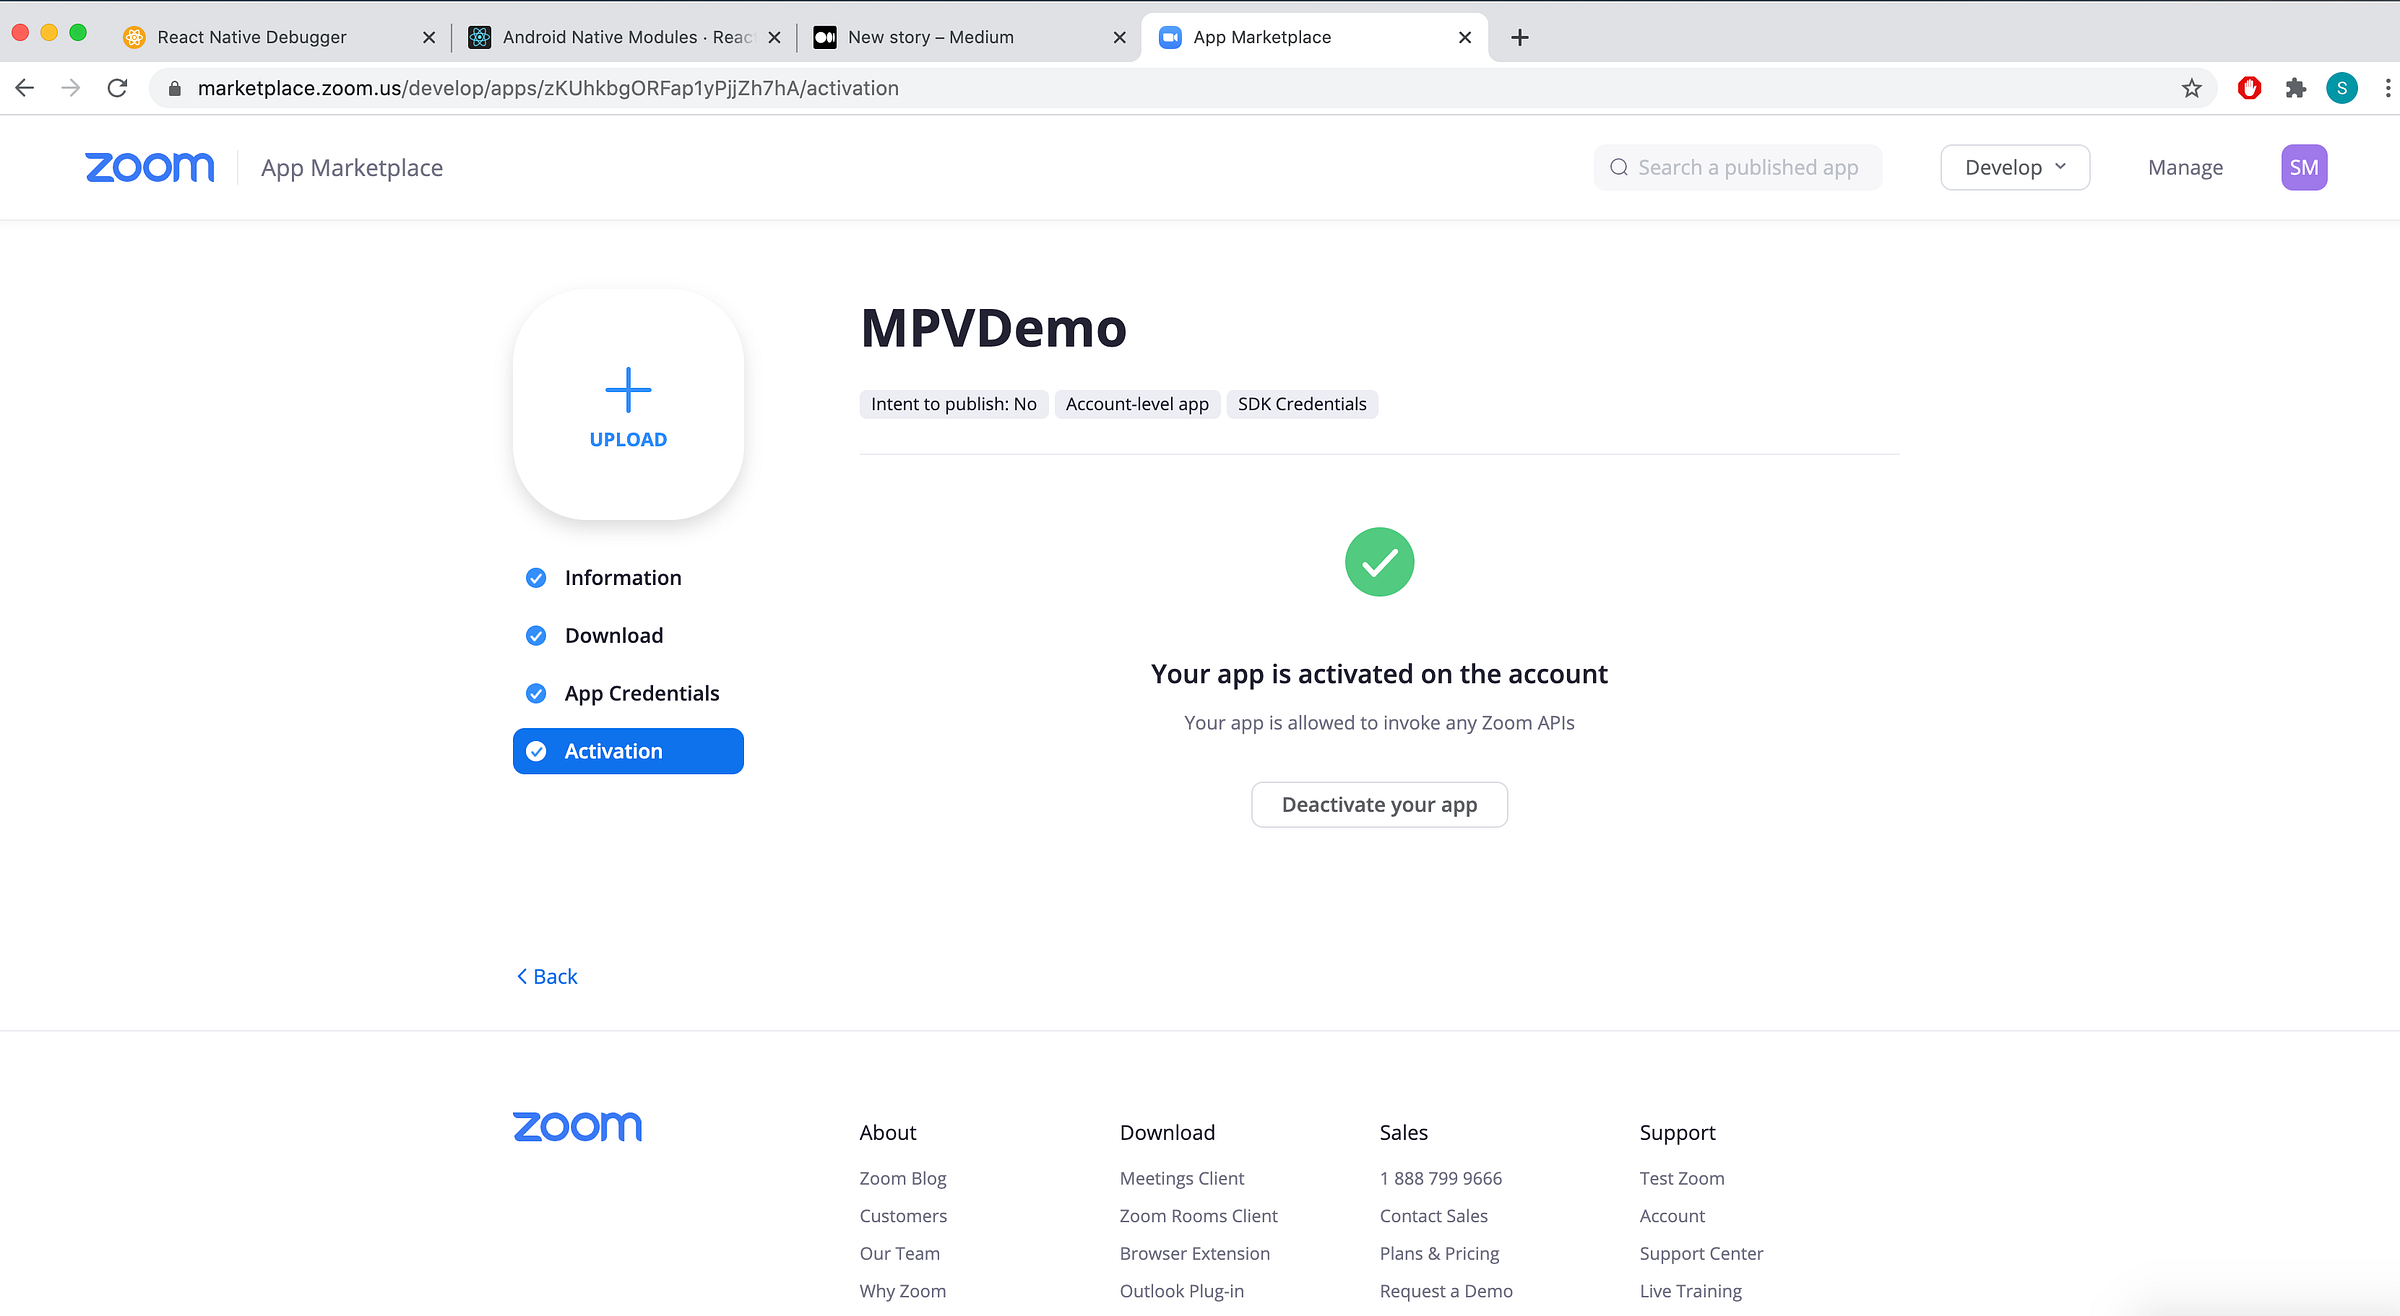
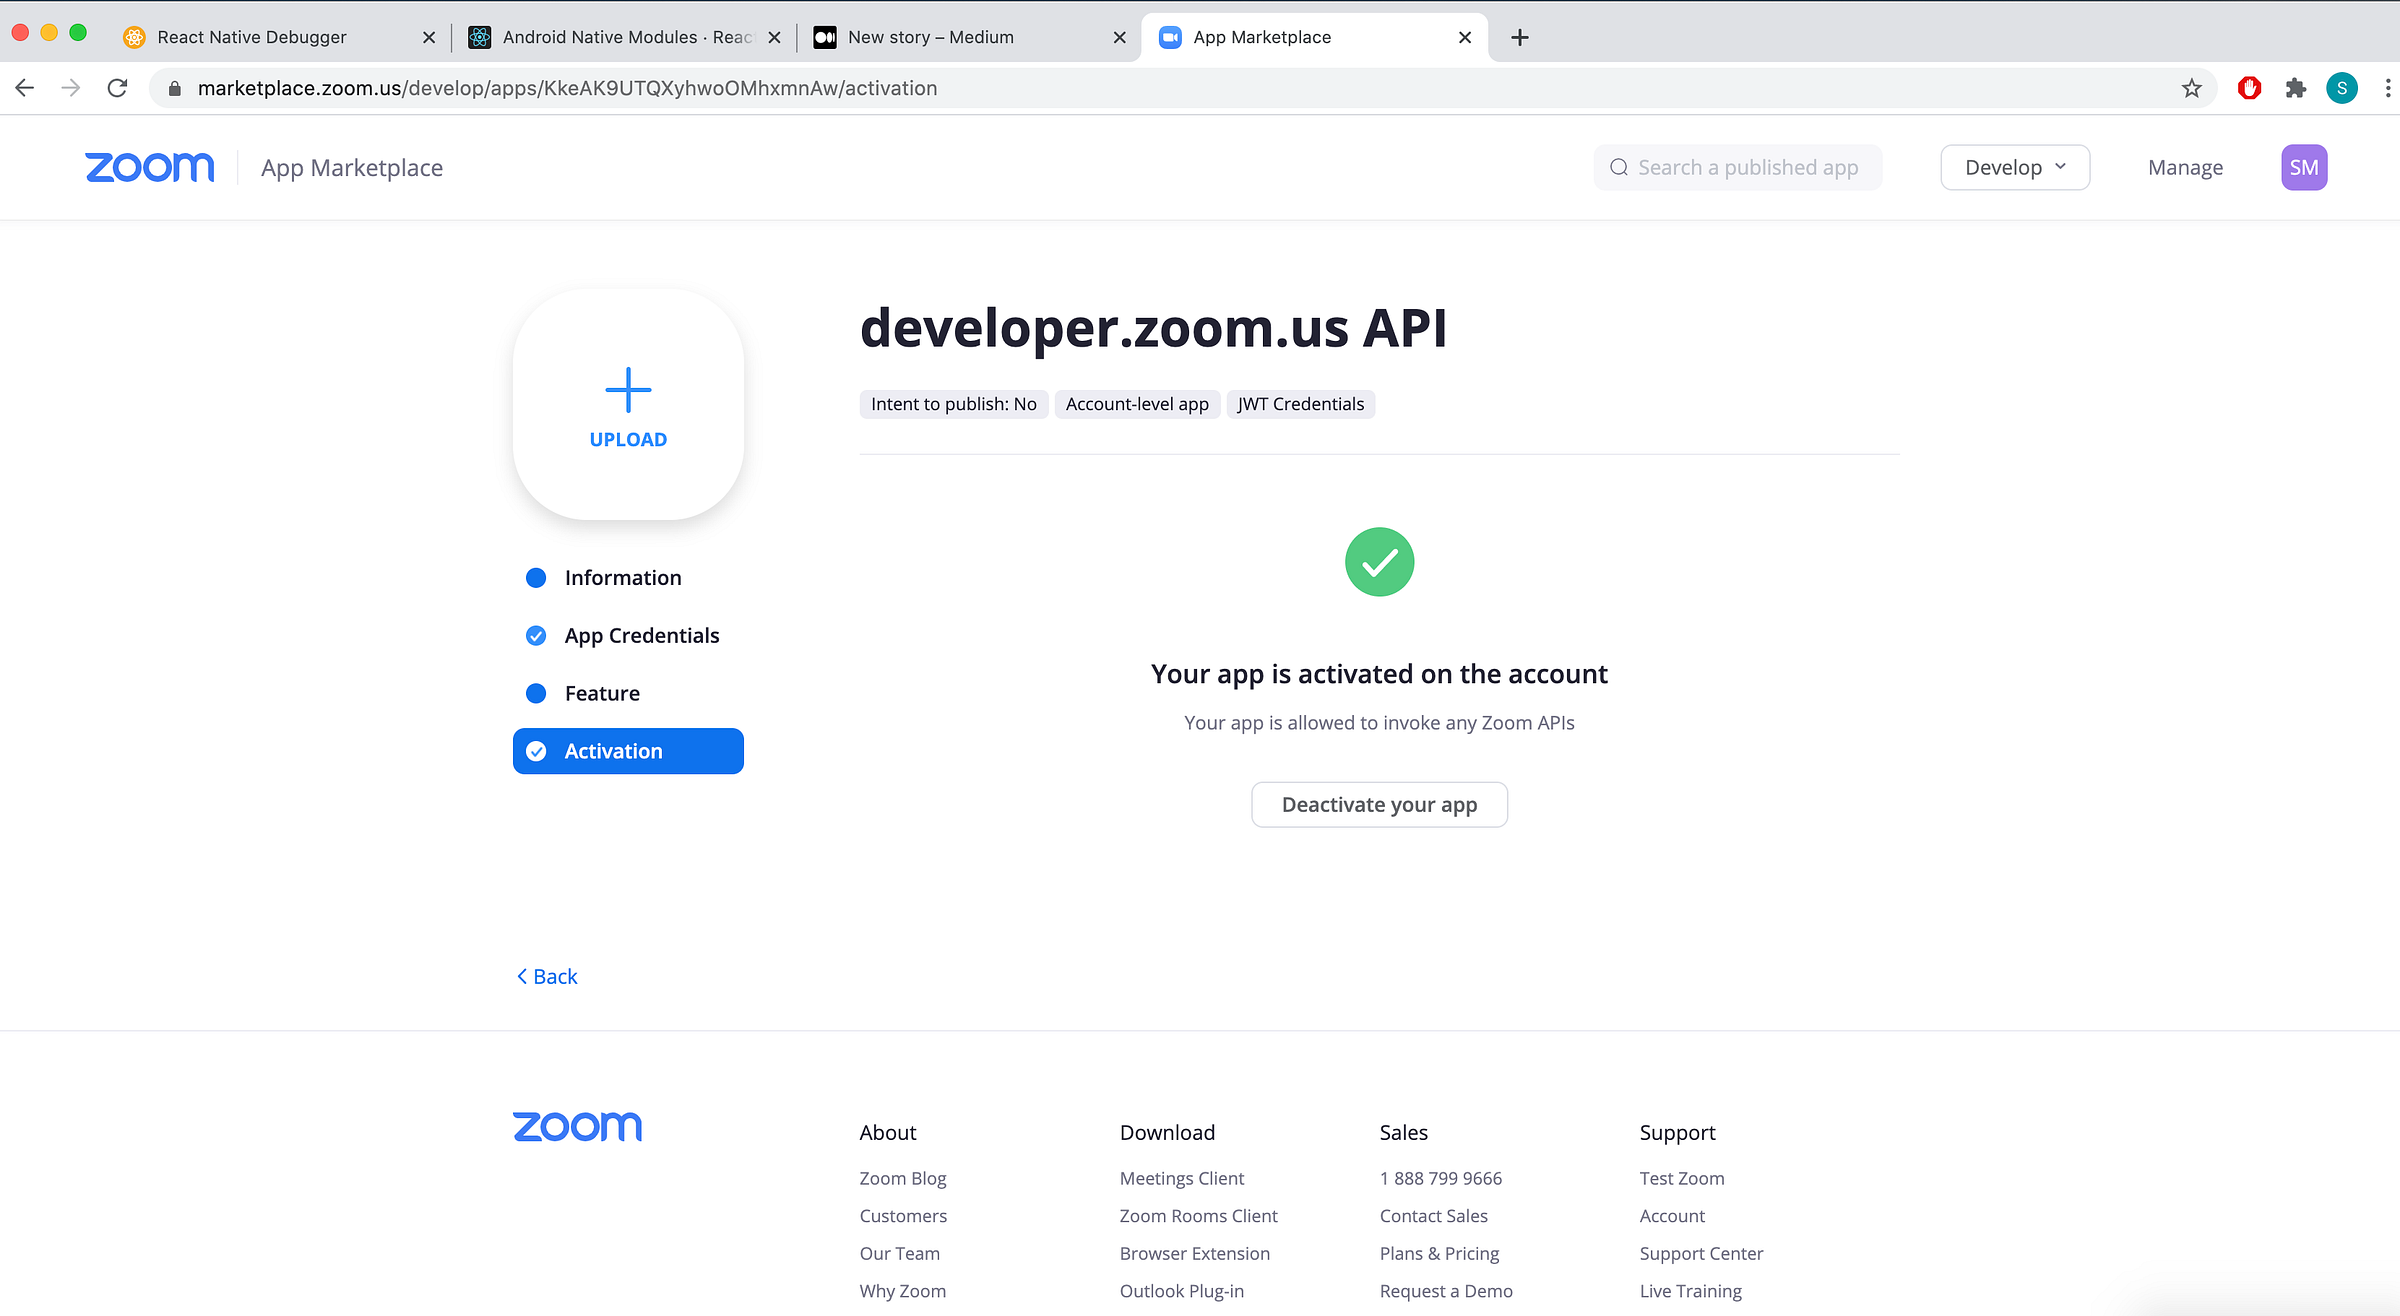
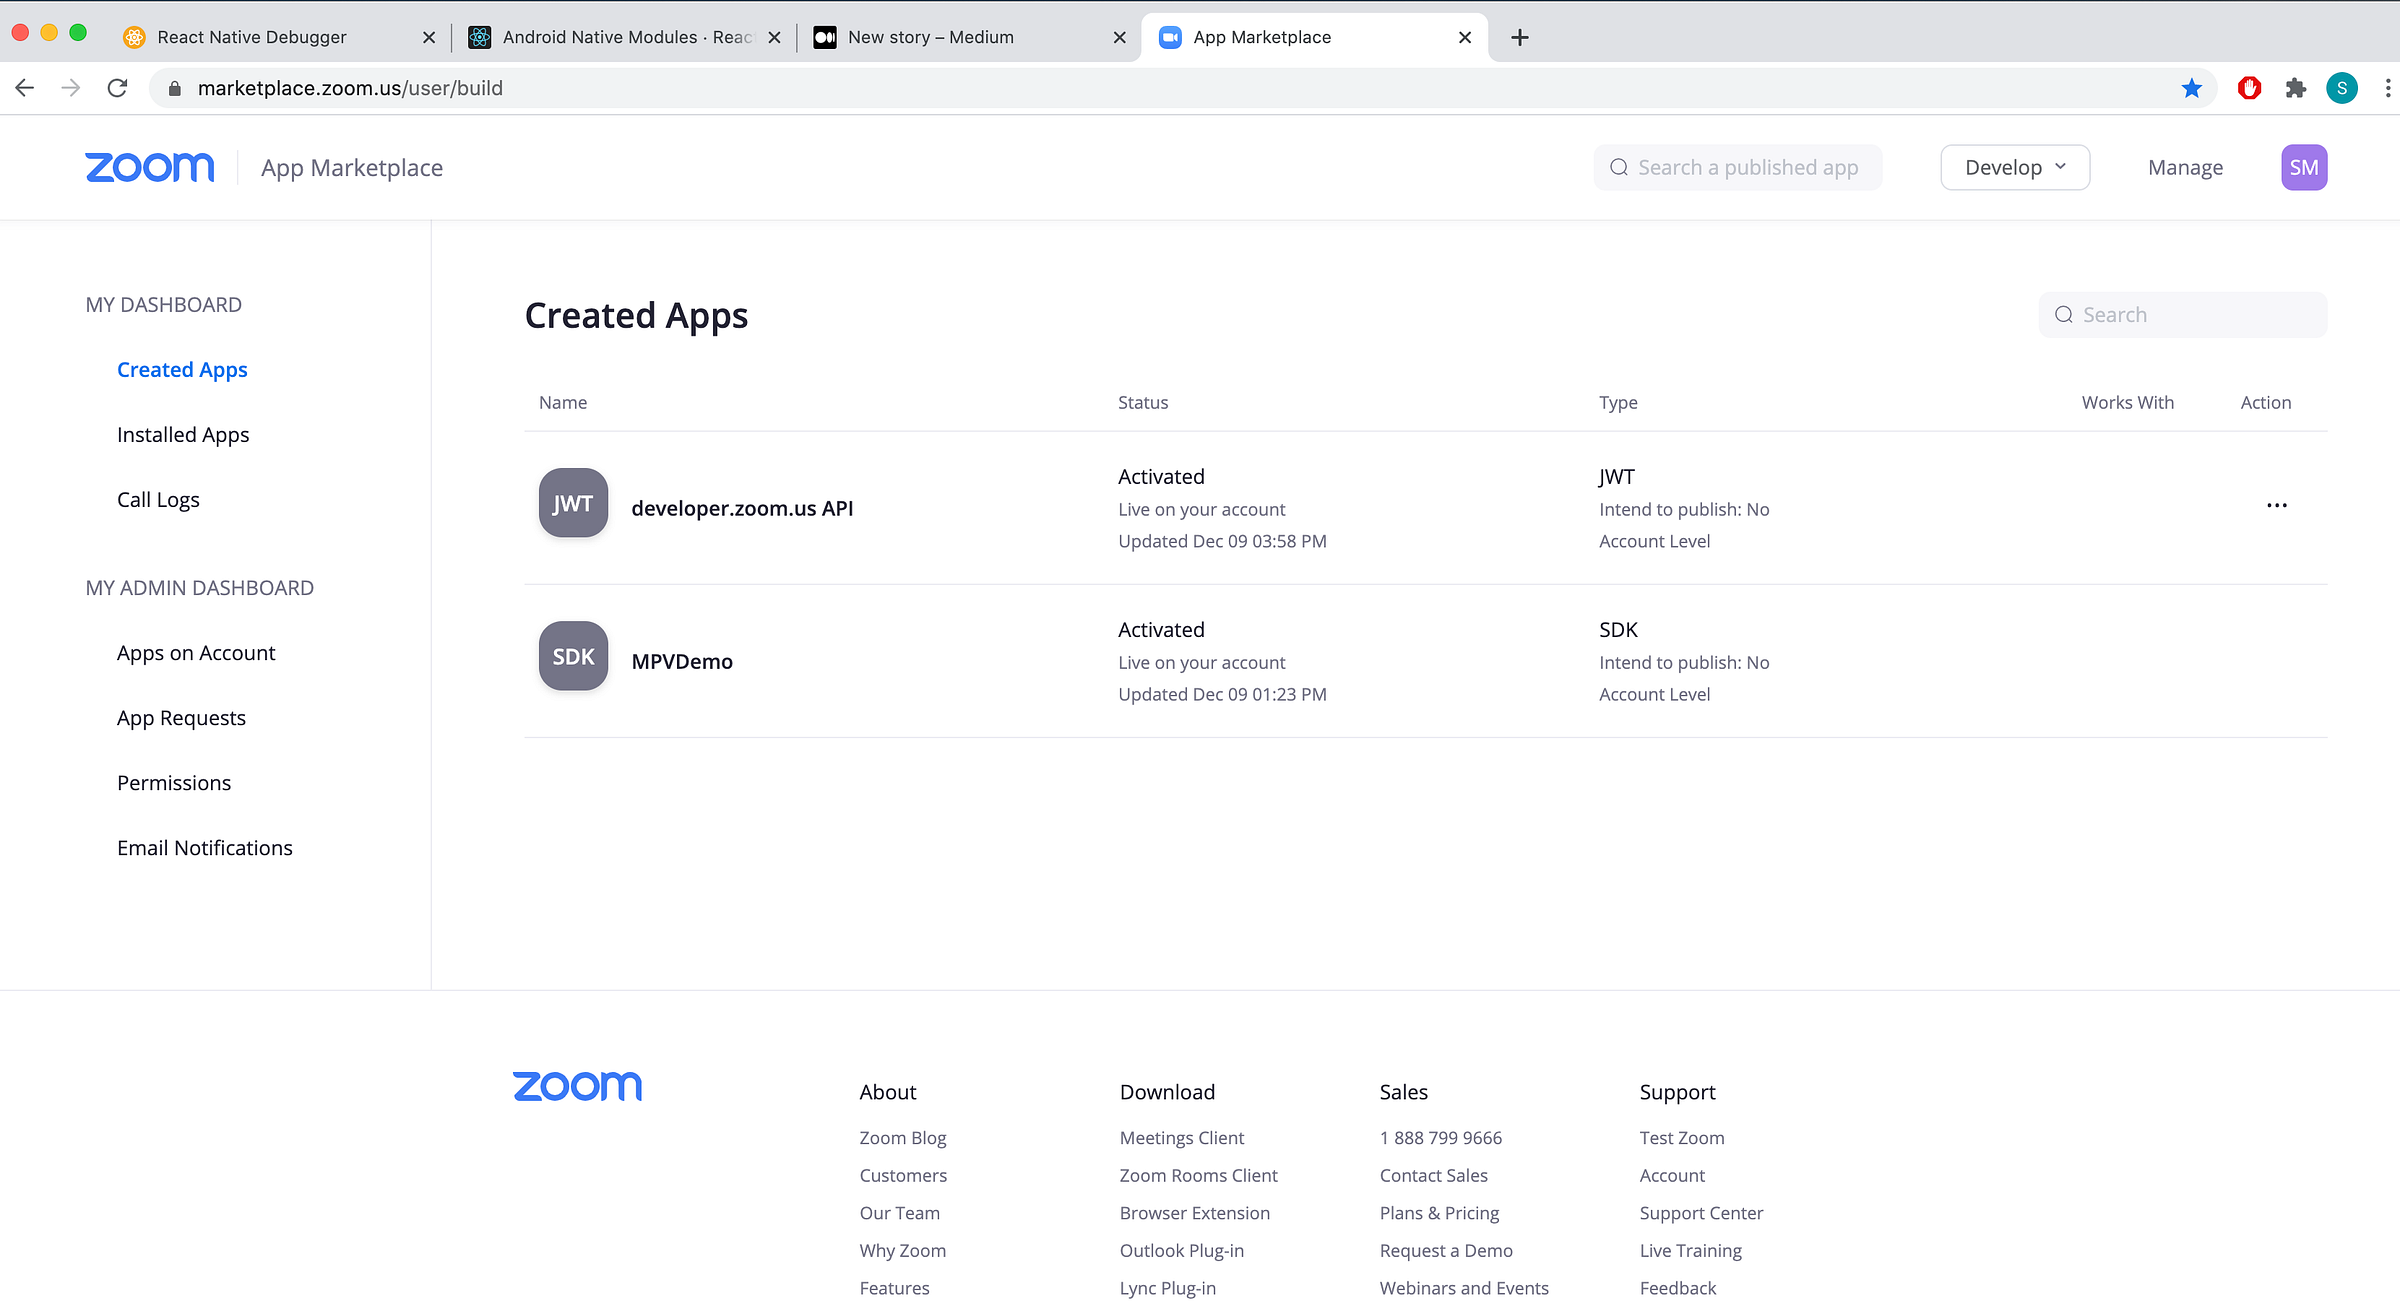
In the end, your dashboard should look similar to this screen below — if you did everything right.
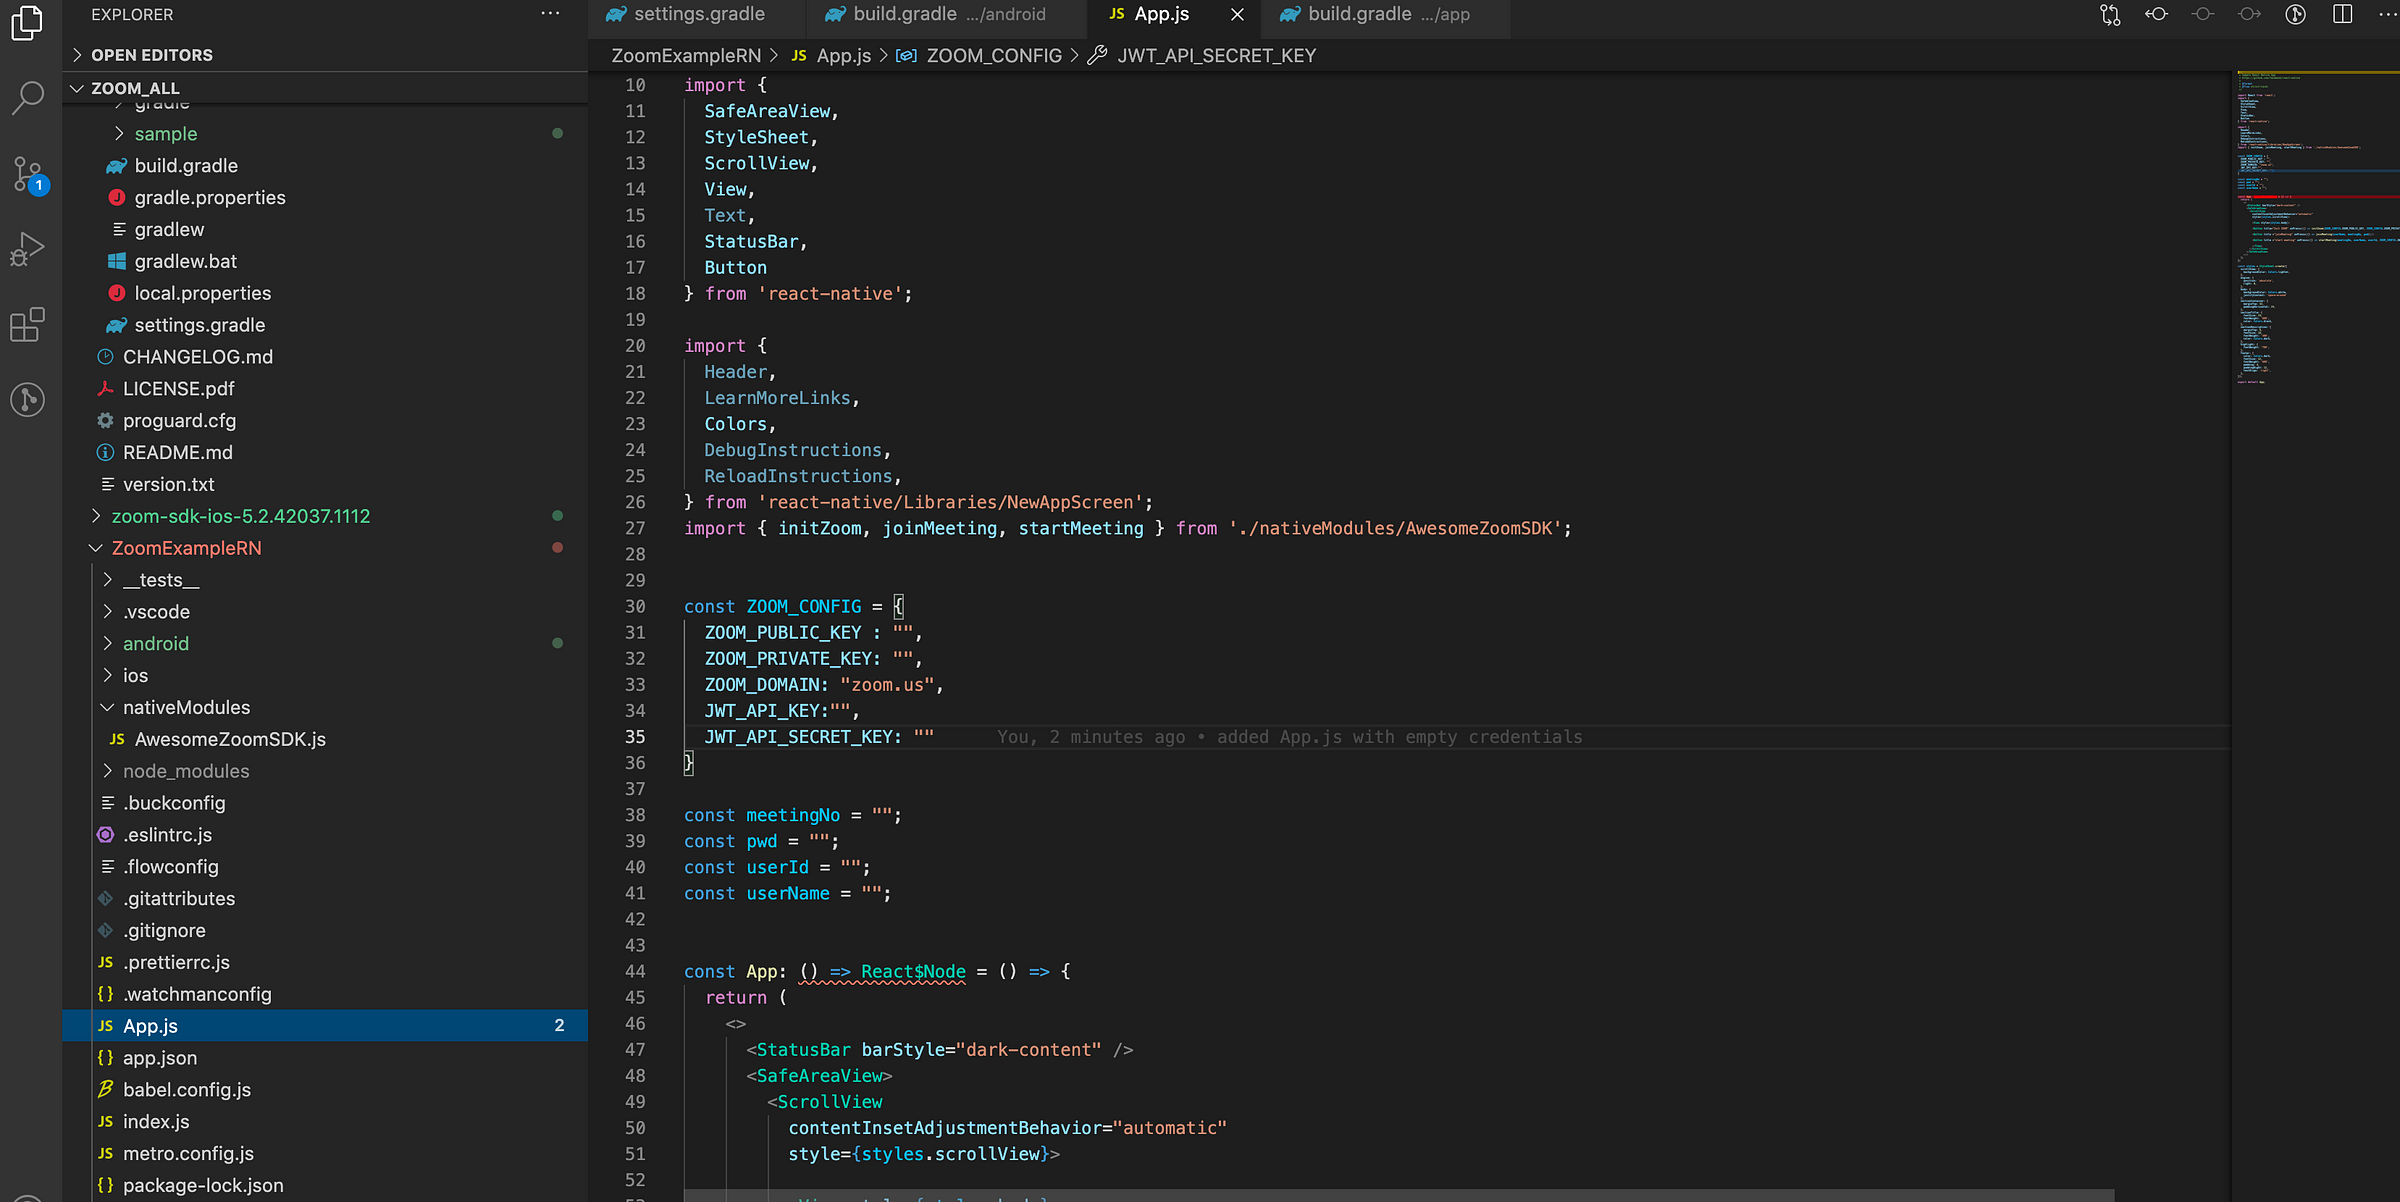
Then just put the downloaded keys into App.js file. I grouped all keys together, under ZOOM_CONFIG object.
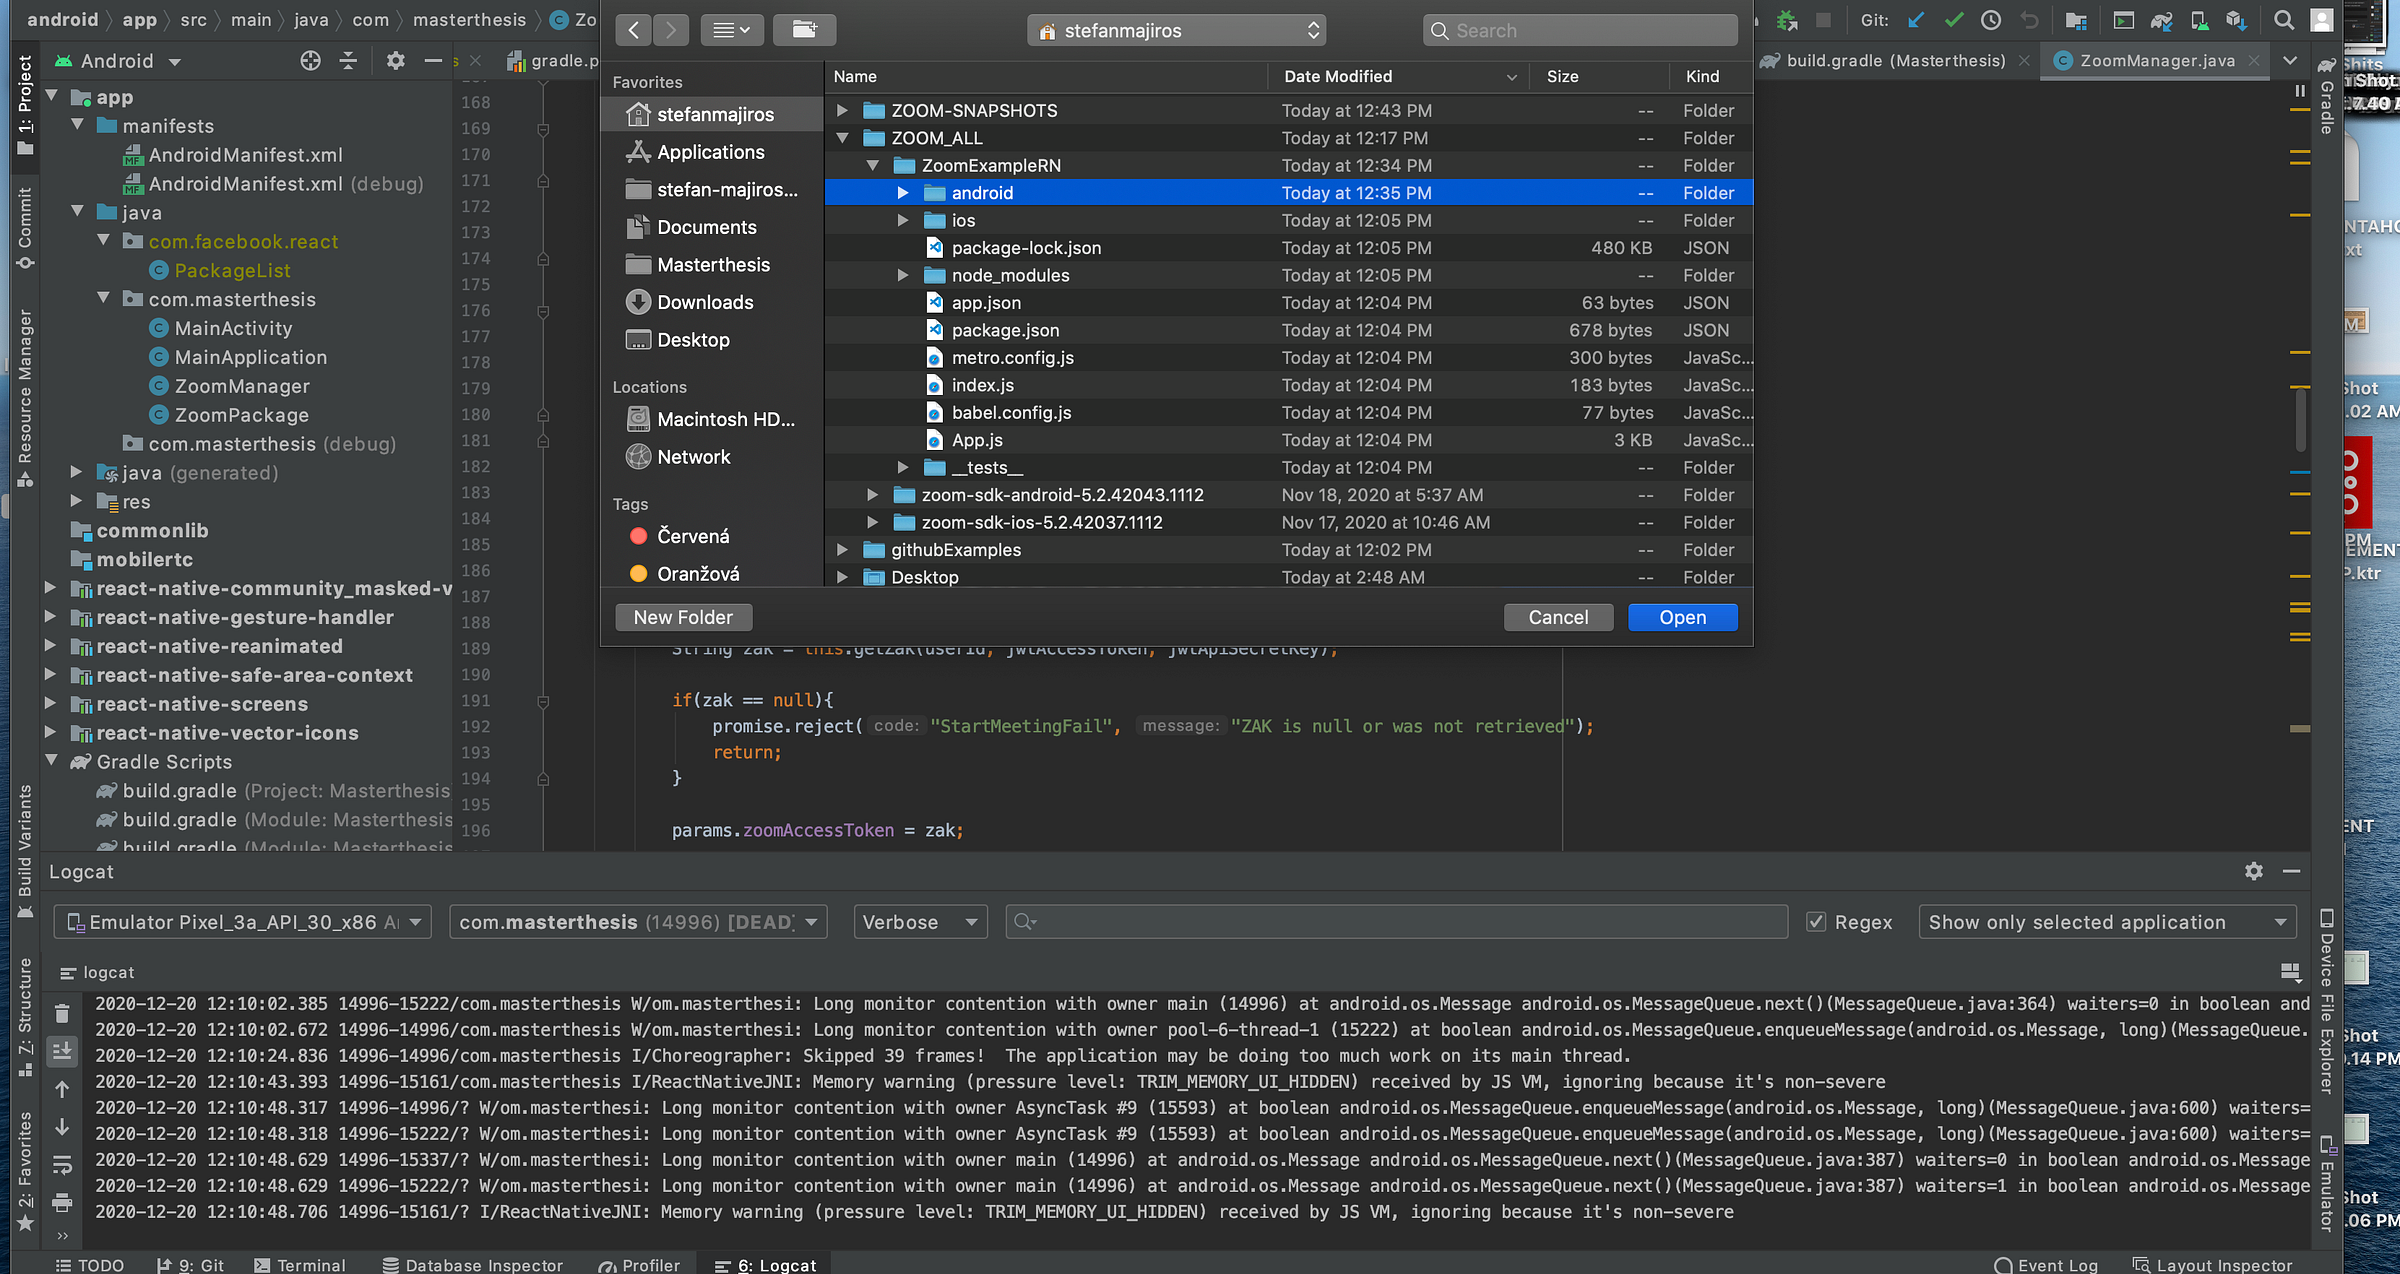
If you downloaded the latest ZOOM SDKs for Android or iOS, or cloned my repo, now you will need to copy two folders from Zoom Android SDK into your android folder.
These folders are named: “commonlib” & “mobilertc”.
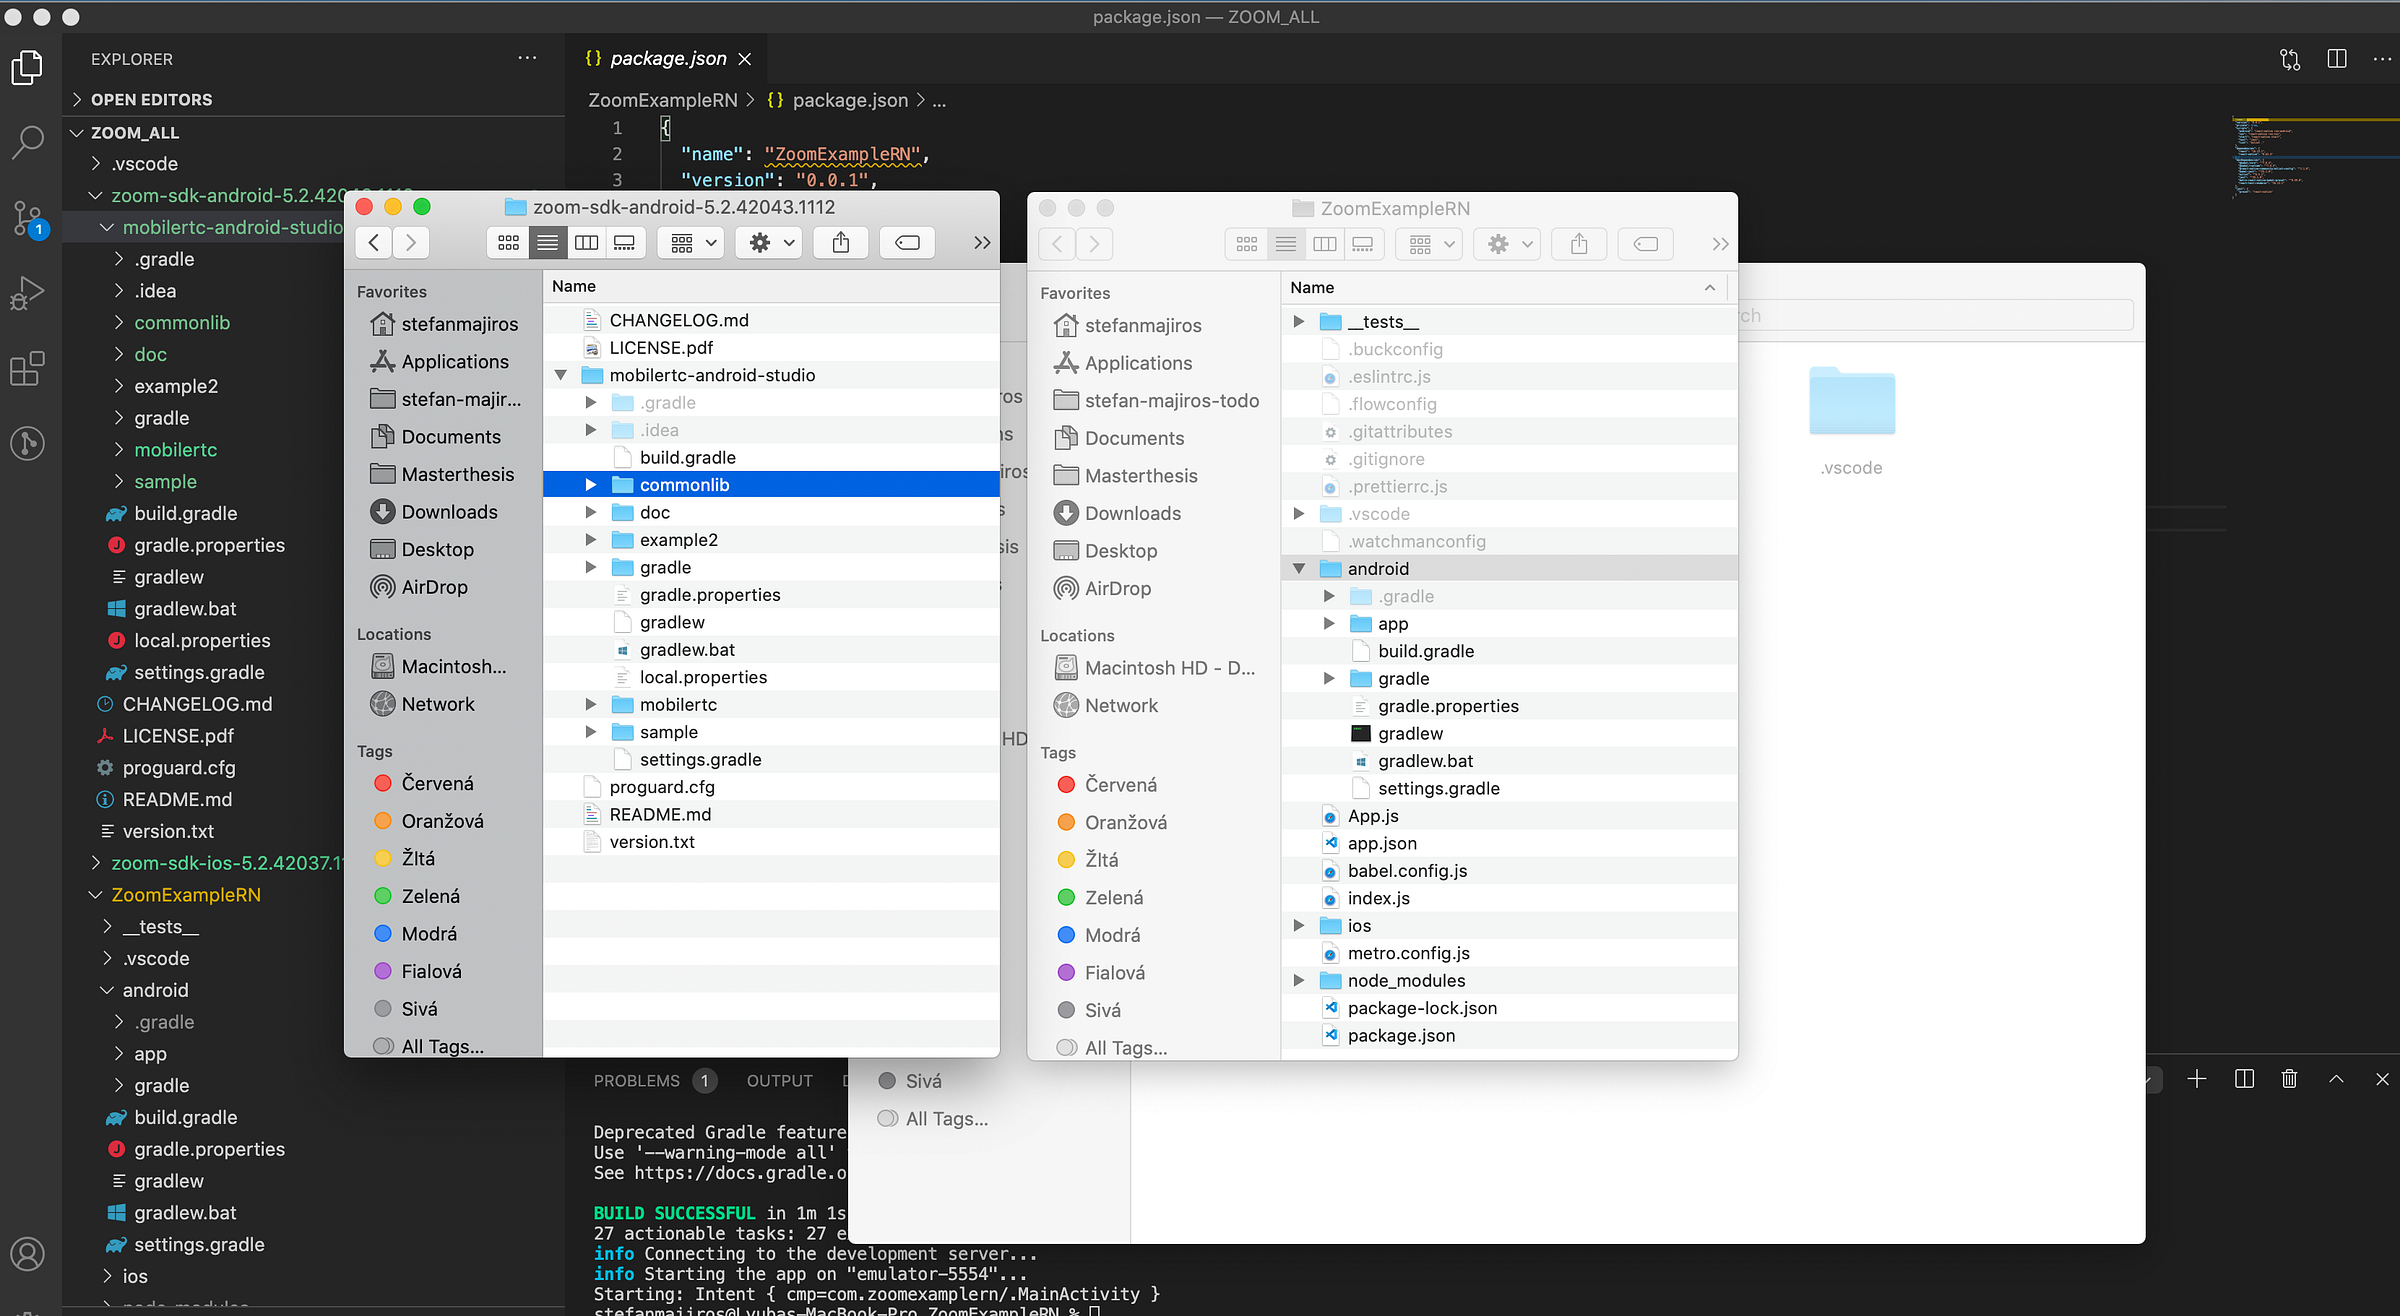
First one, “commonlib” should be copied under android folder.
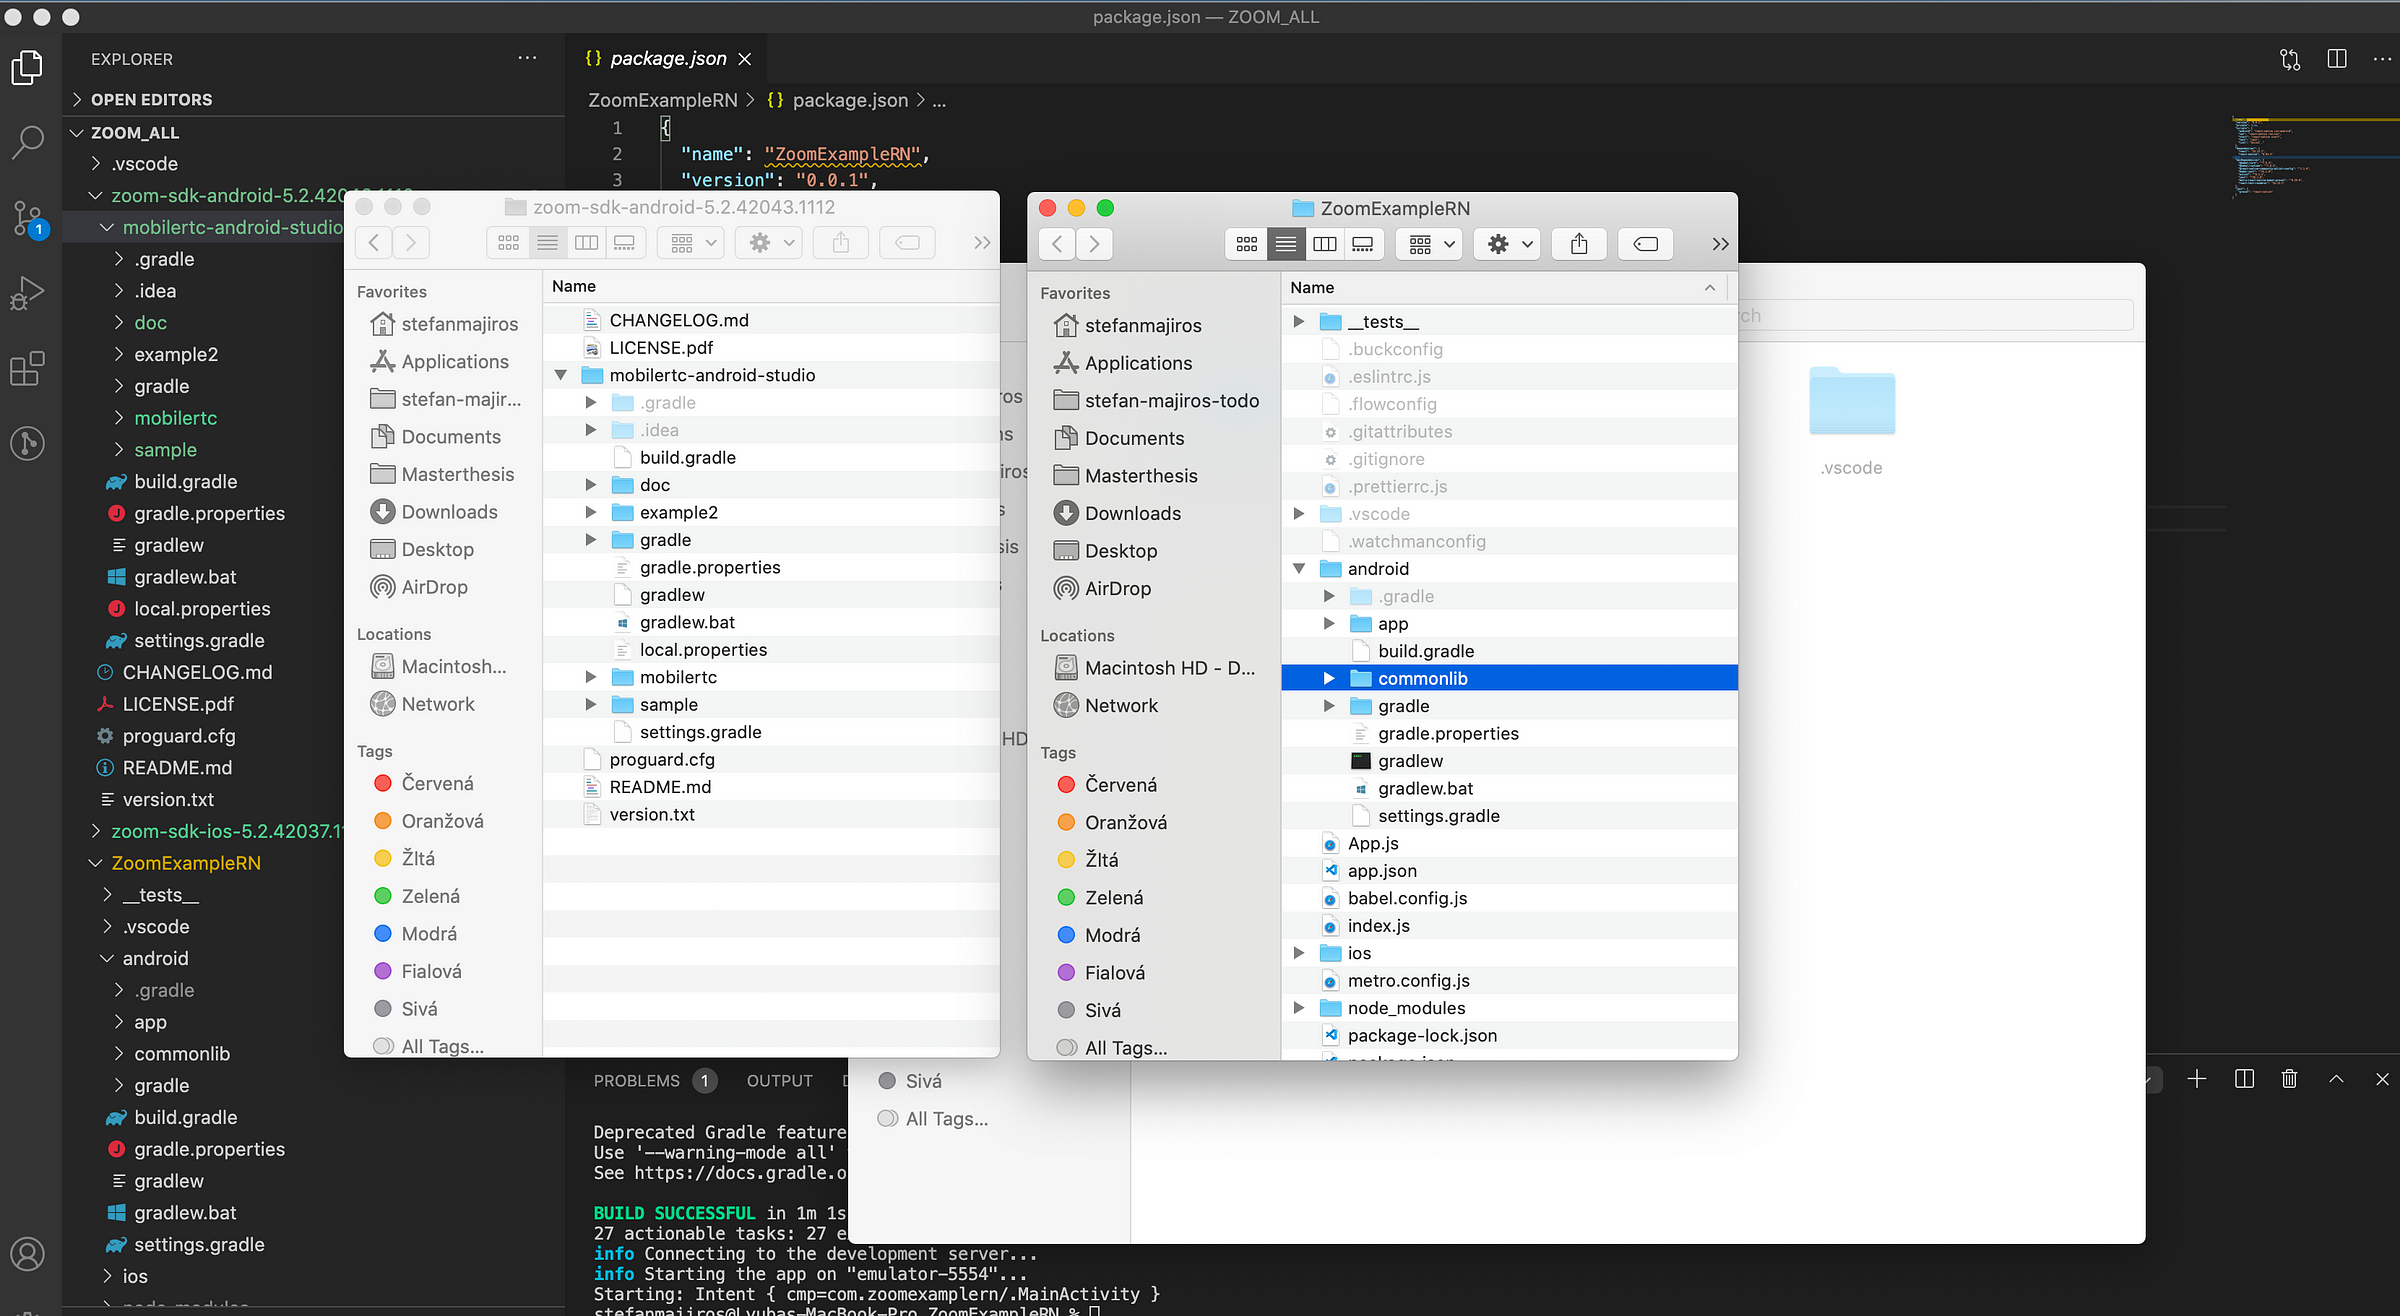
As well, as mobilertc folder.
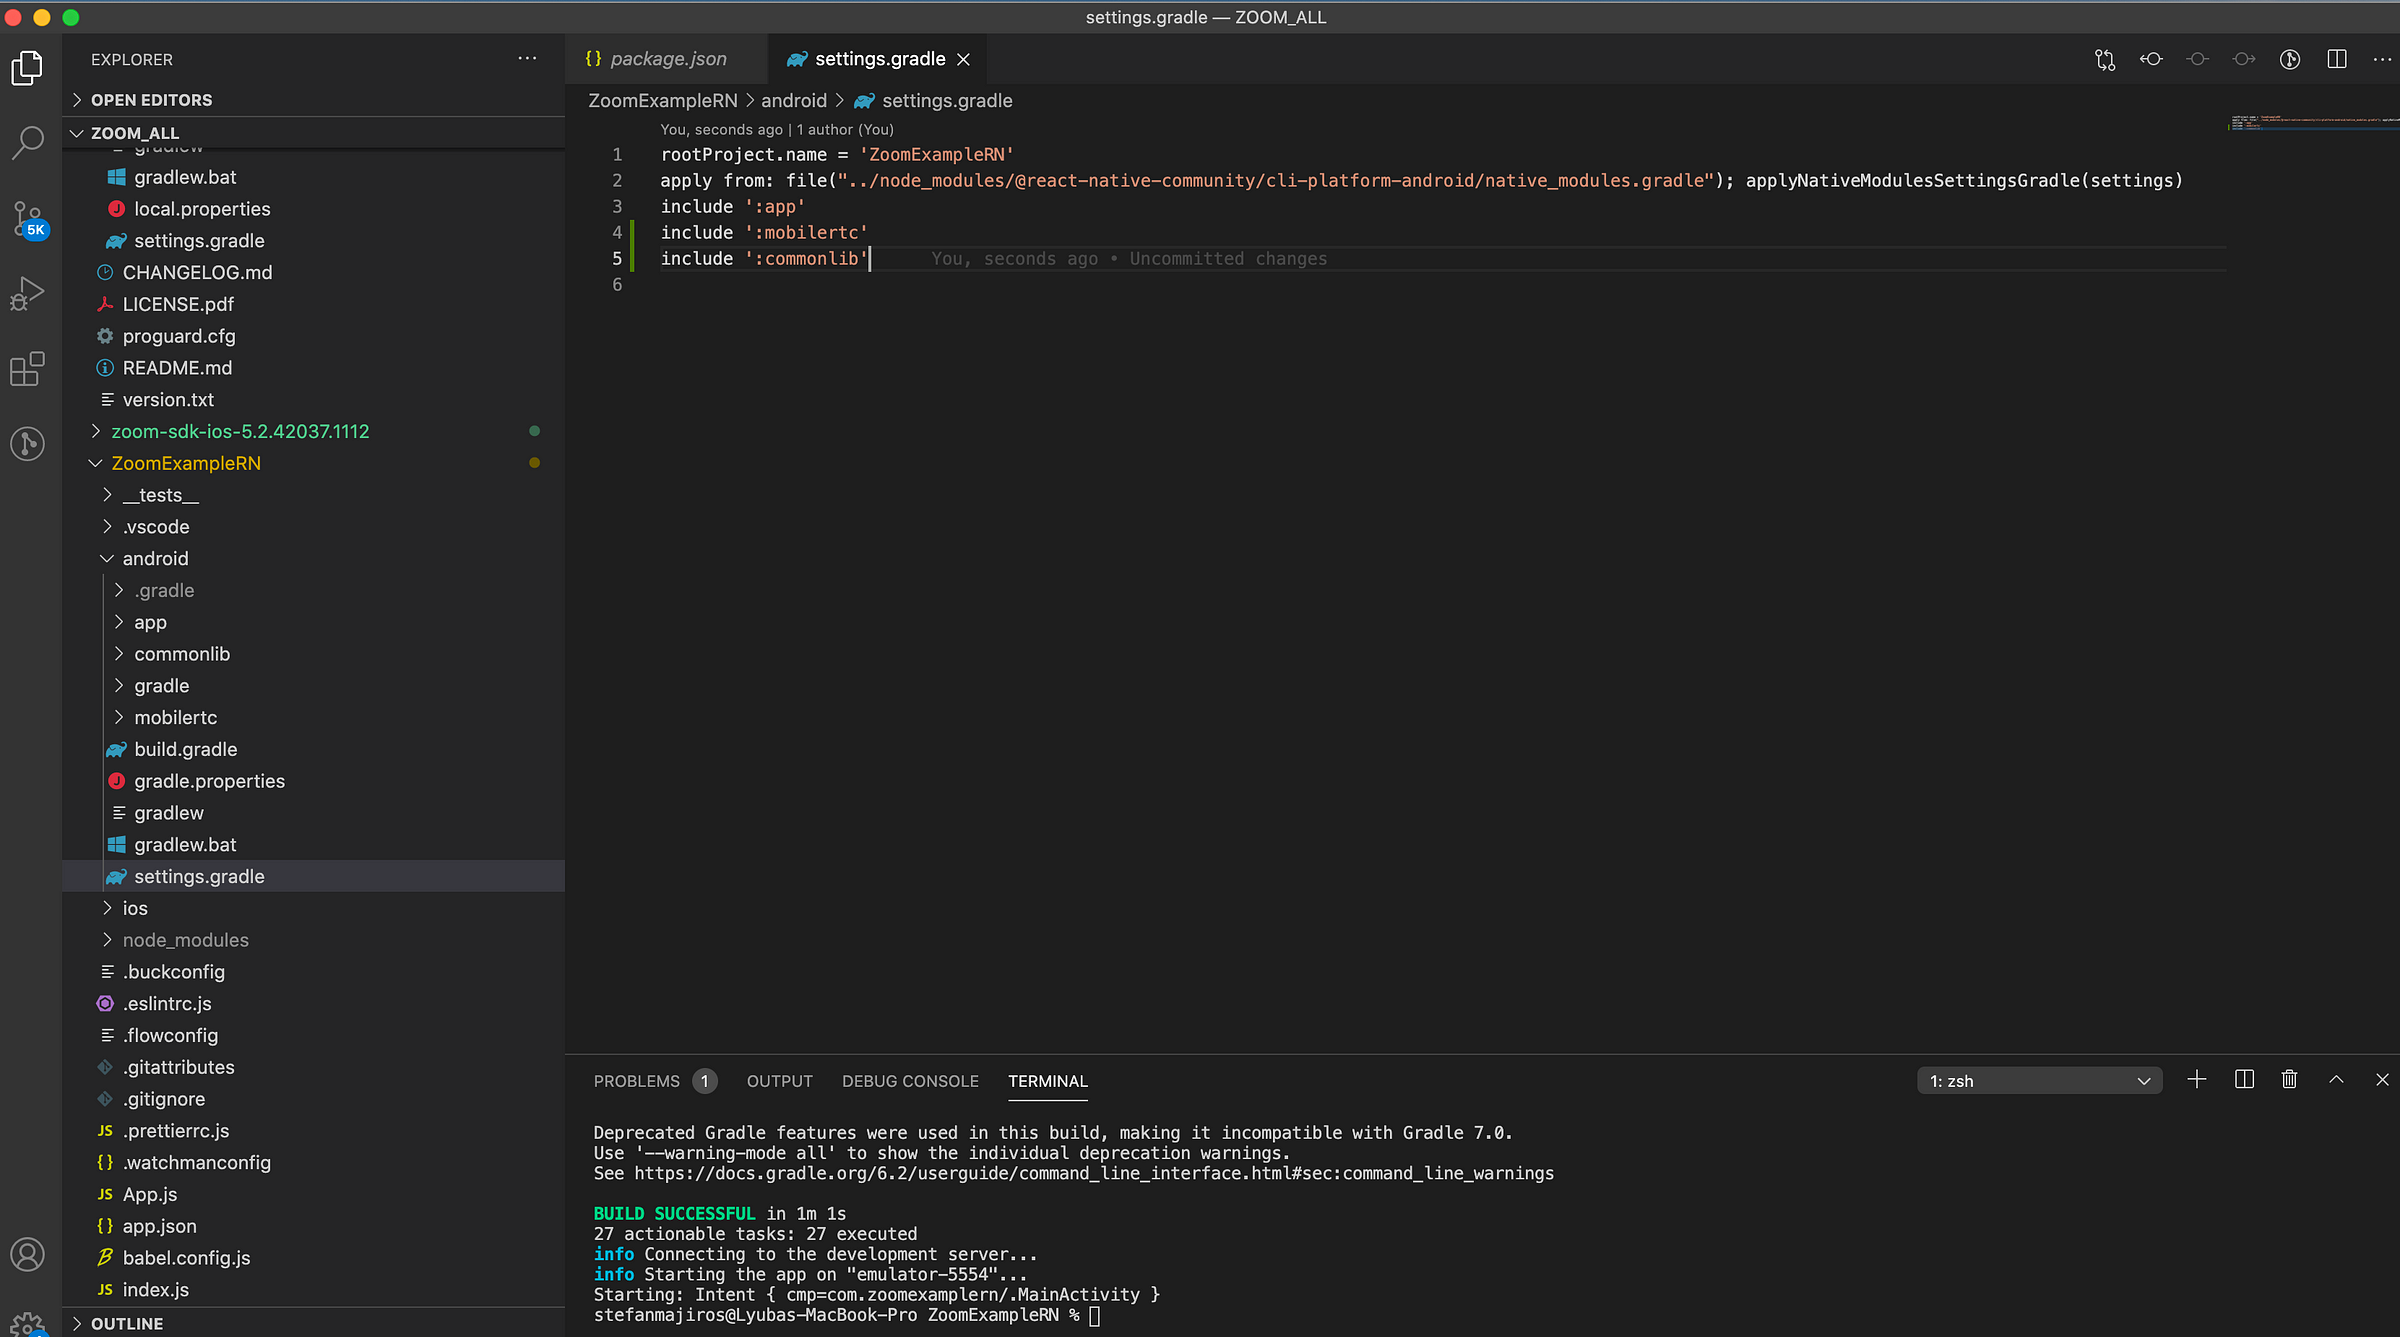
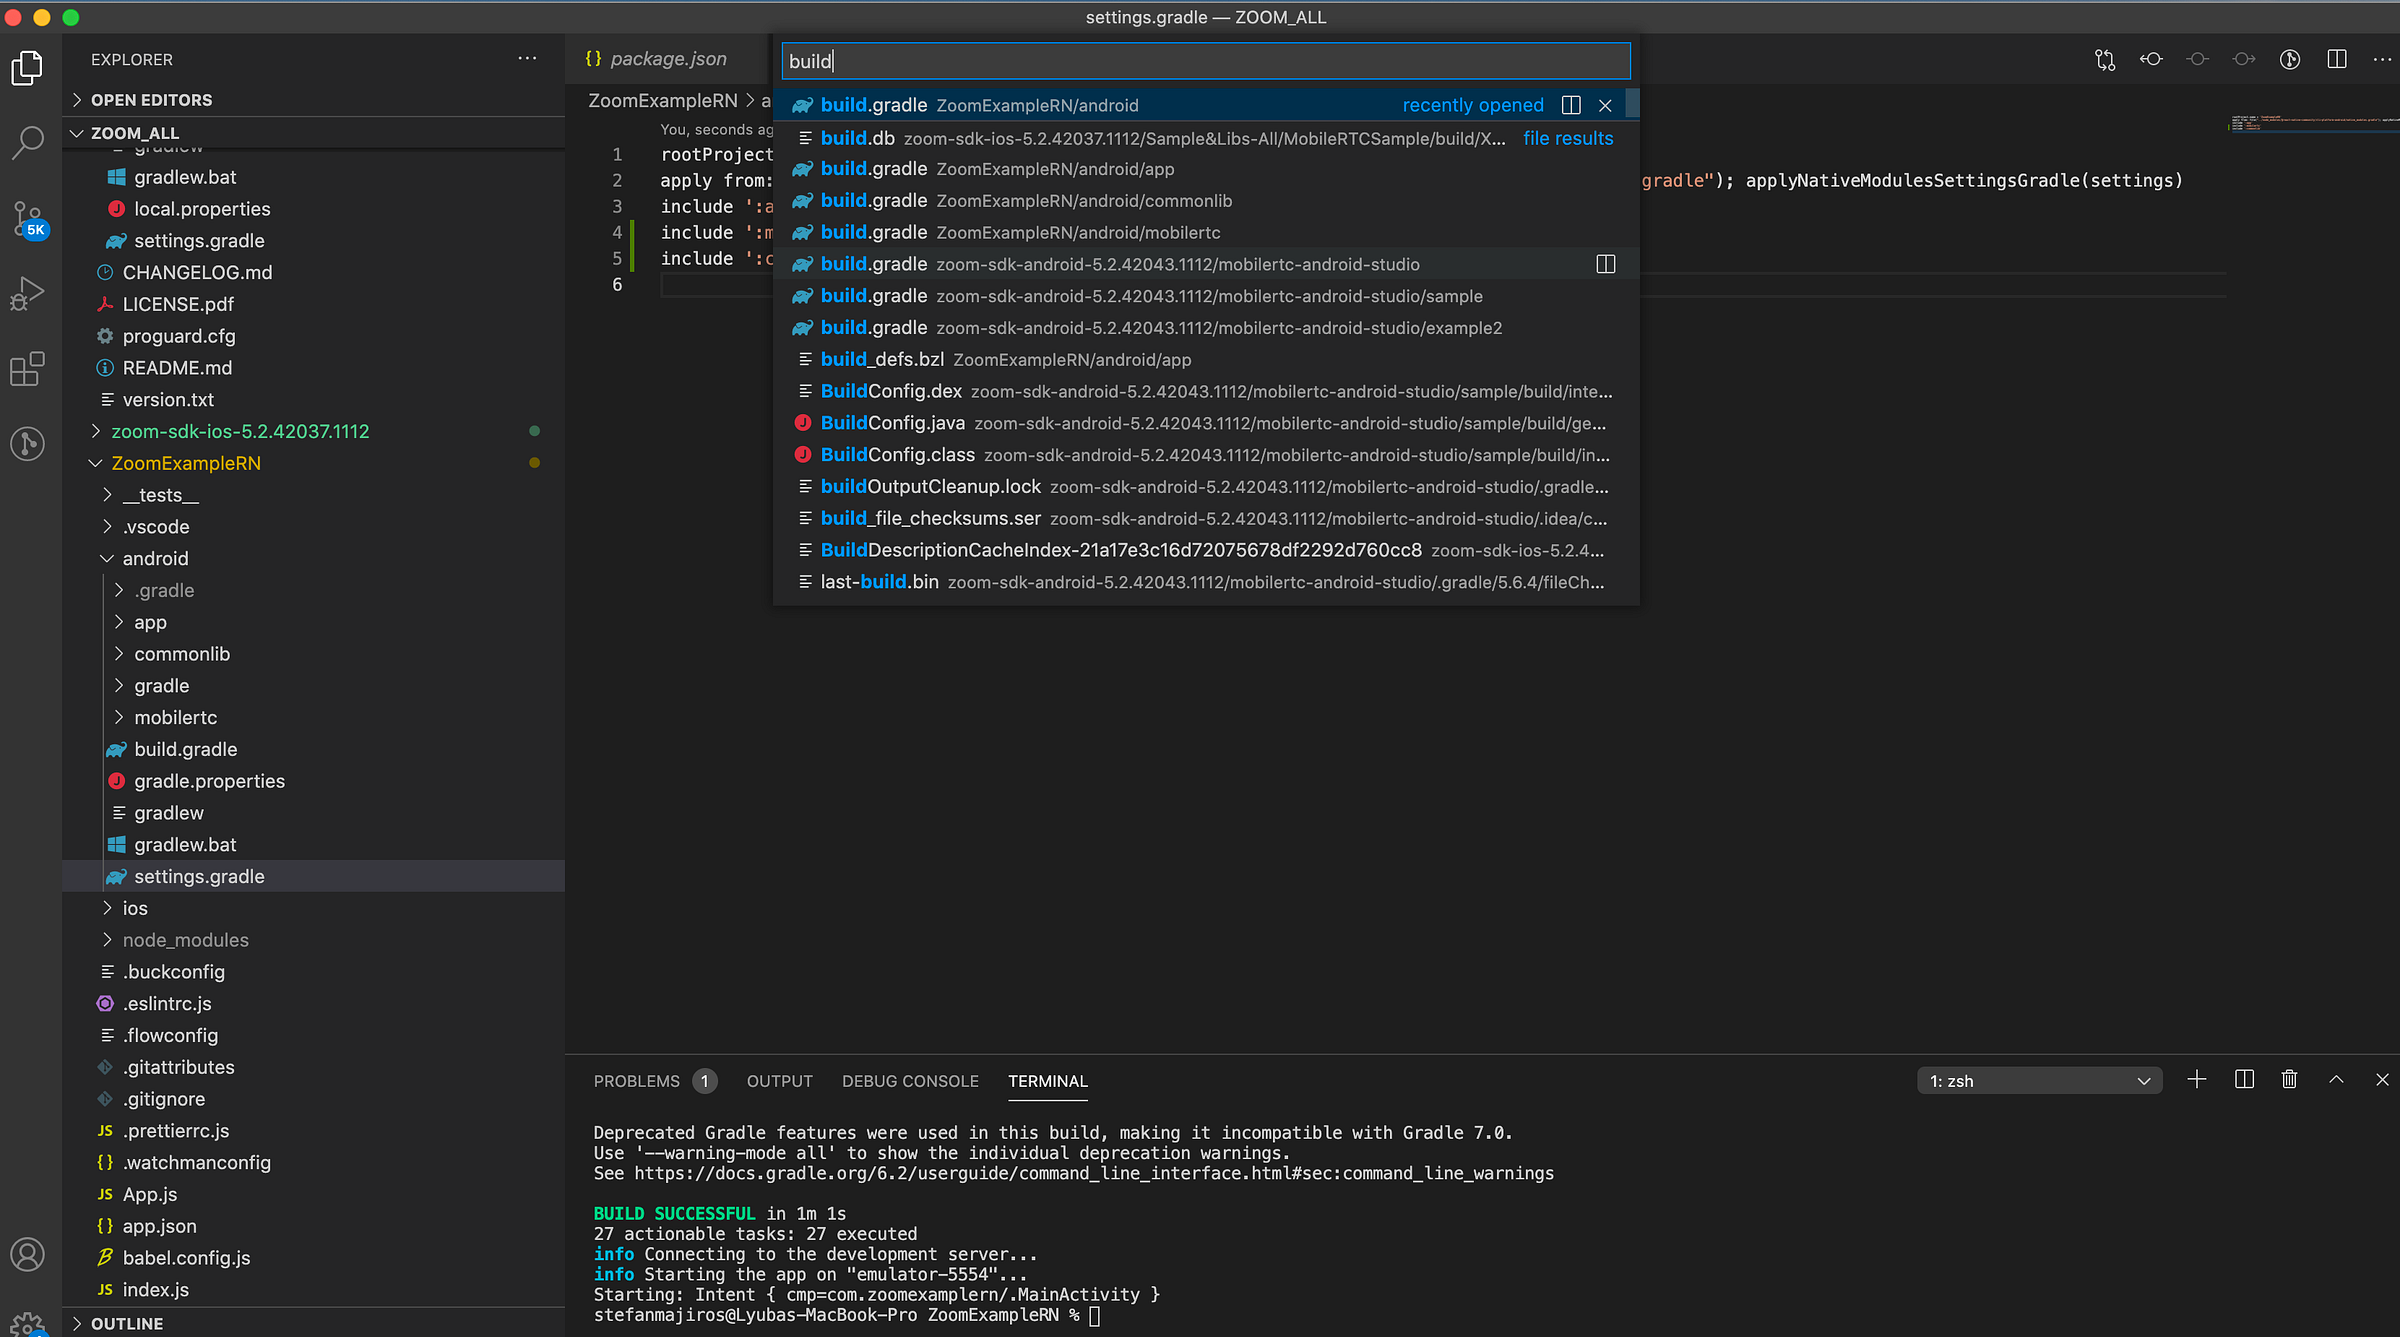
Now, let’s gonna modify settings.gradle.
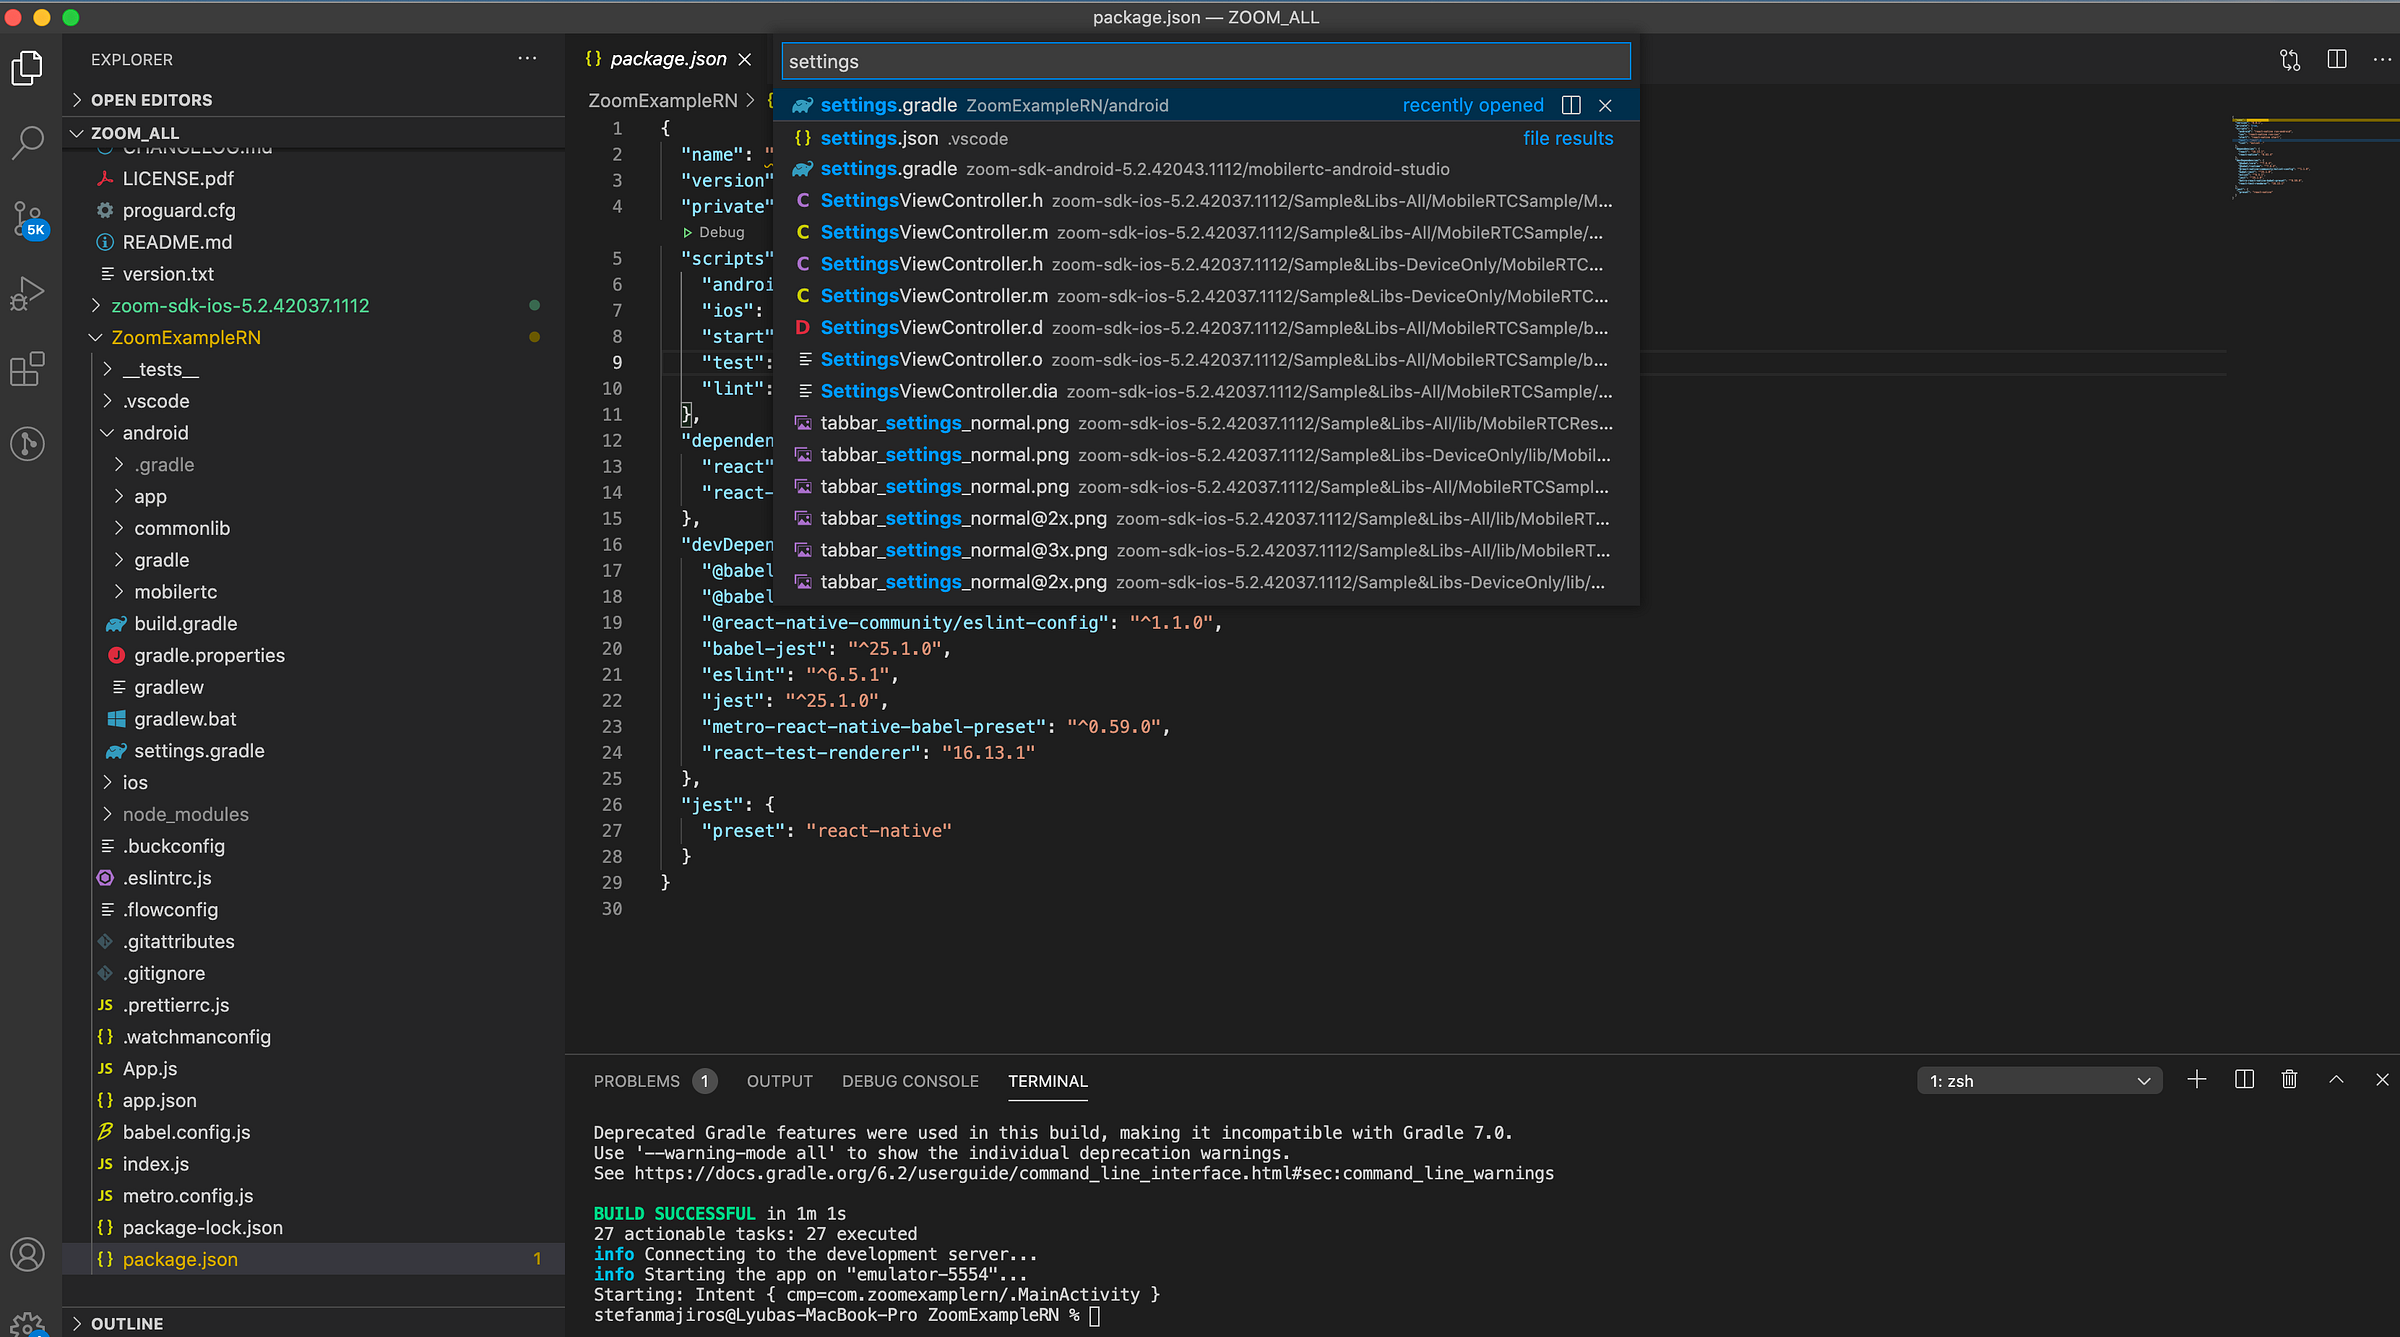
We need to tell Gradle, to include these copied folders into build process.
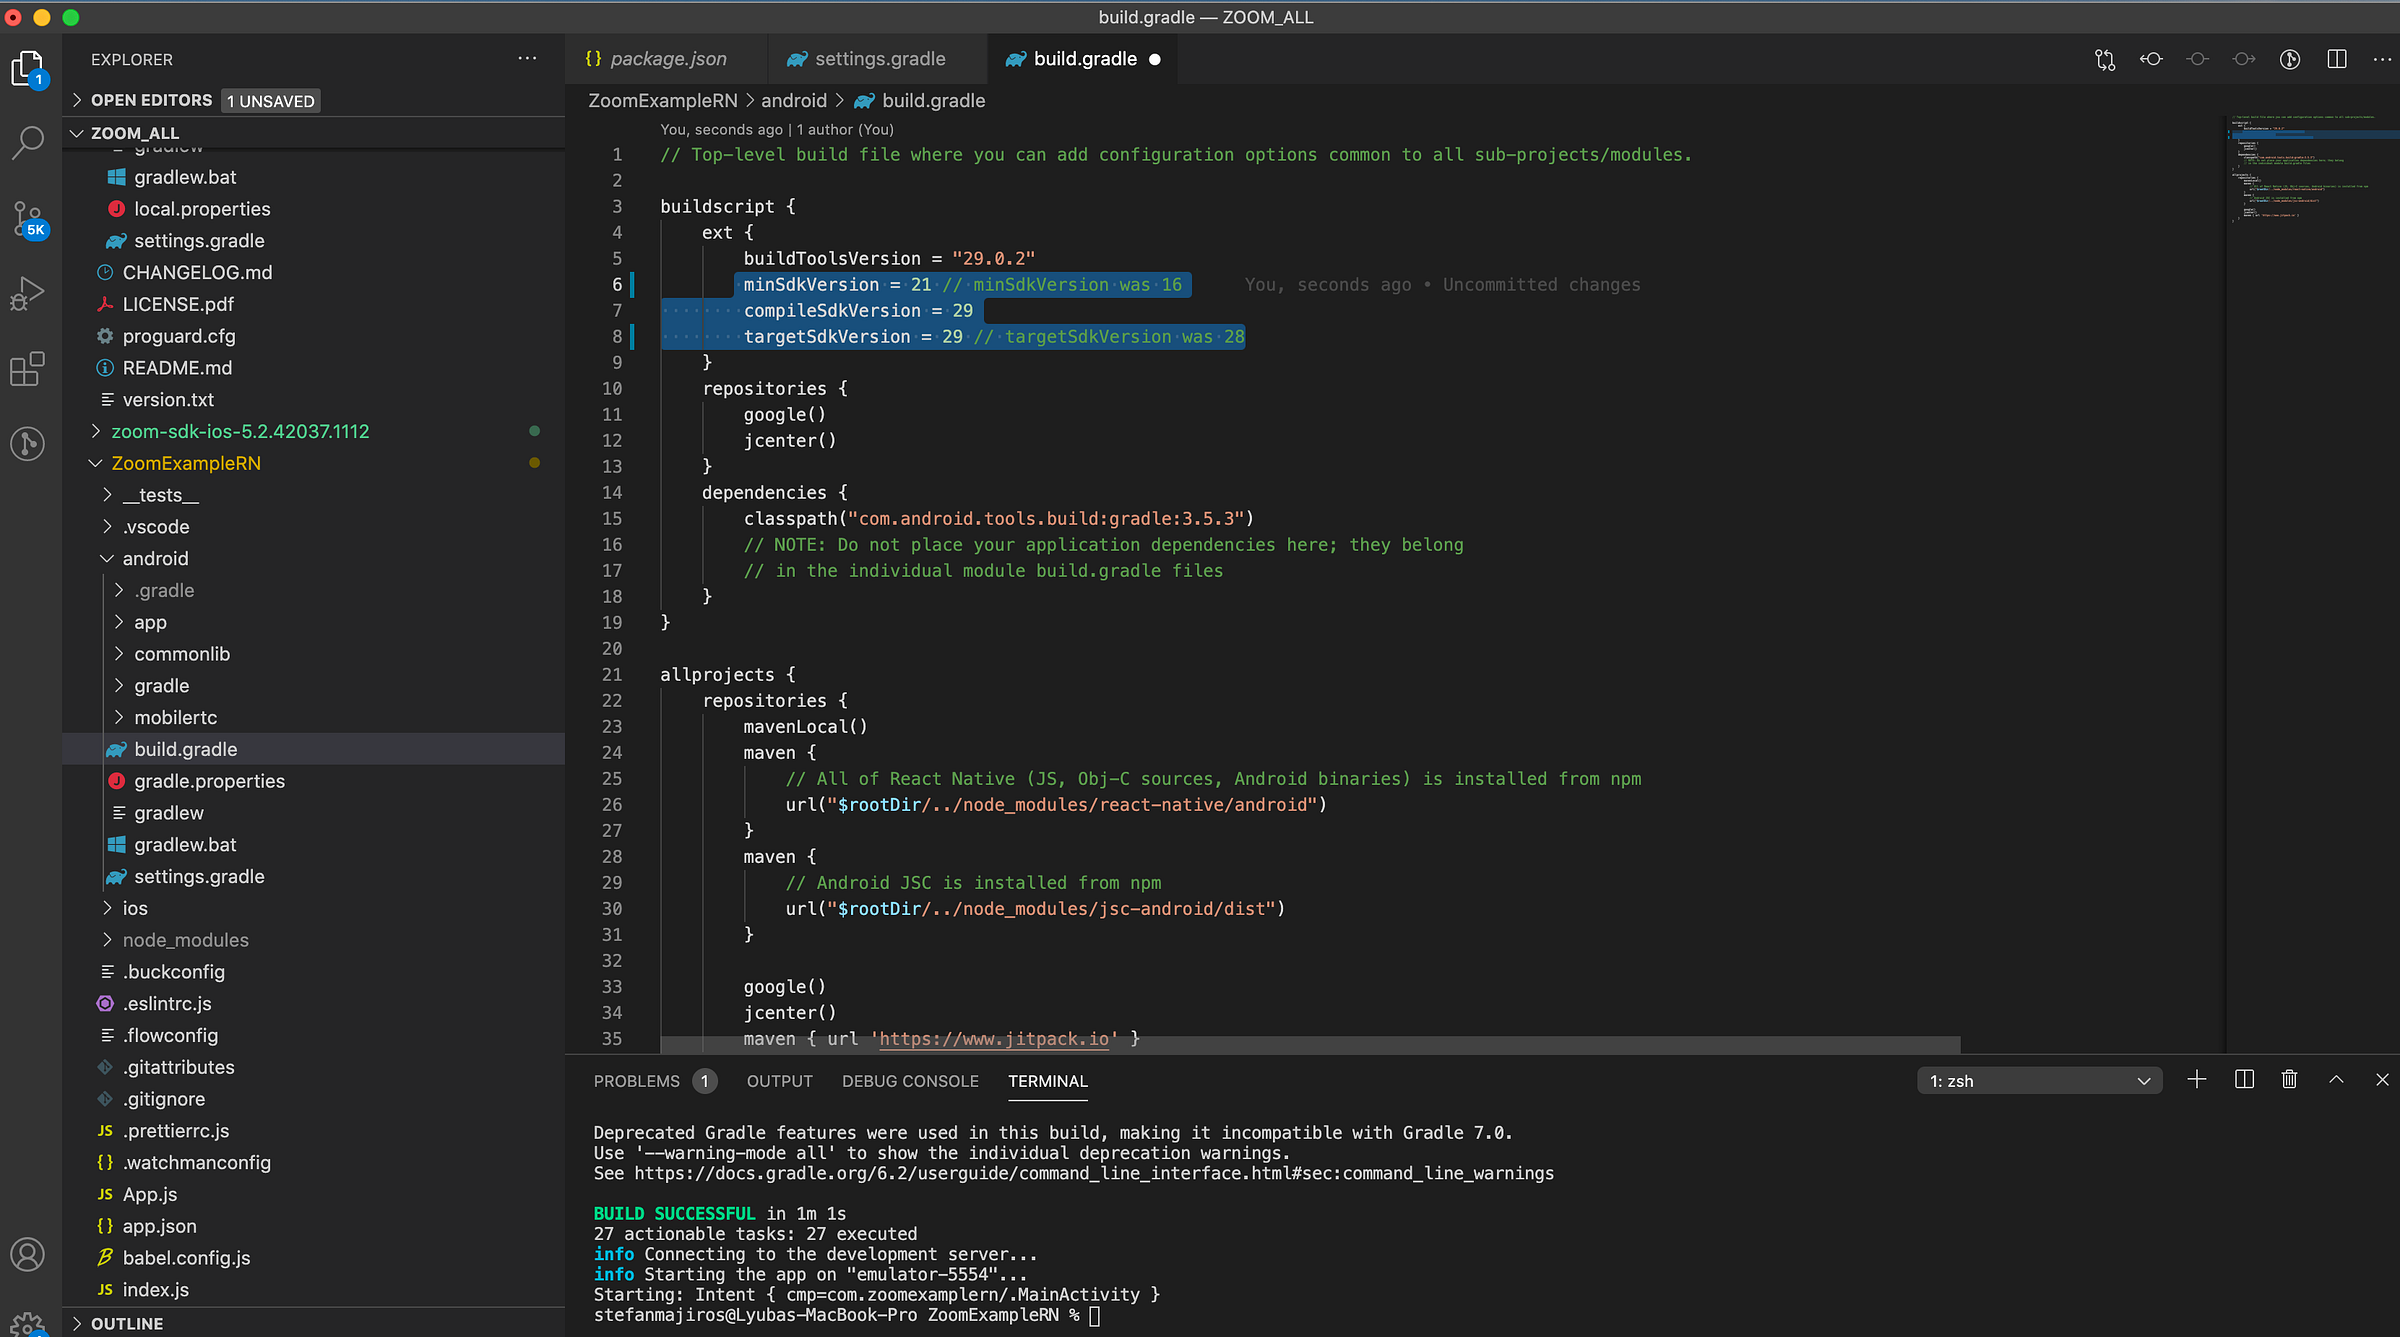
Then we need to modify android/build.gradle file.
We need to bump minSDKVersion and targetSDKVersion.
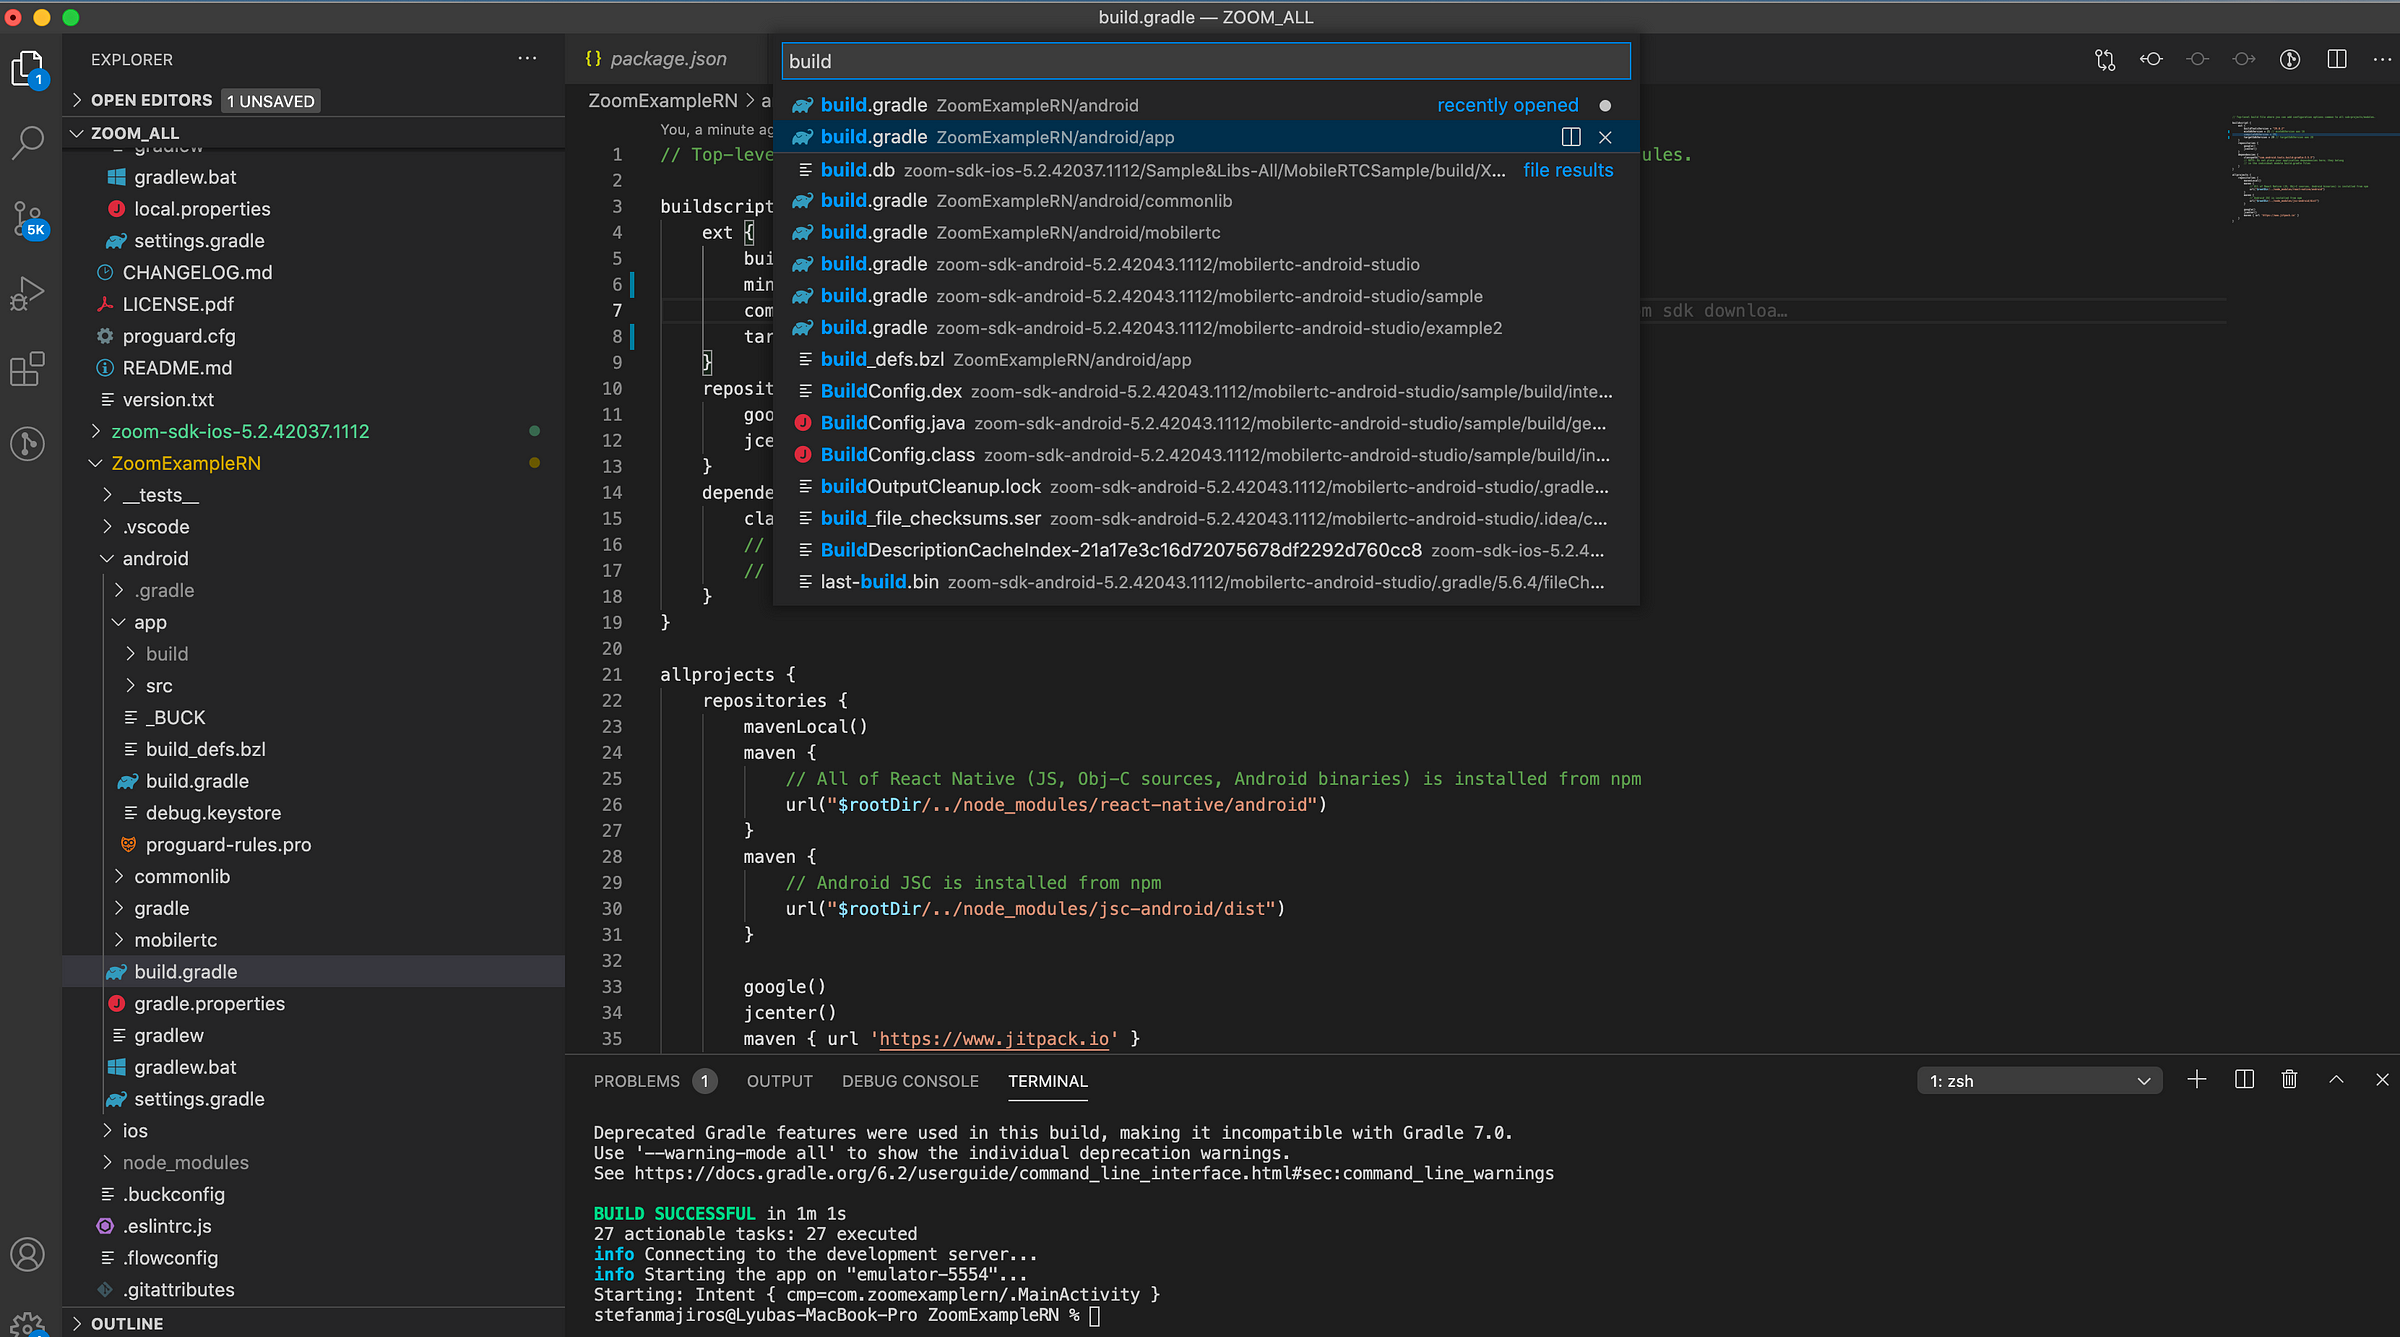
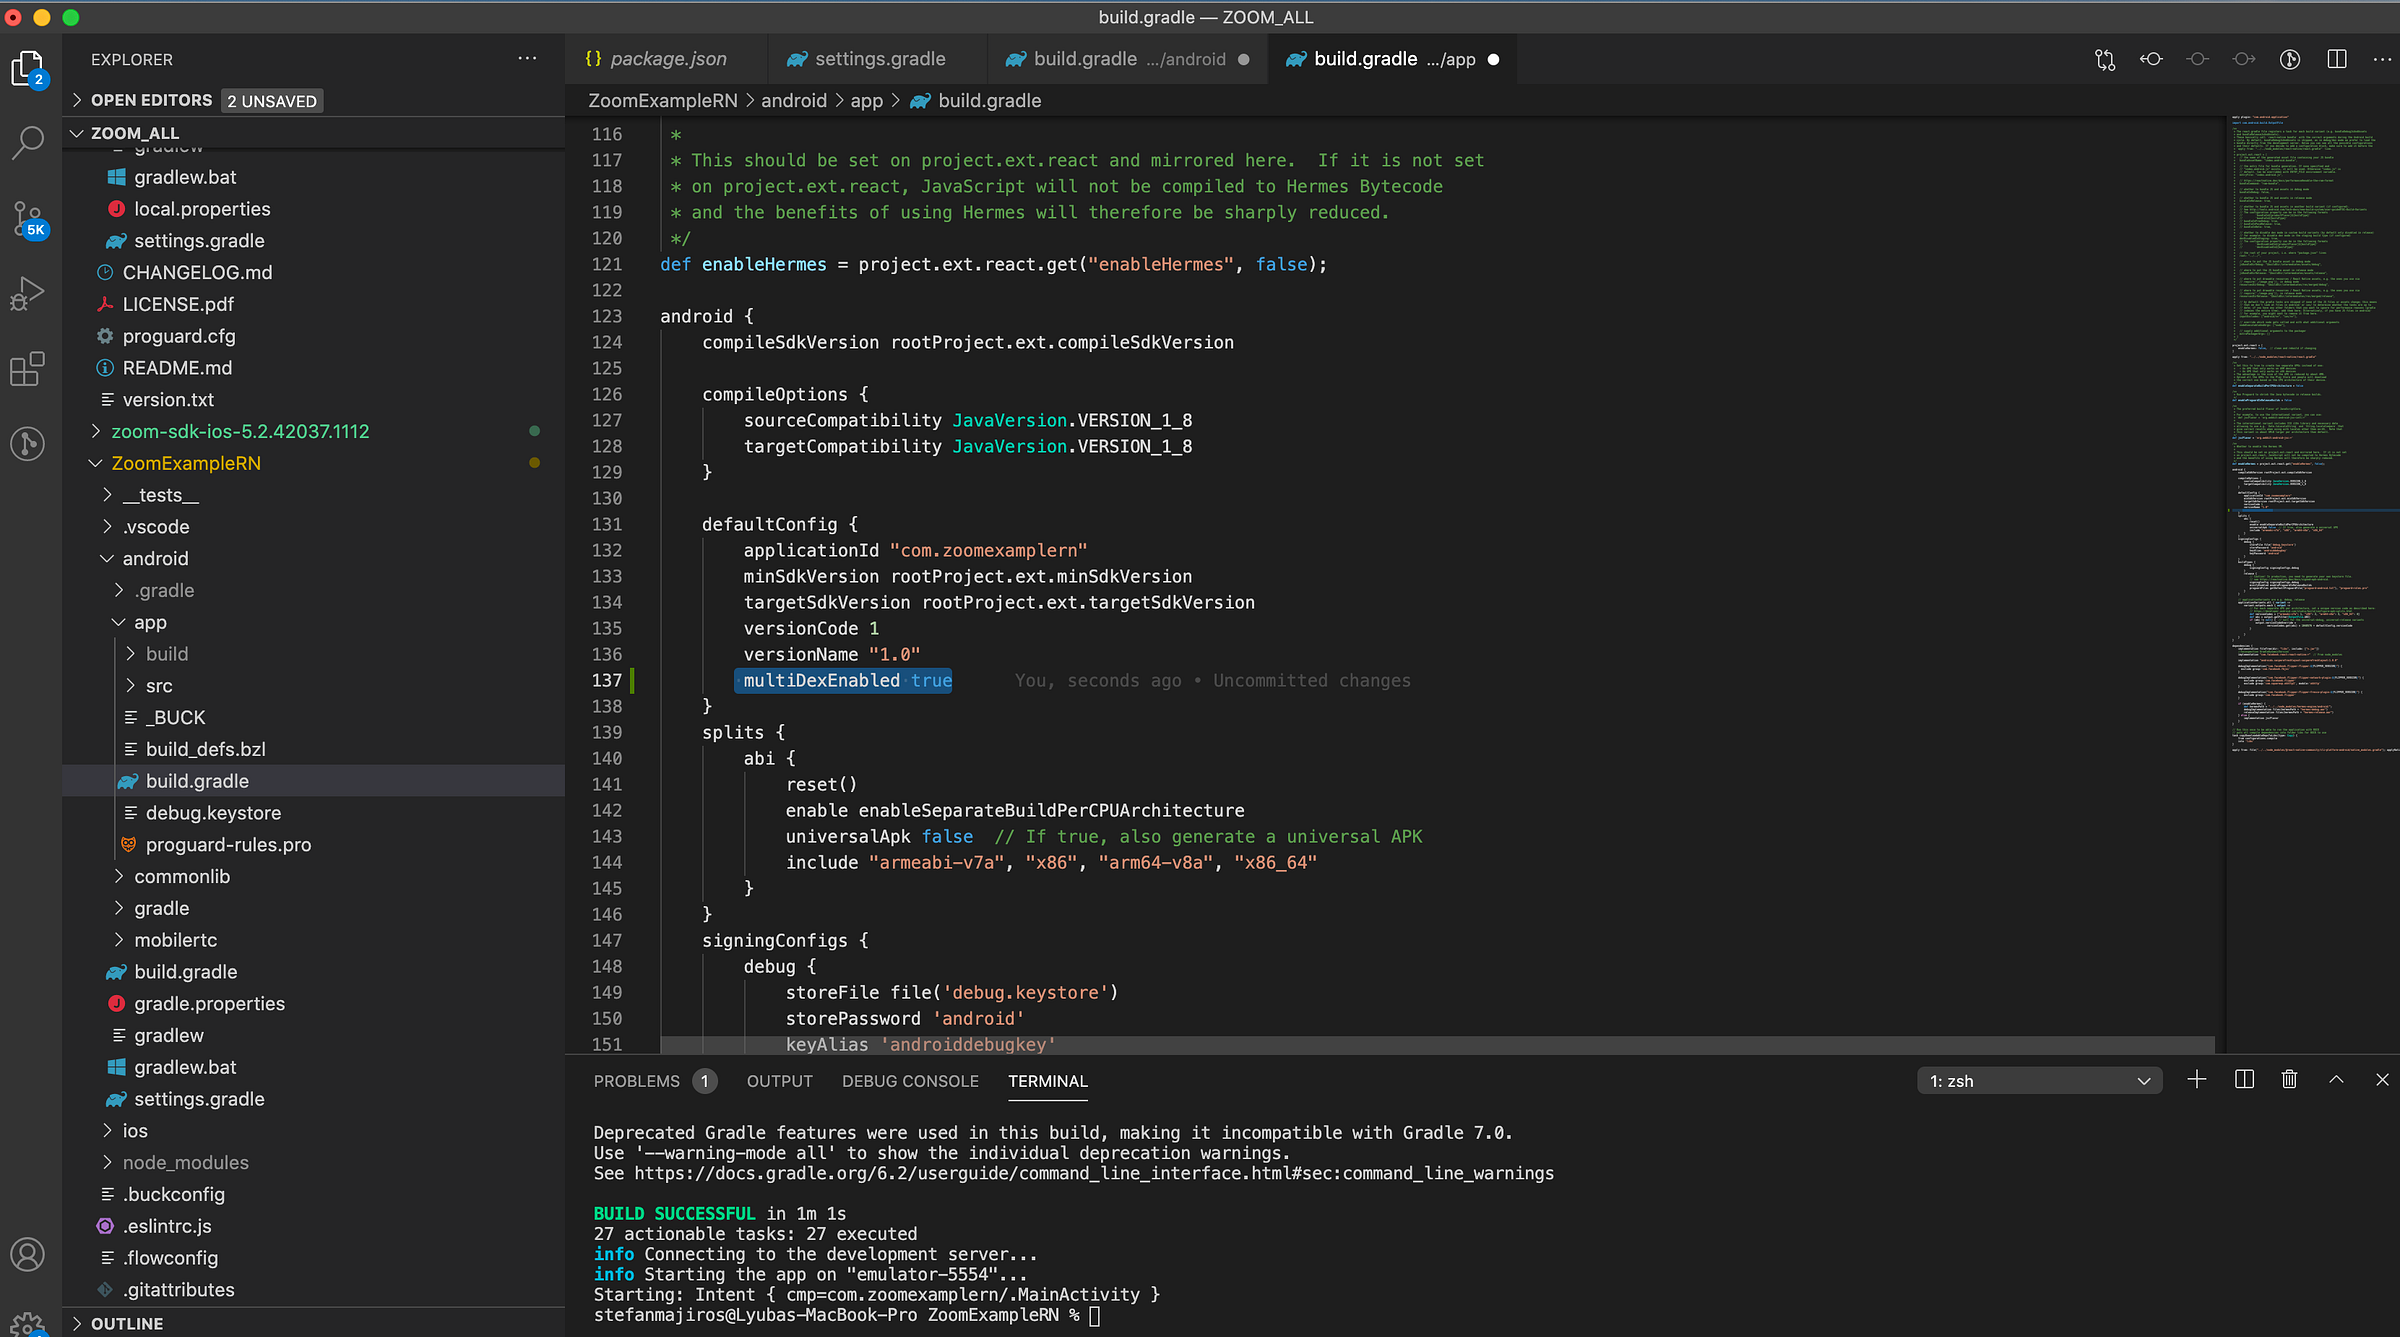
Then we need to modify android/app/build.gradle file.
Let’s enable multidex.
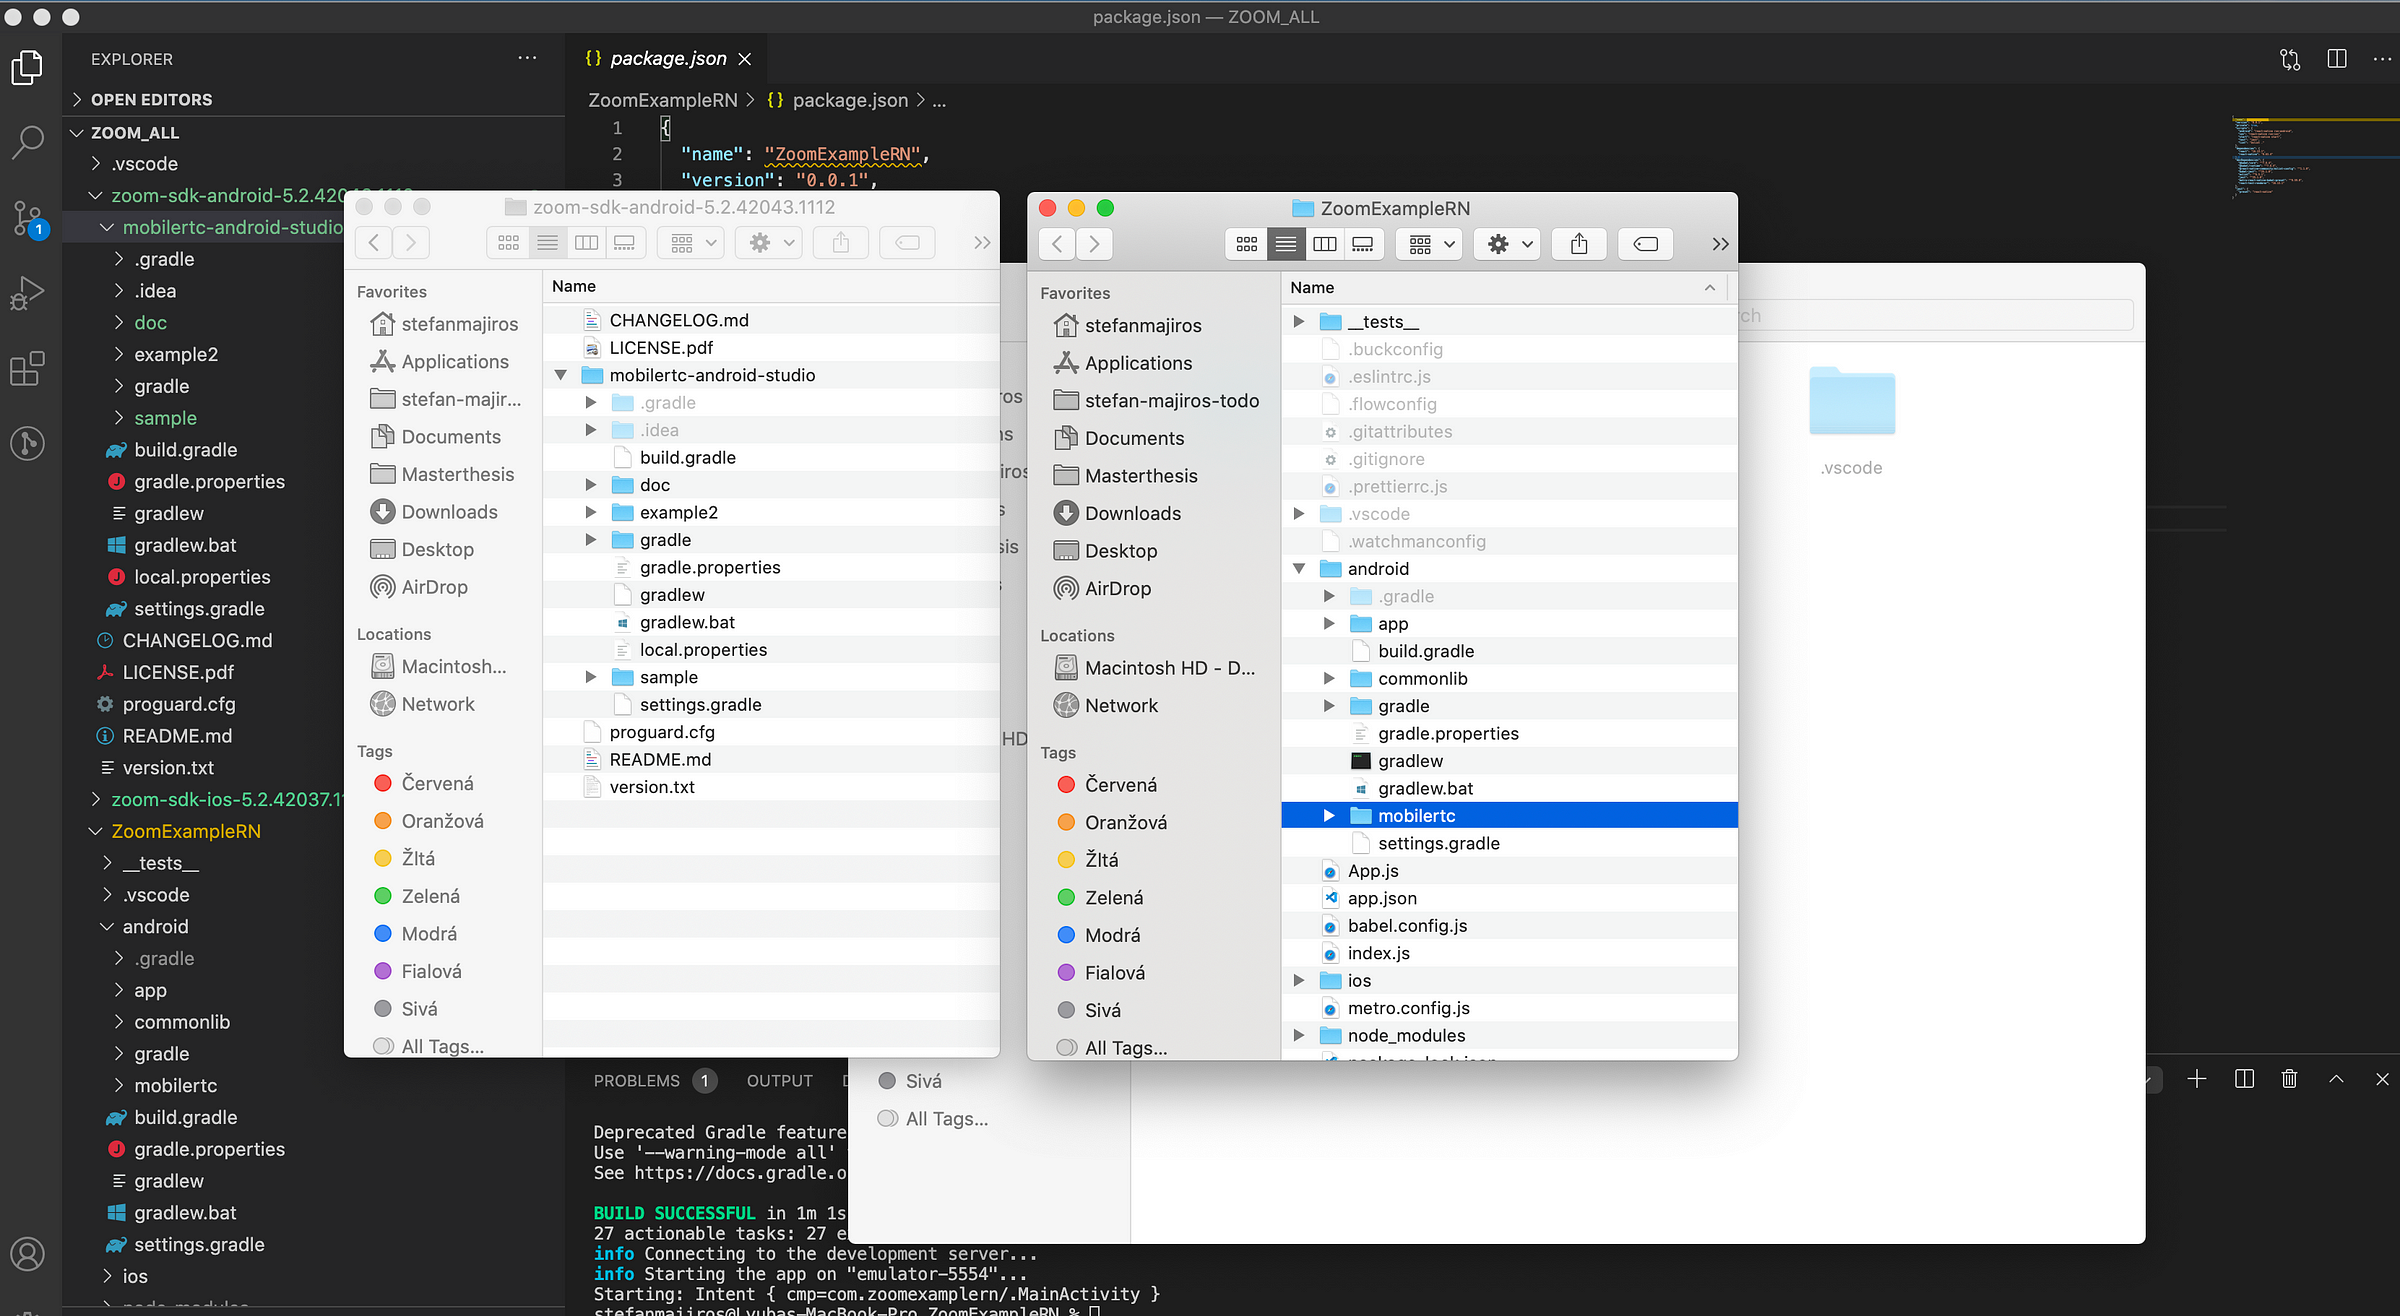
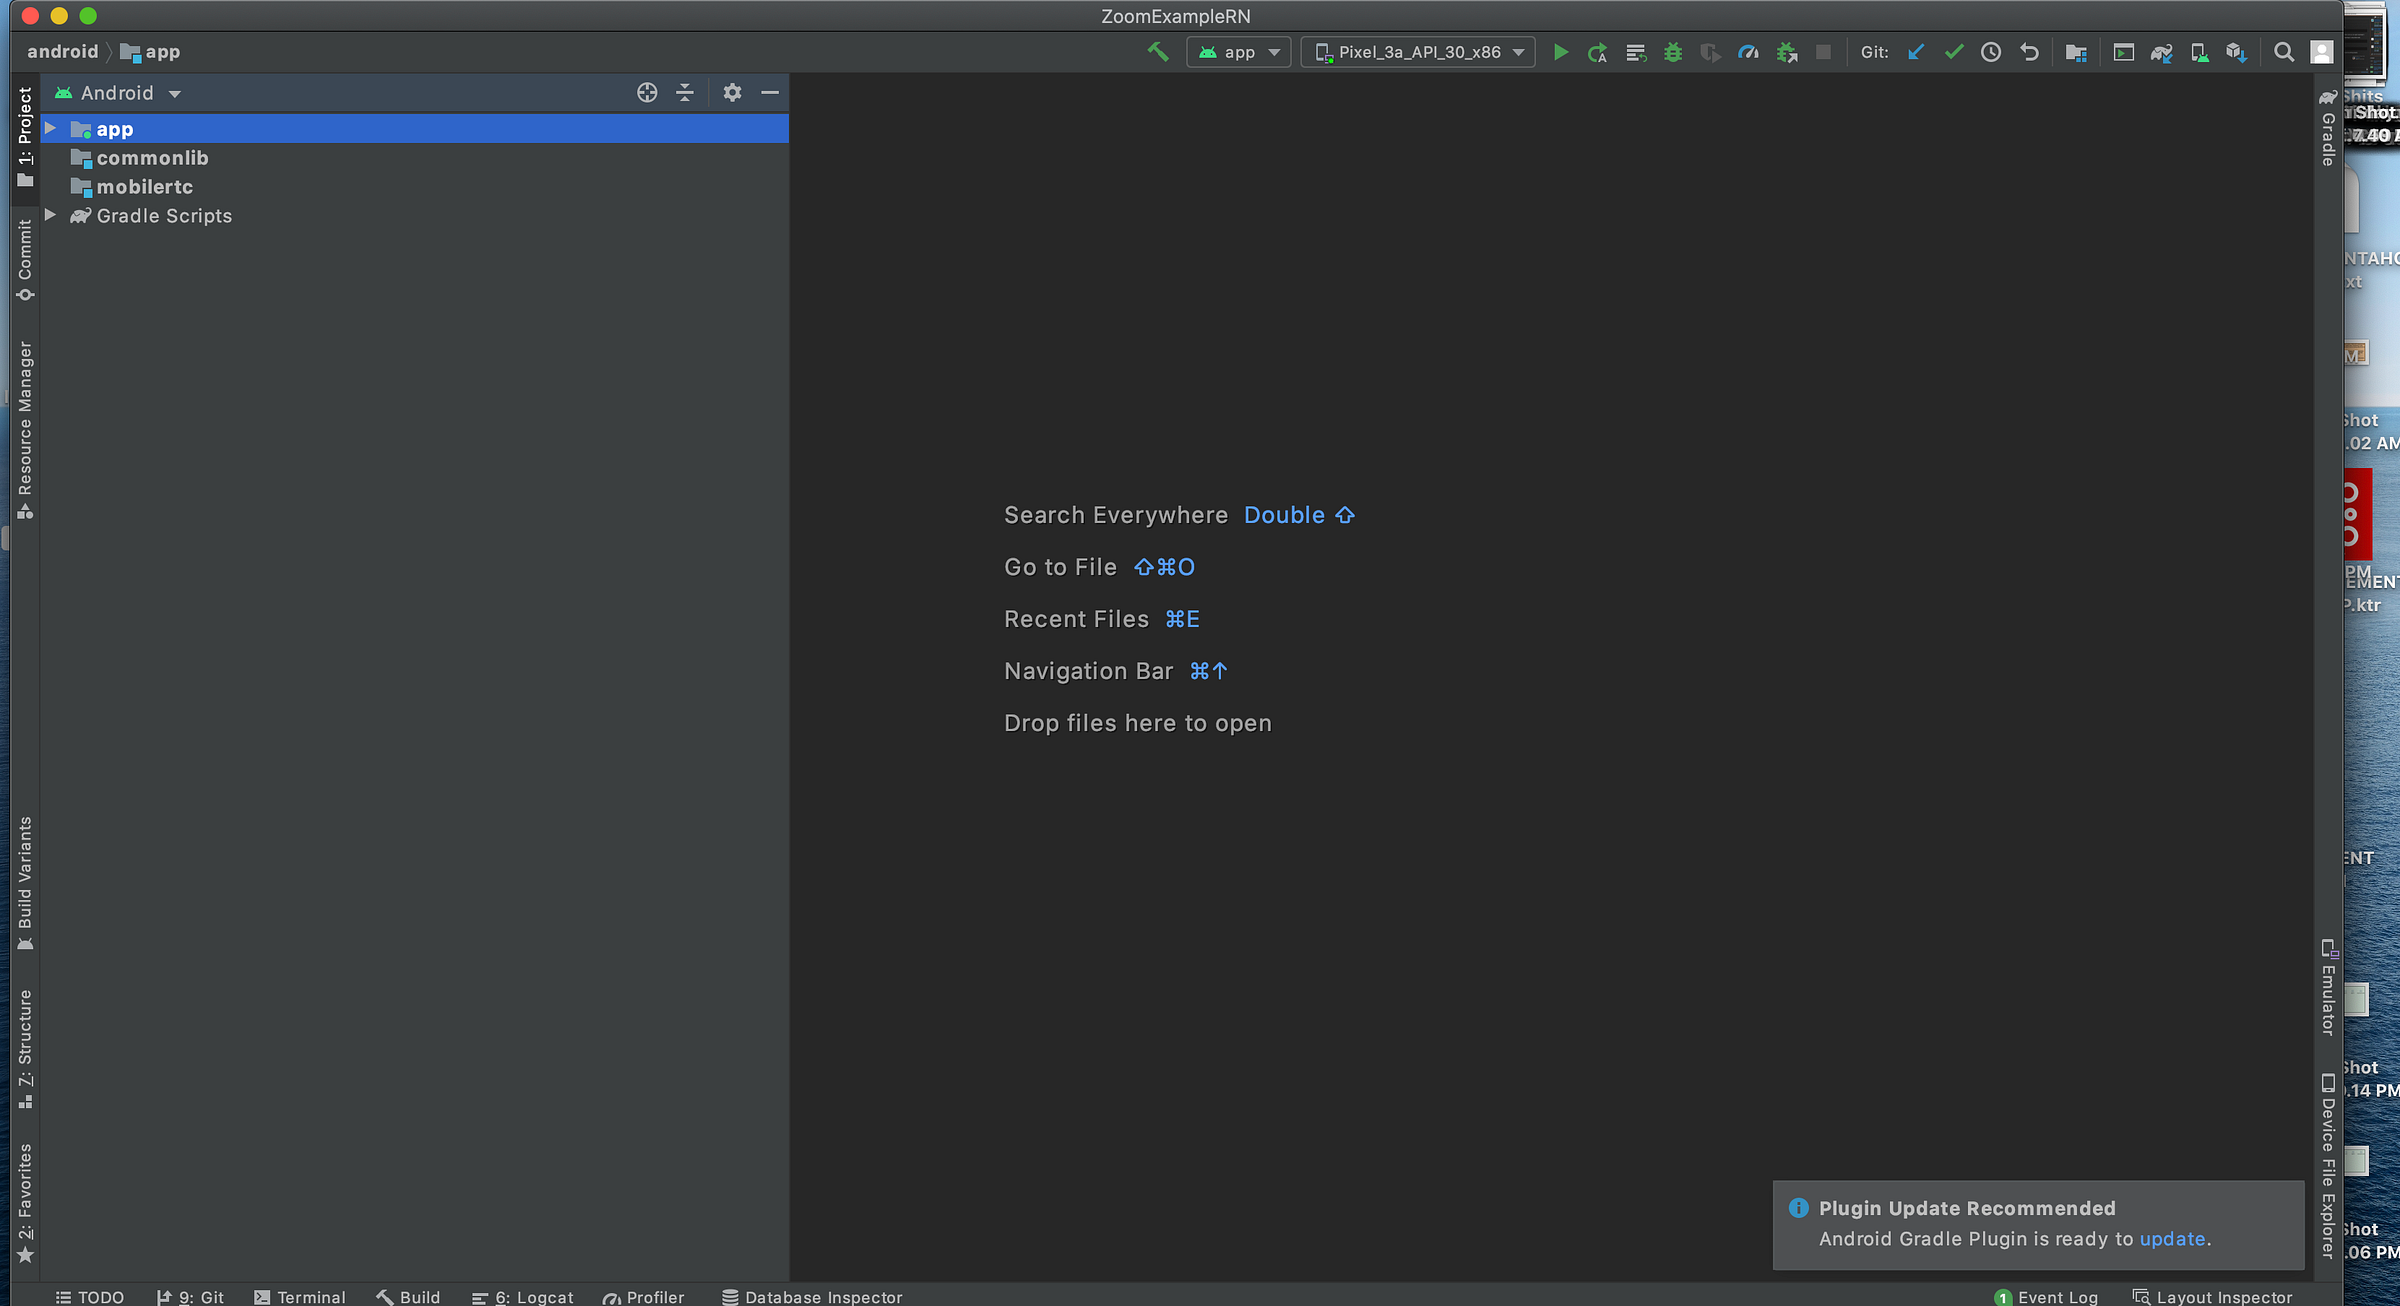
Then, let’s open the android folder in Android Studio and wait for sync.
If you did everything right, you will see 3 folder on the left side: app, commonlib, mobilertc.
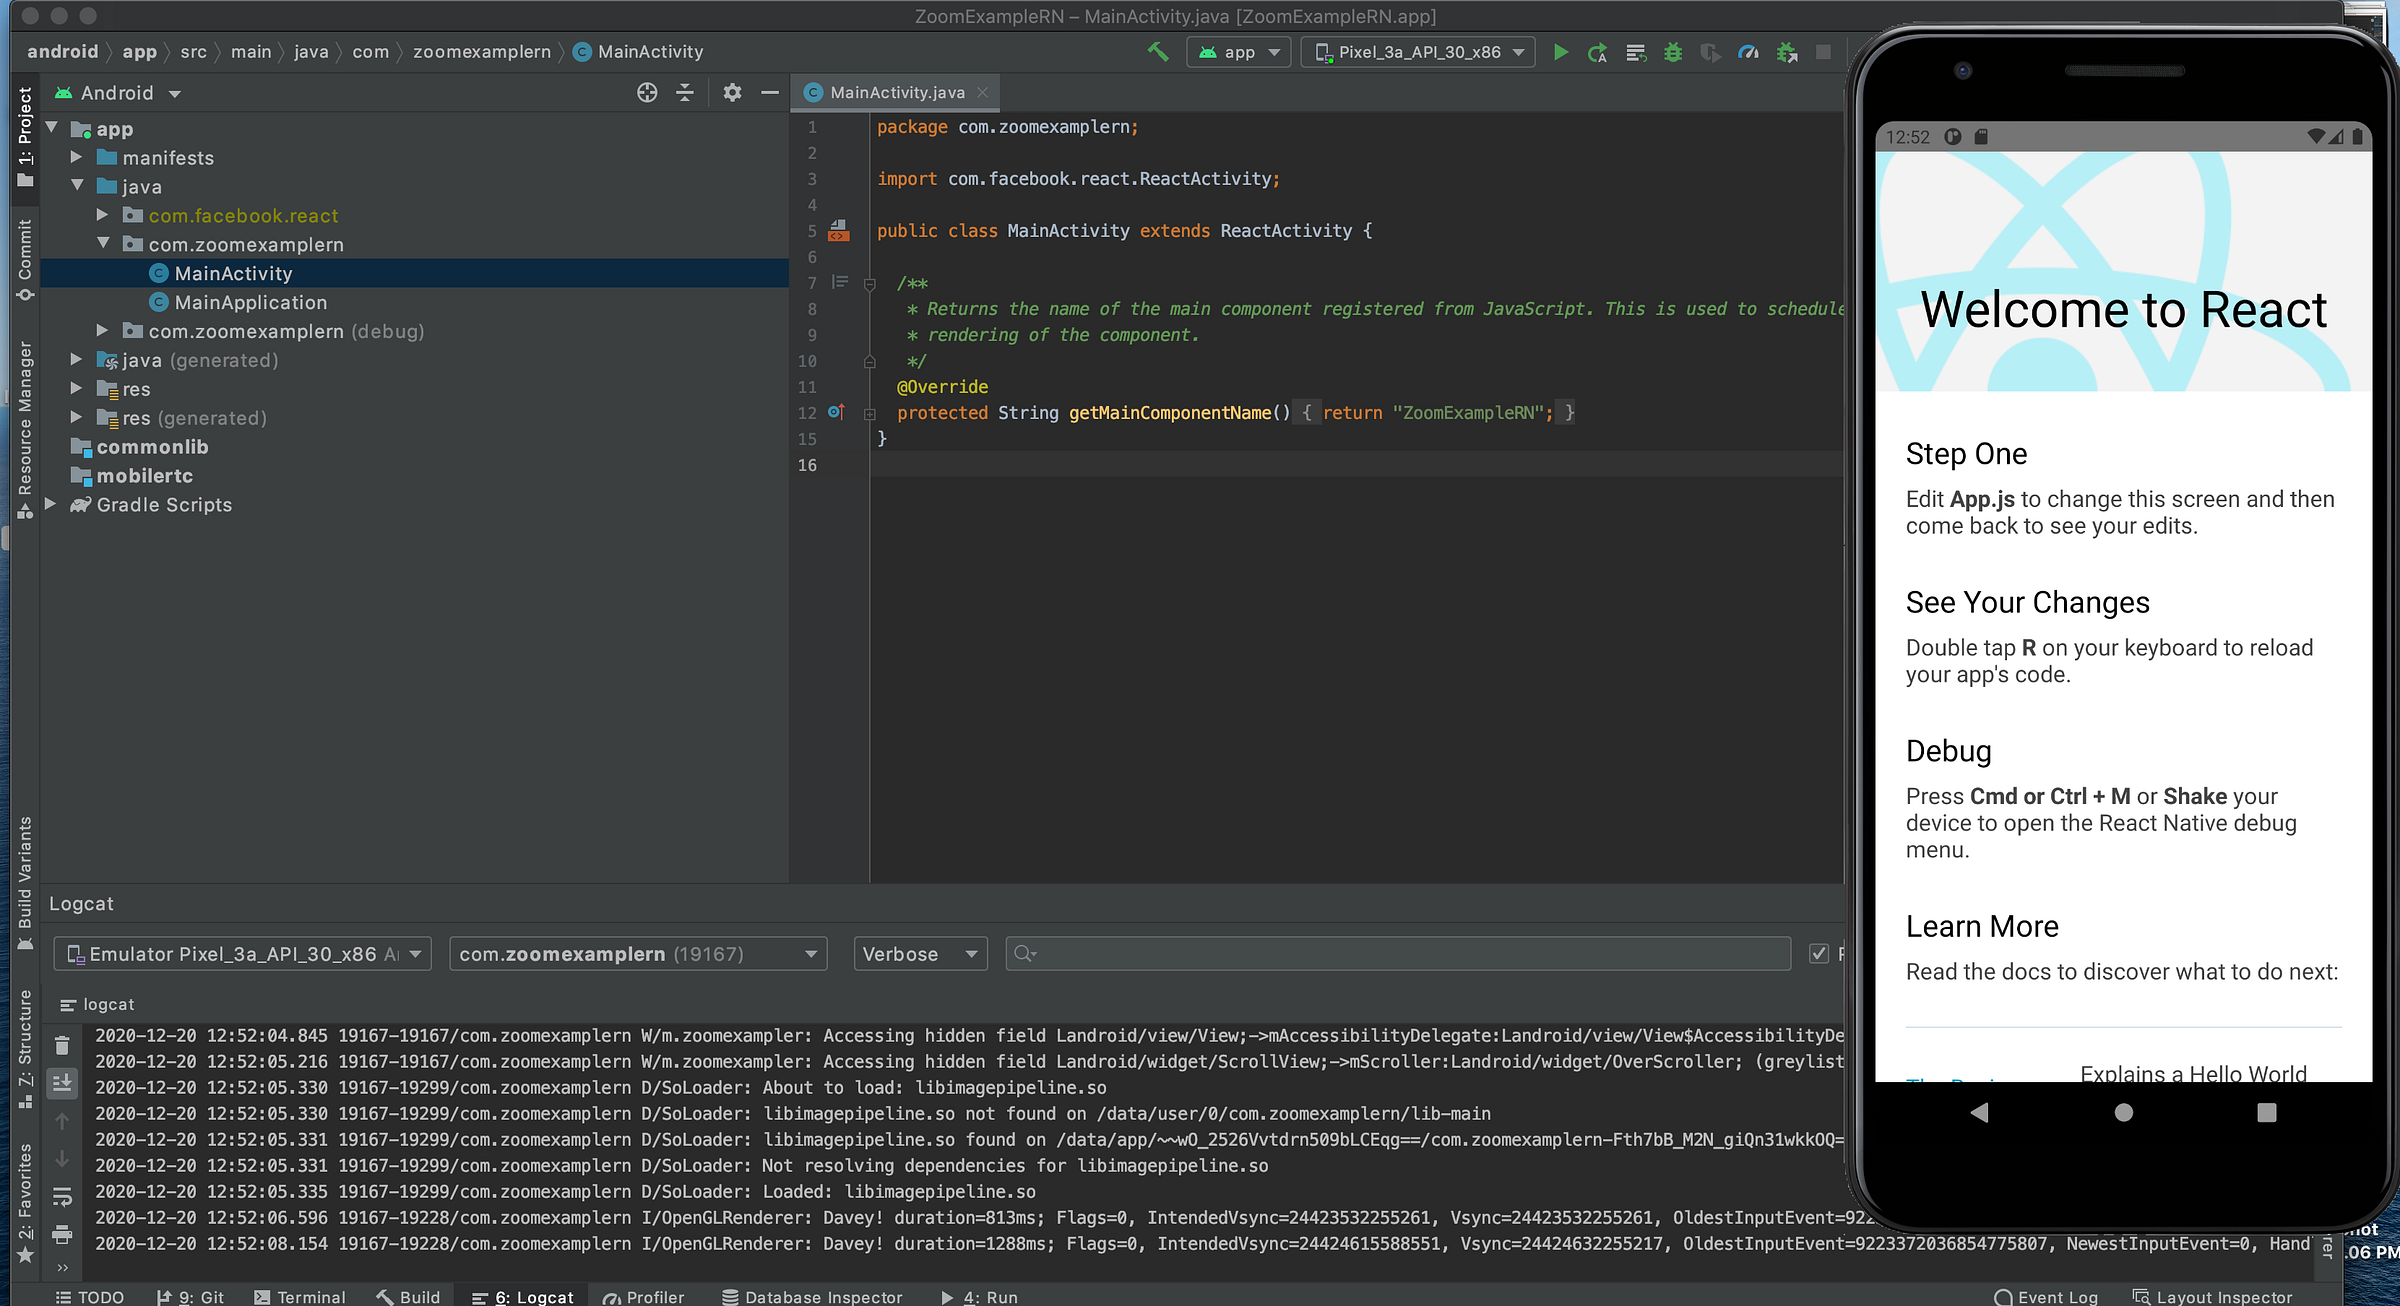
Let’s build it.
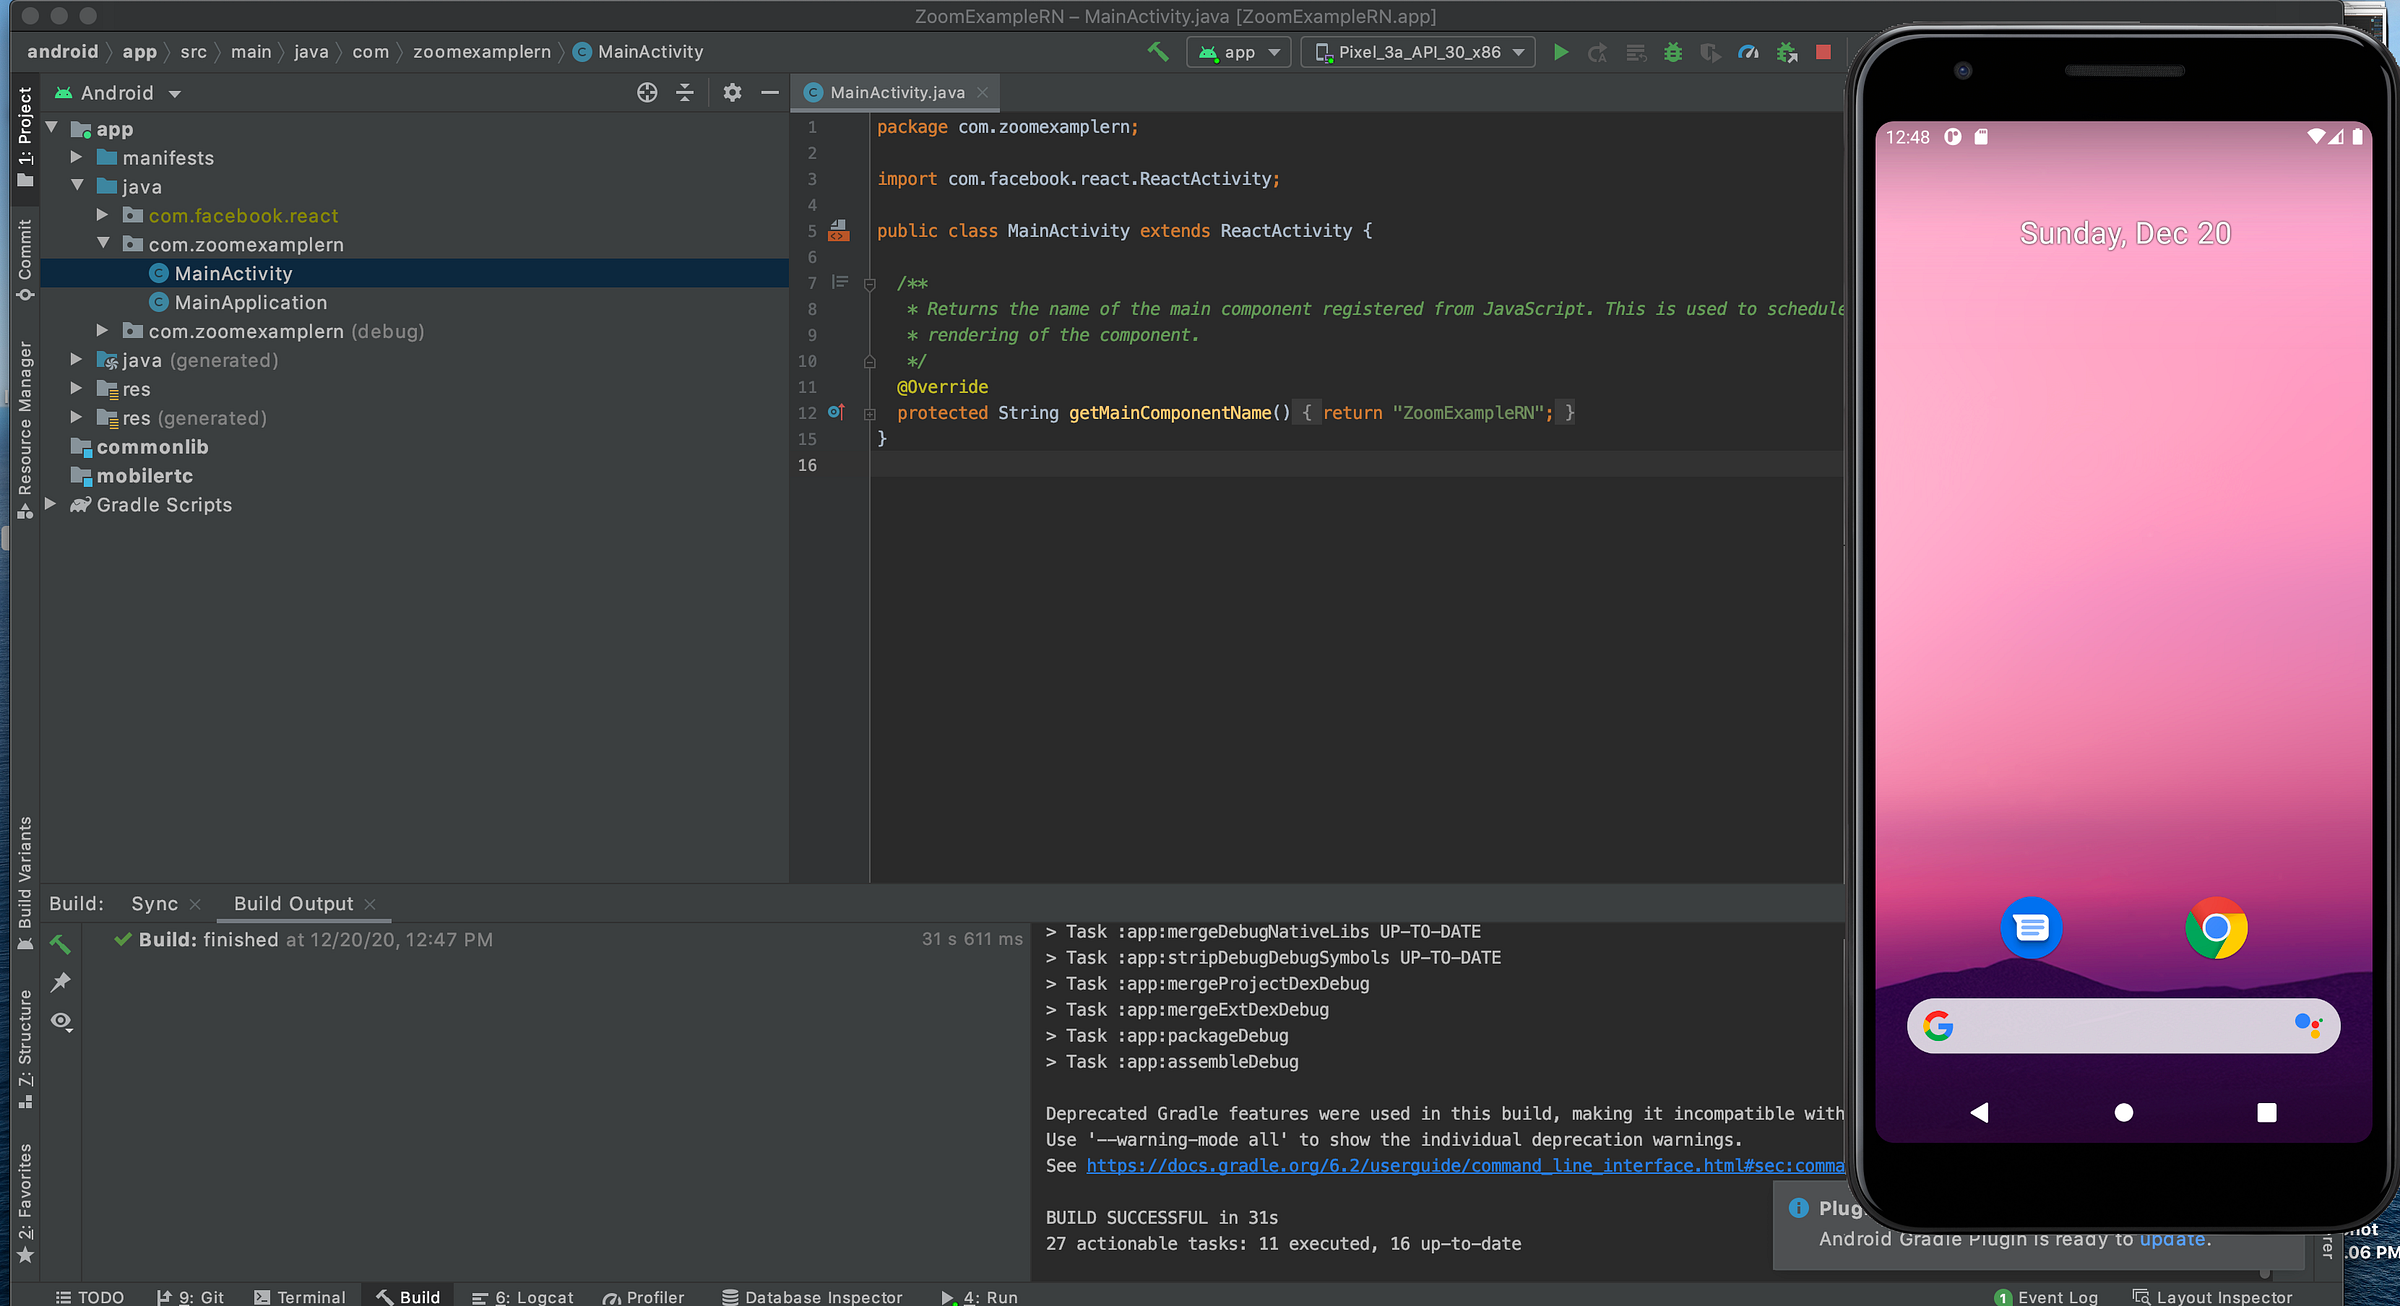
It runs. So far, so good.
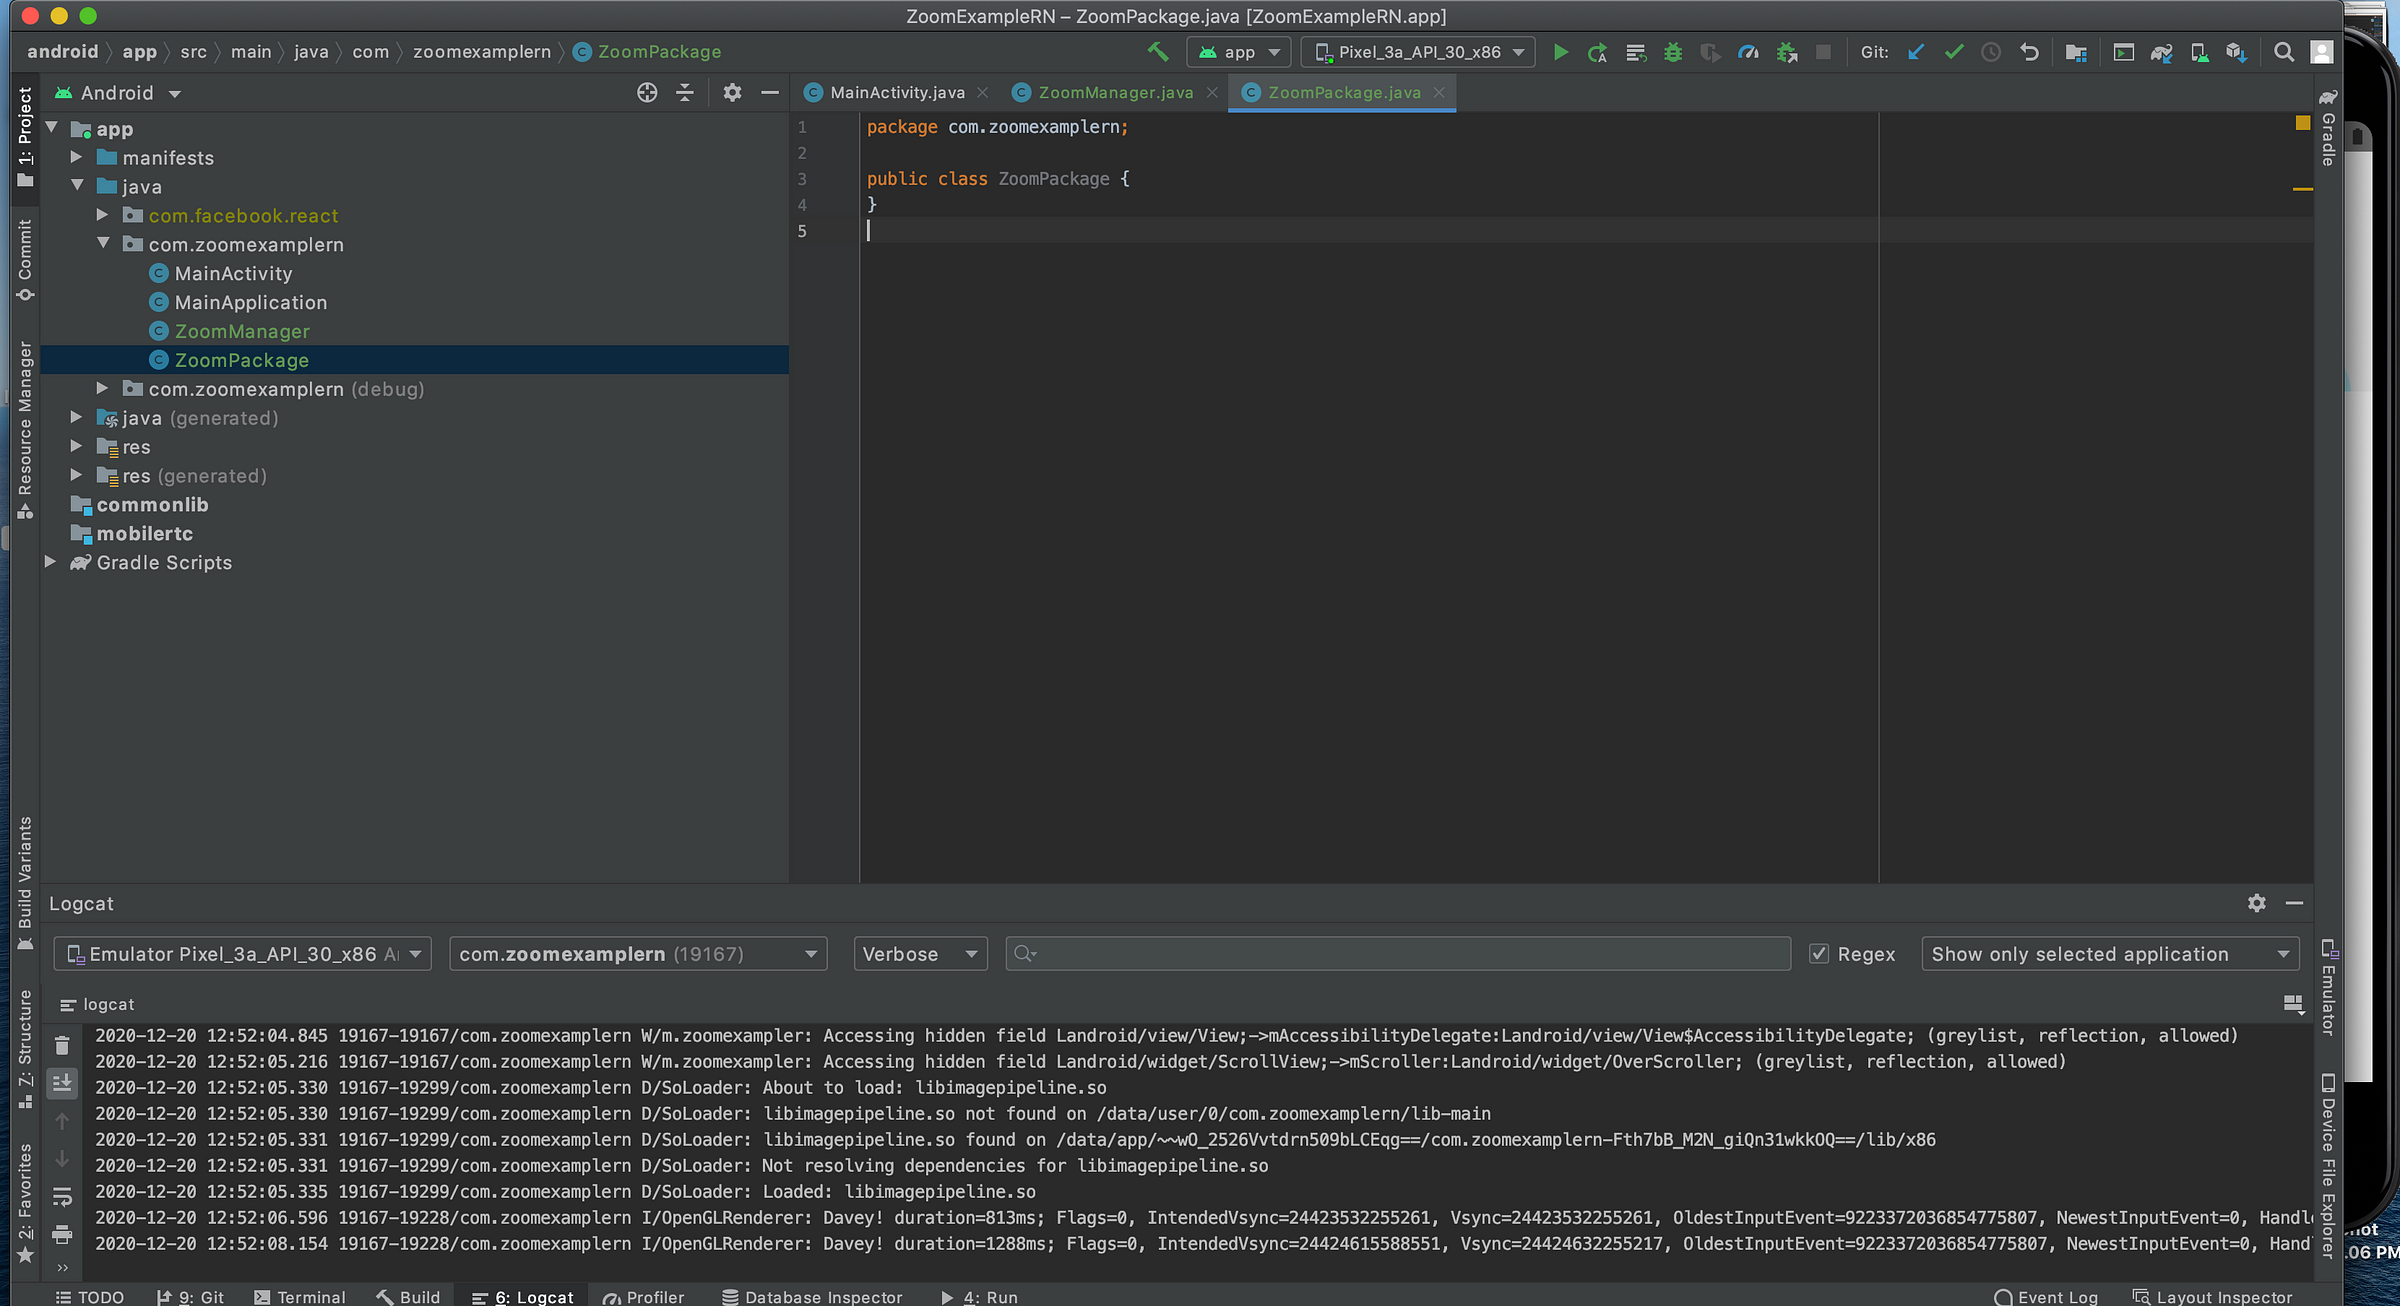
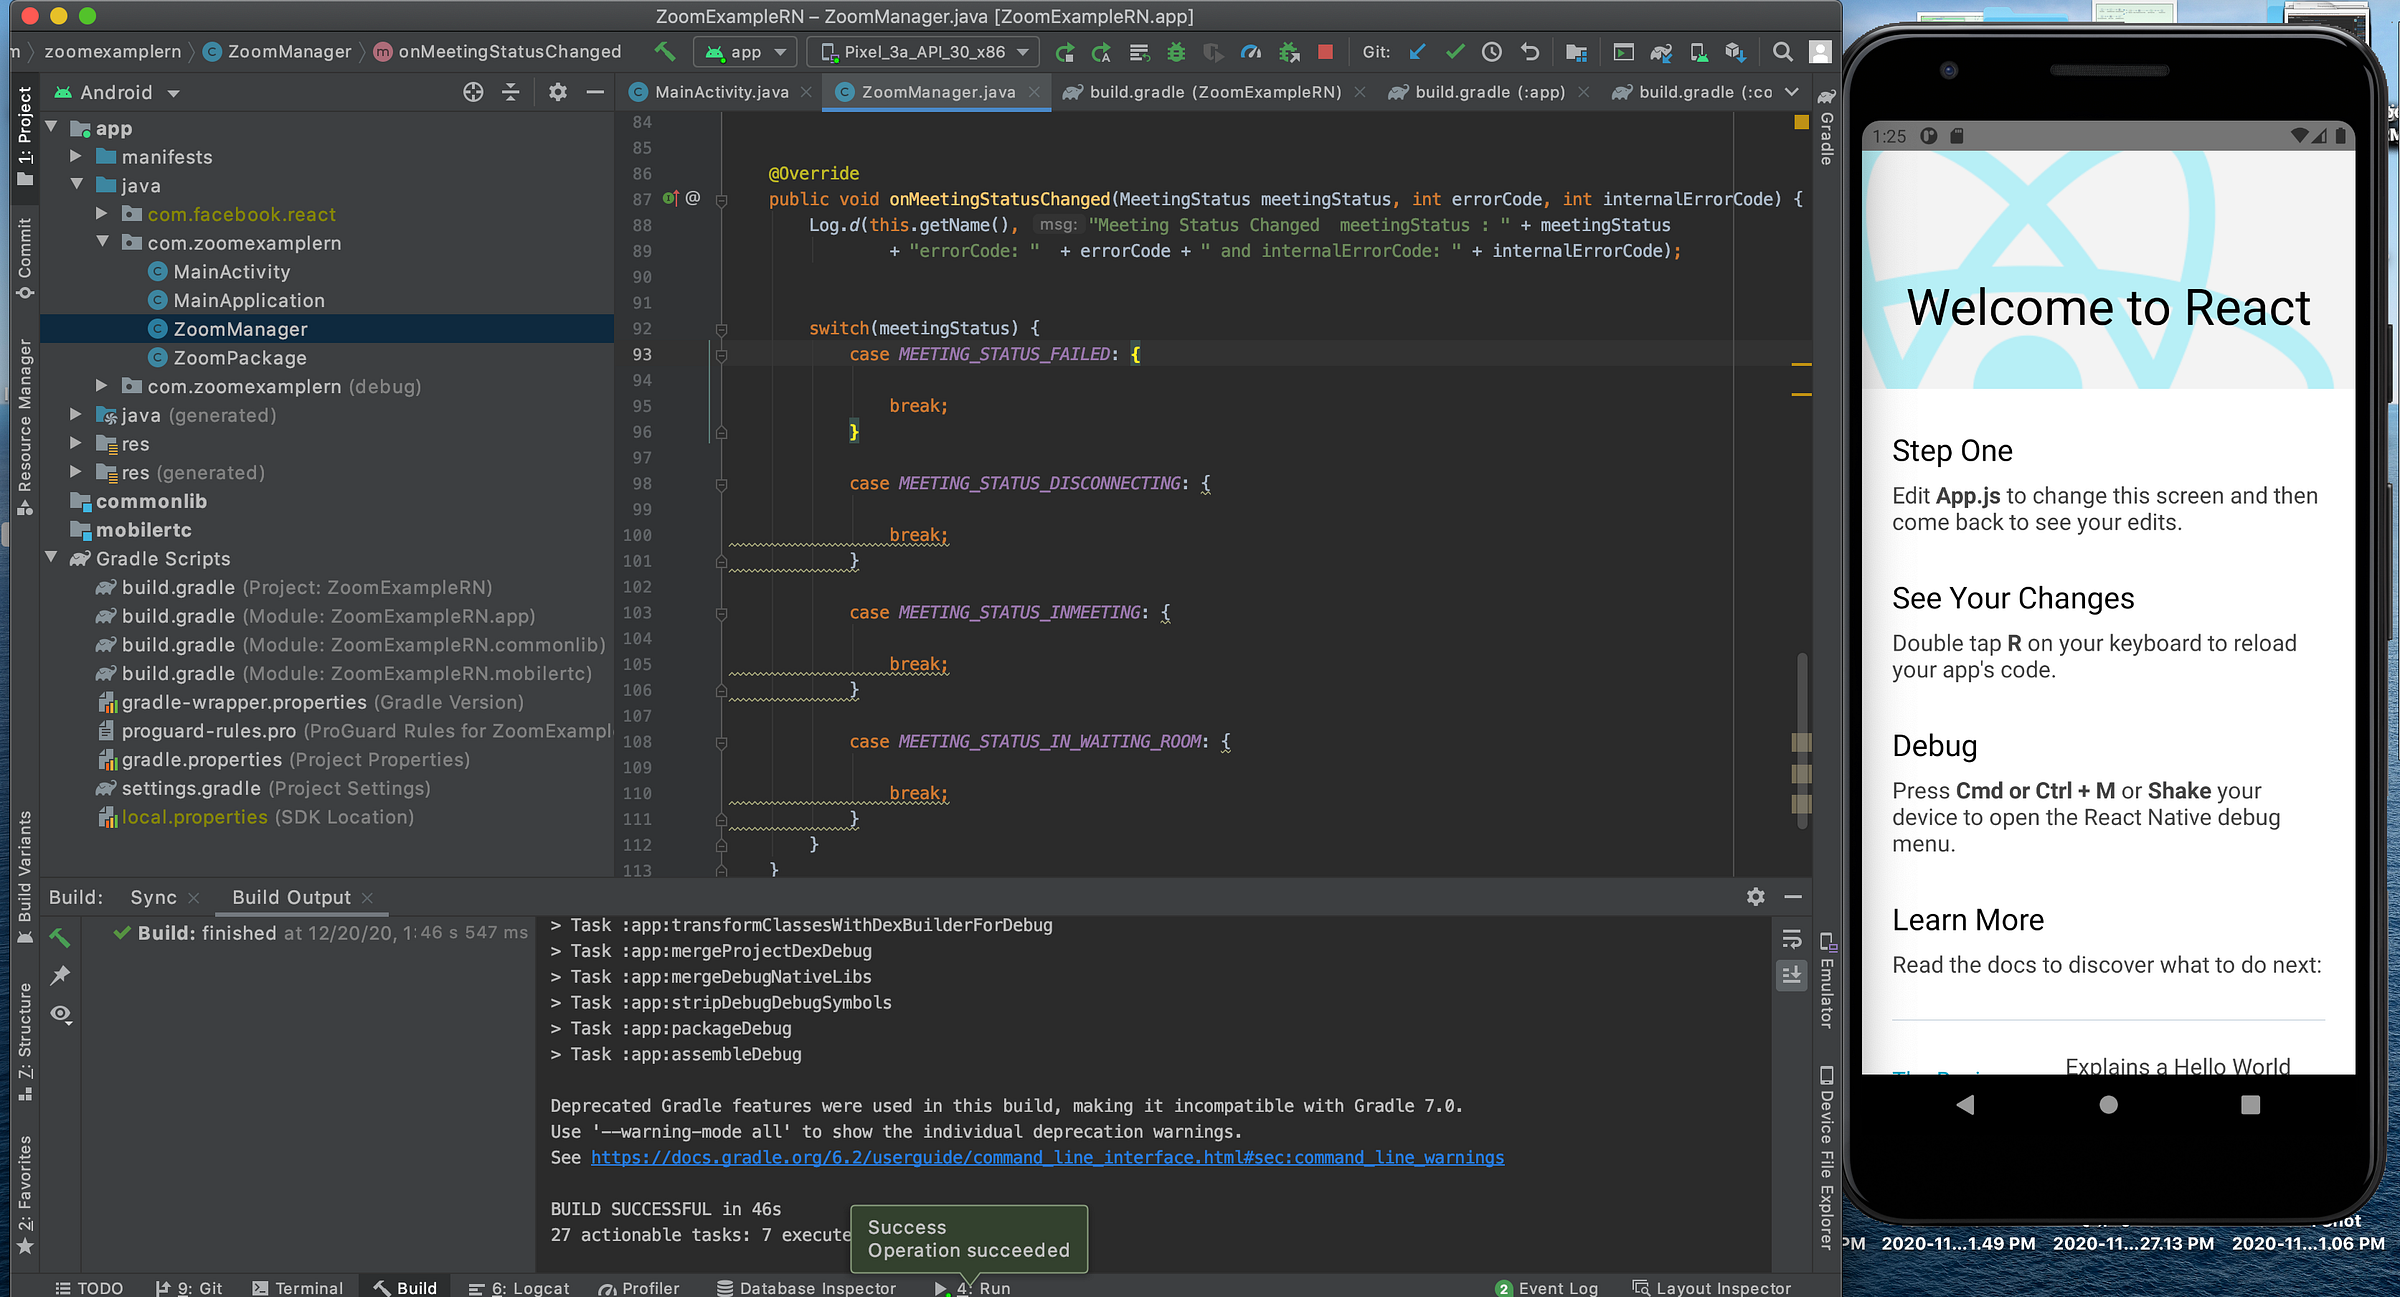
Now, we will create 2 classes for React Native Modules: called ZoomManager and ZoomPackage. (under com.yourapp.package). As you can see, they are empty classes.
Let’ create basic structure for the React Native Modules in Android.
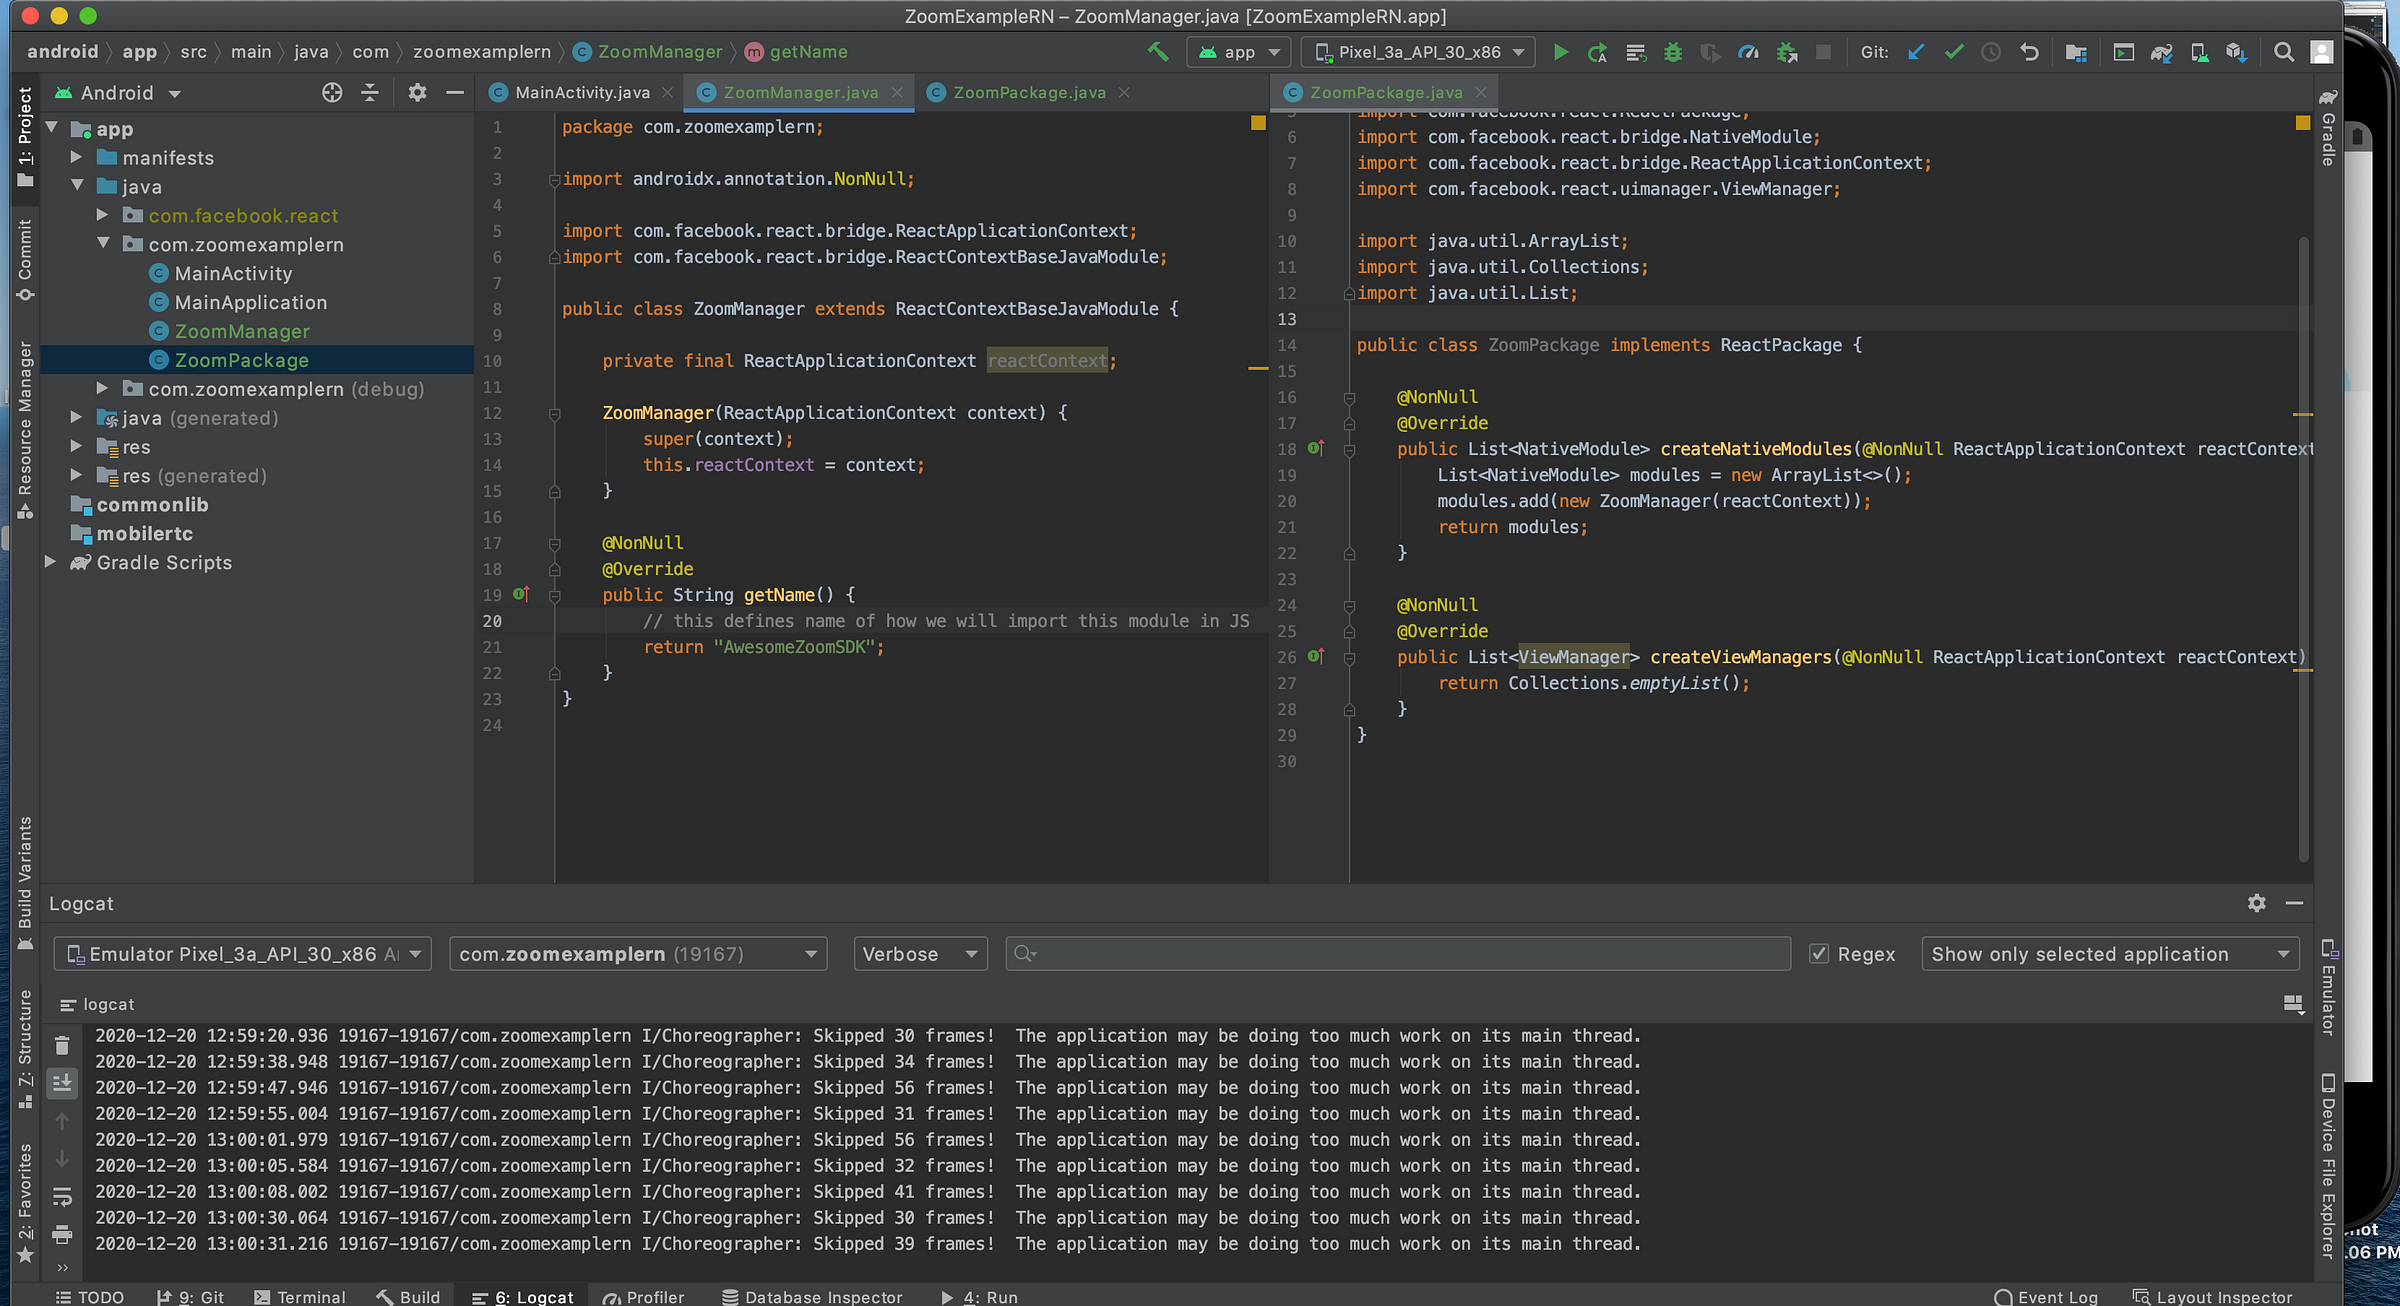
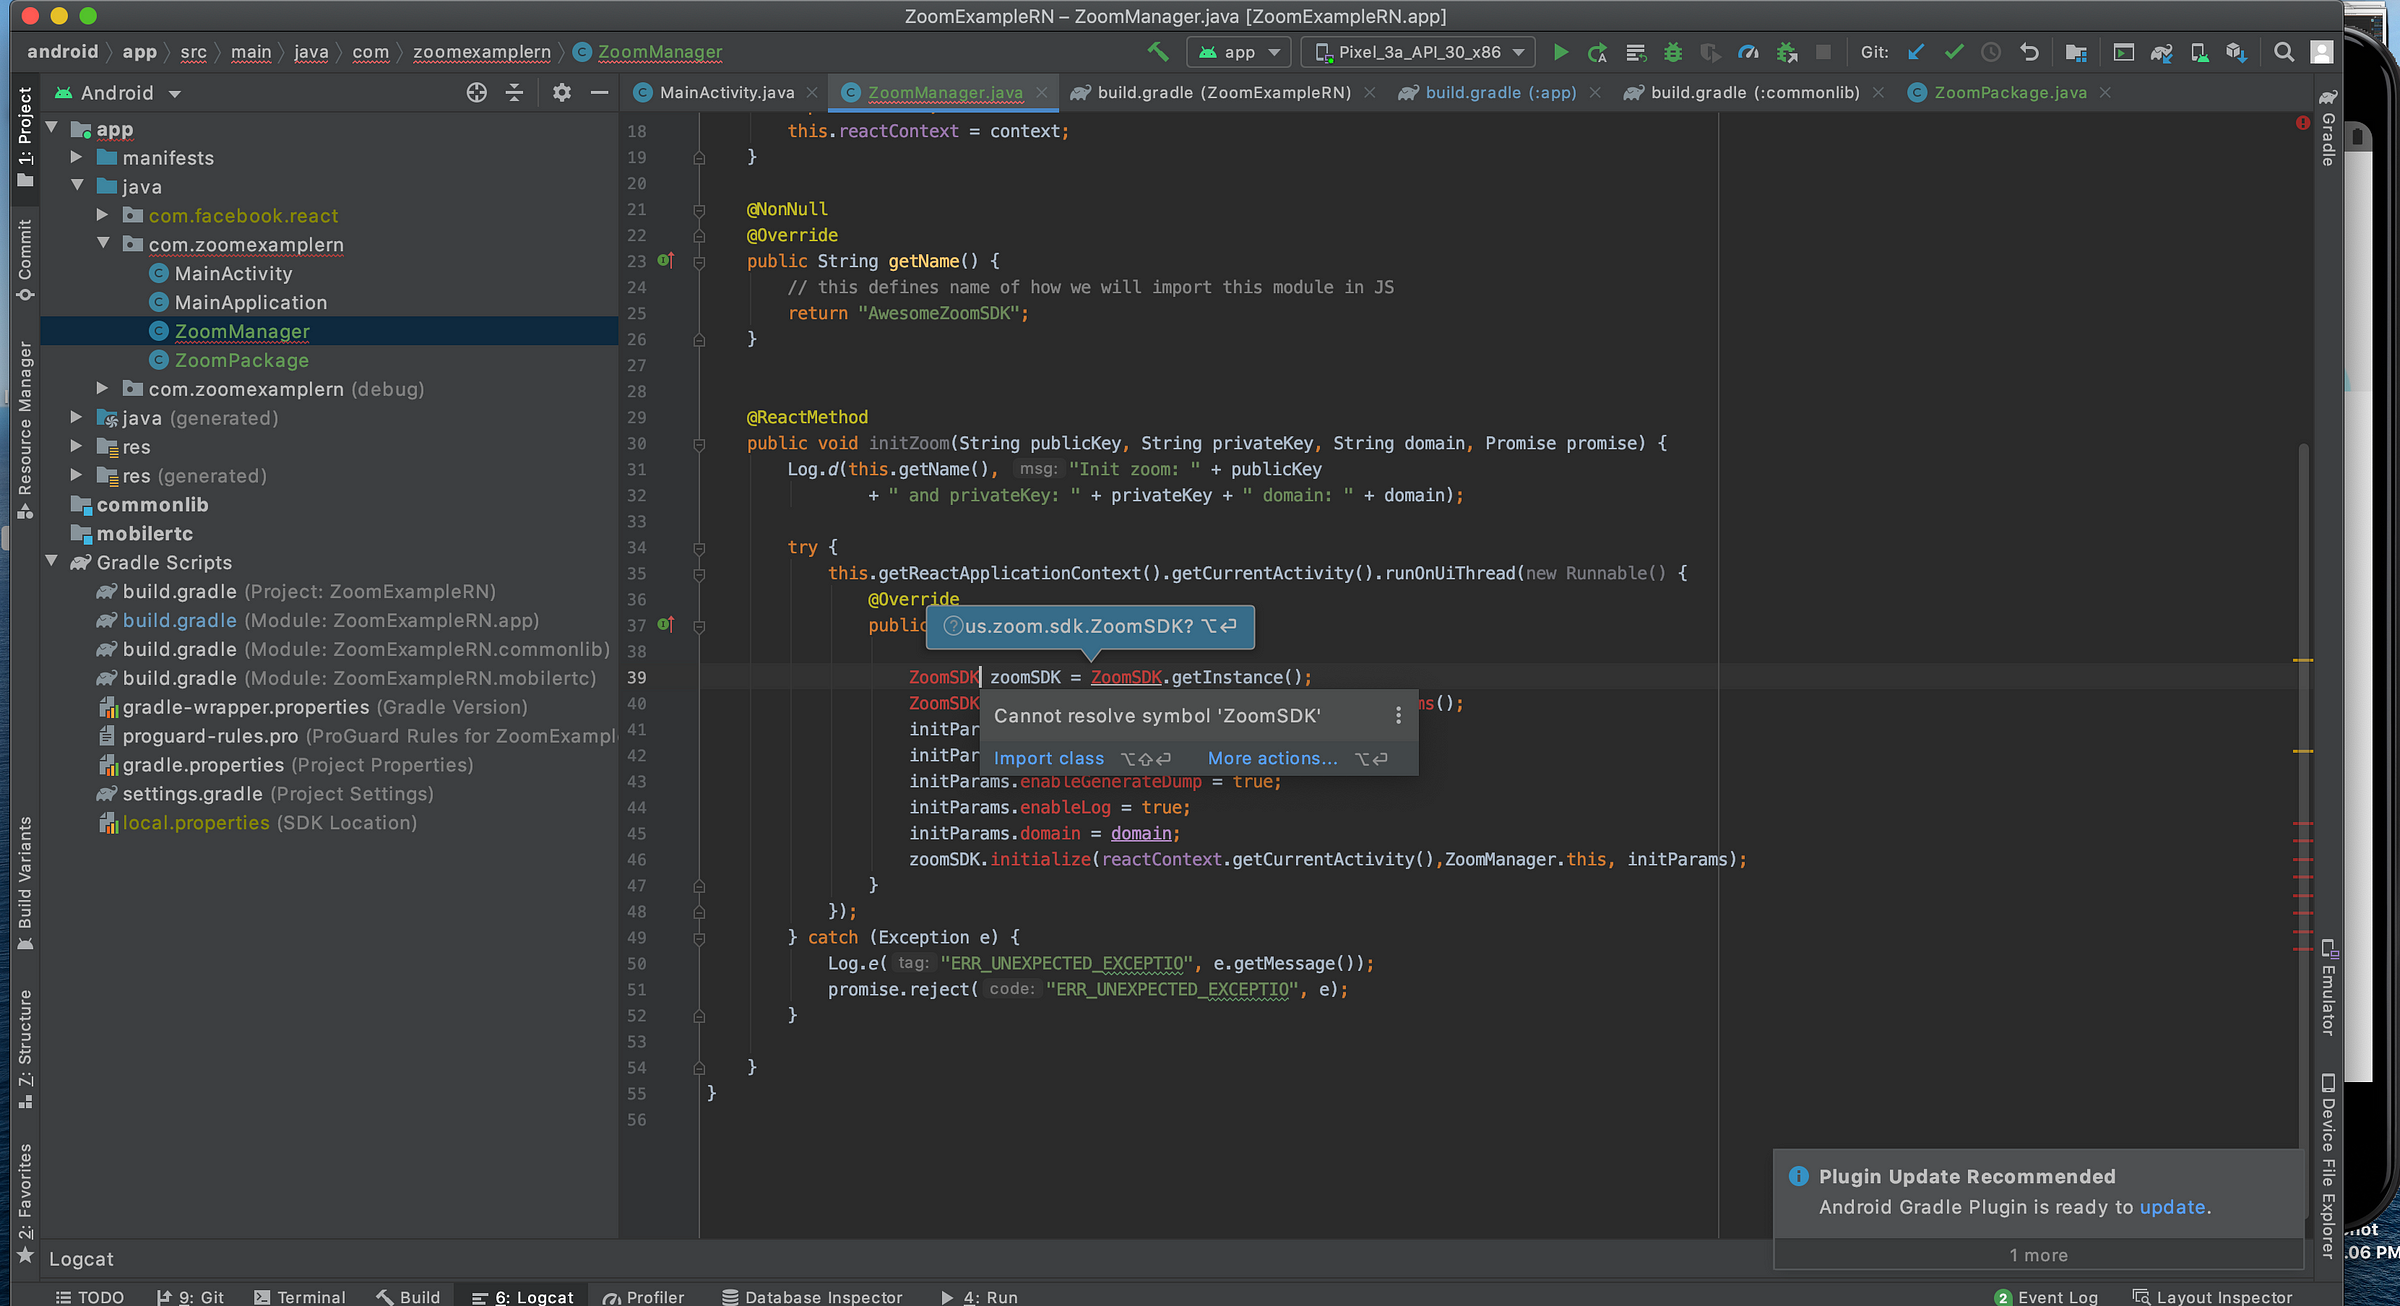
Then, let’s create initZoom method in ZoomManager class, where we will try to add ZOOM SDK logic.
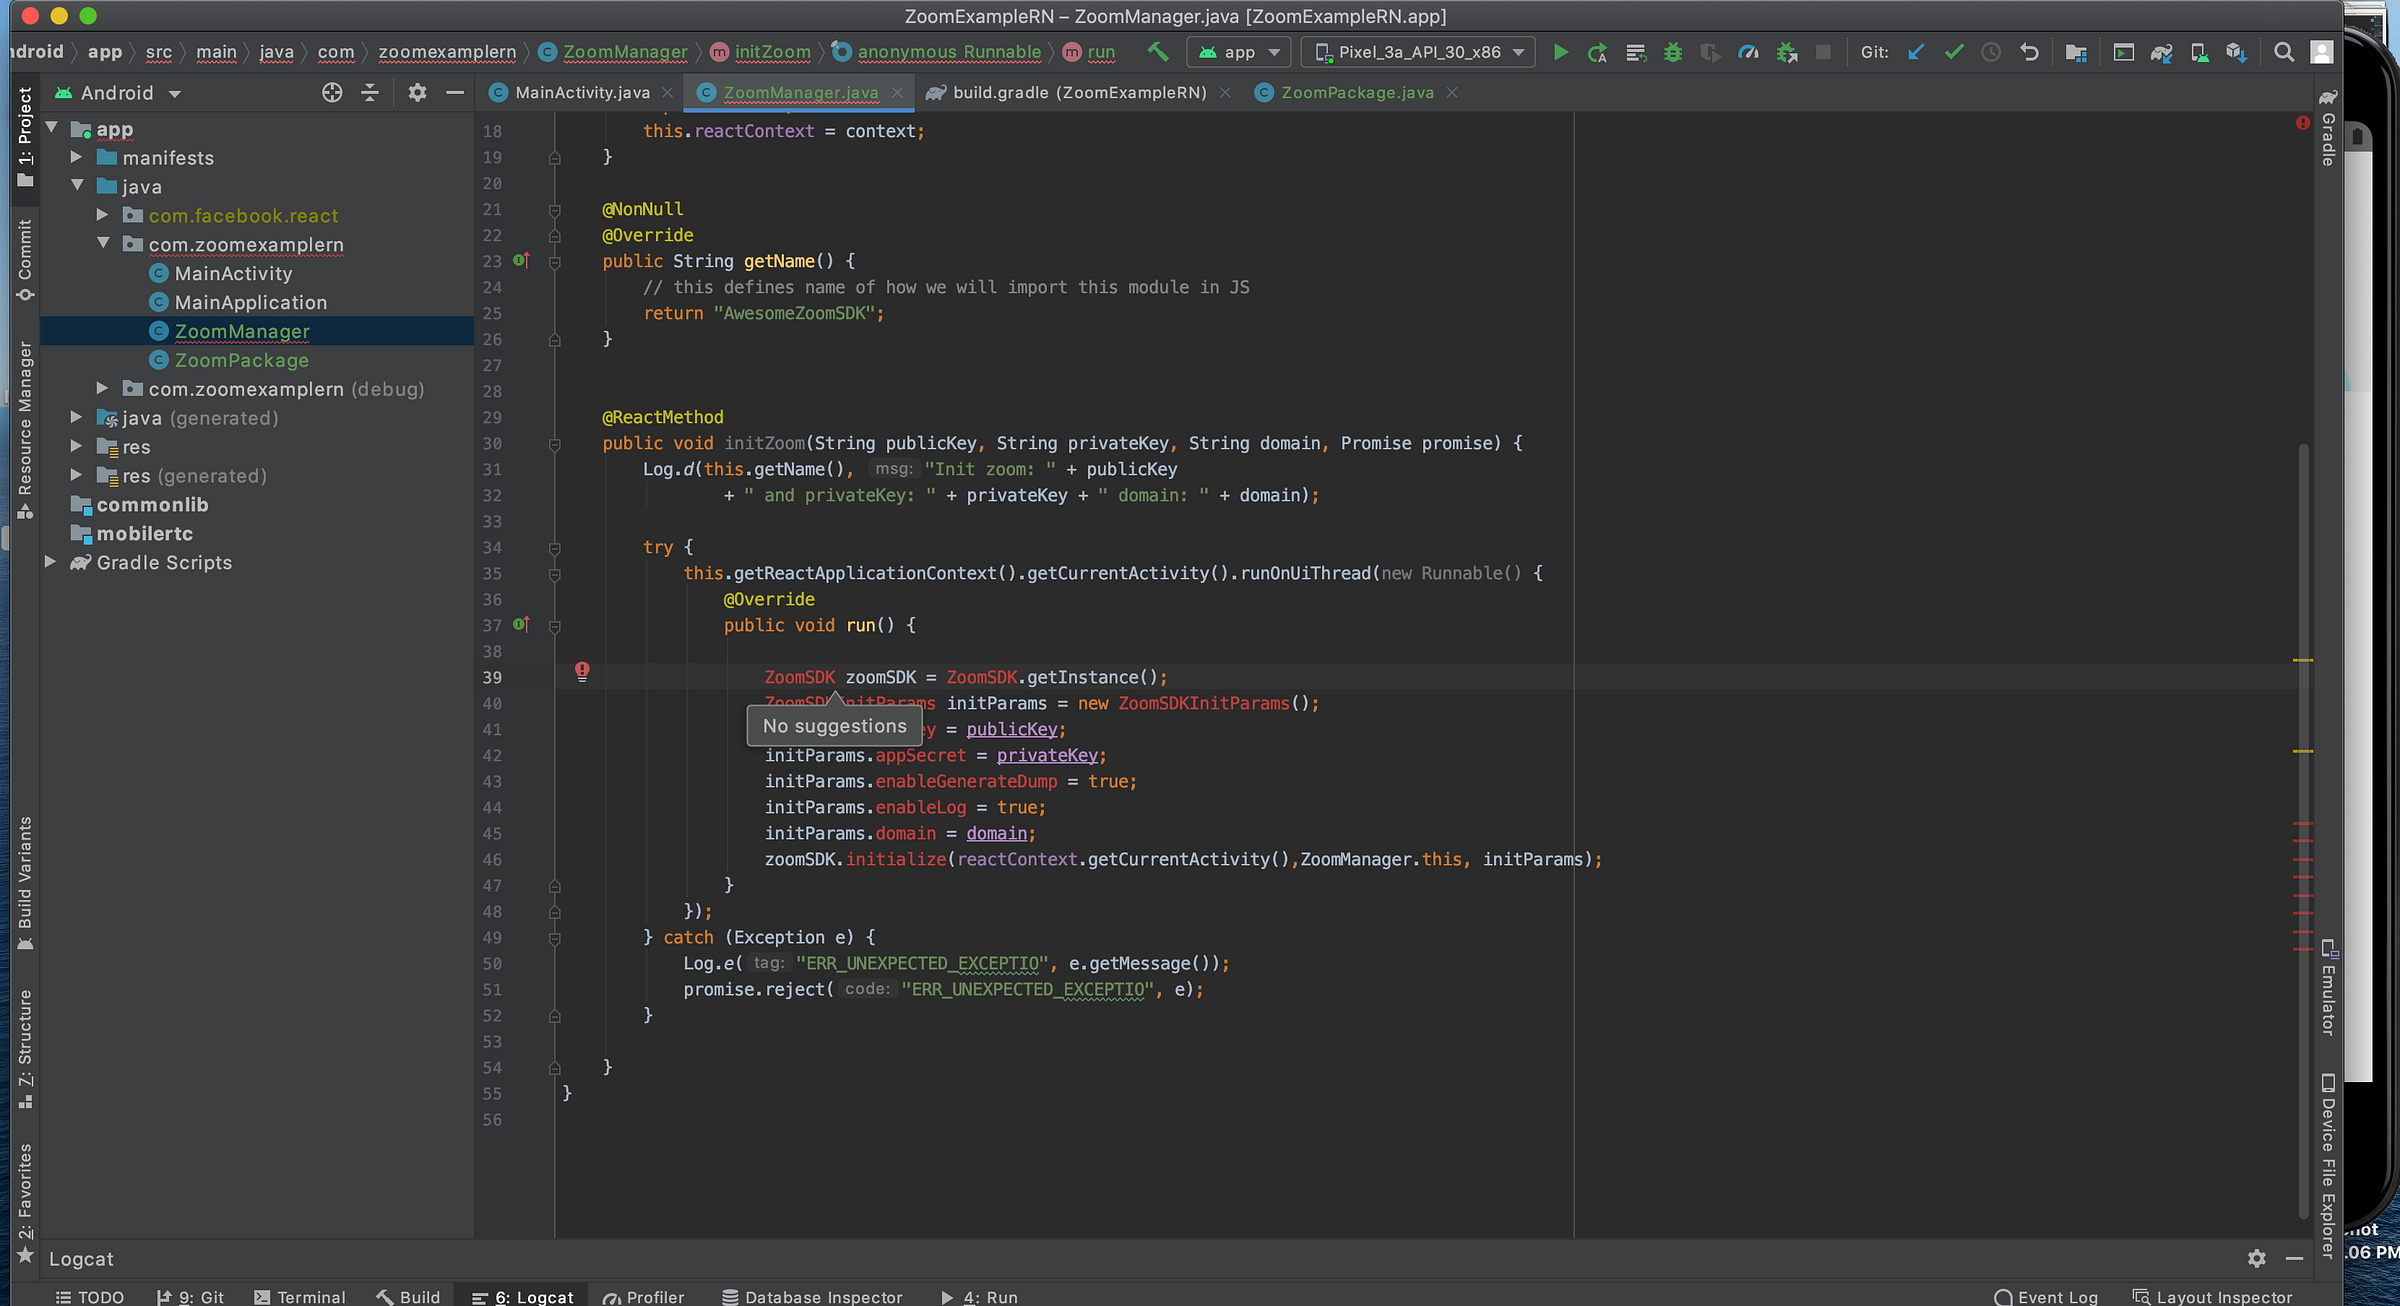
As you can see, ZoomSDK is undefined. Let’s fix it by putting dependencies into build.gradle.
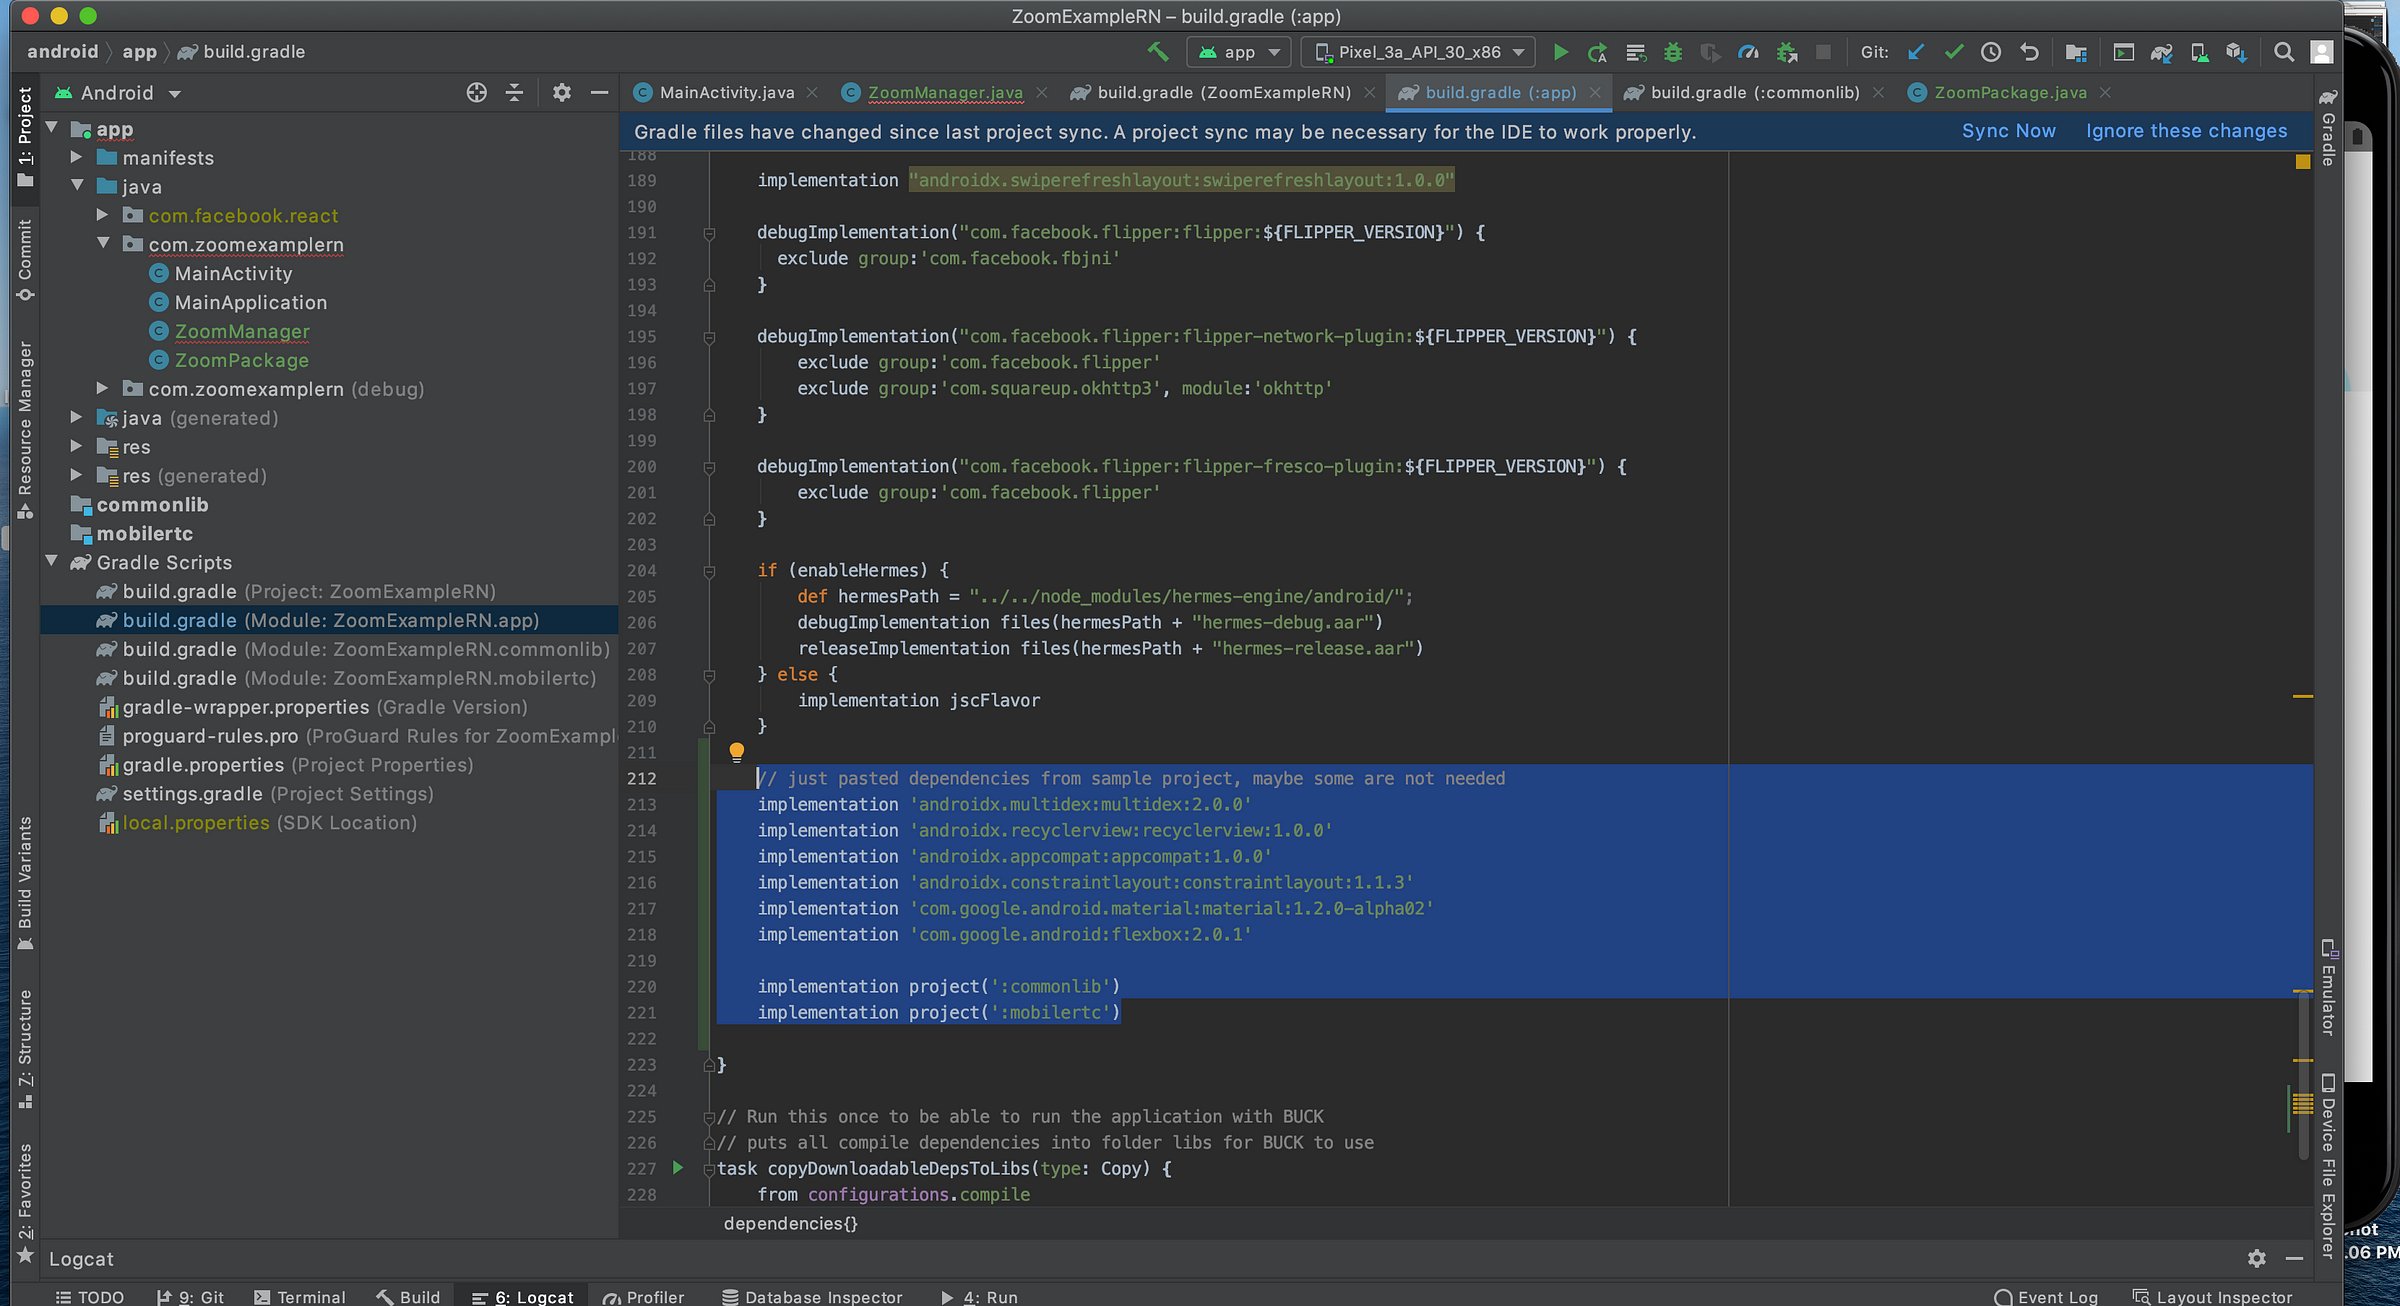
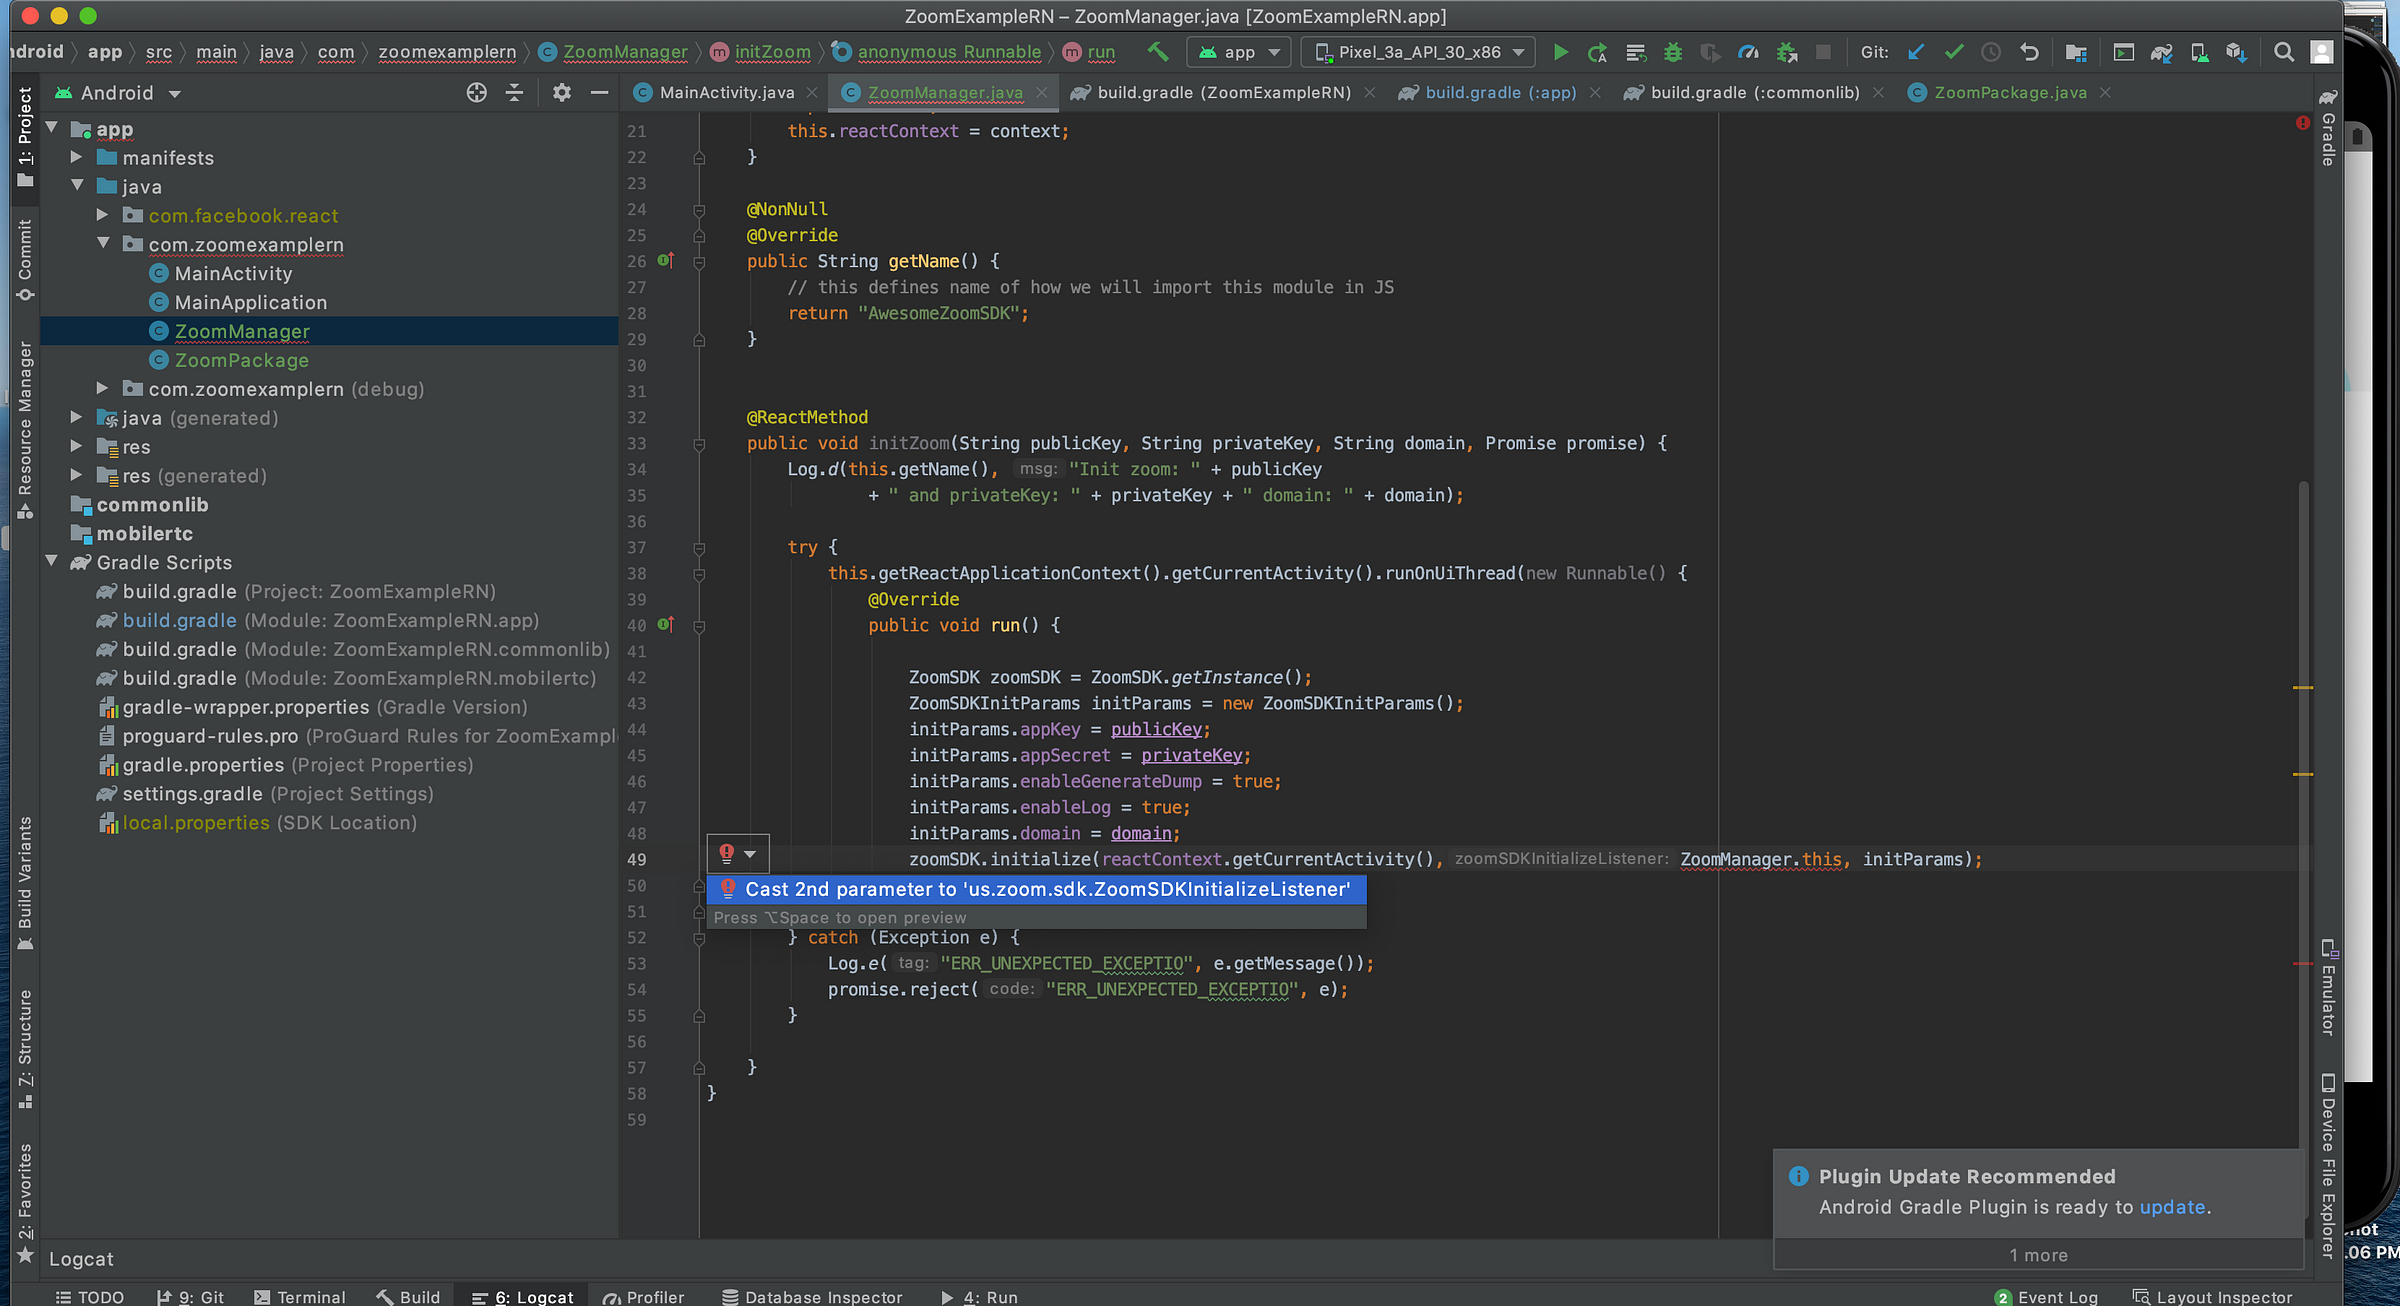
Then, we would probably need to run Gradle sync again. But after syncing, ZoomSDK imports will work.
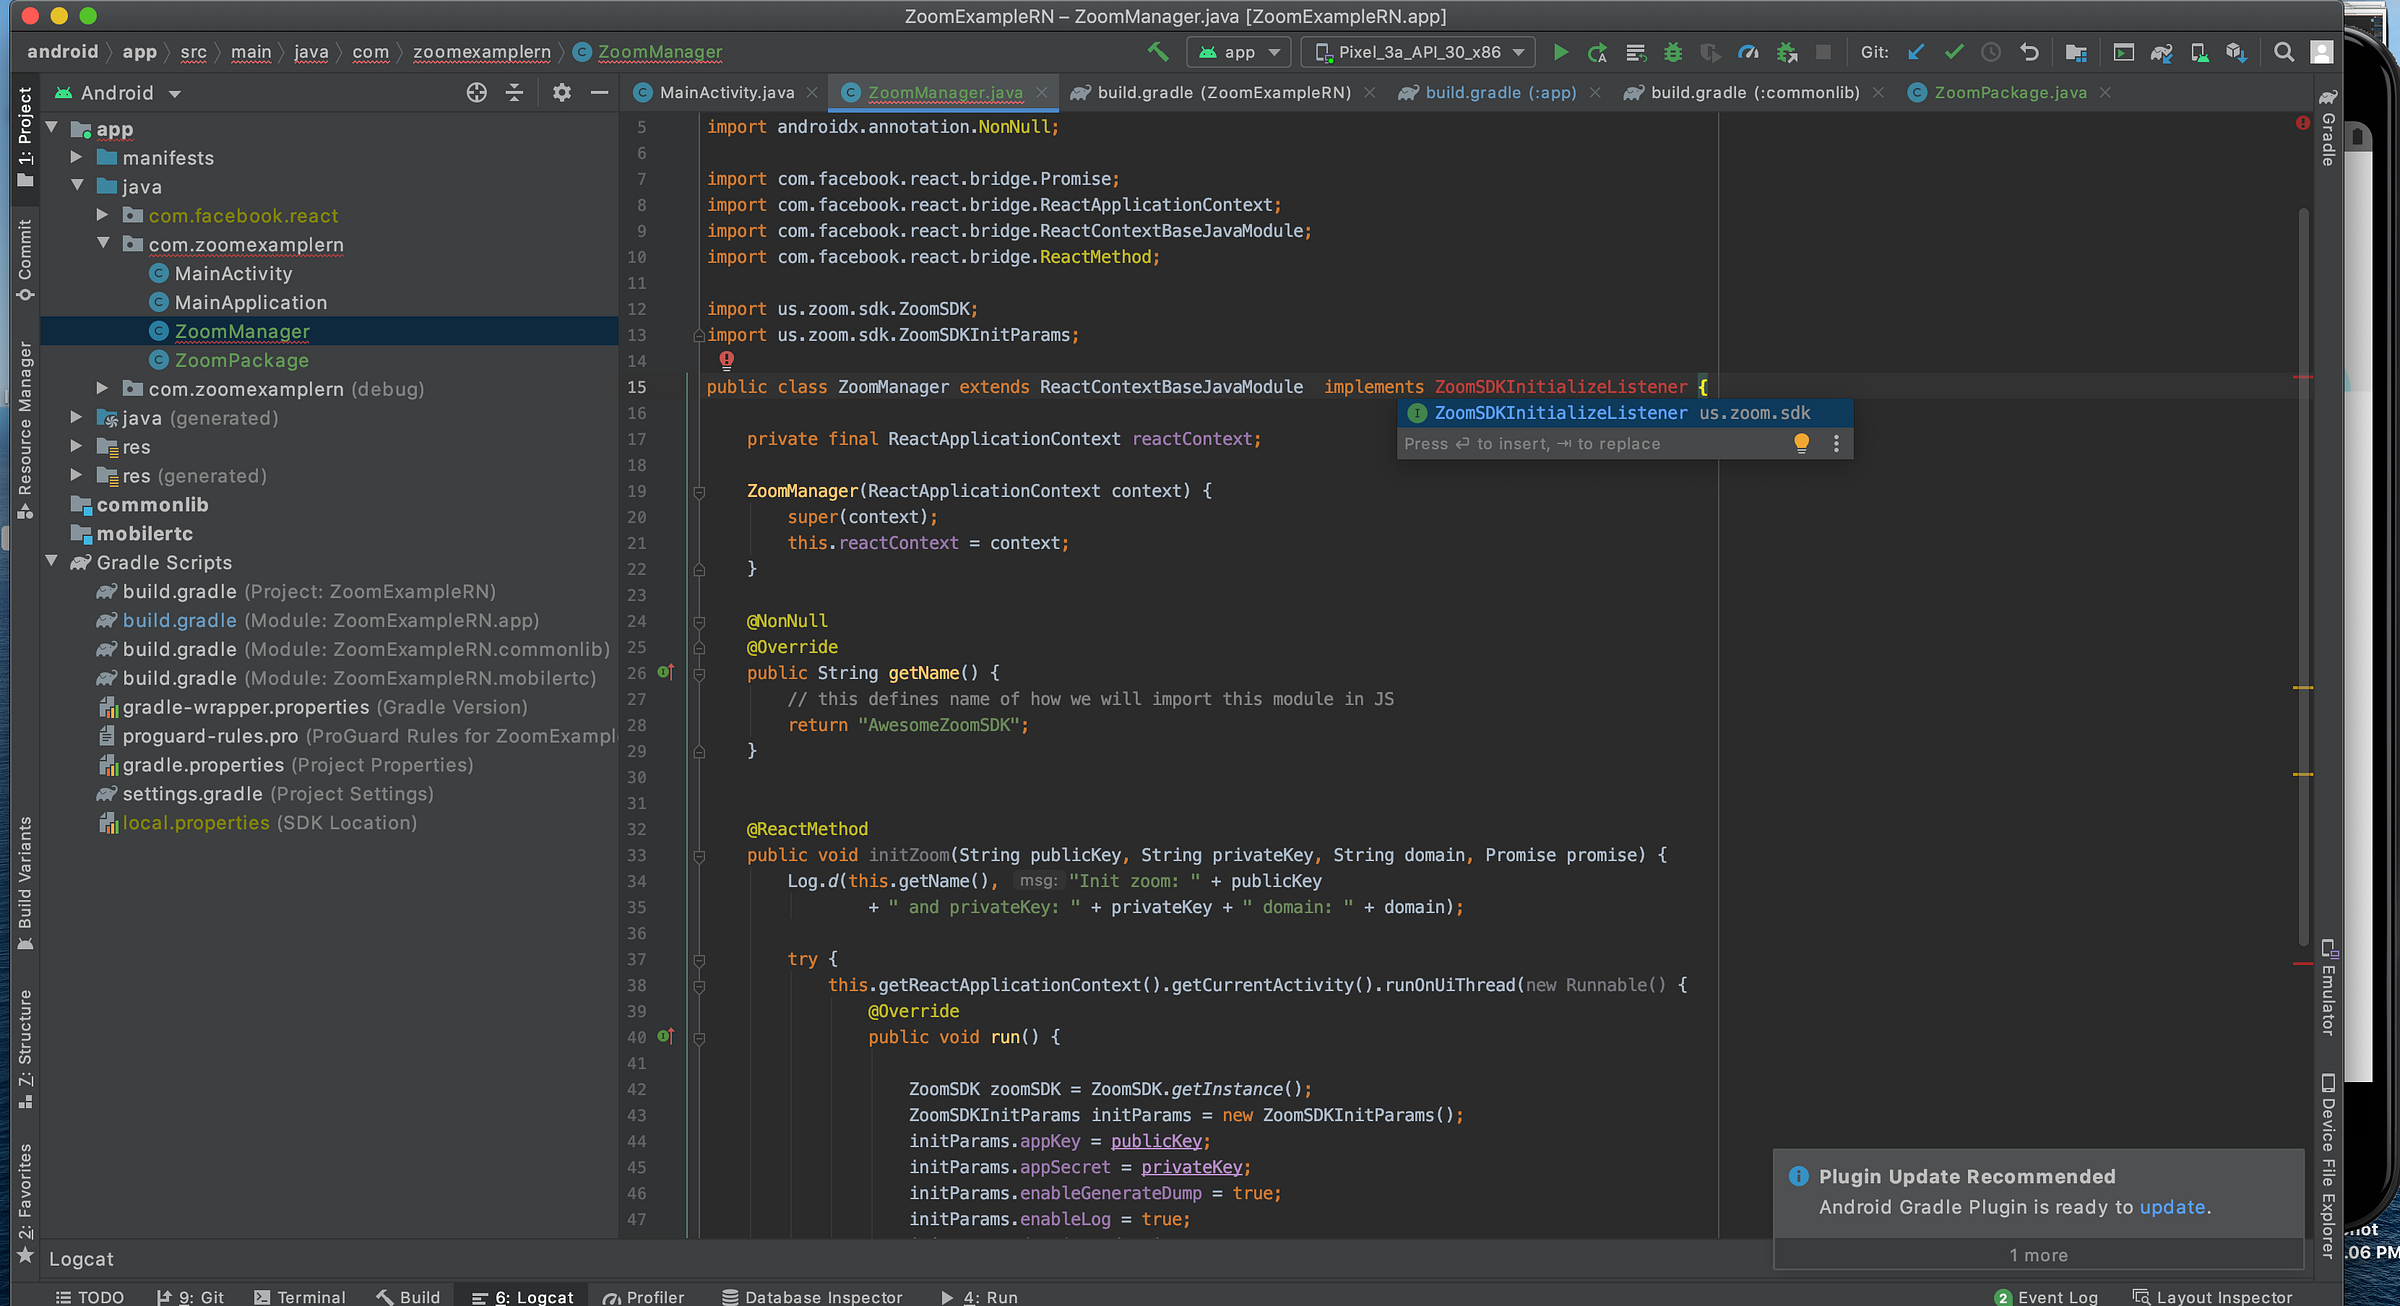
If you rewrite the code above, you will notice that it is not compilable. Something with ZoomSDKInitializeListener.
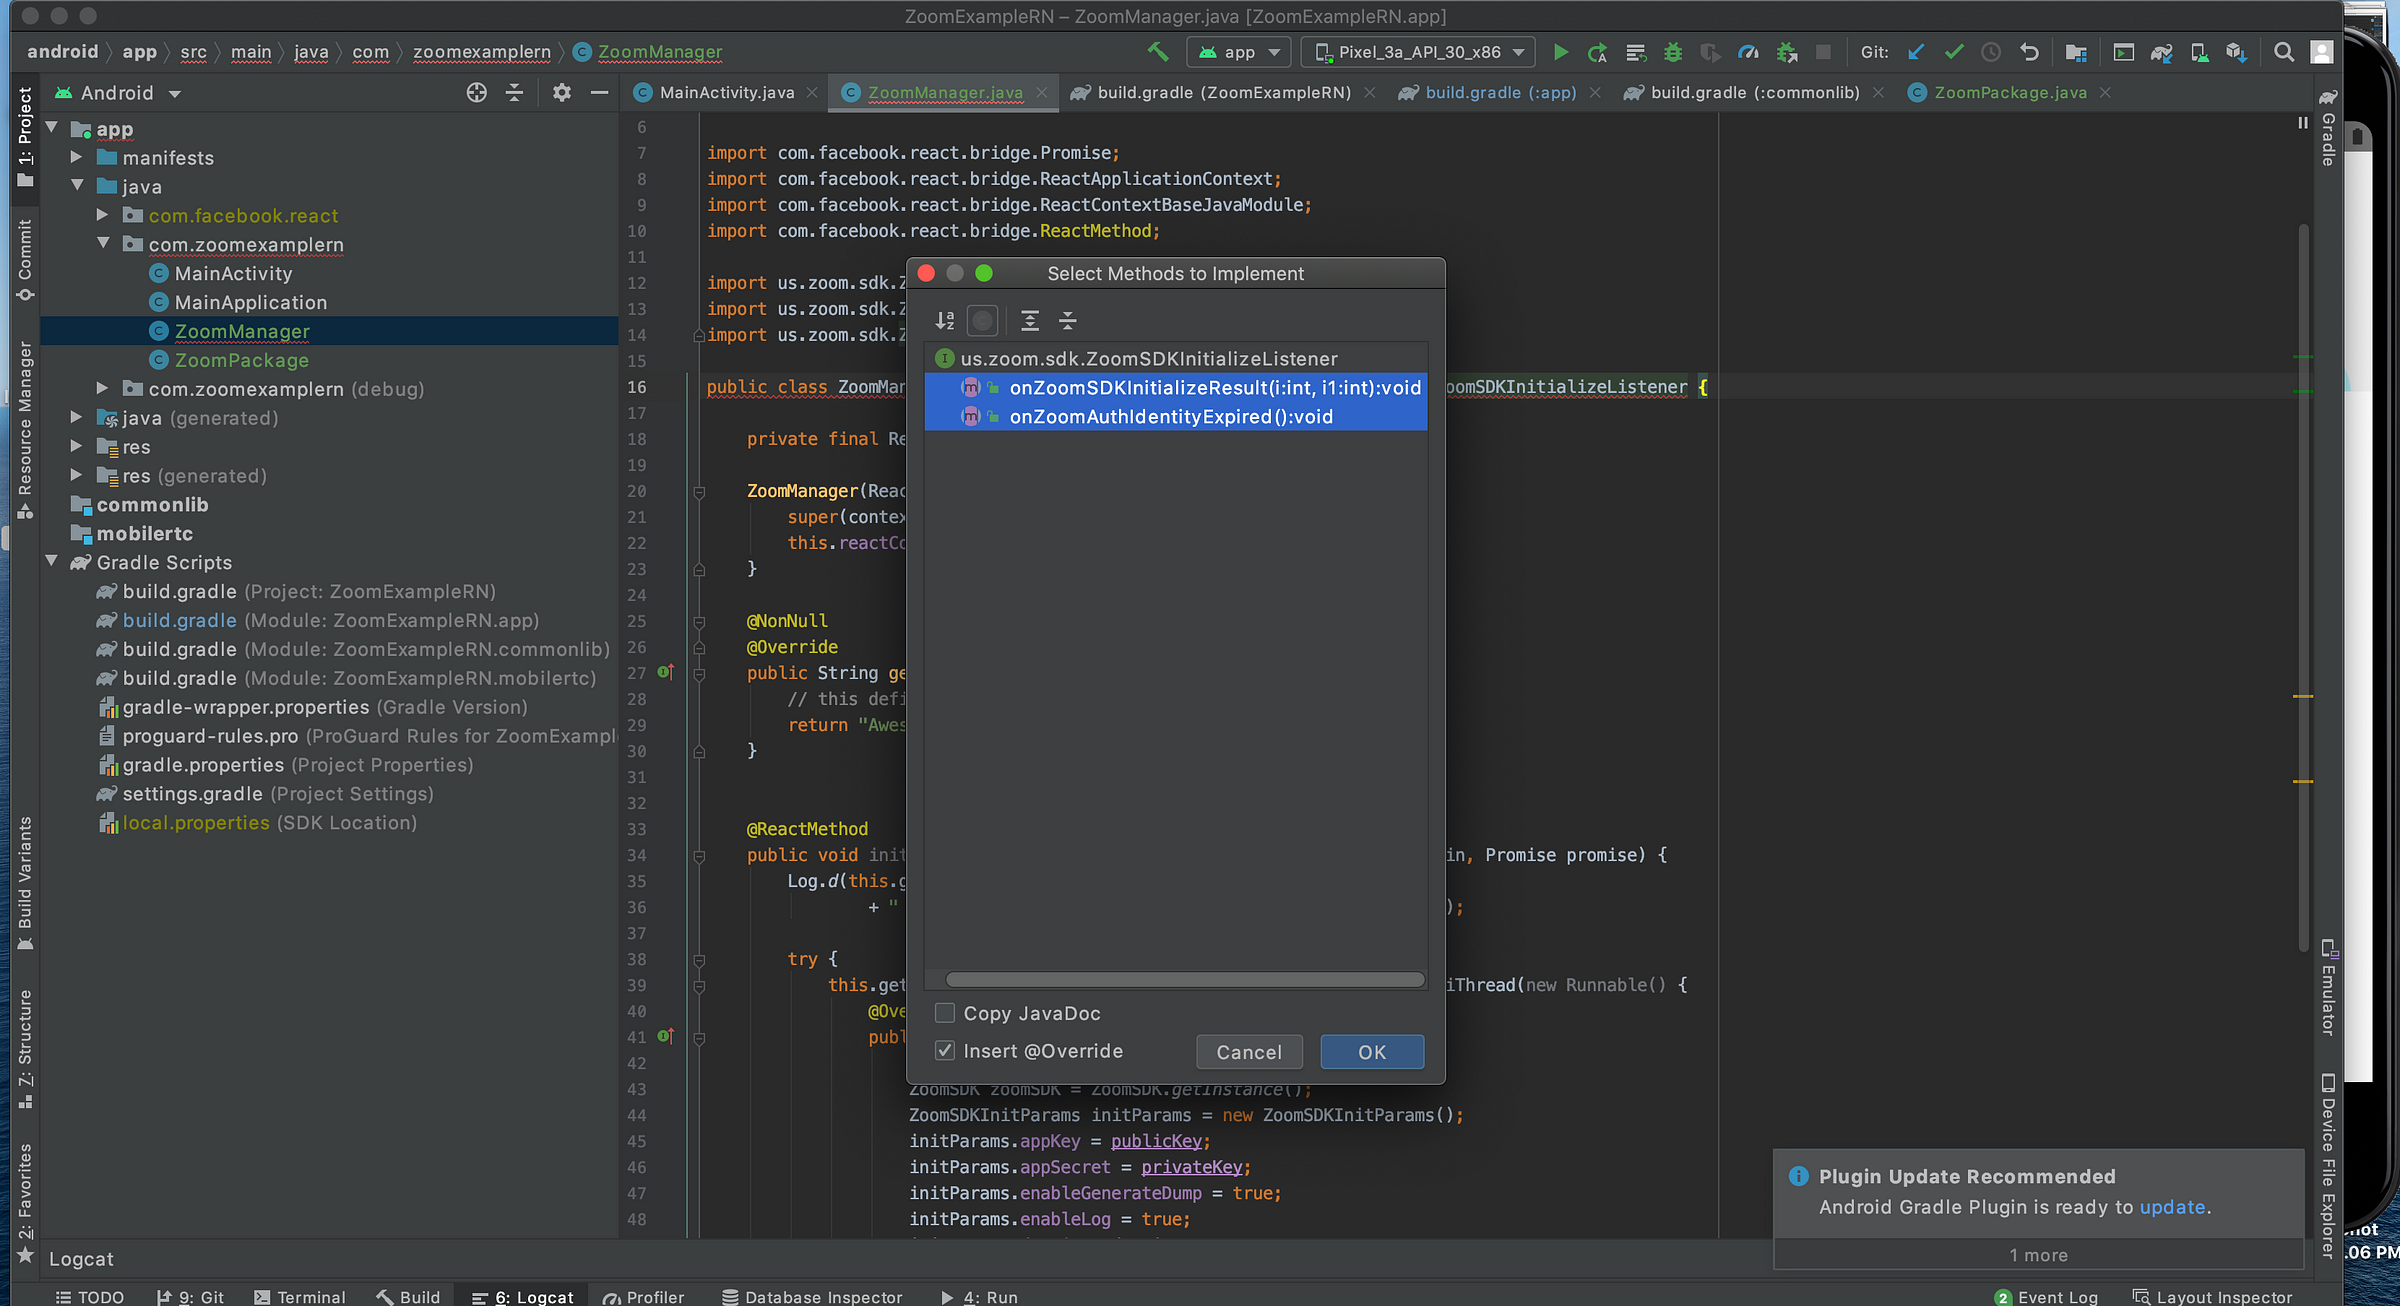
So, it seems that our module must implement this ZoomSDKInitializeListener interface. Here it is.
Let’s add necessary methods.
Then, let’s implement the logic of these 2 methods.
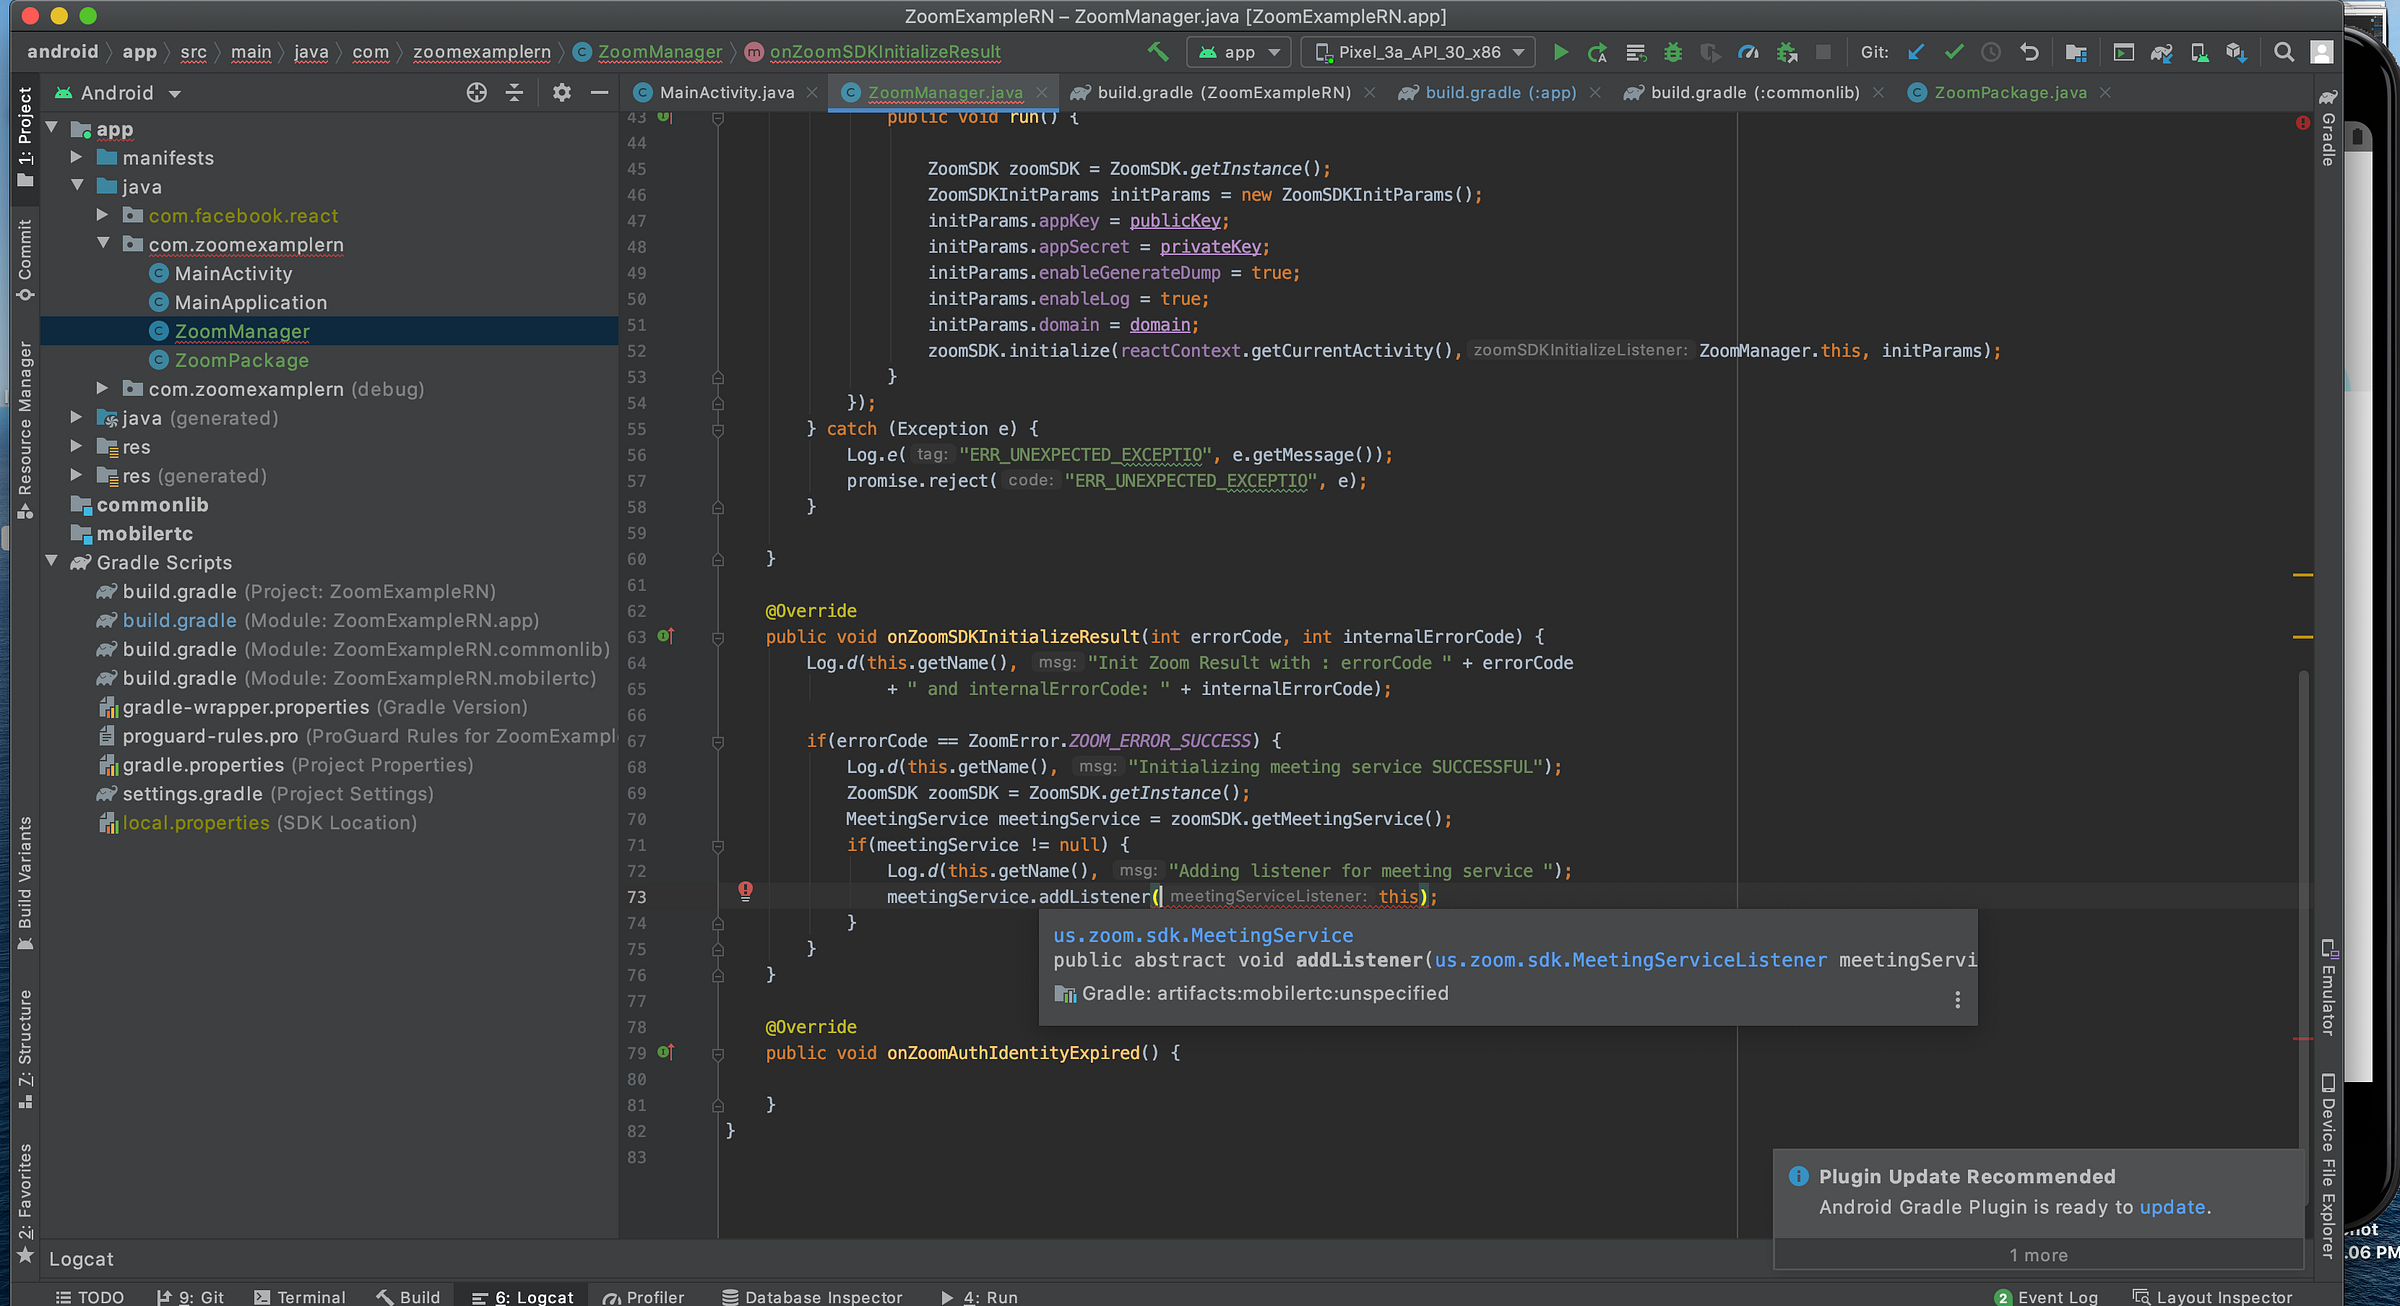
As you see, there is another listener that needs to be added, MeetingServiceListener. So let’s add it.
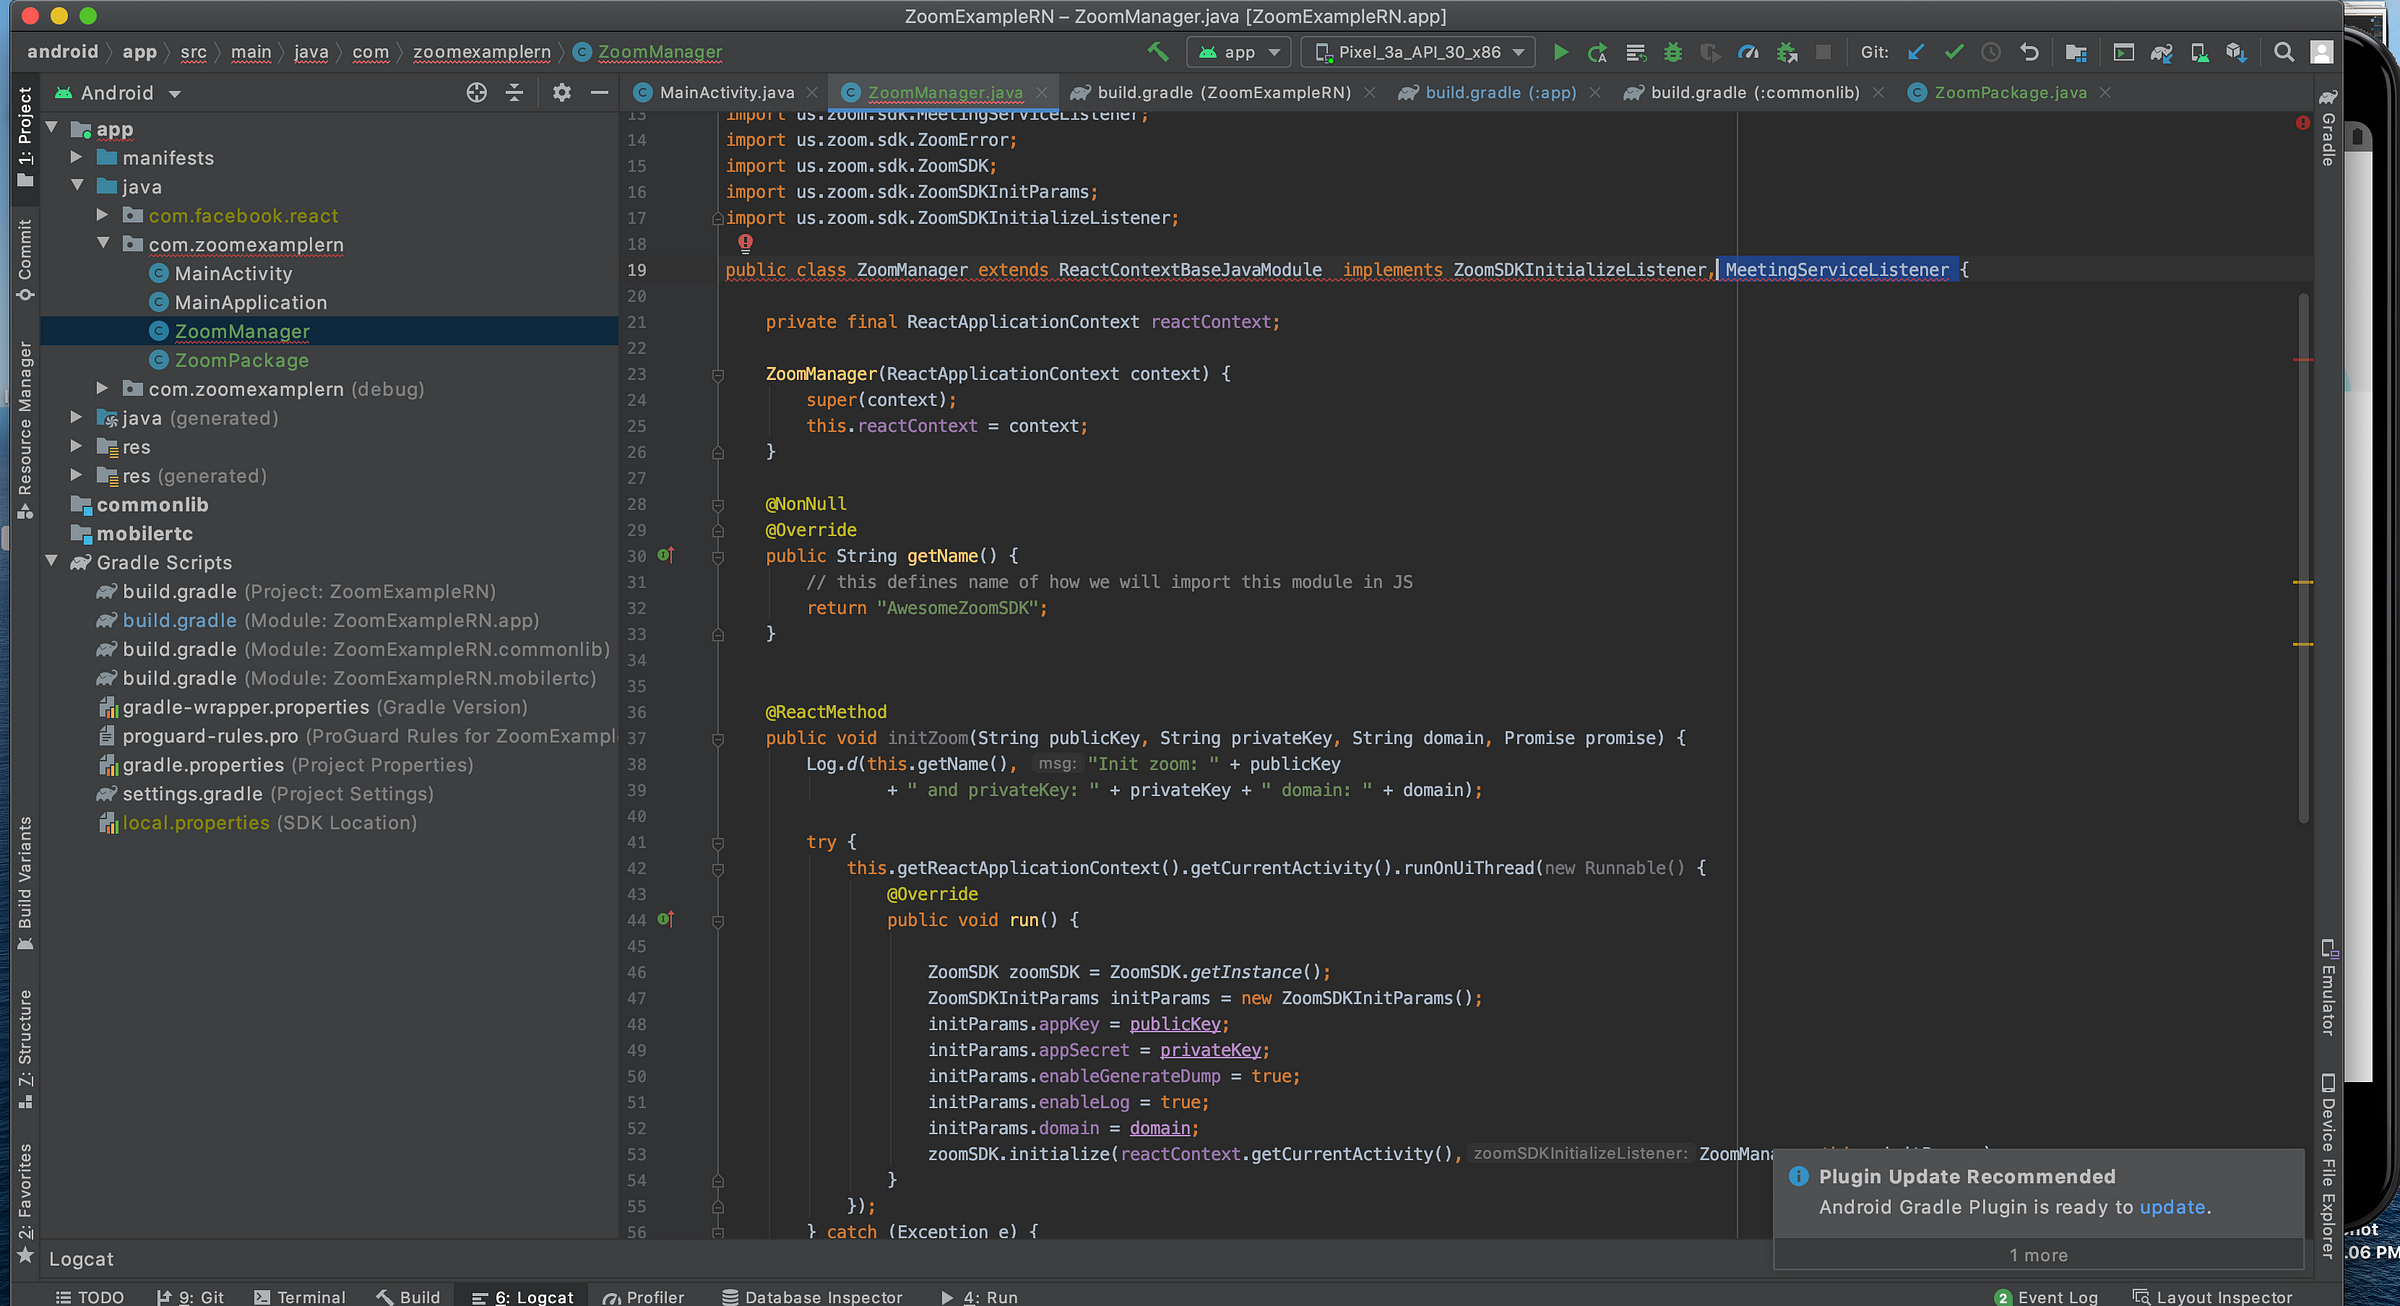
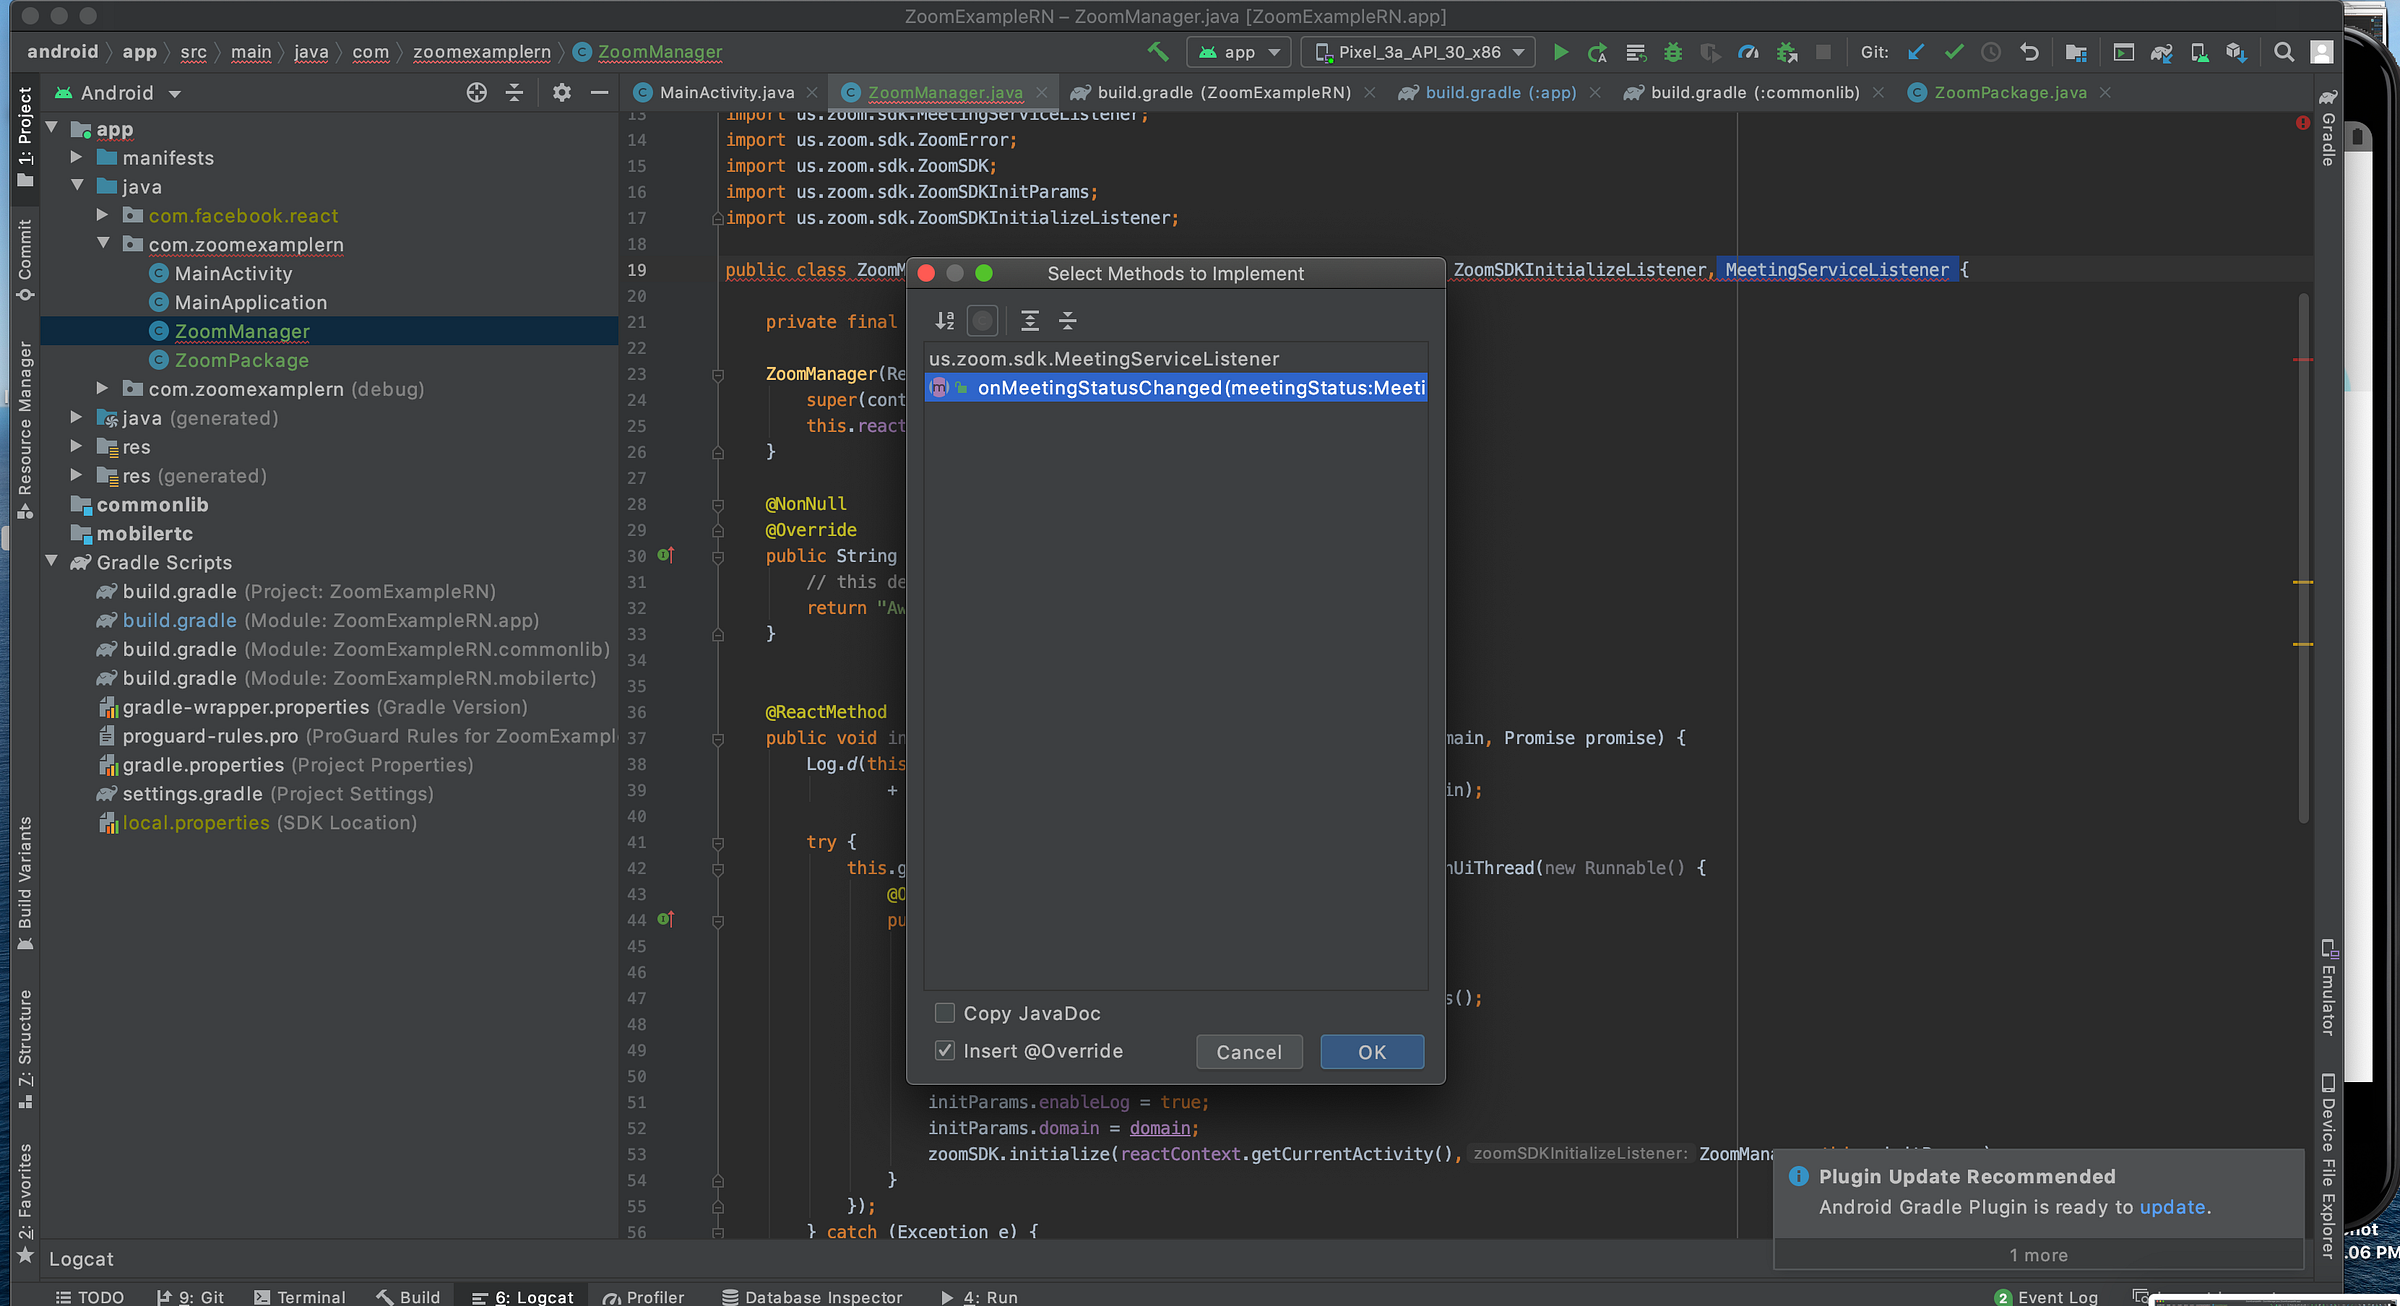
Again, we need to implement necessary method, but now, just one.
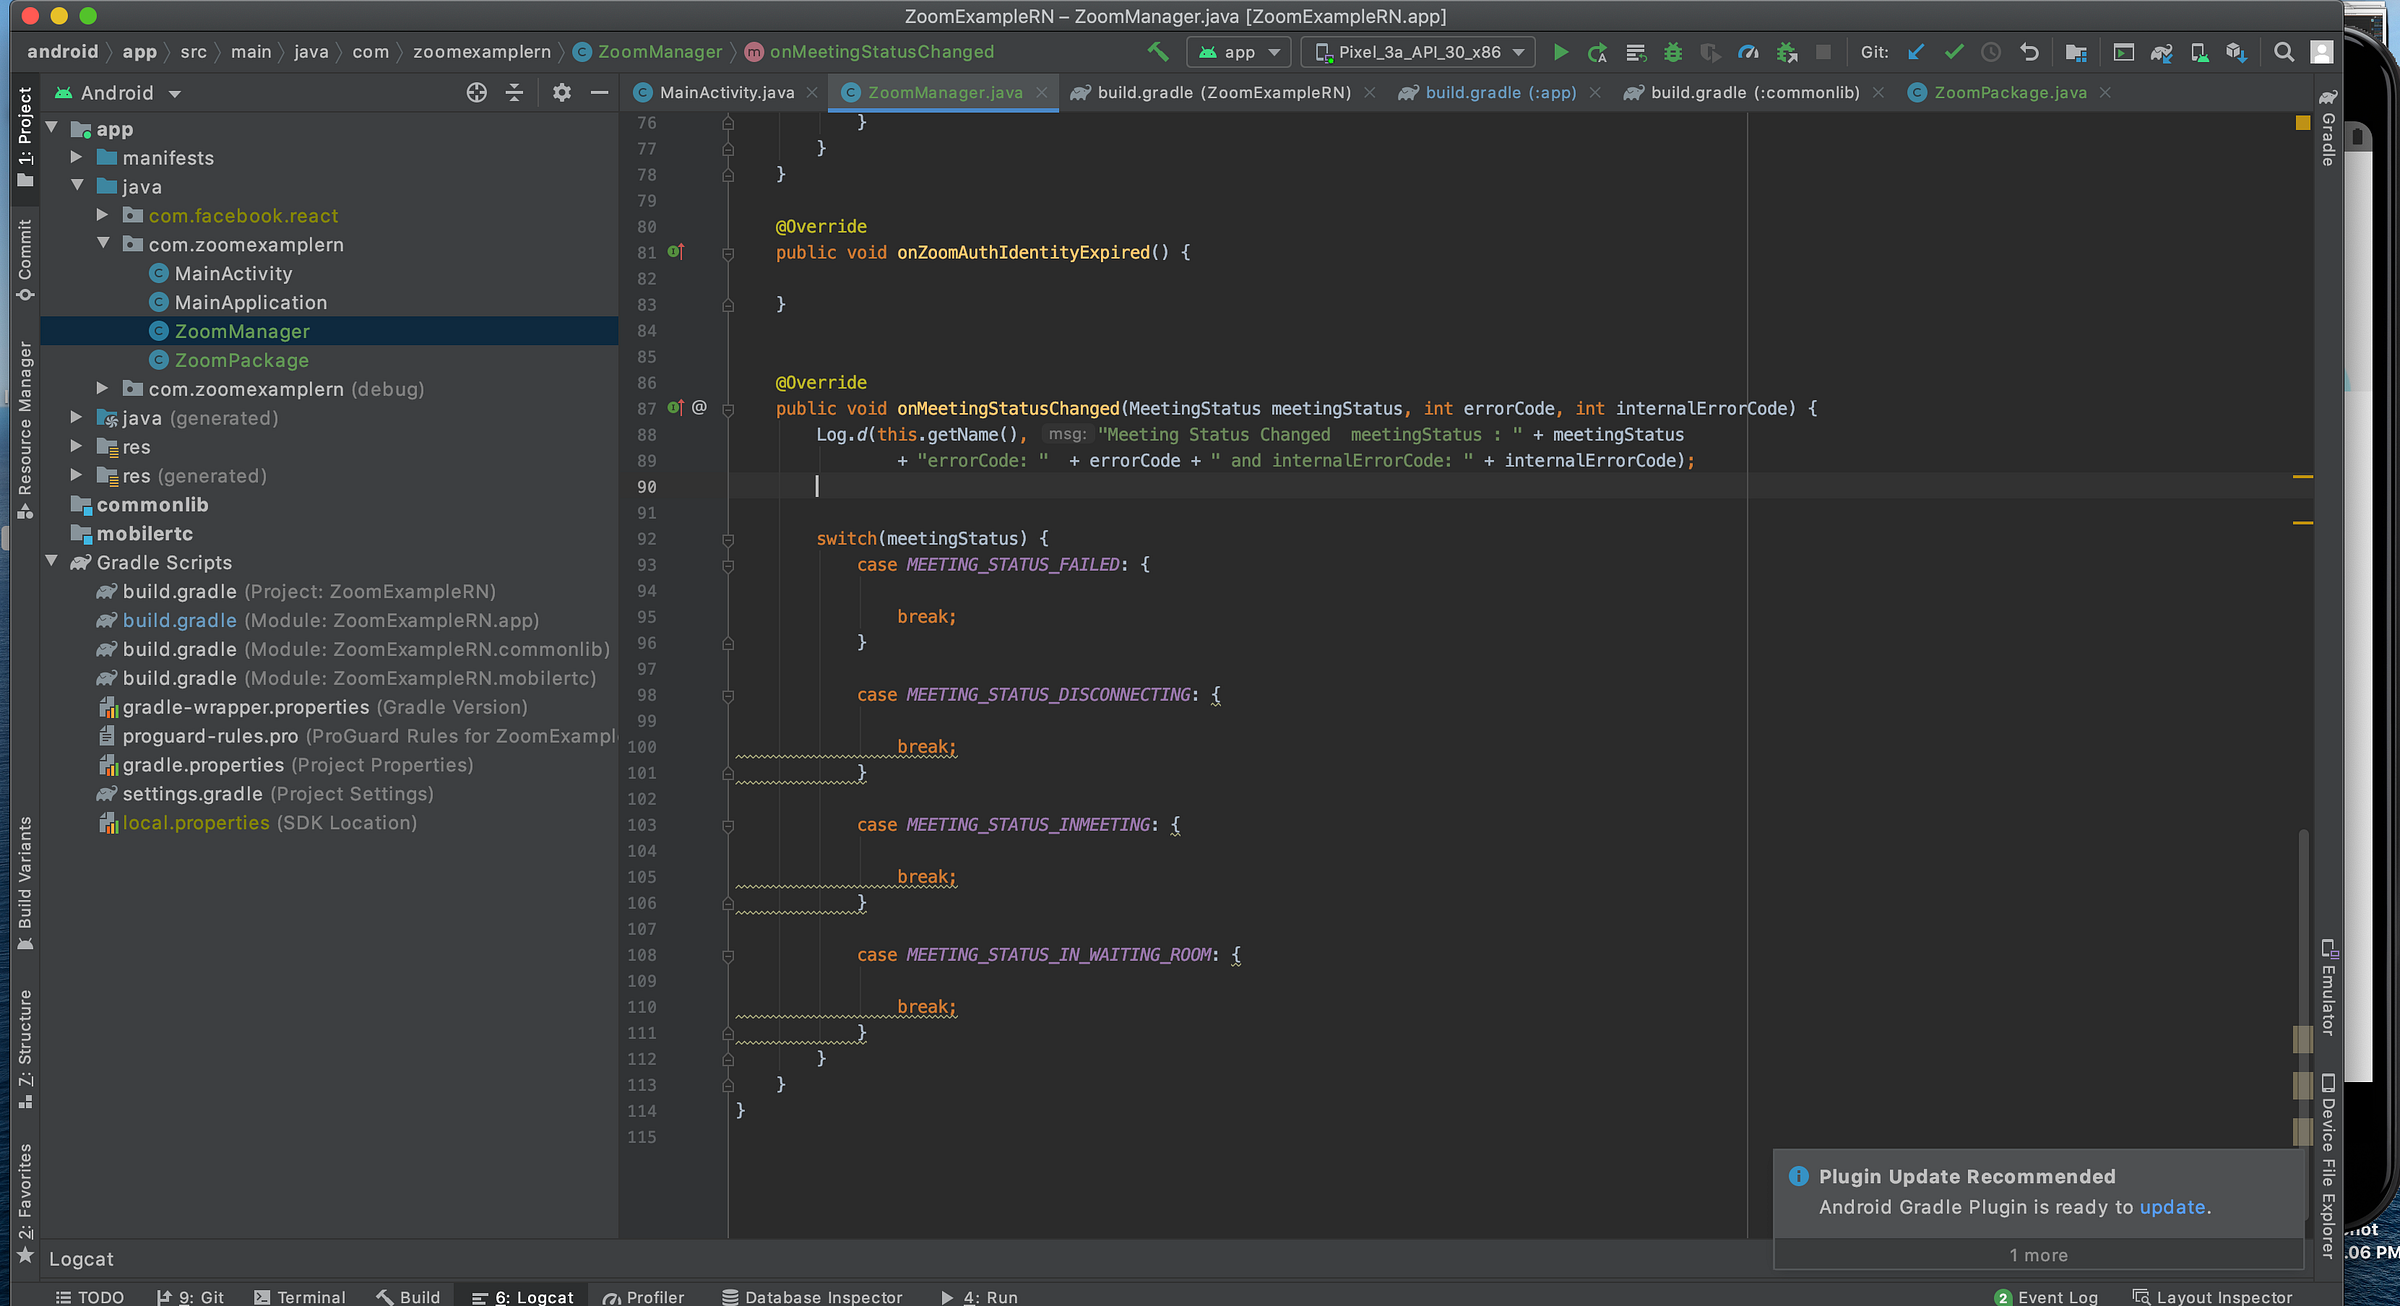
And, for now, let’s keep its logic very dummy.
Let’s build it.
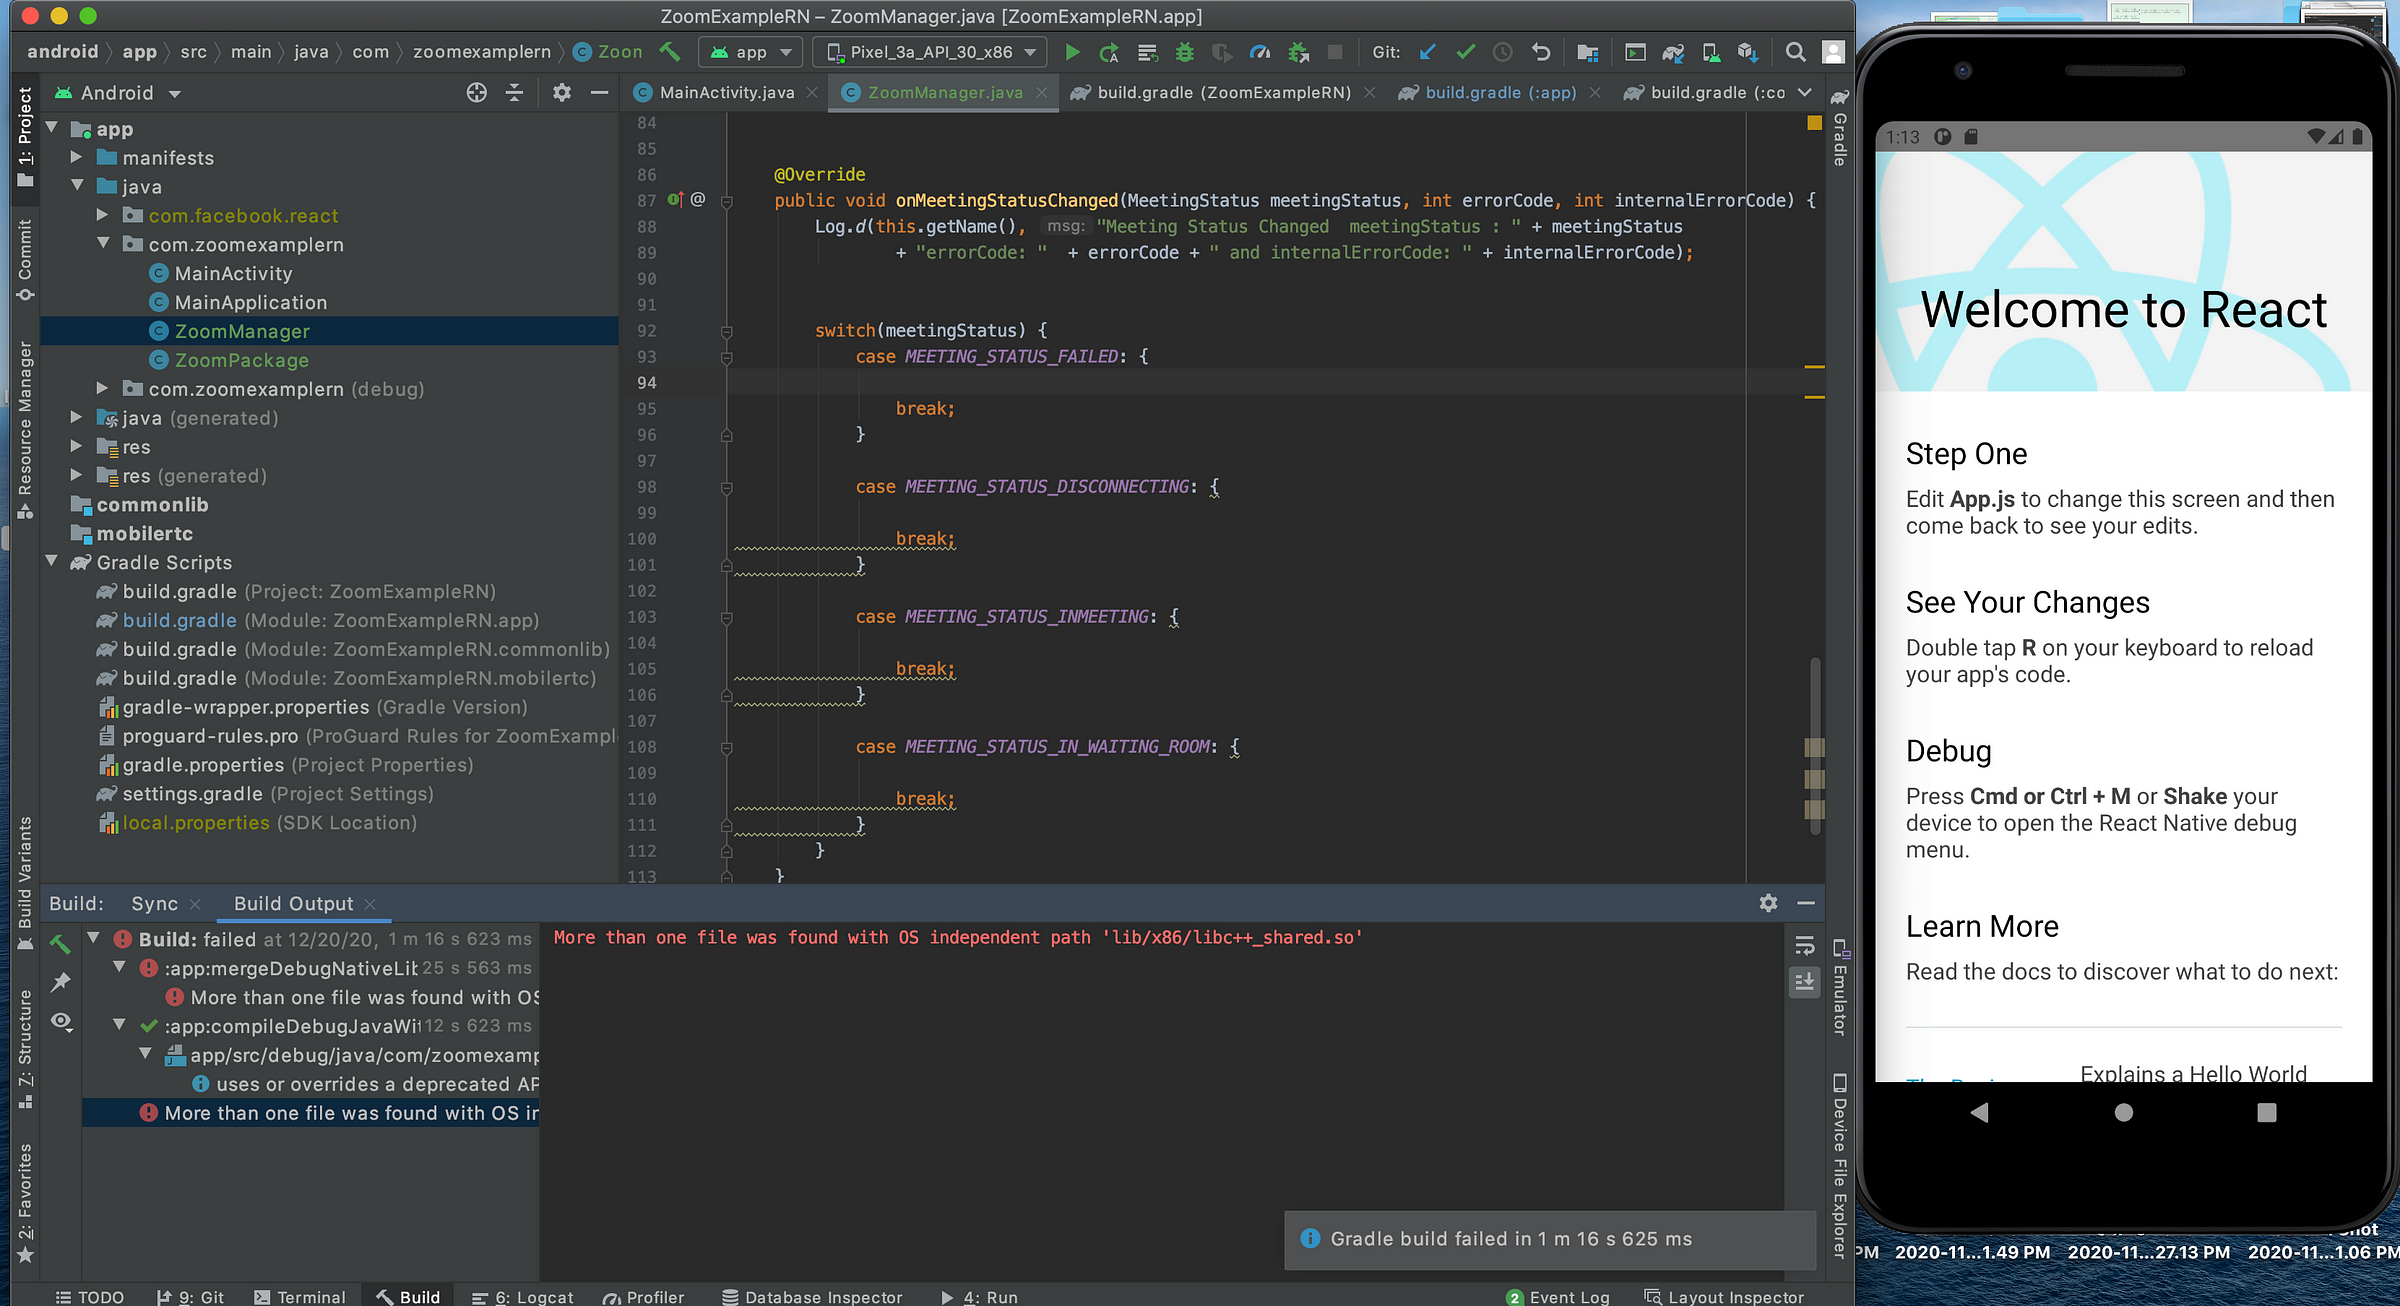
As you can see, it will not run. Taking look at the Zoom dev forum, we can see that some folks already tried to solve this.
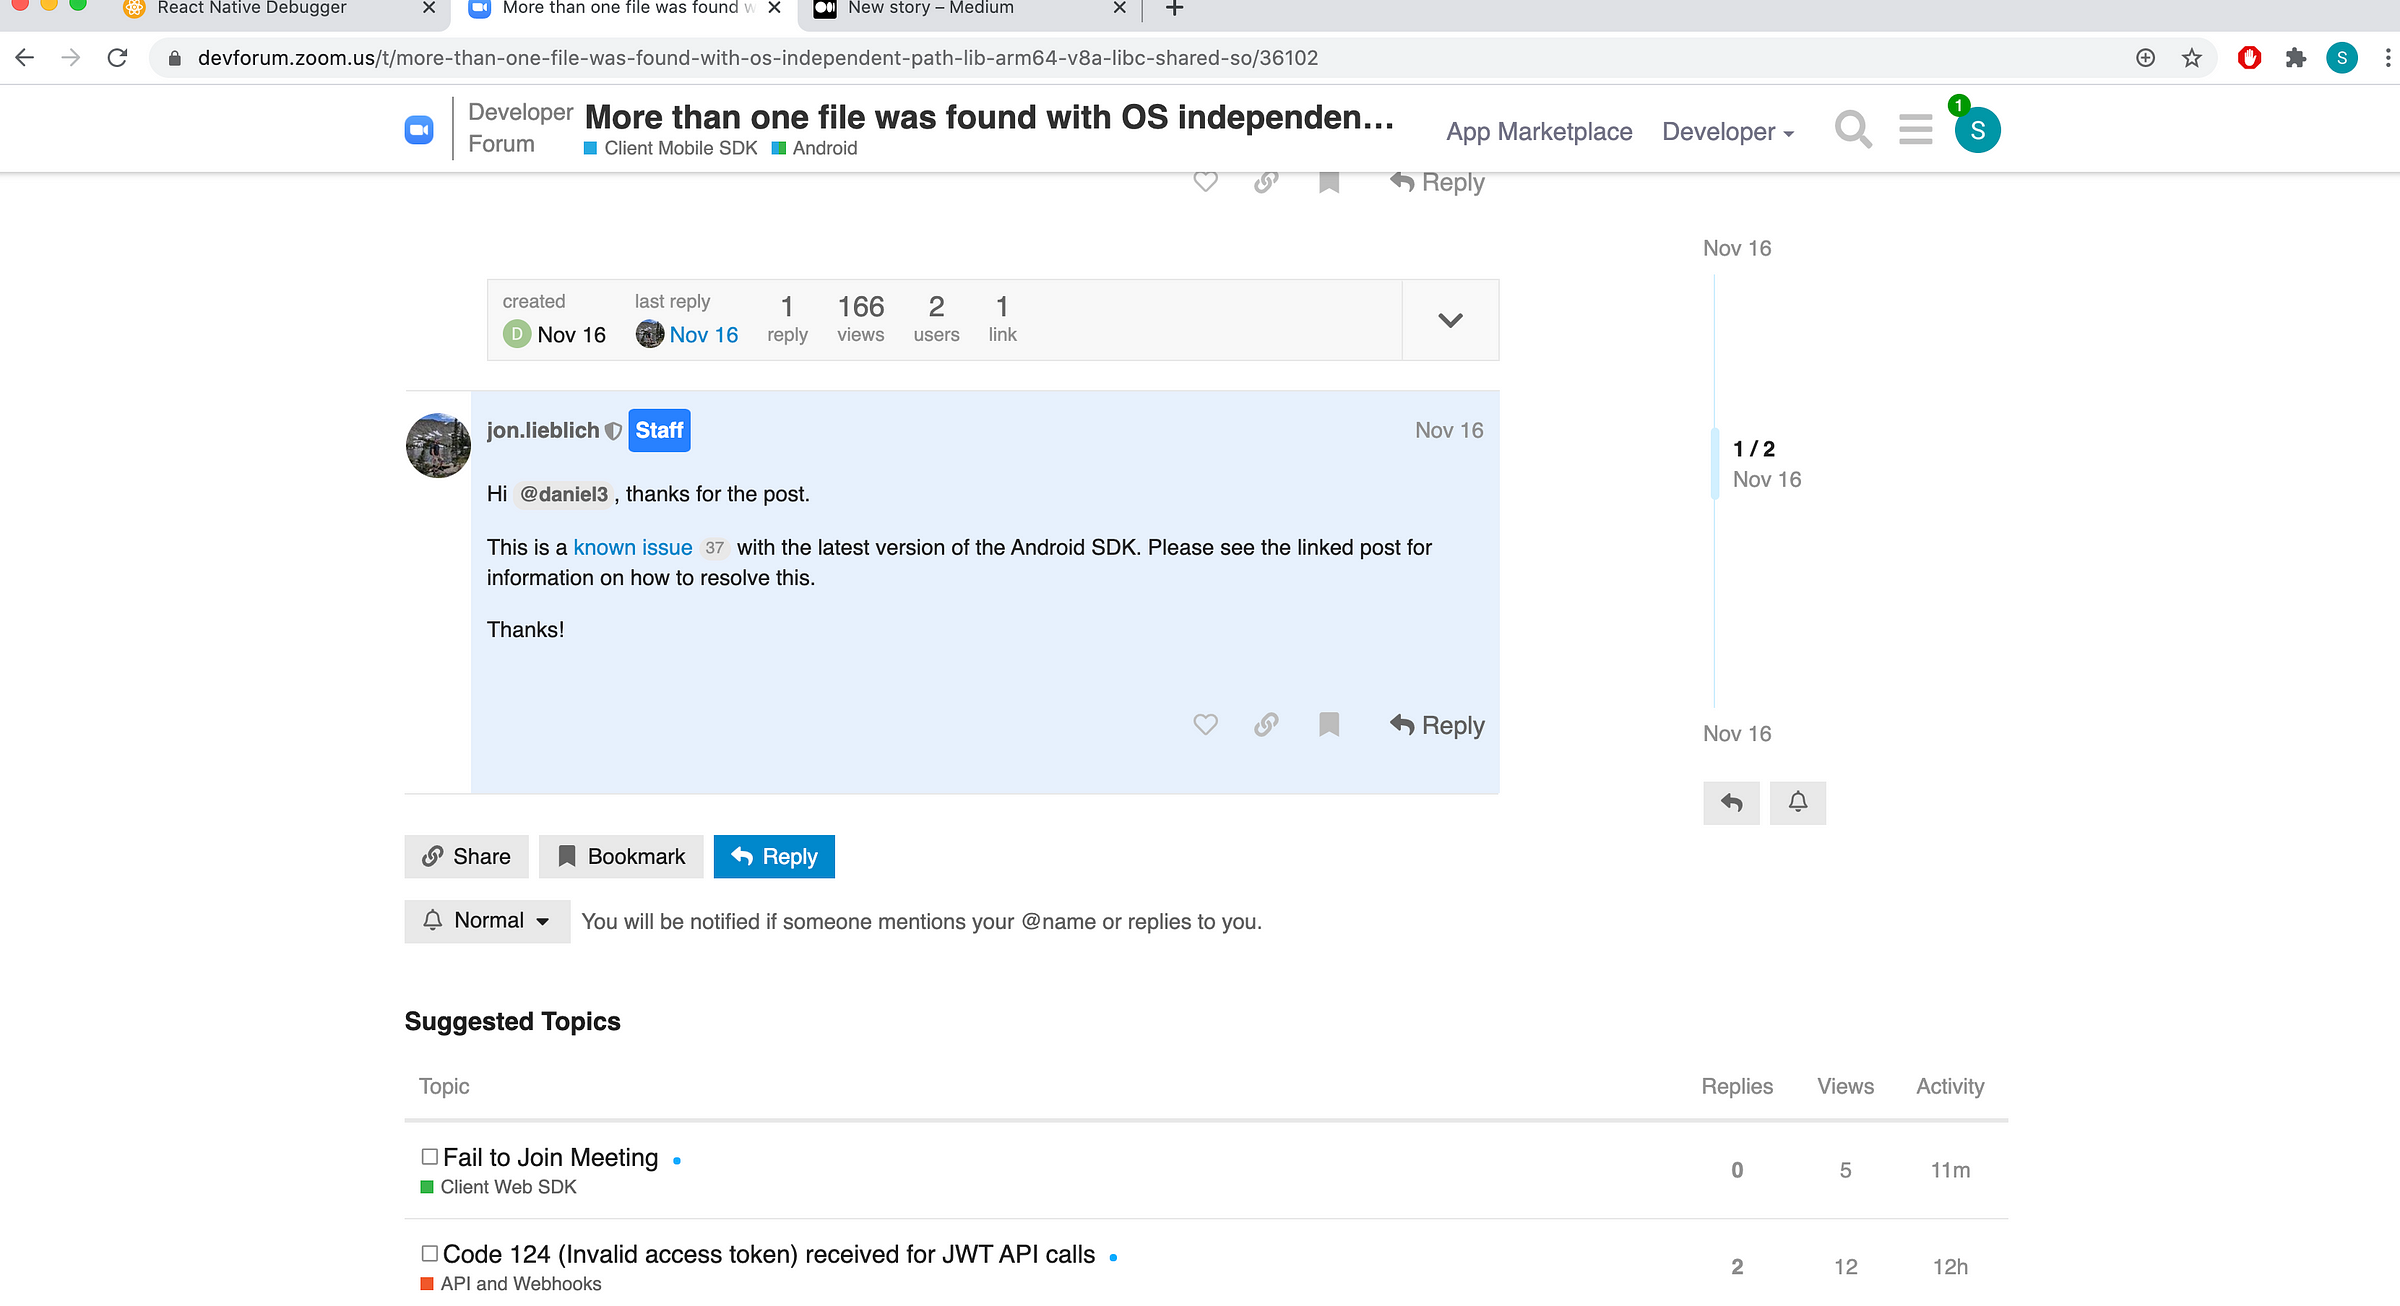
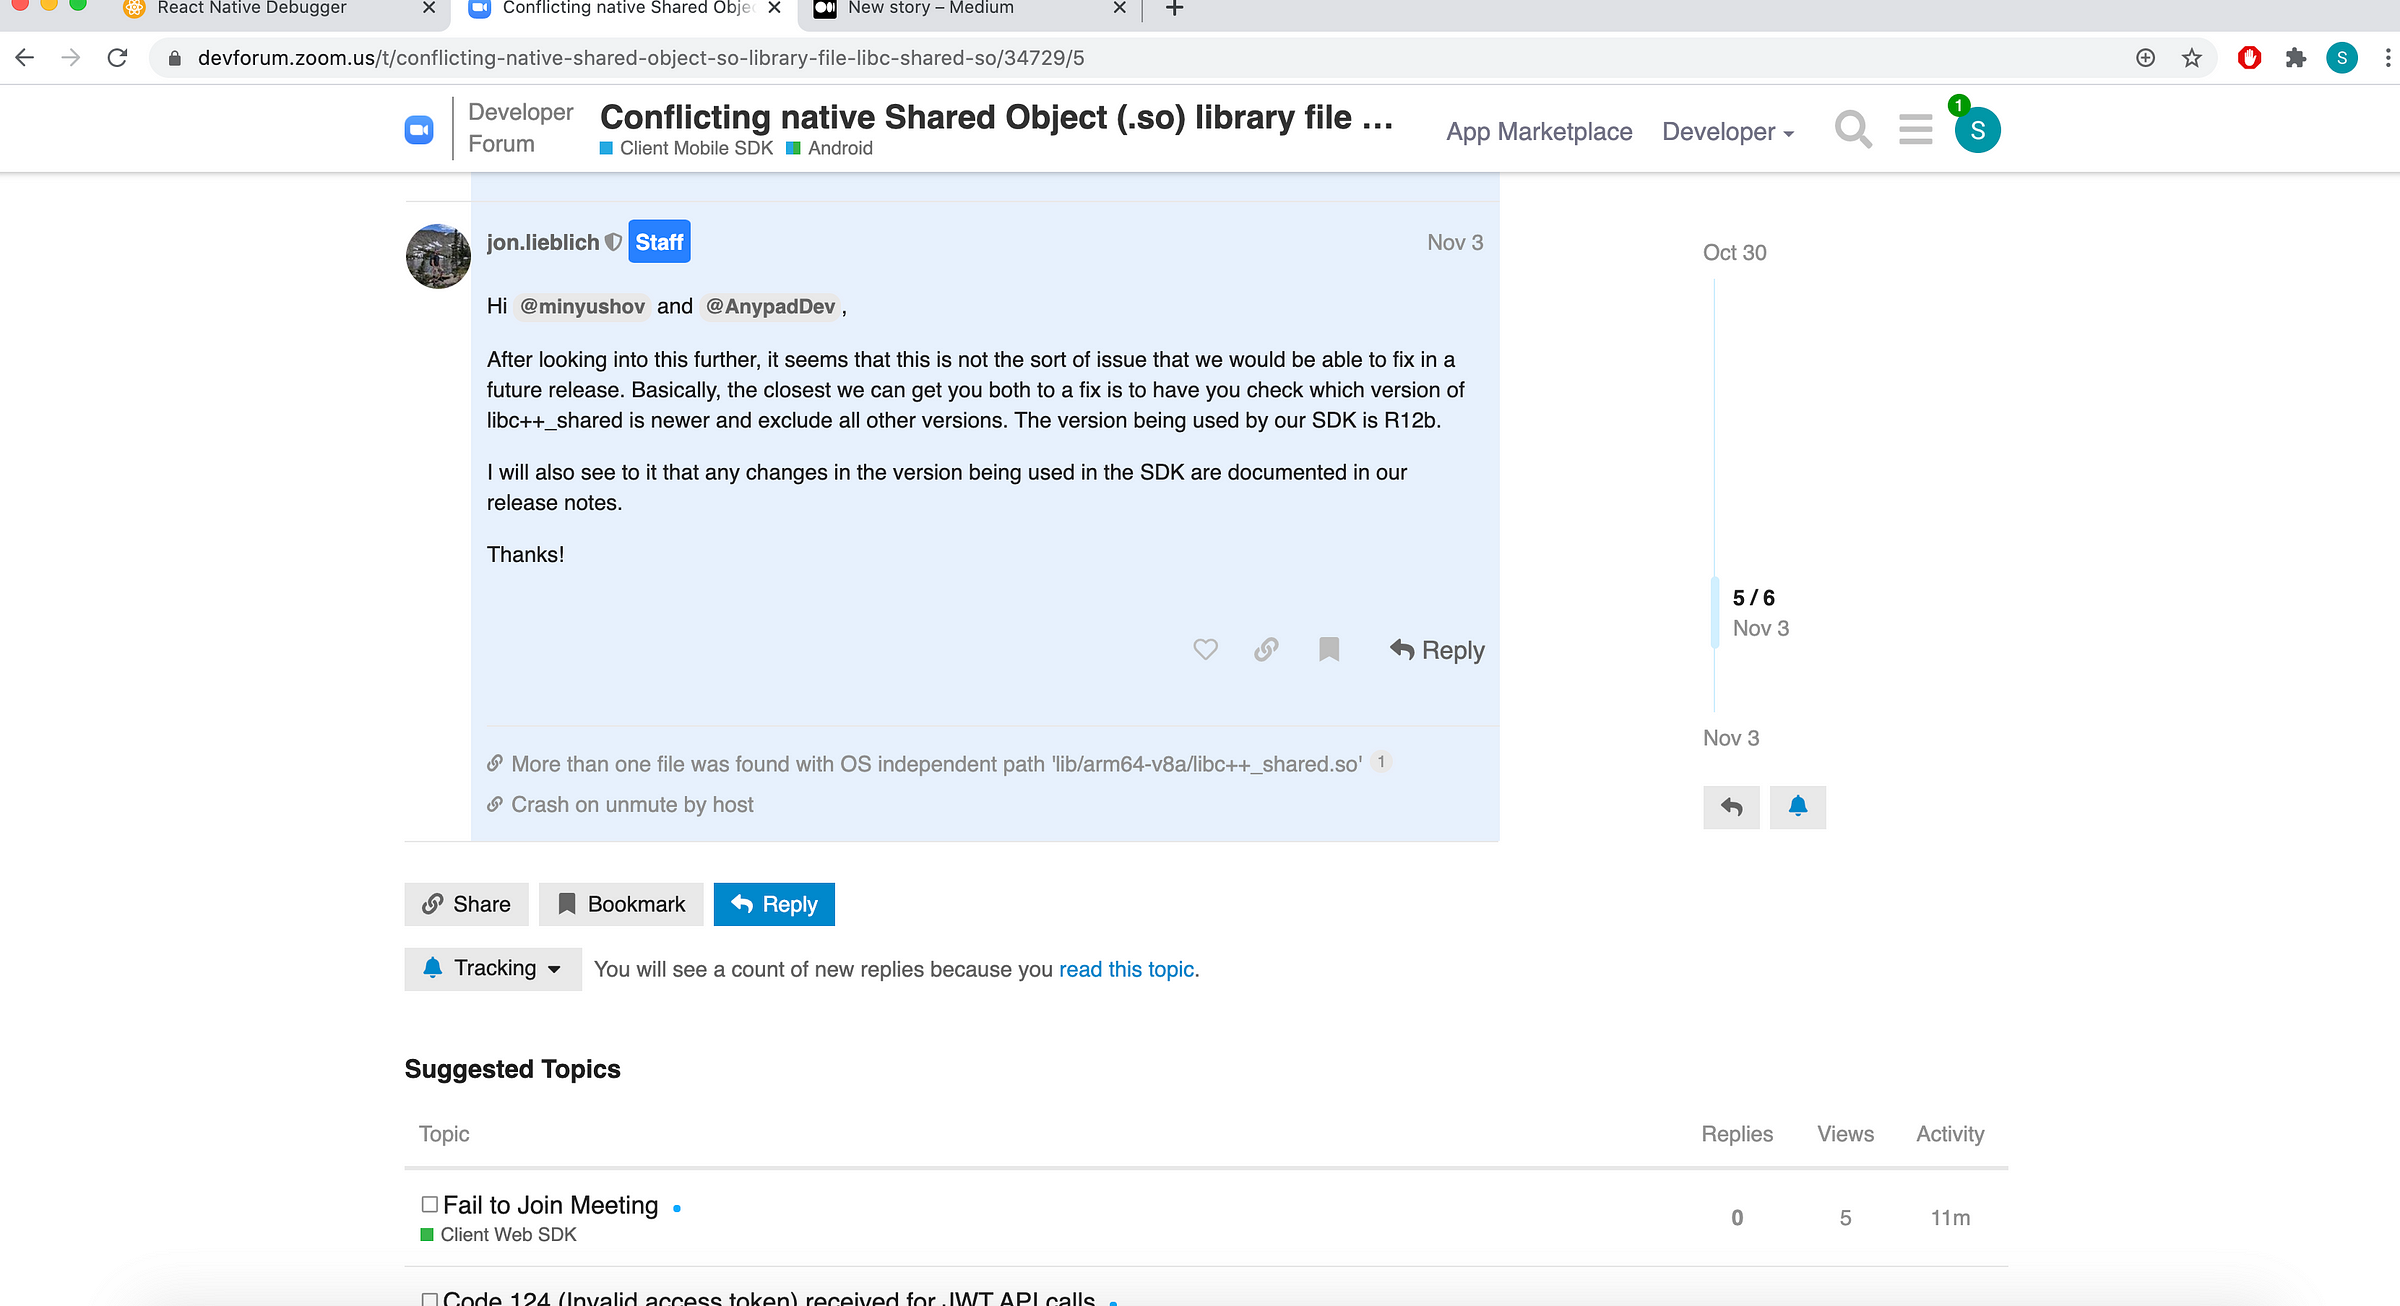
“Known issue”. And the ZOOM team is not able to solve this issue in future release.
But other folks said in the same thread that the issue could be “easily” solved.
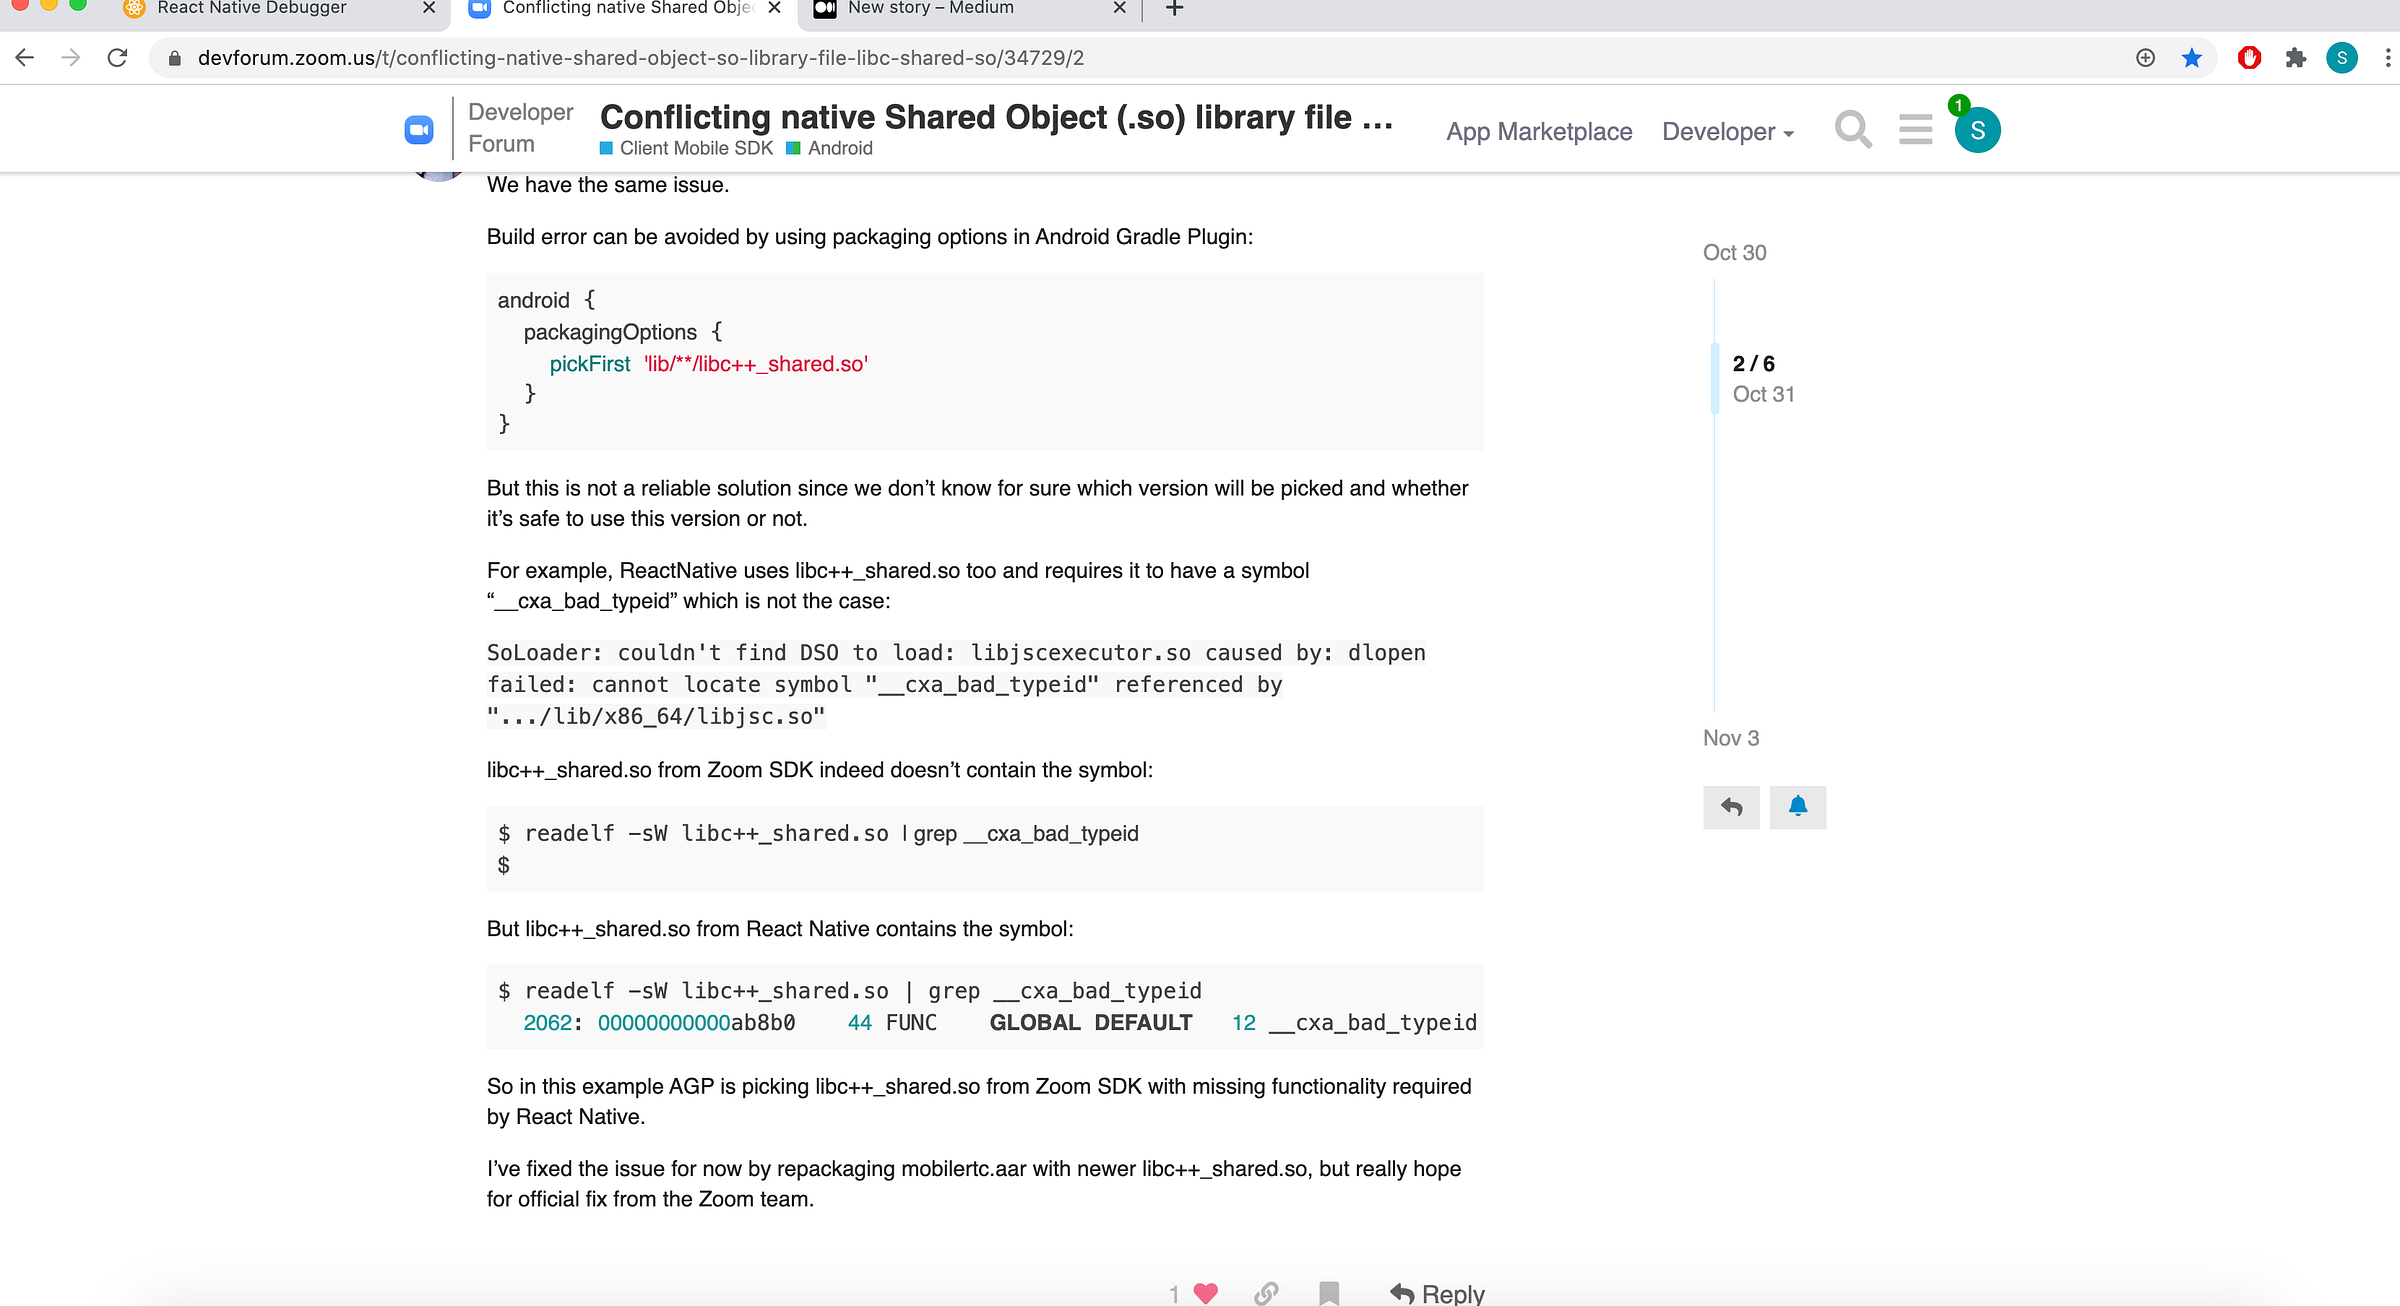
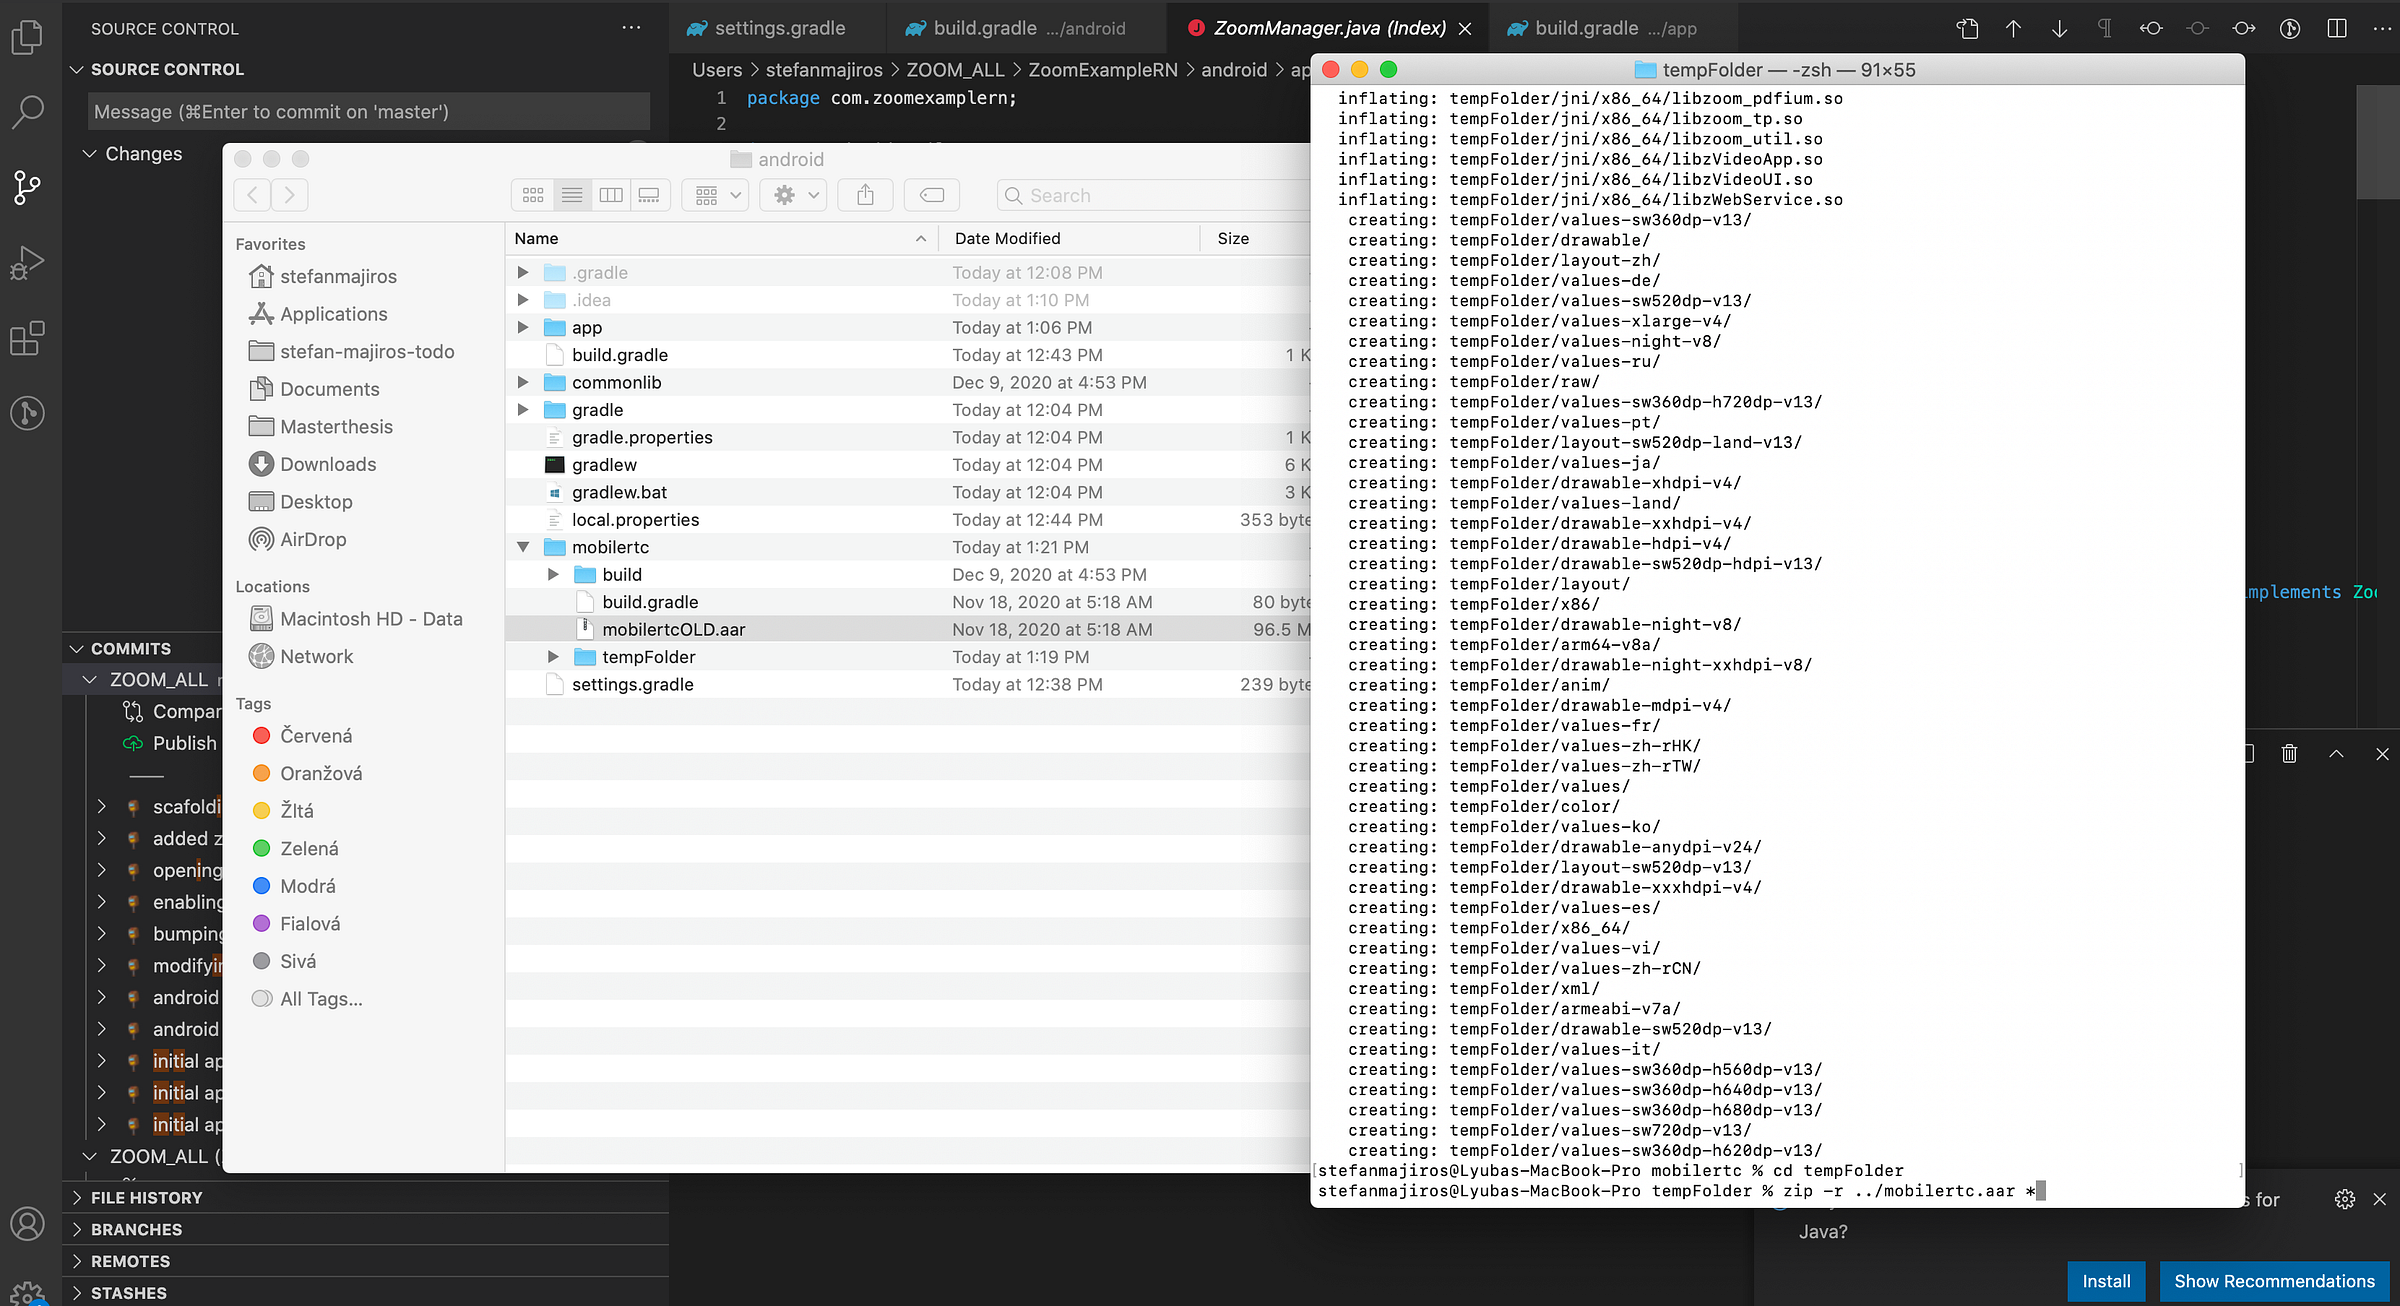
So, let’s try this “easy” way. Find mobilertc.aar file inside your project and open terminal in the enclosing folder.
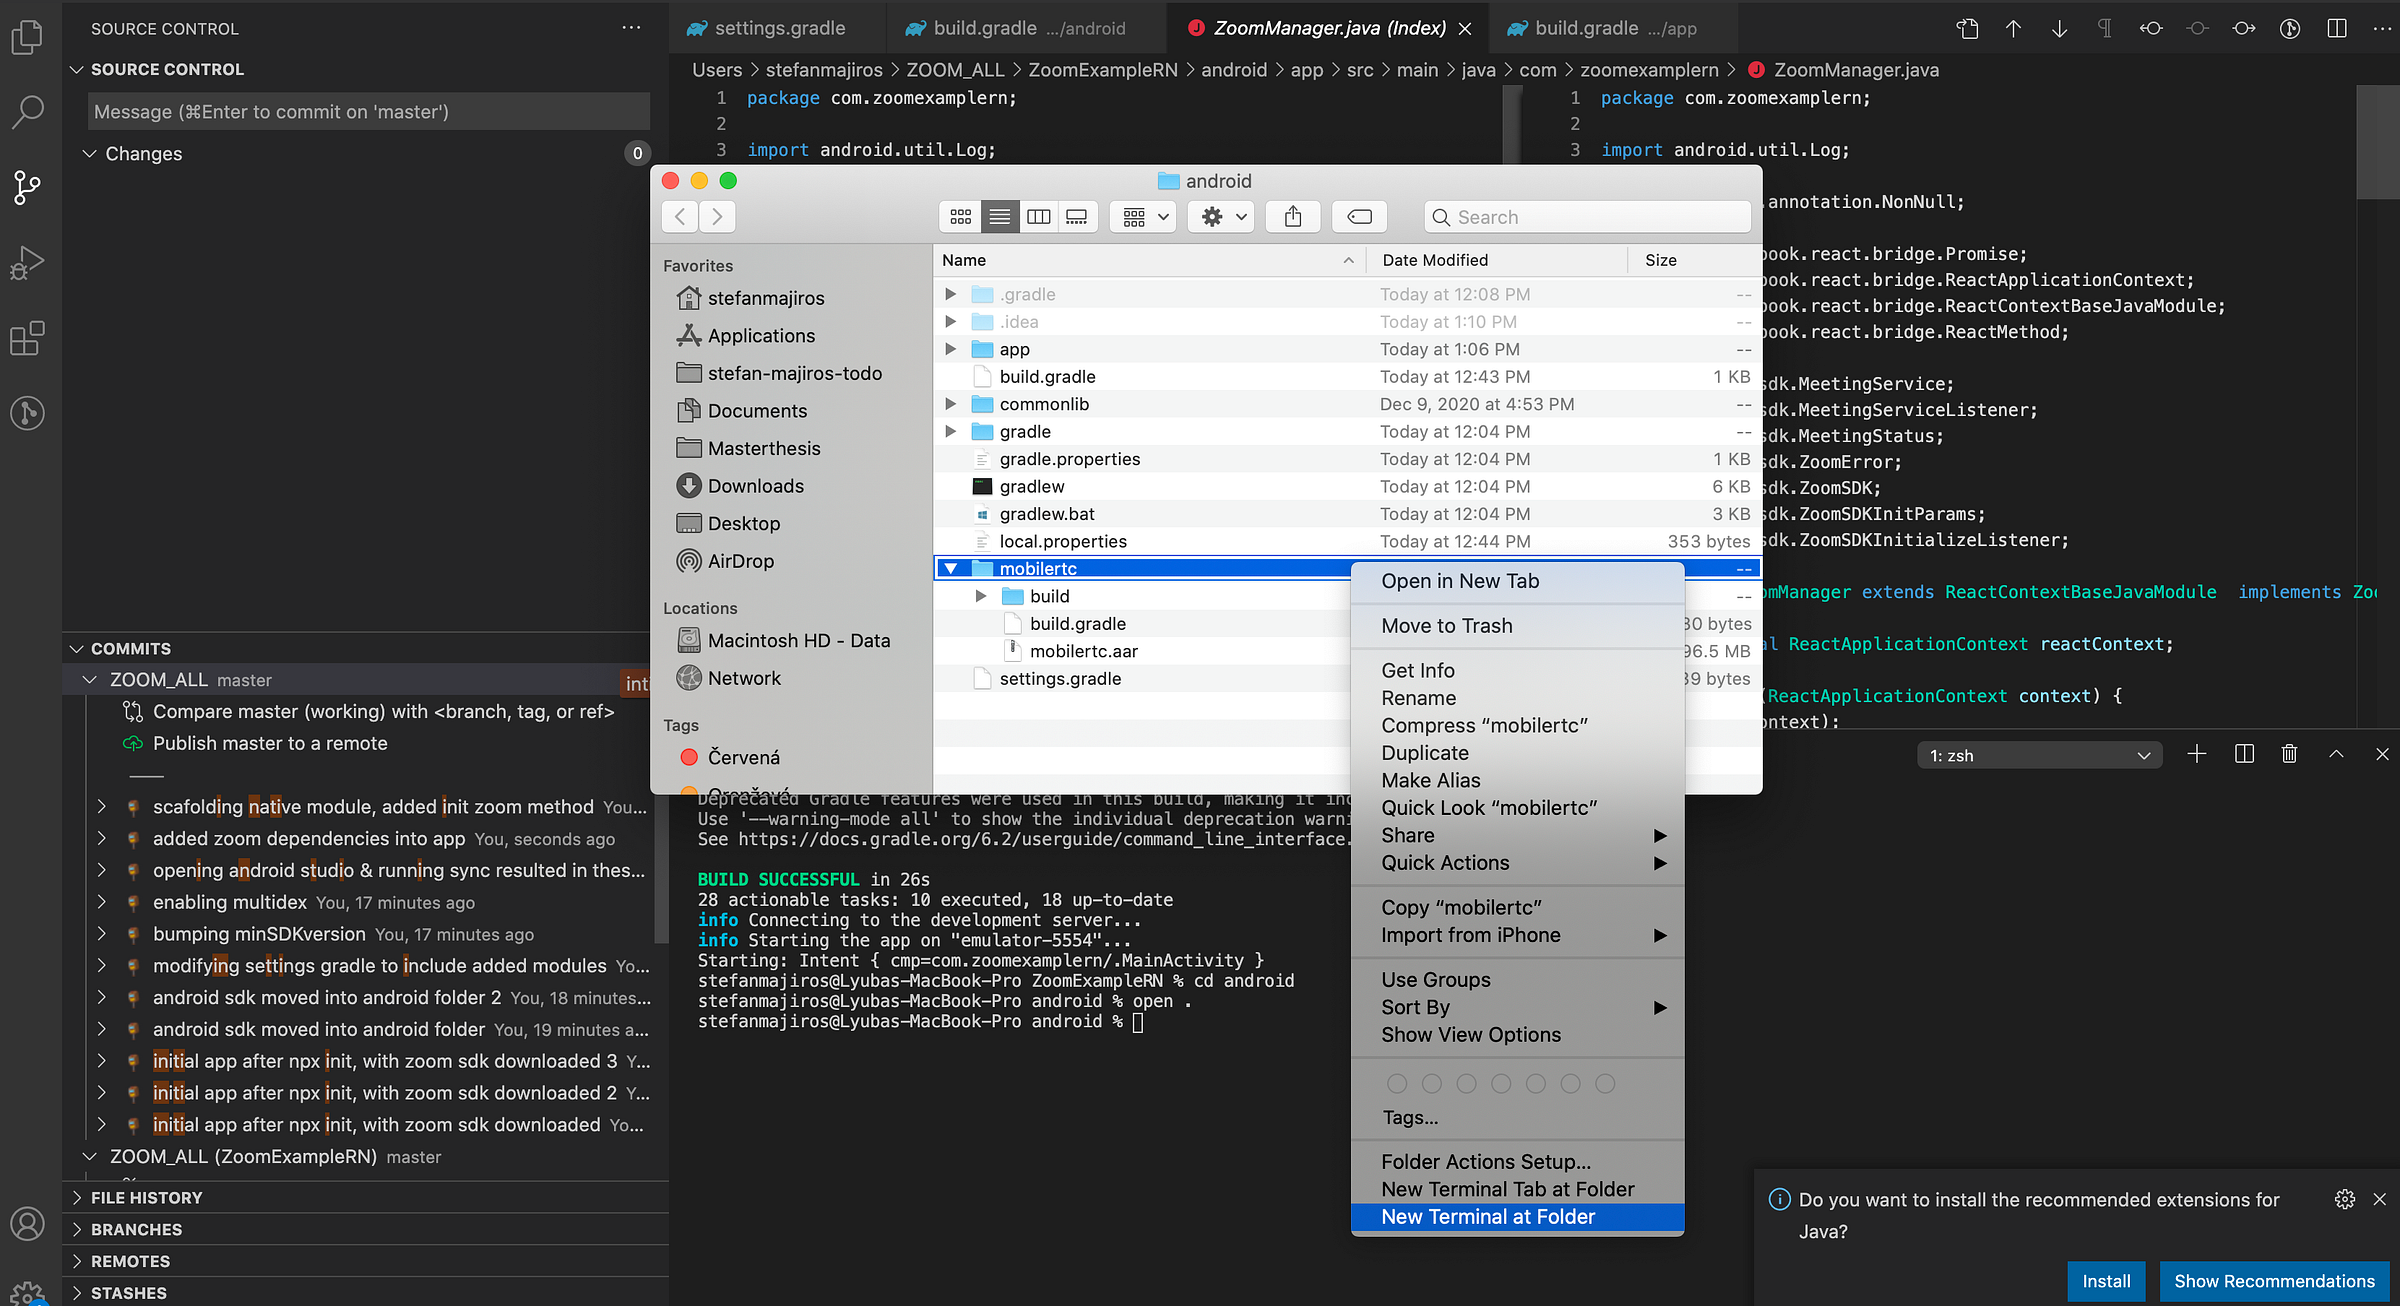
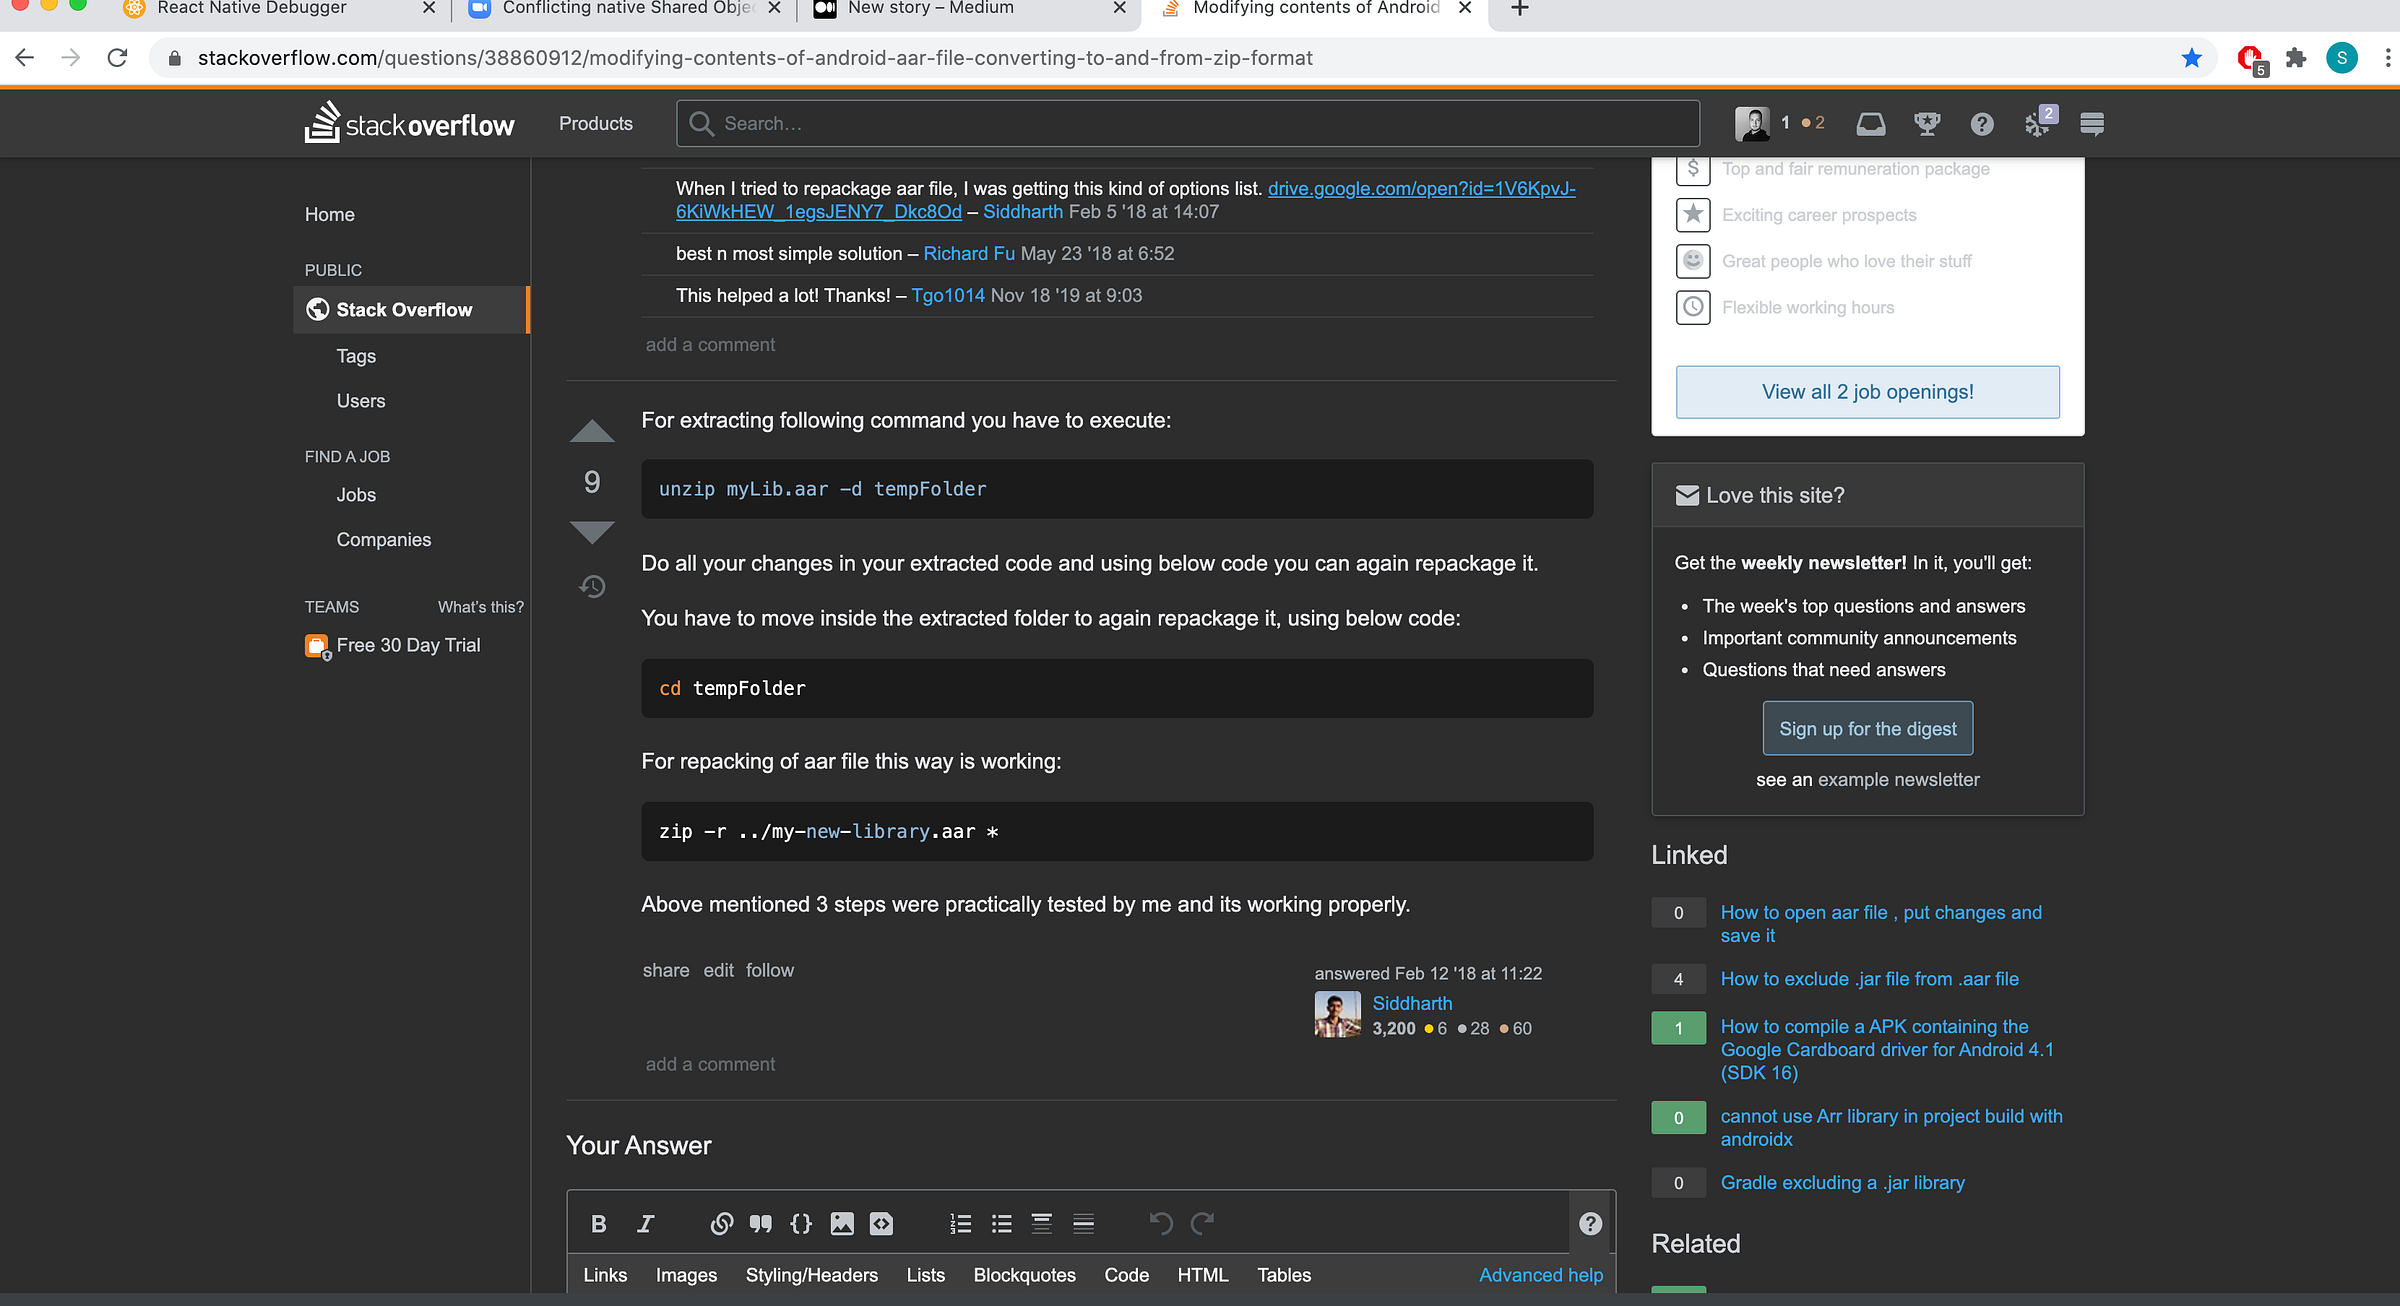
According to the stackoverflow, we can use these simple commands to unpack and repack .aar file.
Unpacking mobilertc.aar into tempFolder with the command above looks like this:
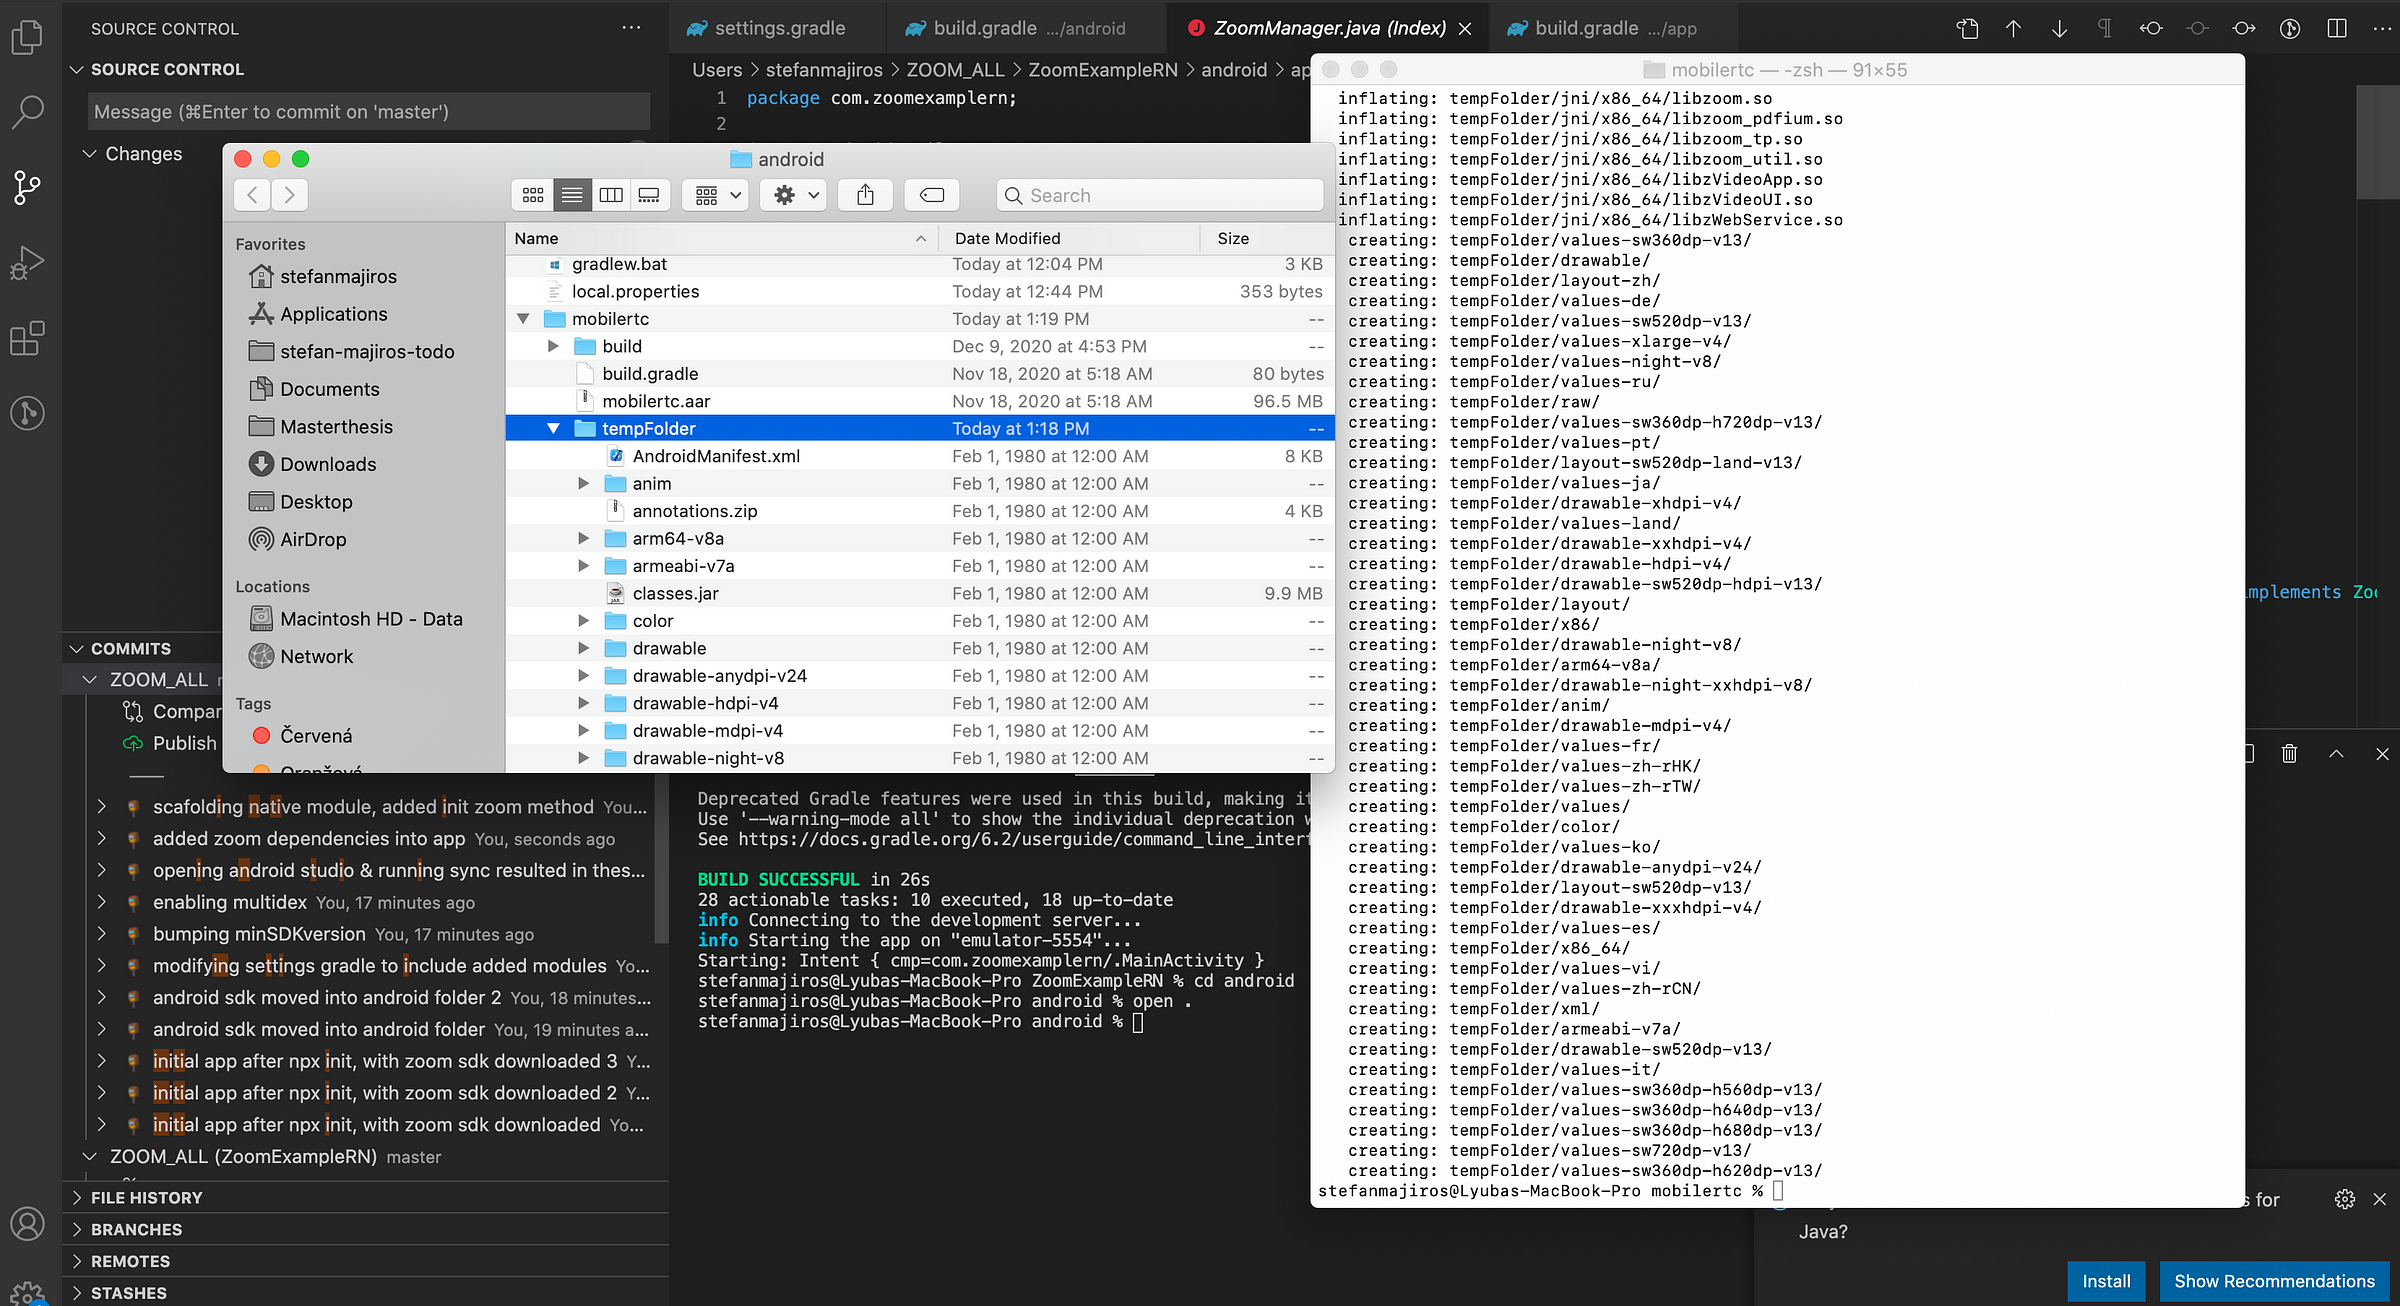
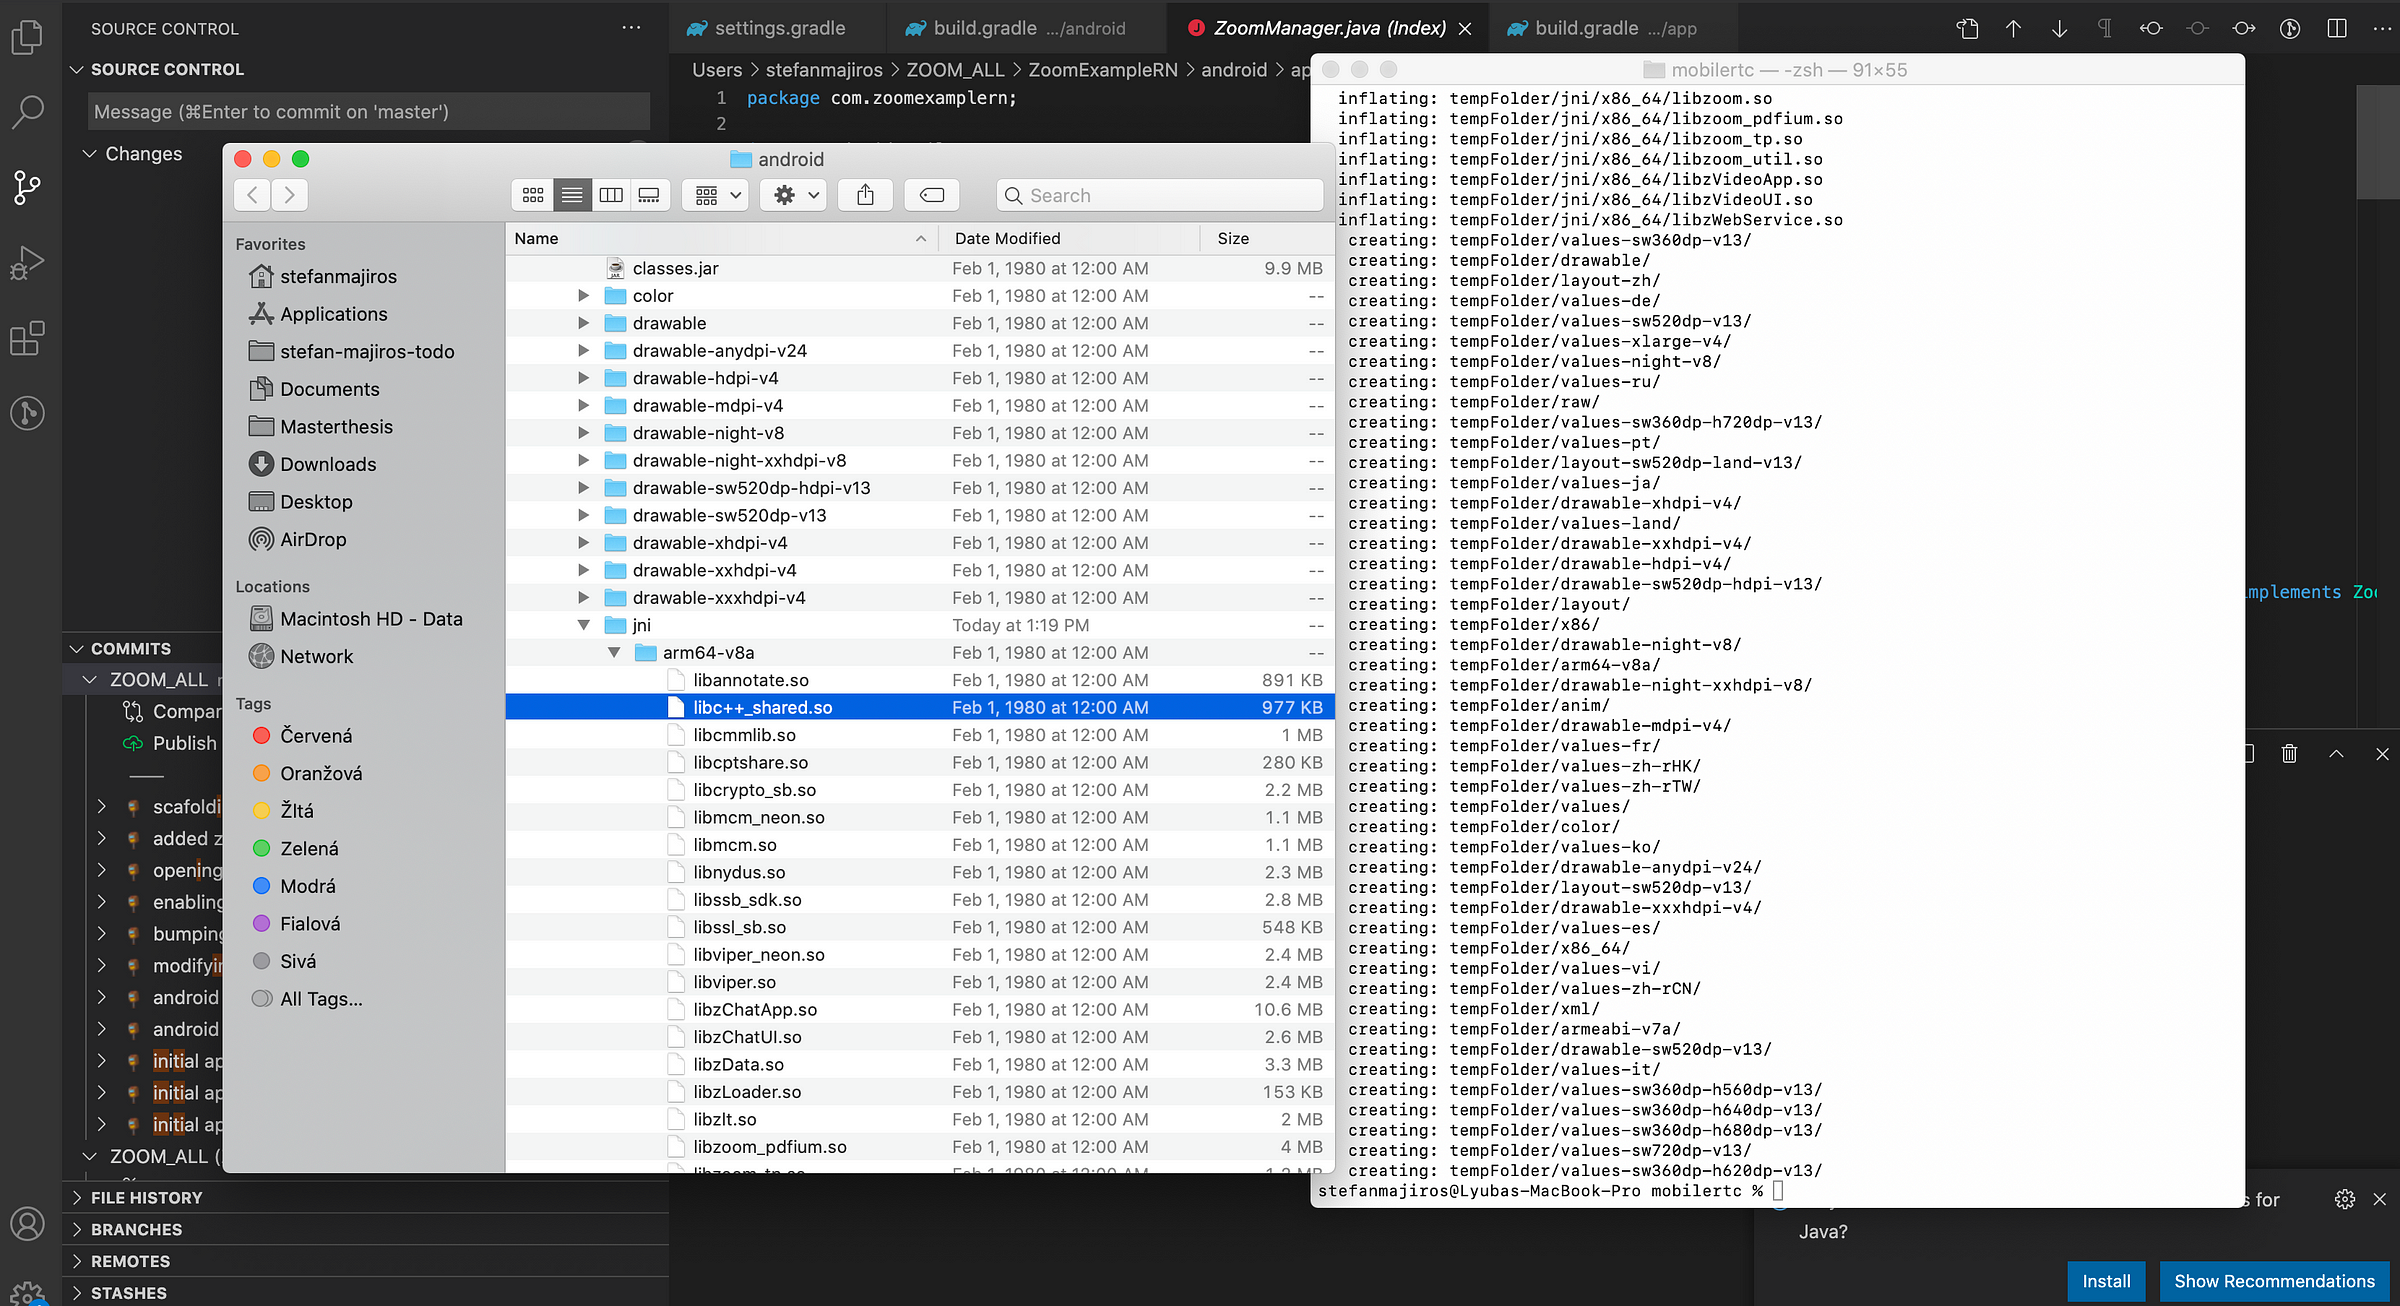
Let’s take a look at the content of tempFolder. Inside, we need to find folder called jni. Kind of dark magic.
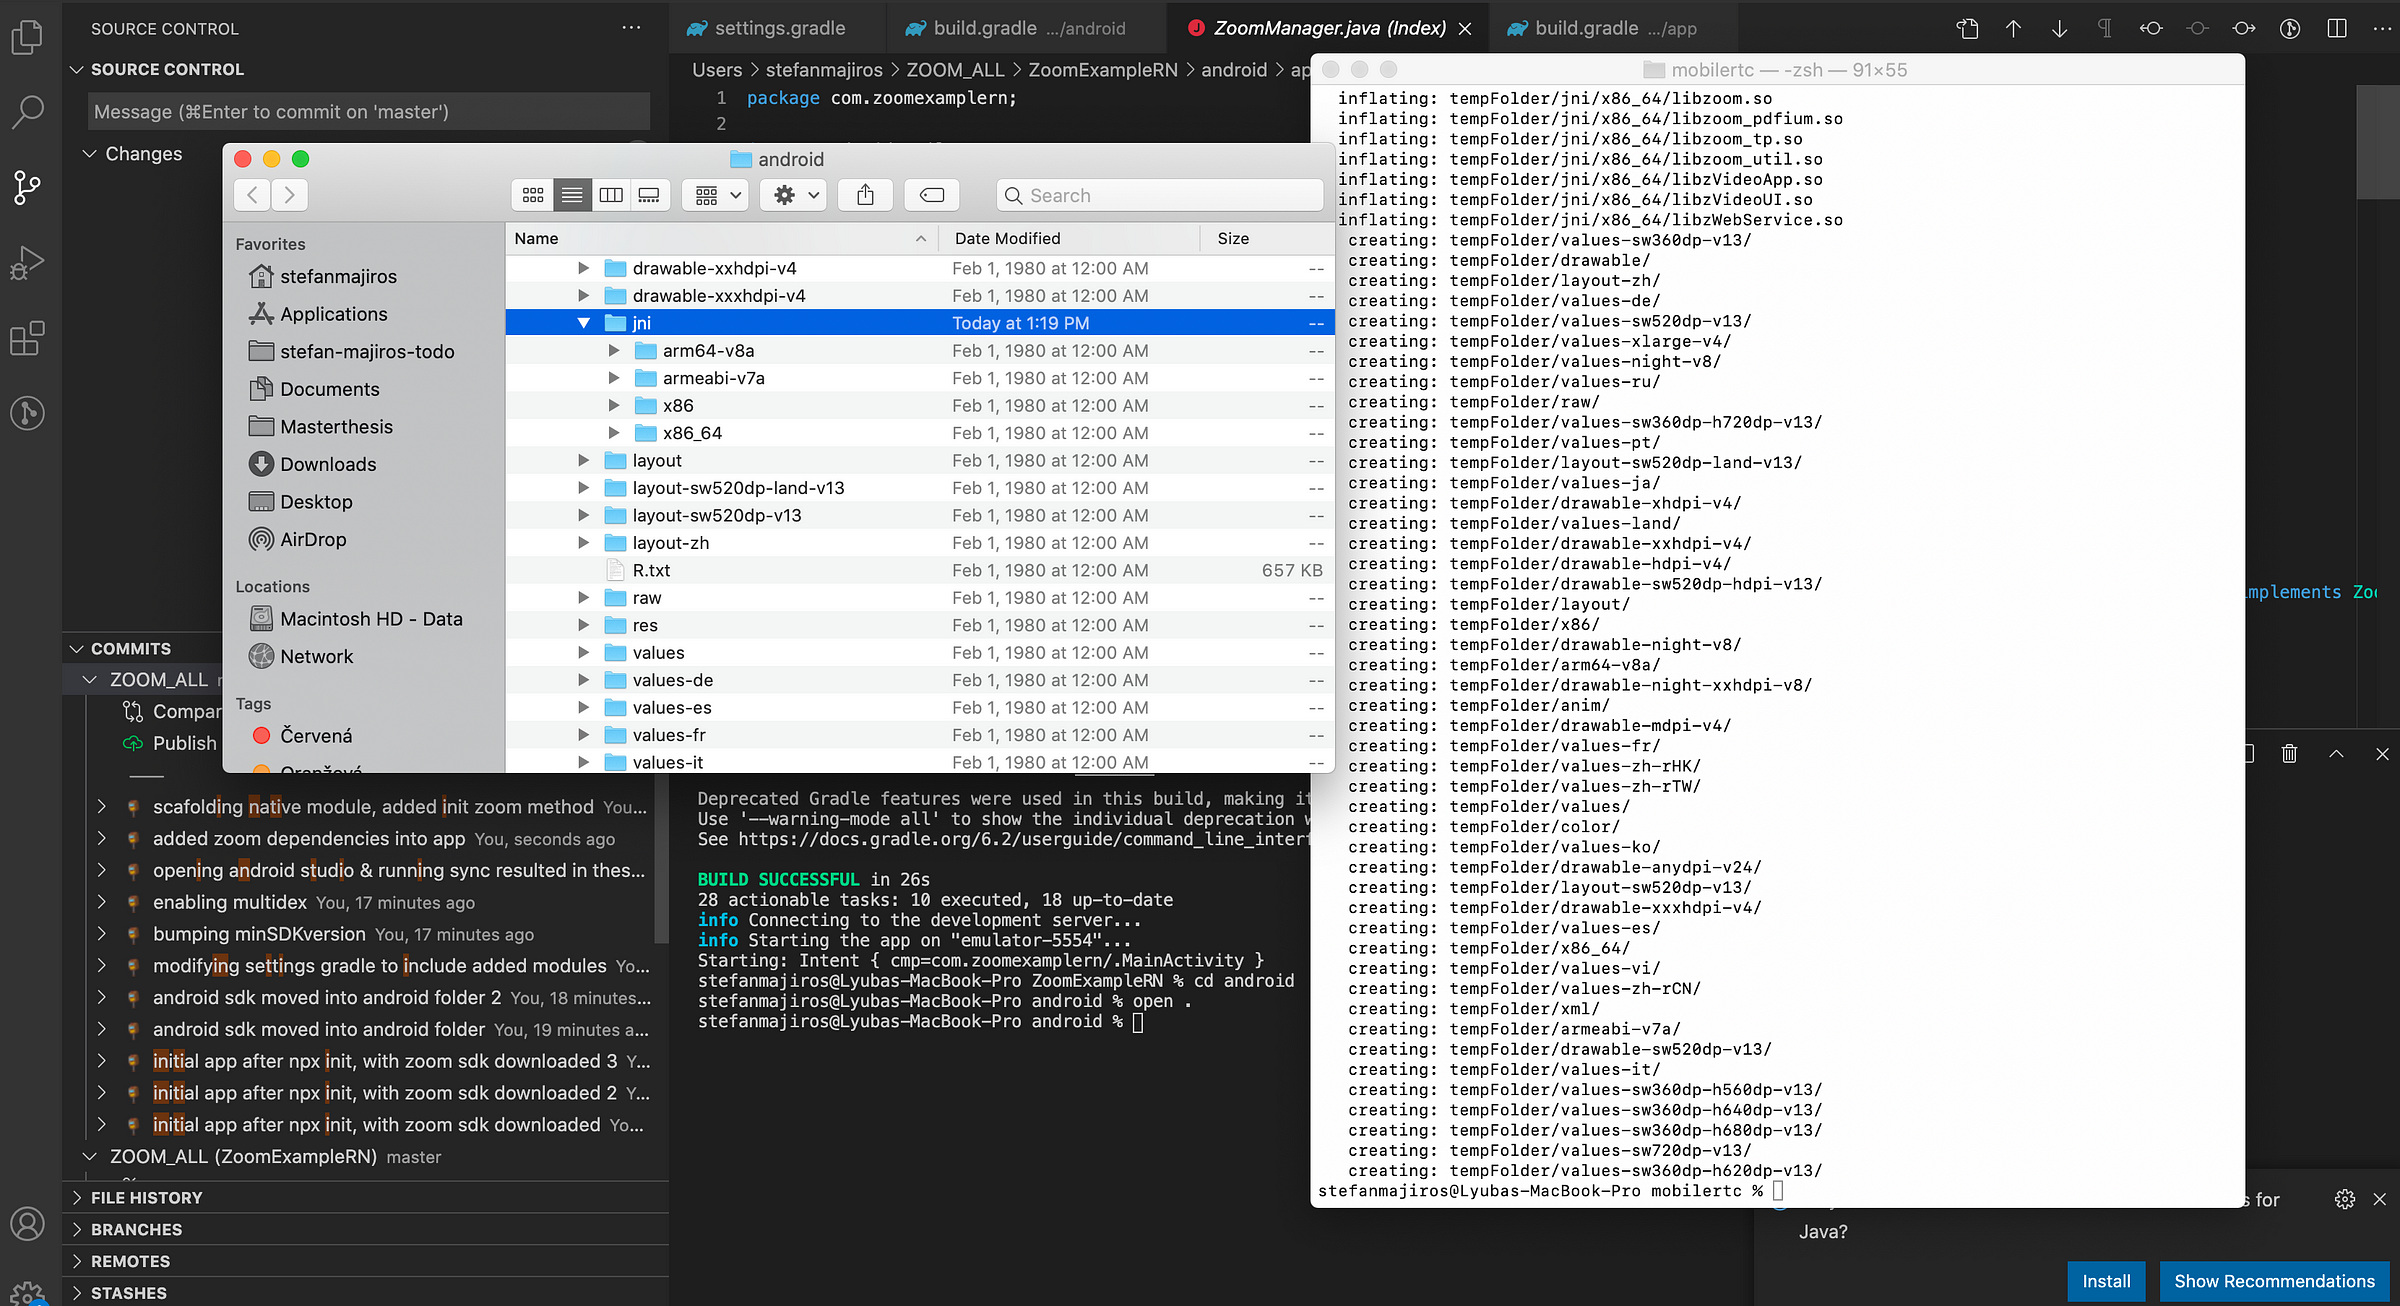
Under jni folder, there are these folders - each for separate architecture of mobile devices.

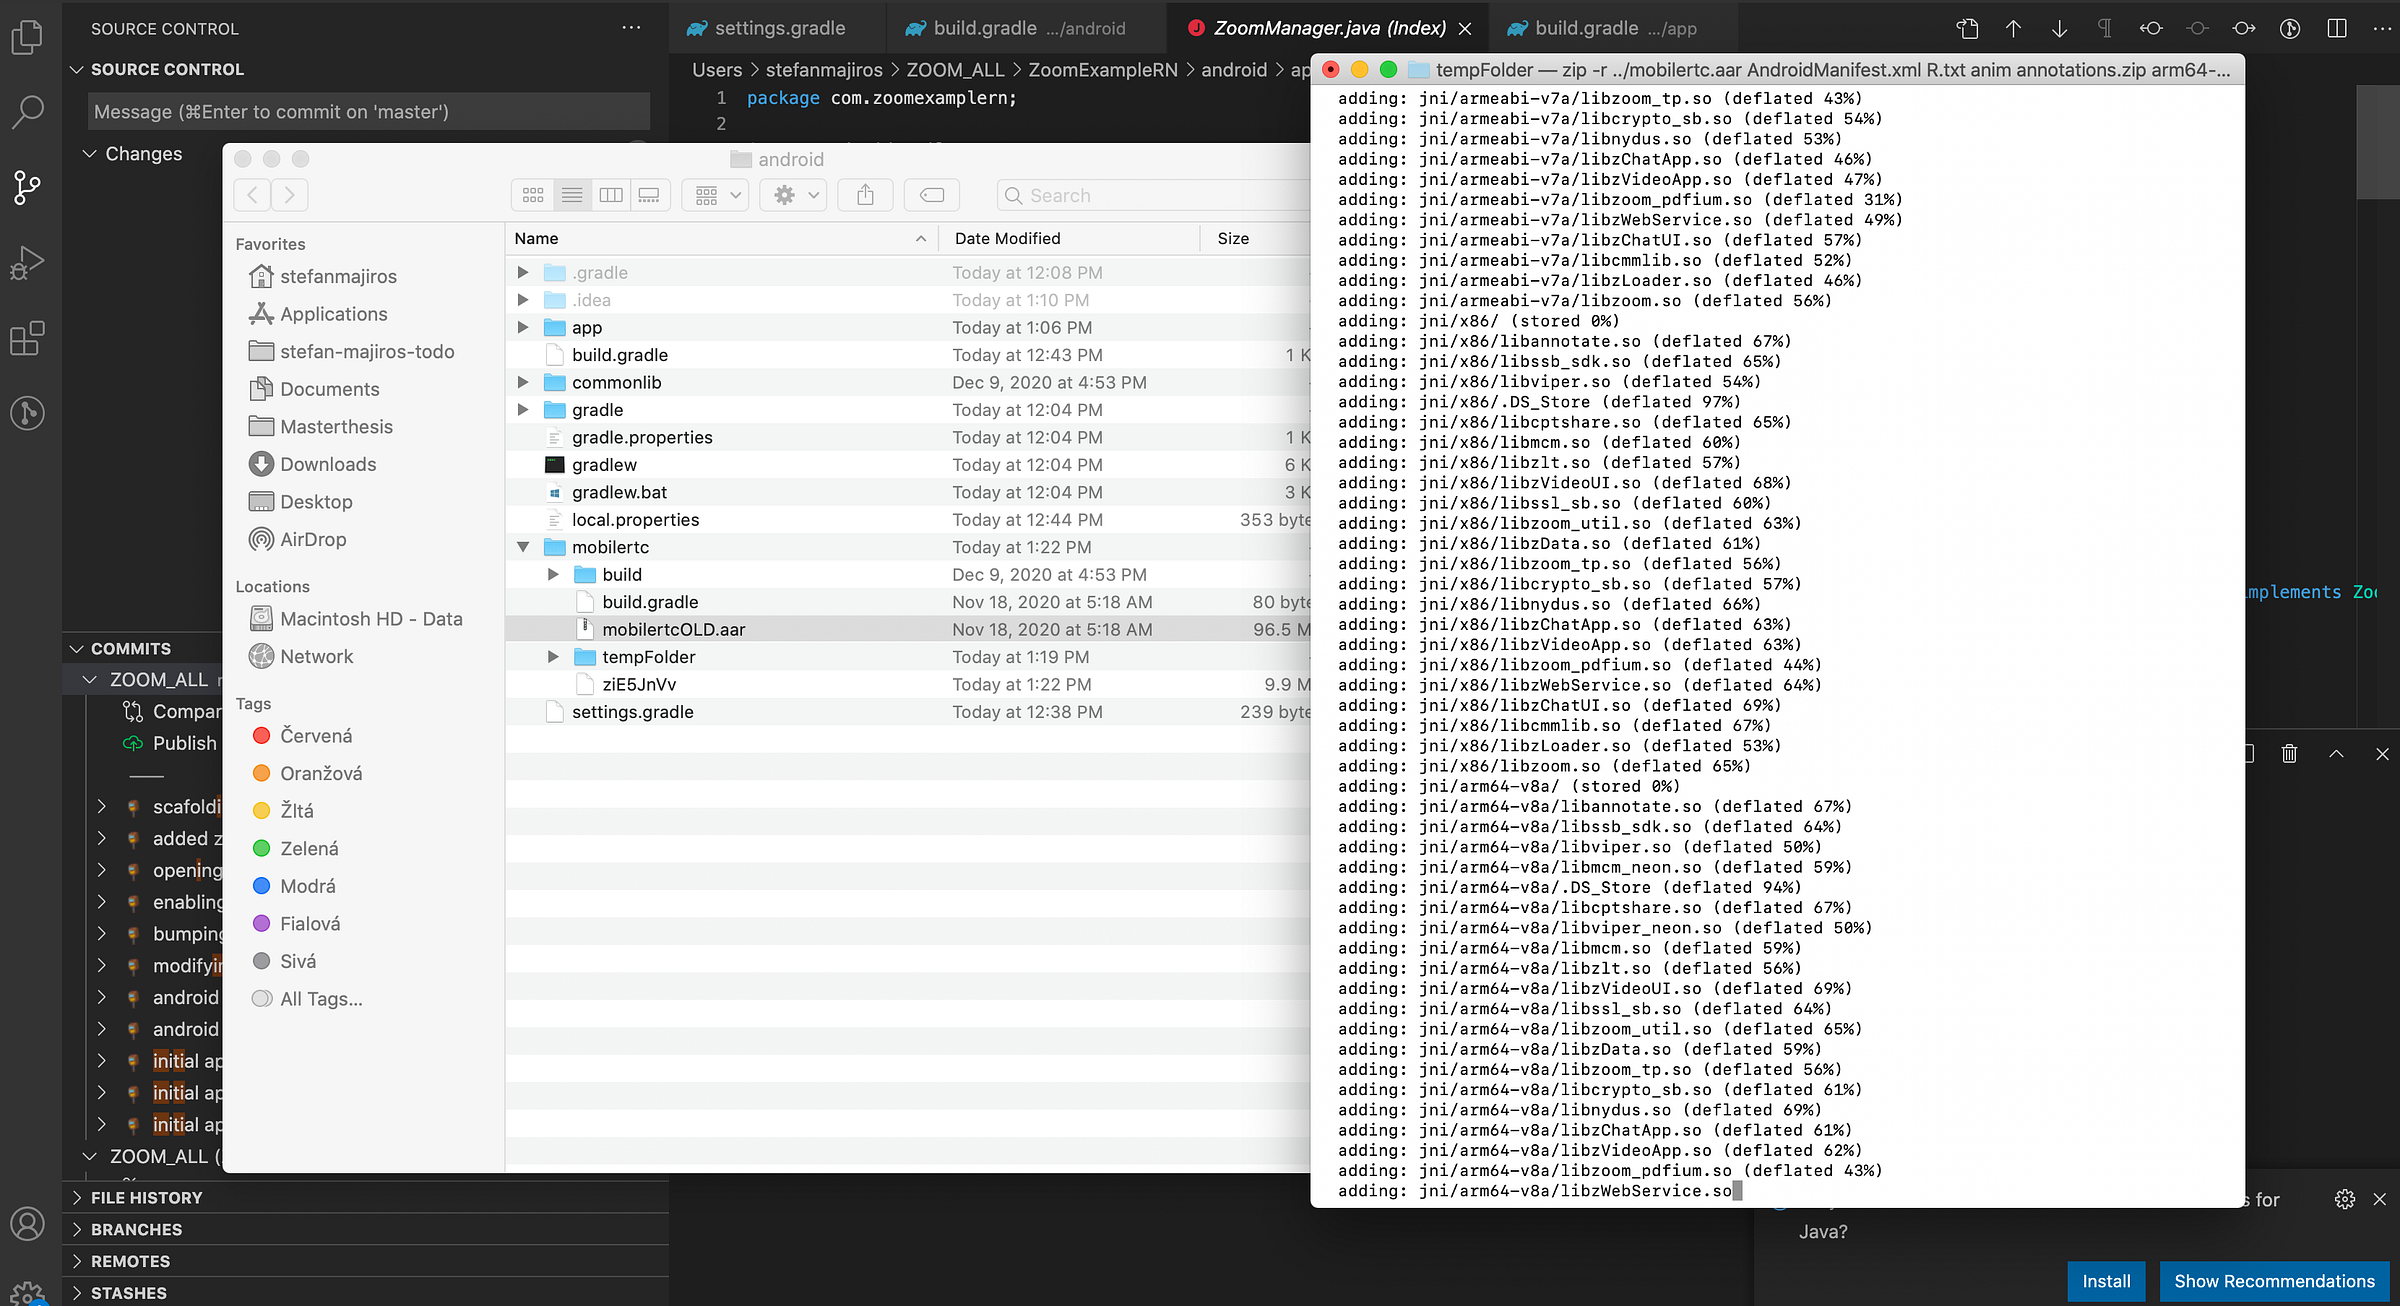
If we click on one architecture, e.g arm64-v8a, we can find one important file inside. The file that was causing problems. libc++_shared.so.
I decided to delete it.
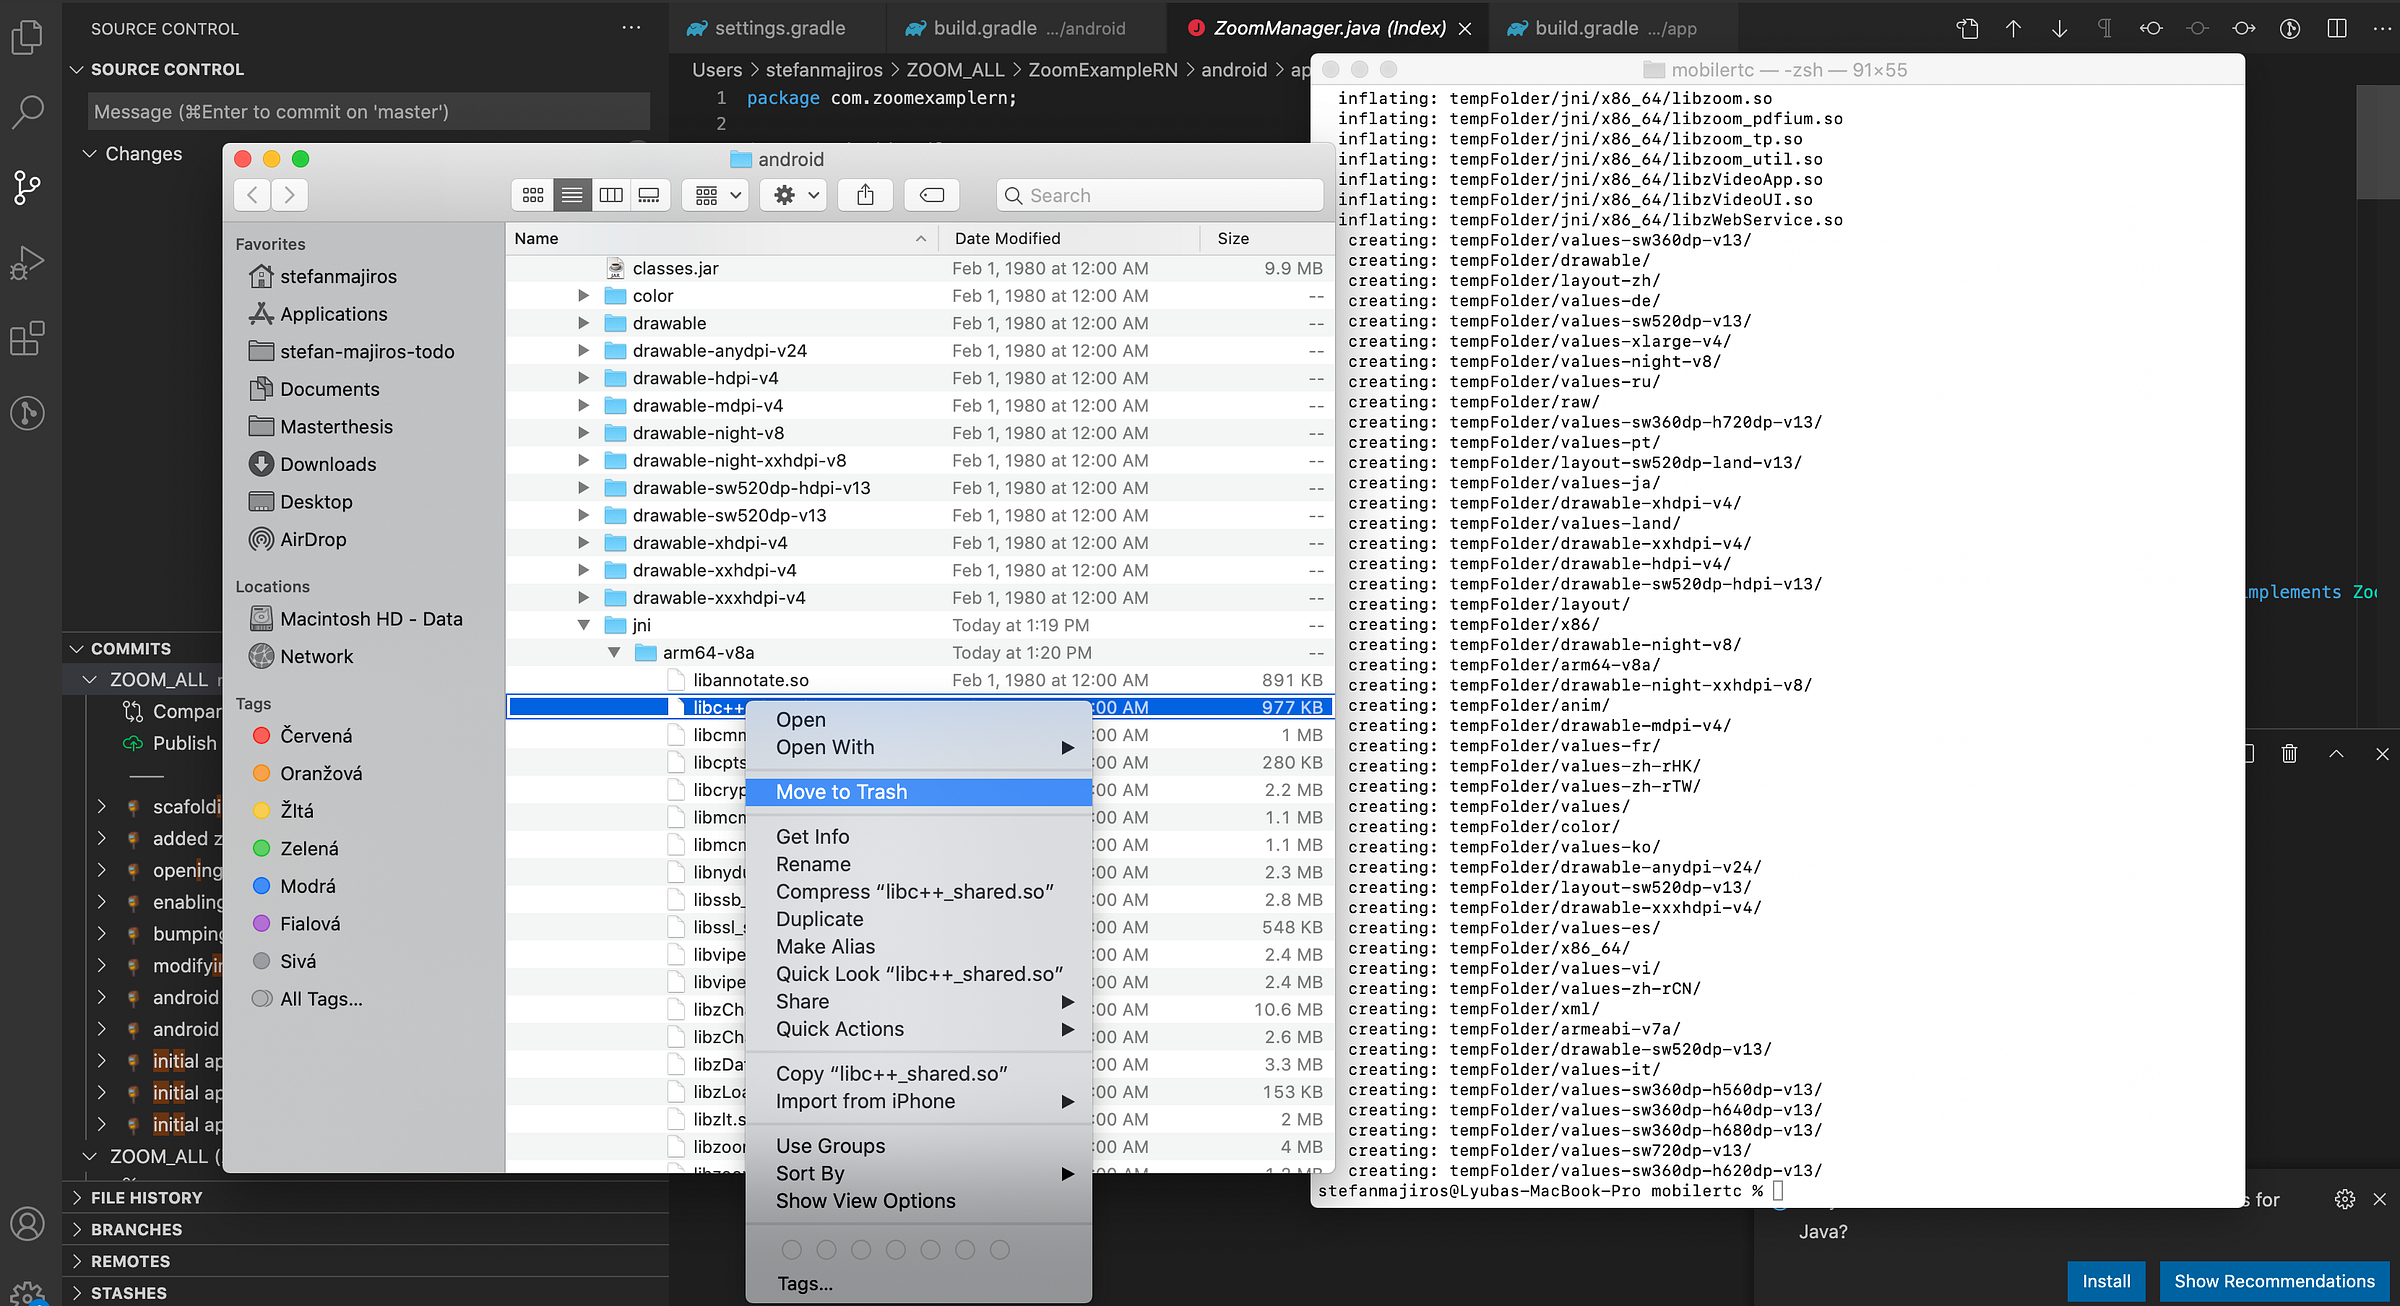
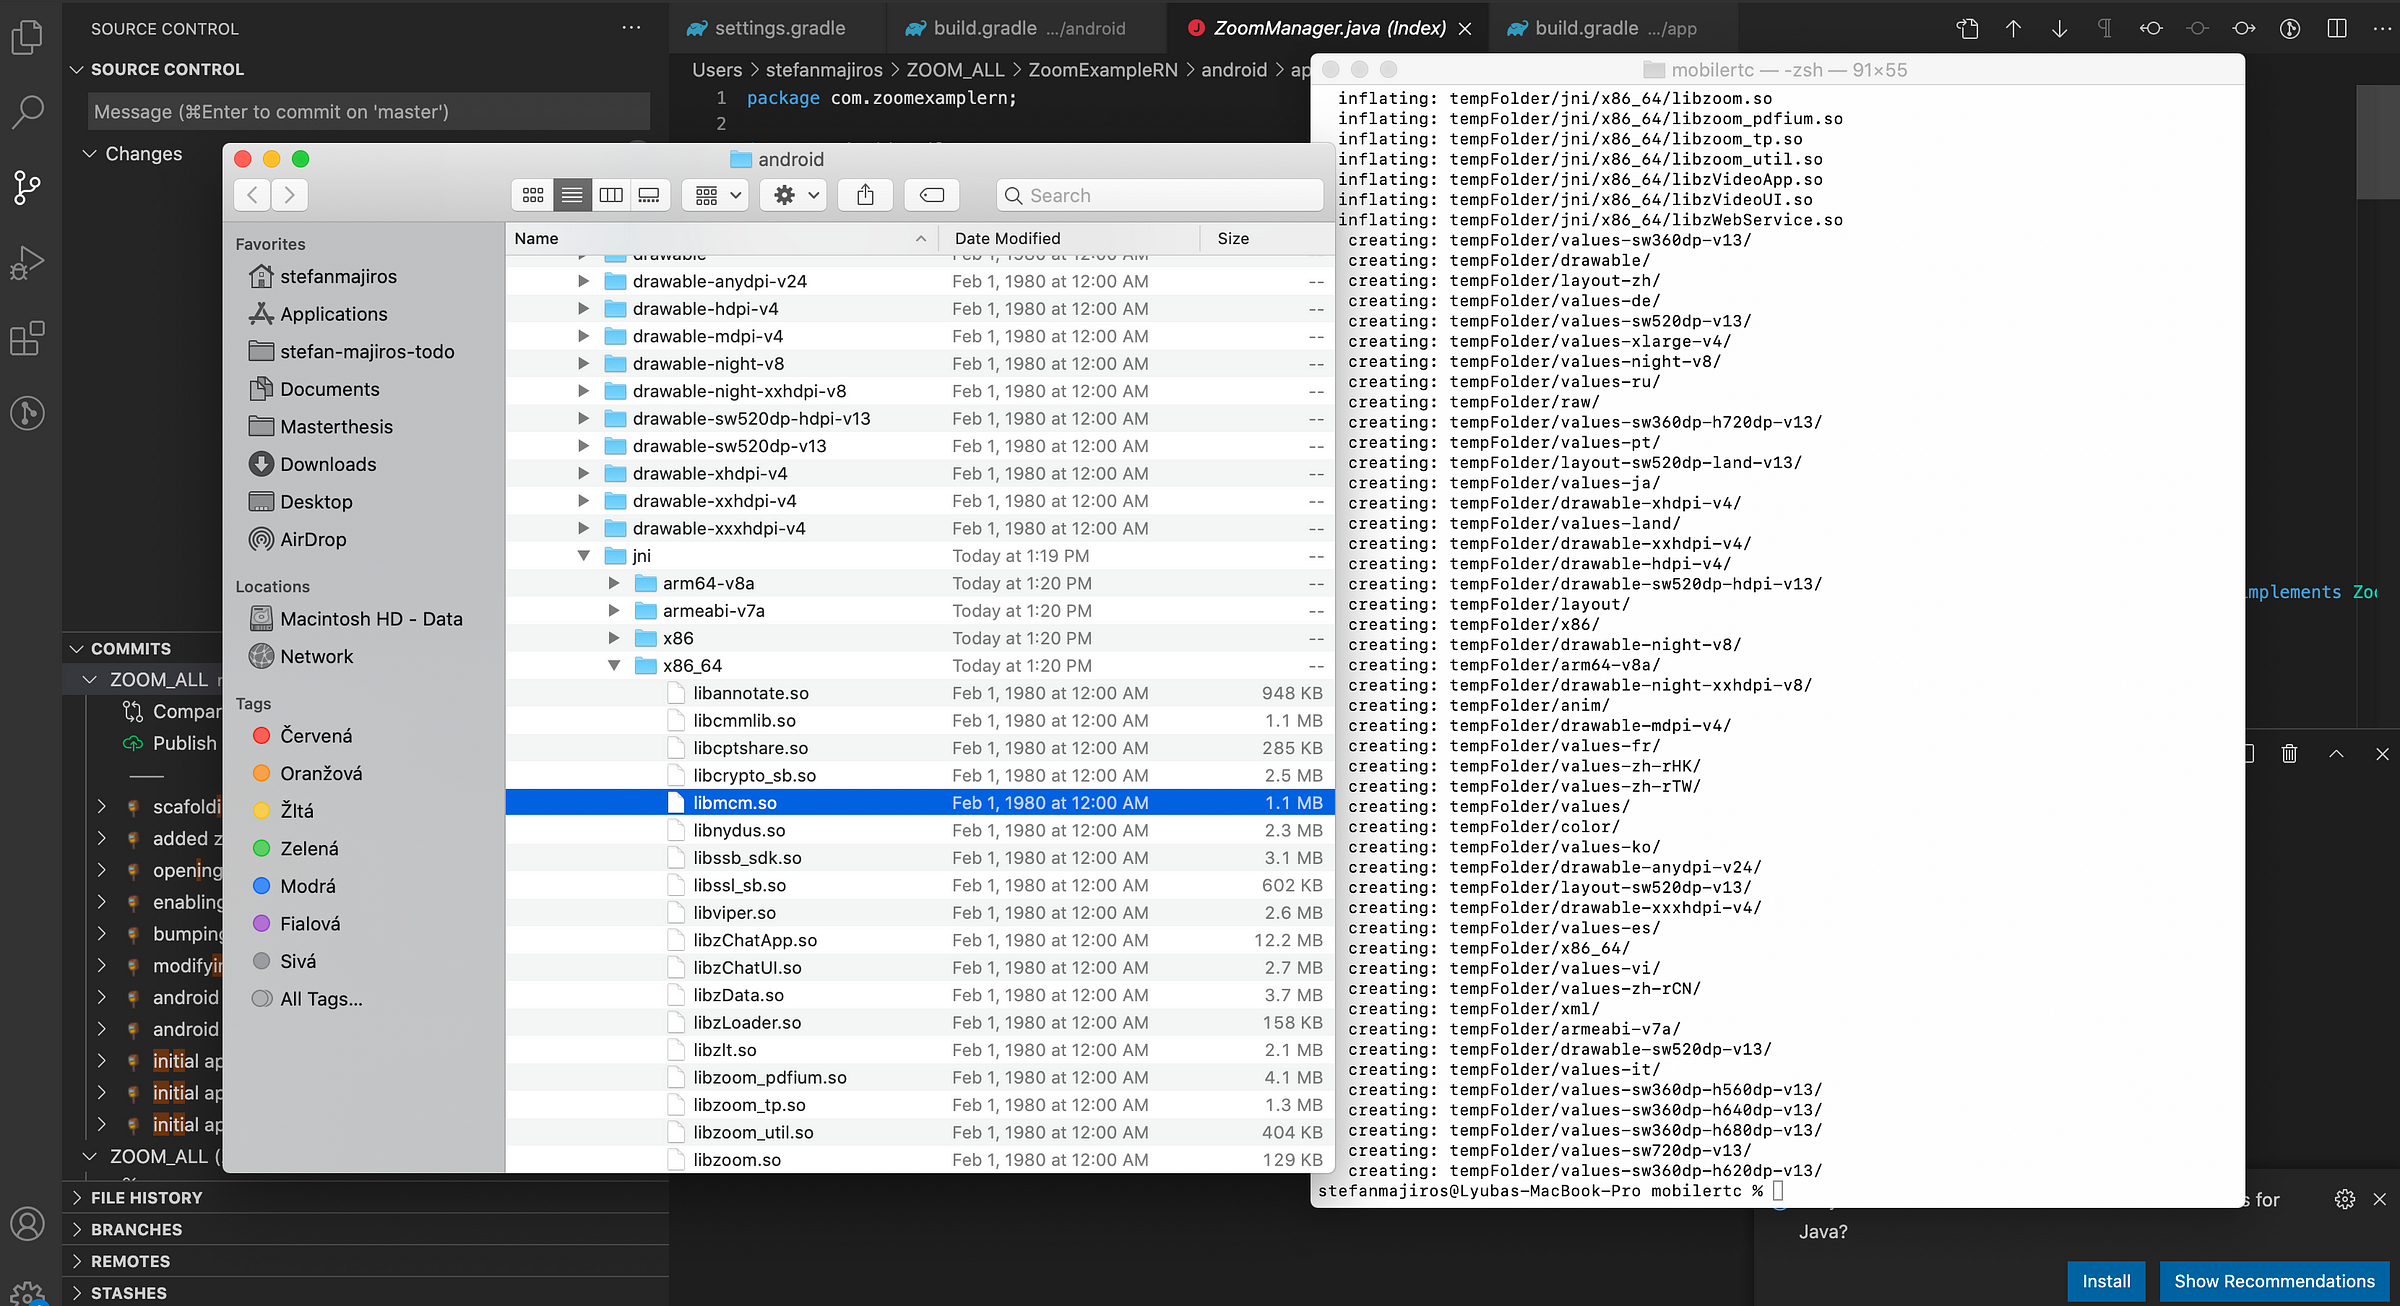
And I deleted it from the other architectures, so in the end, mobilertc.aar will not contain any libc++shared.so files.
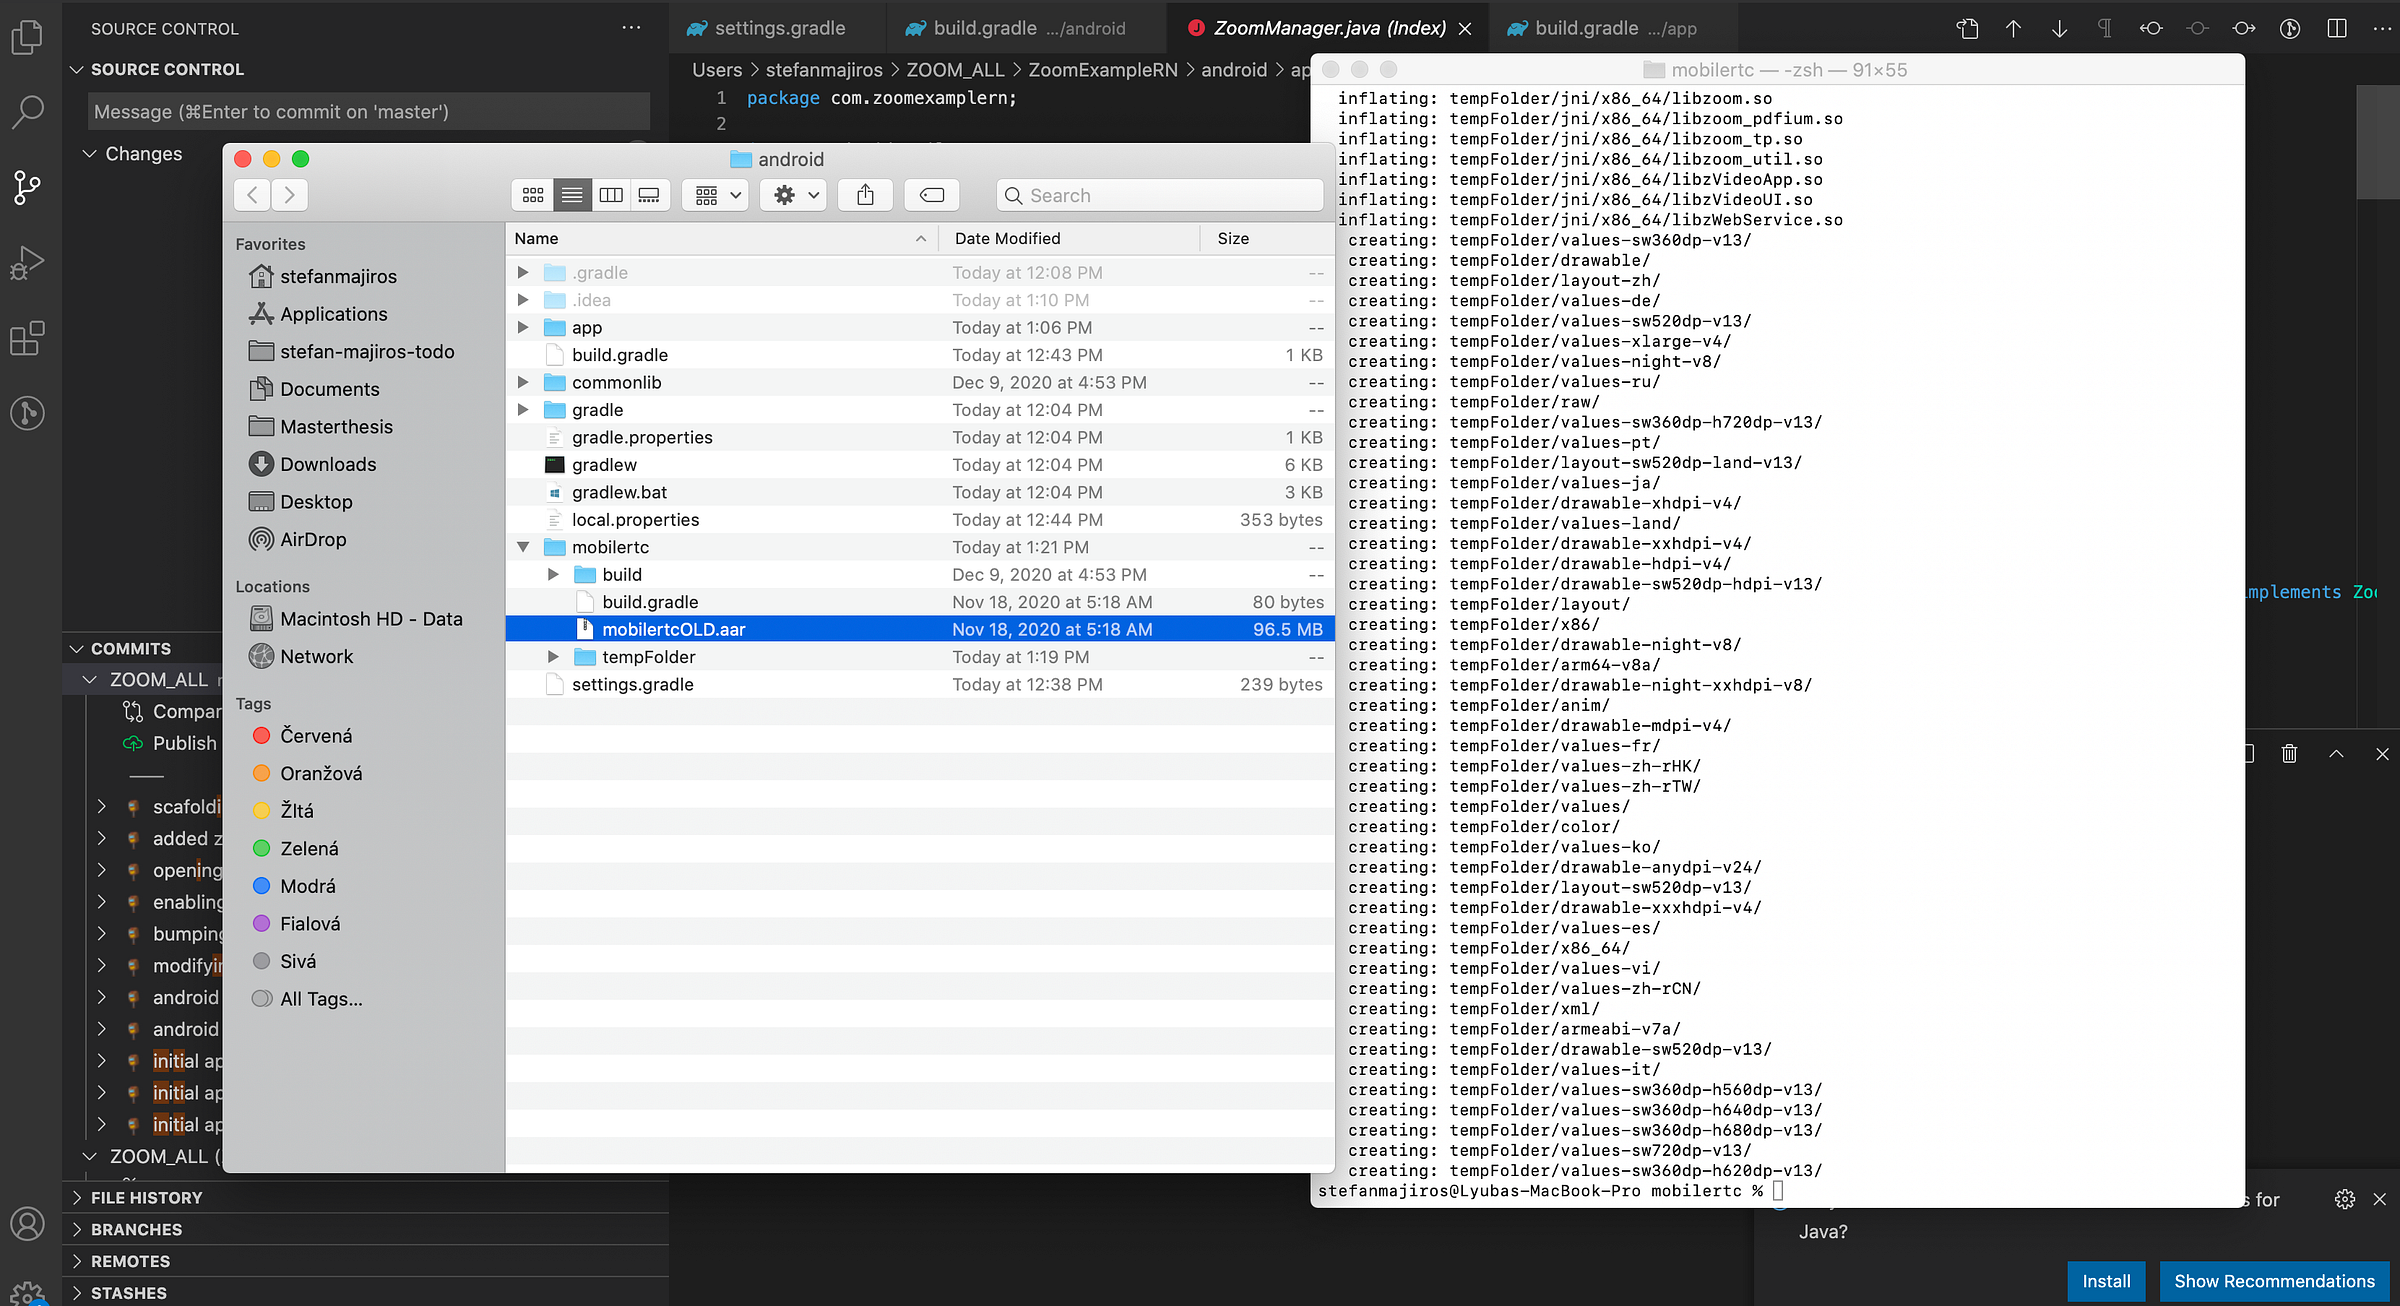
Then, let’s rename the original mobilertc.aar (as backup if something went wrong).
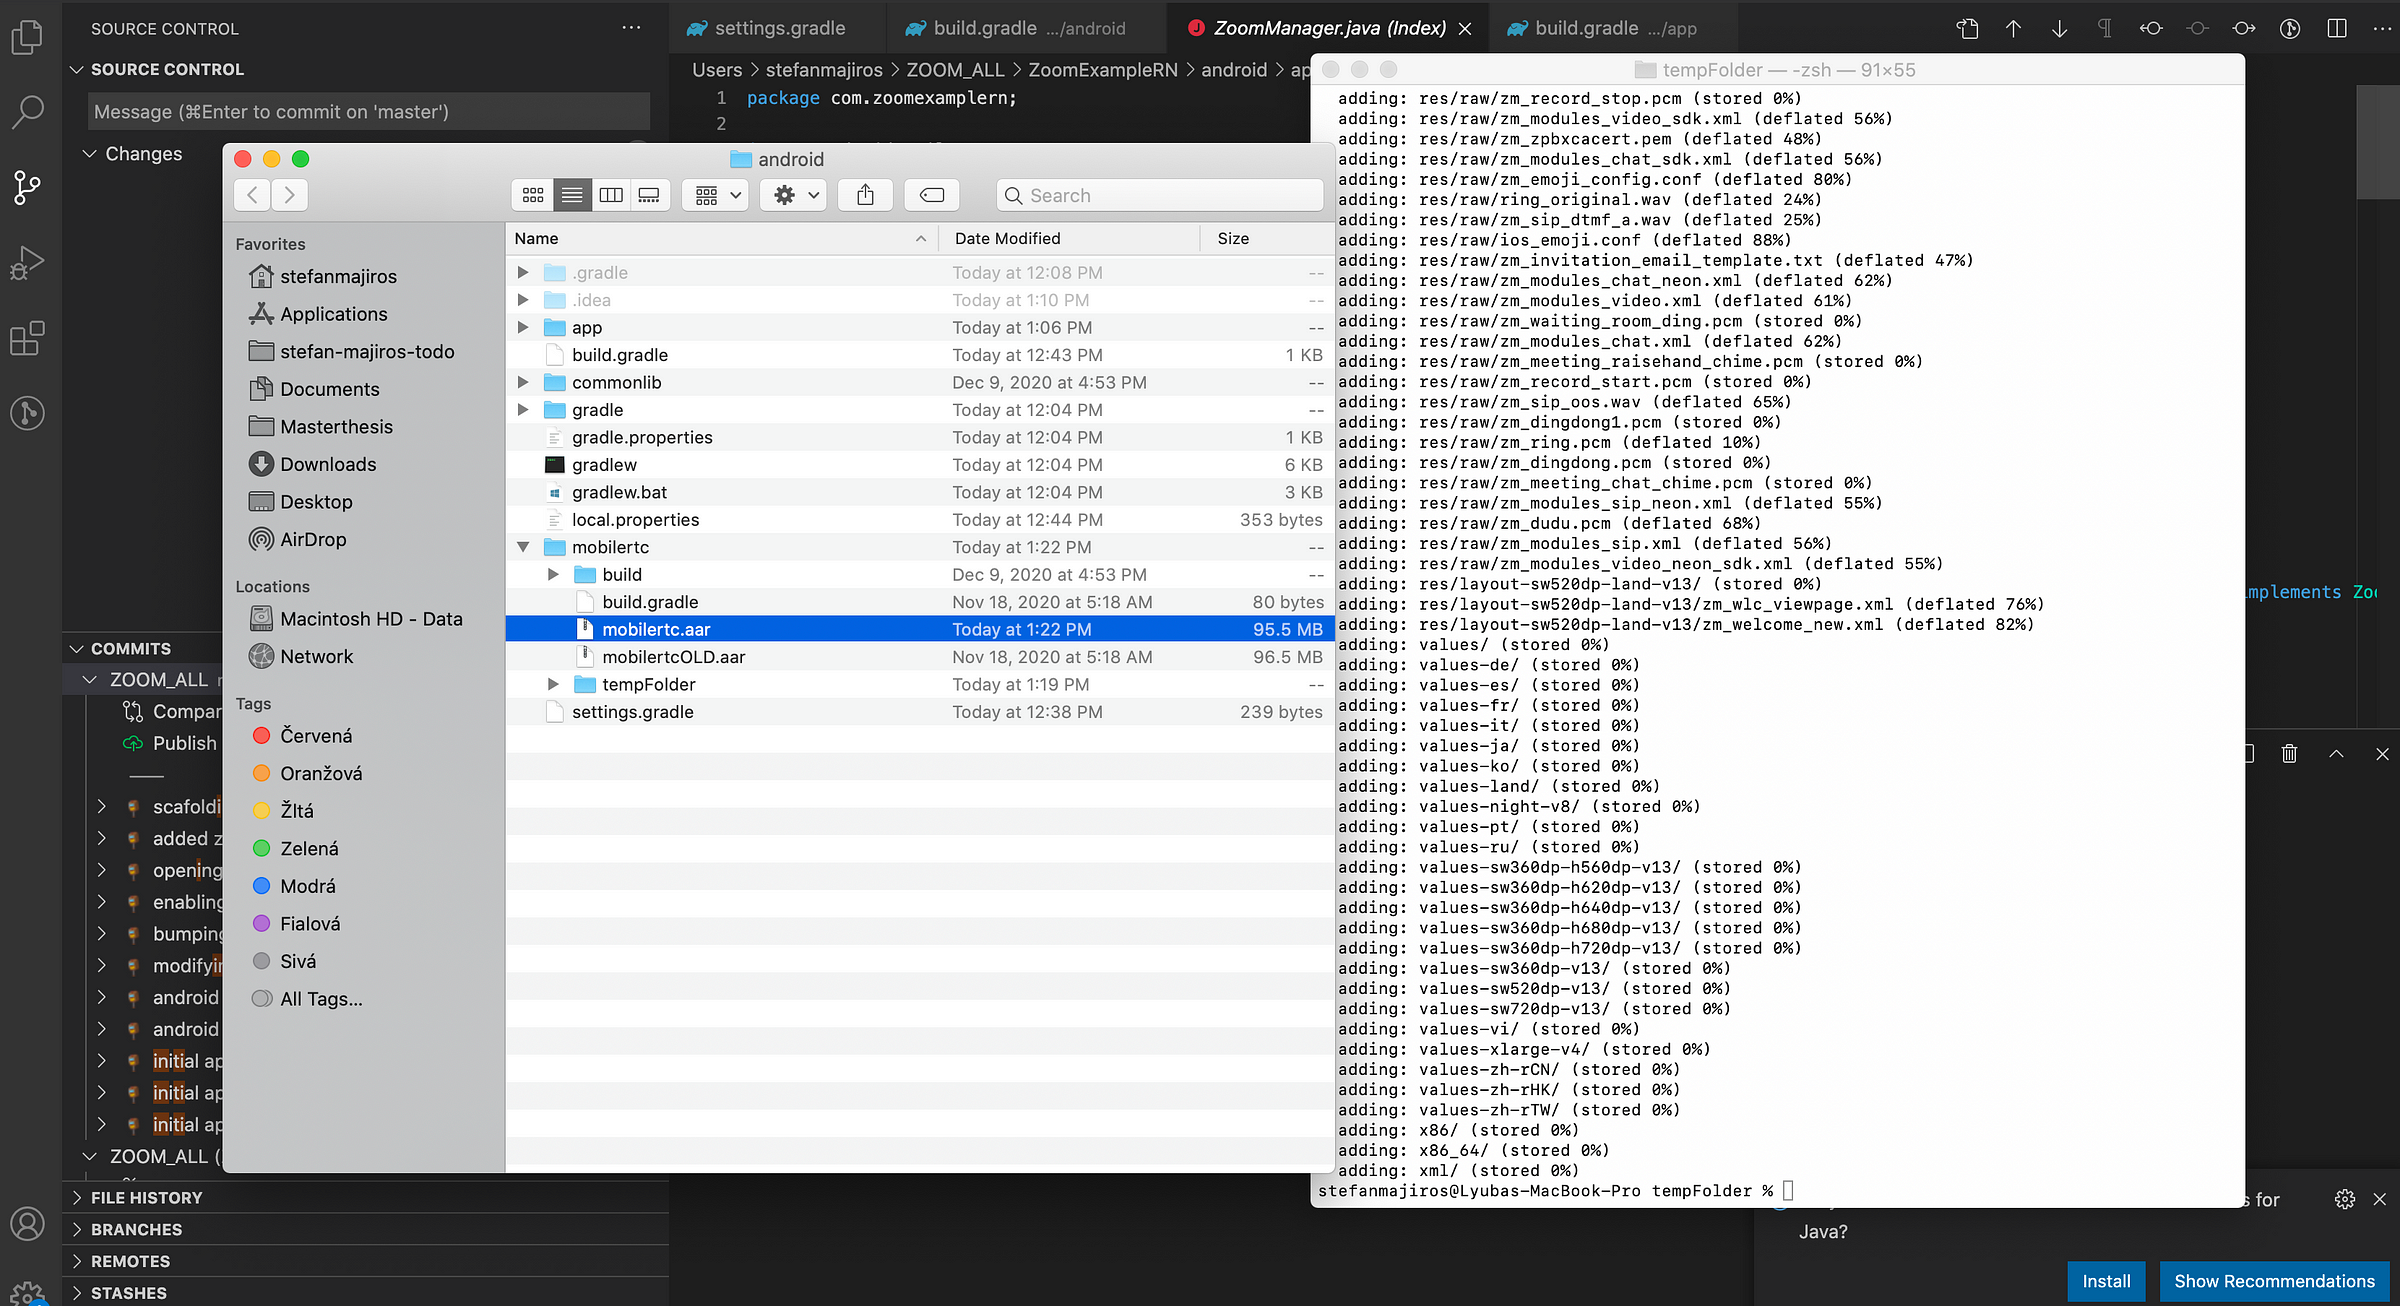
After, we will just need to repack tempFolder into folder that is called “mobilertc.aar”. See the command below, in bottom right corner of the picture.
Btw, this is how the repacking of .aar files looks like.
Voila. After repacking, now we have mobilertc.aar that does not contain any libshared.so files.
Let’s compile the app.
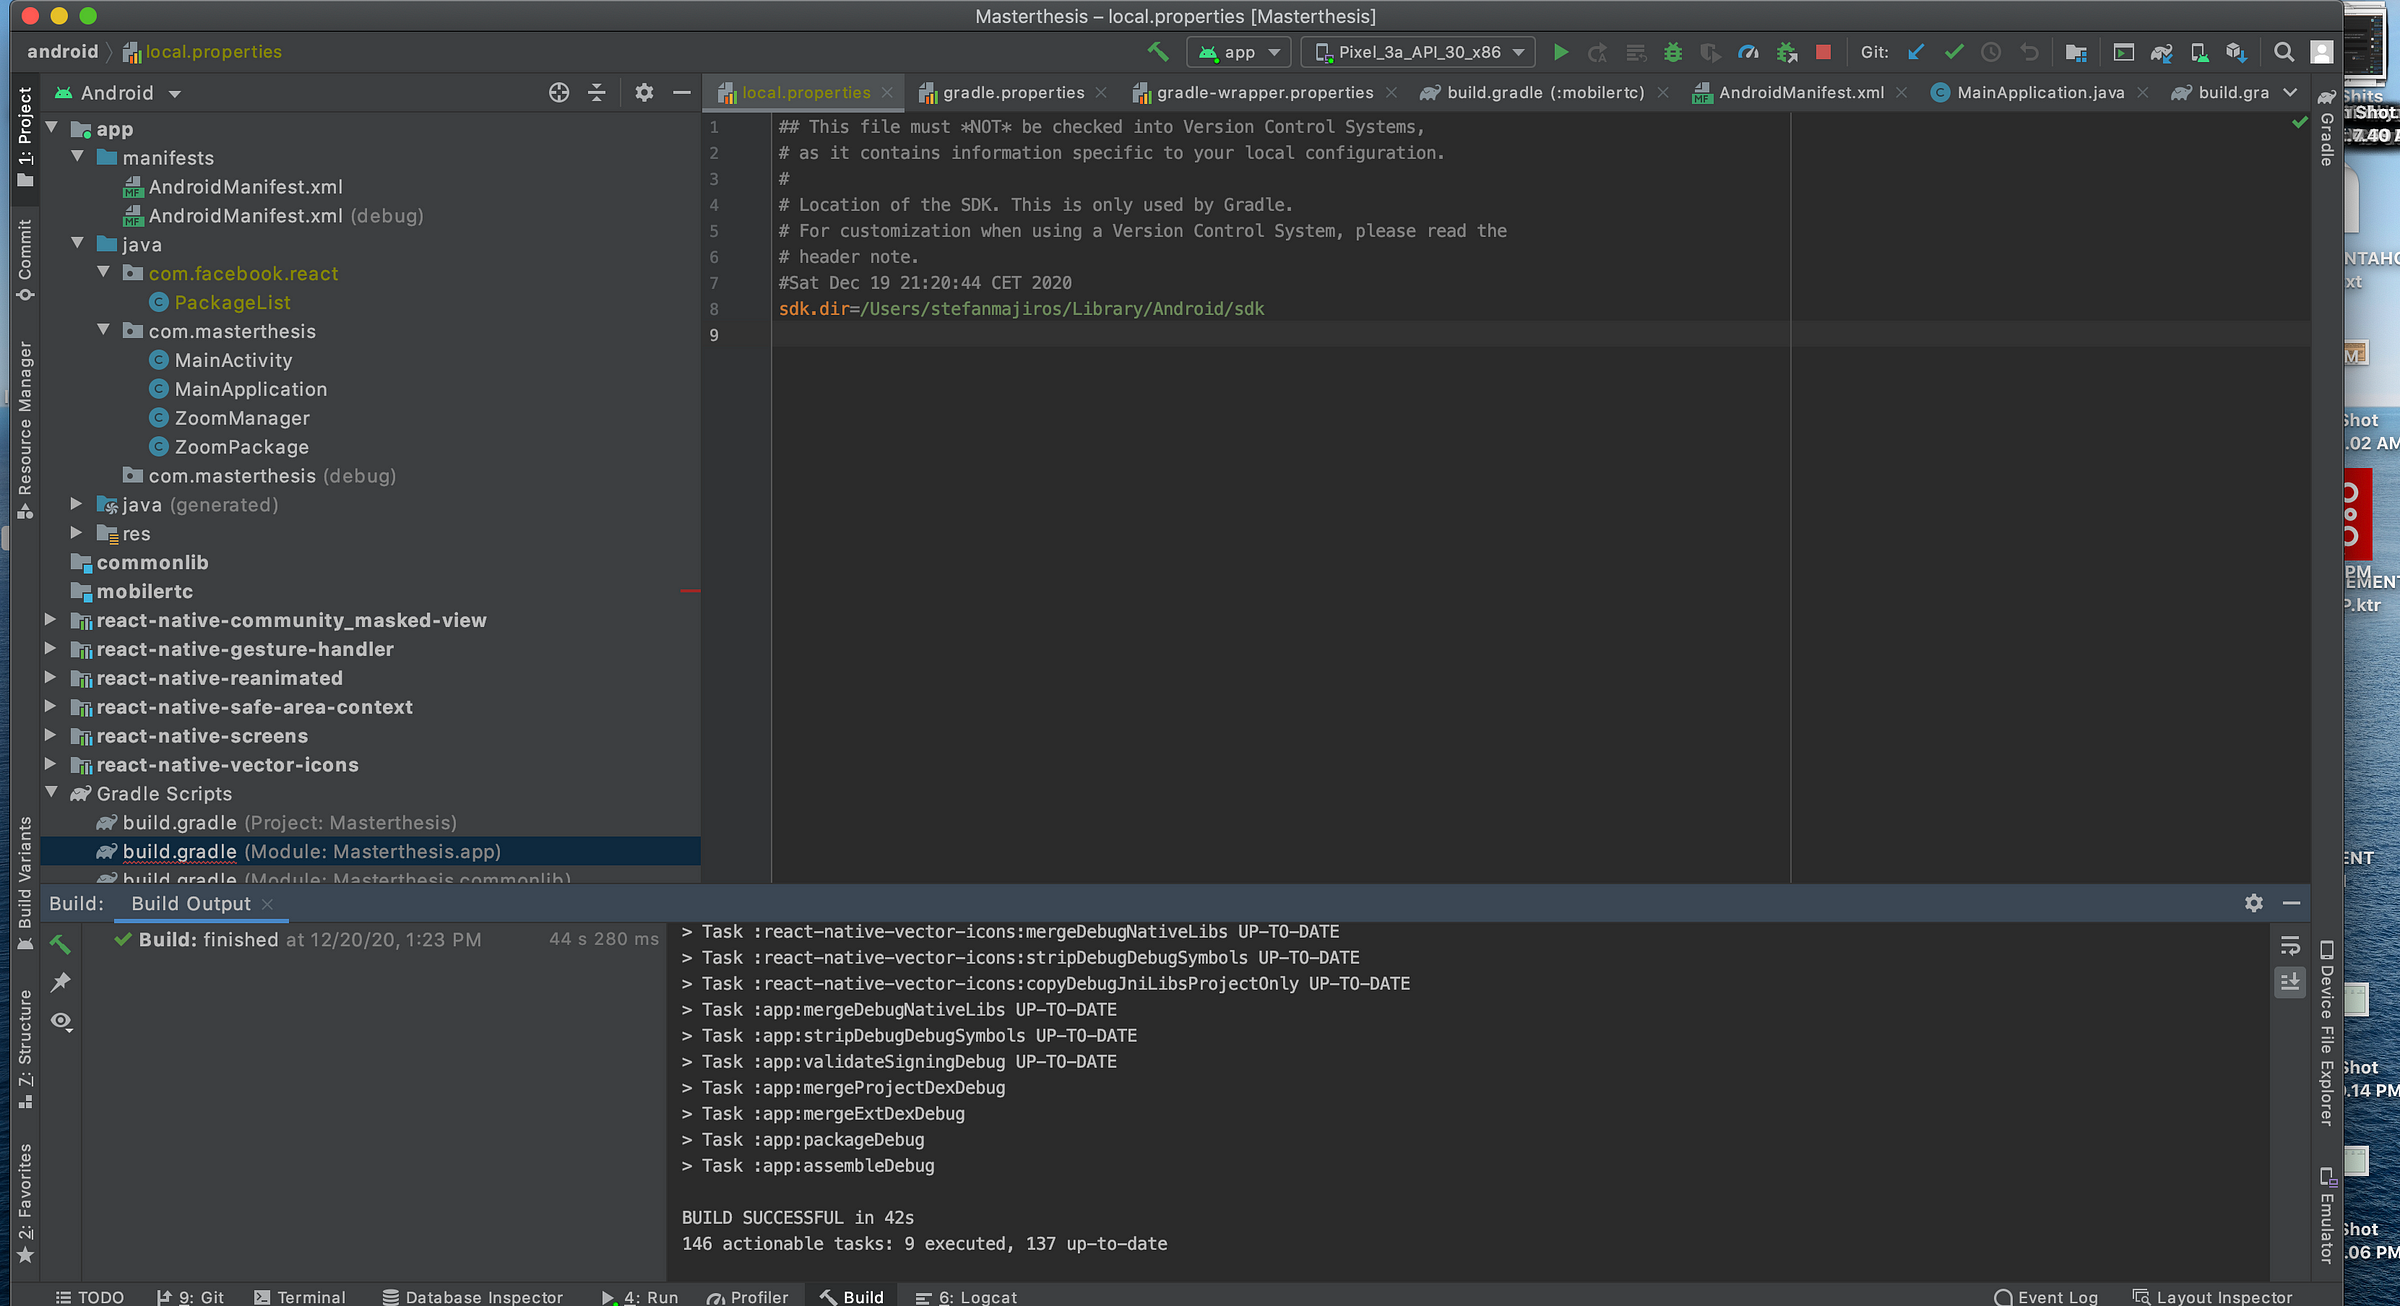
Wohoo, It runs!
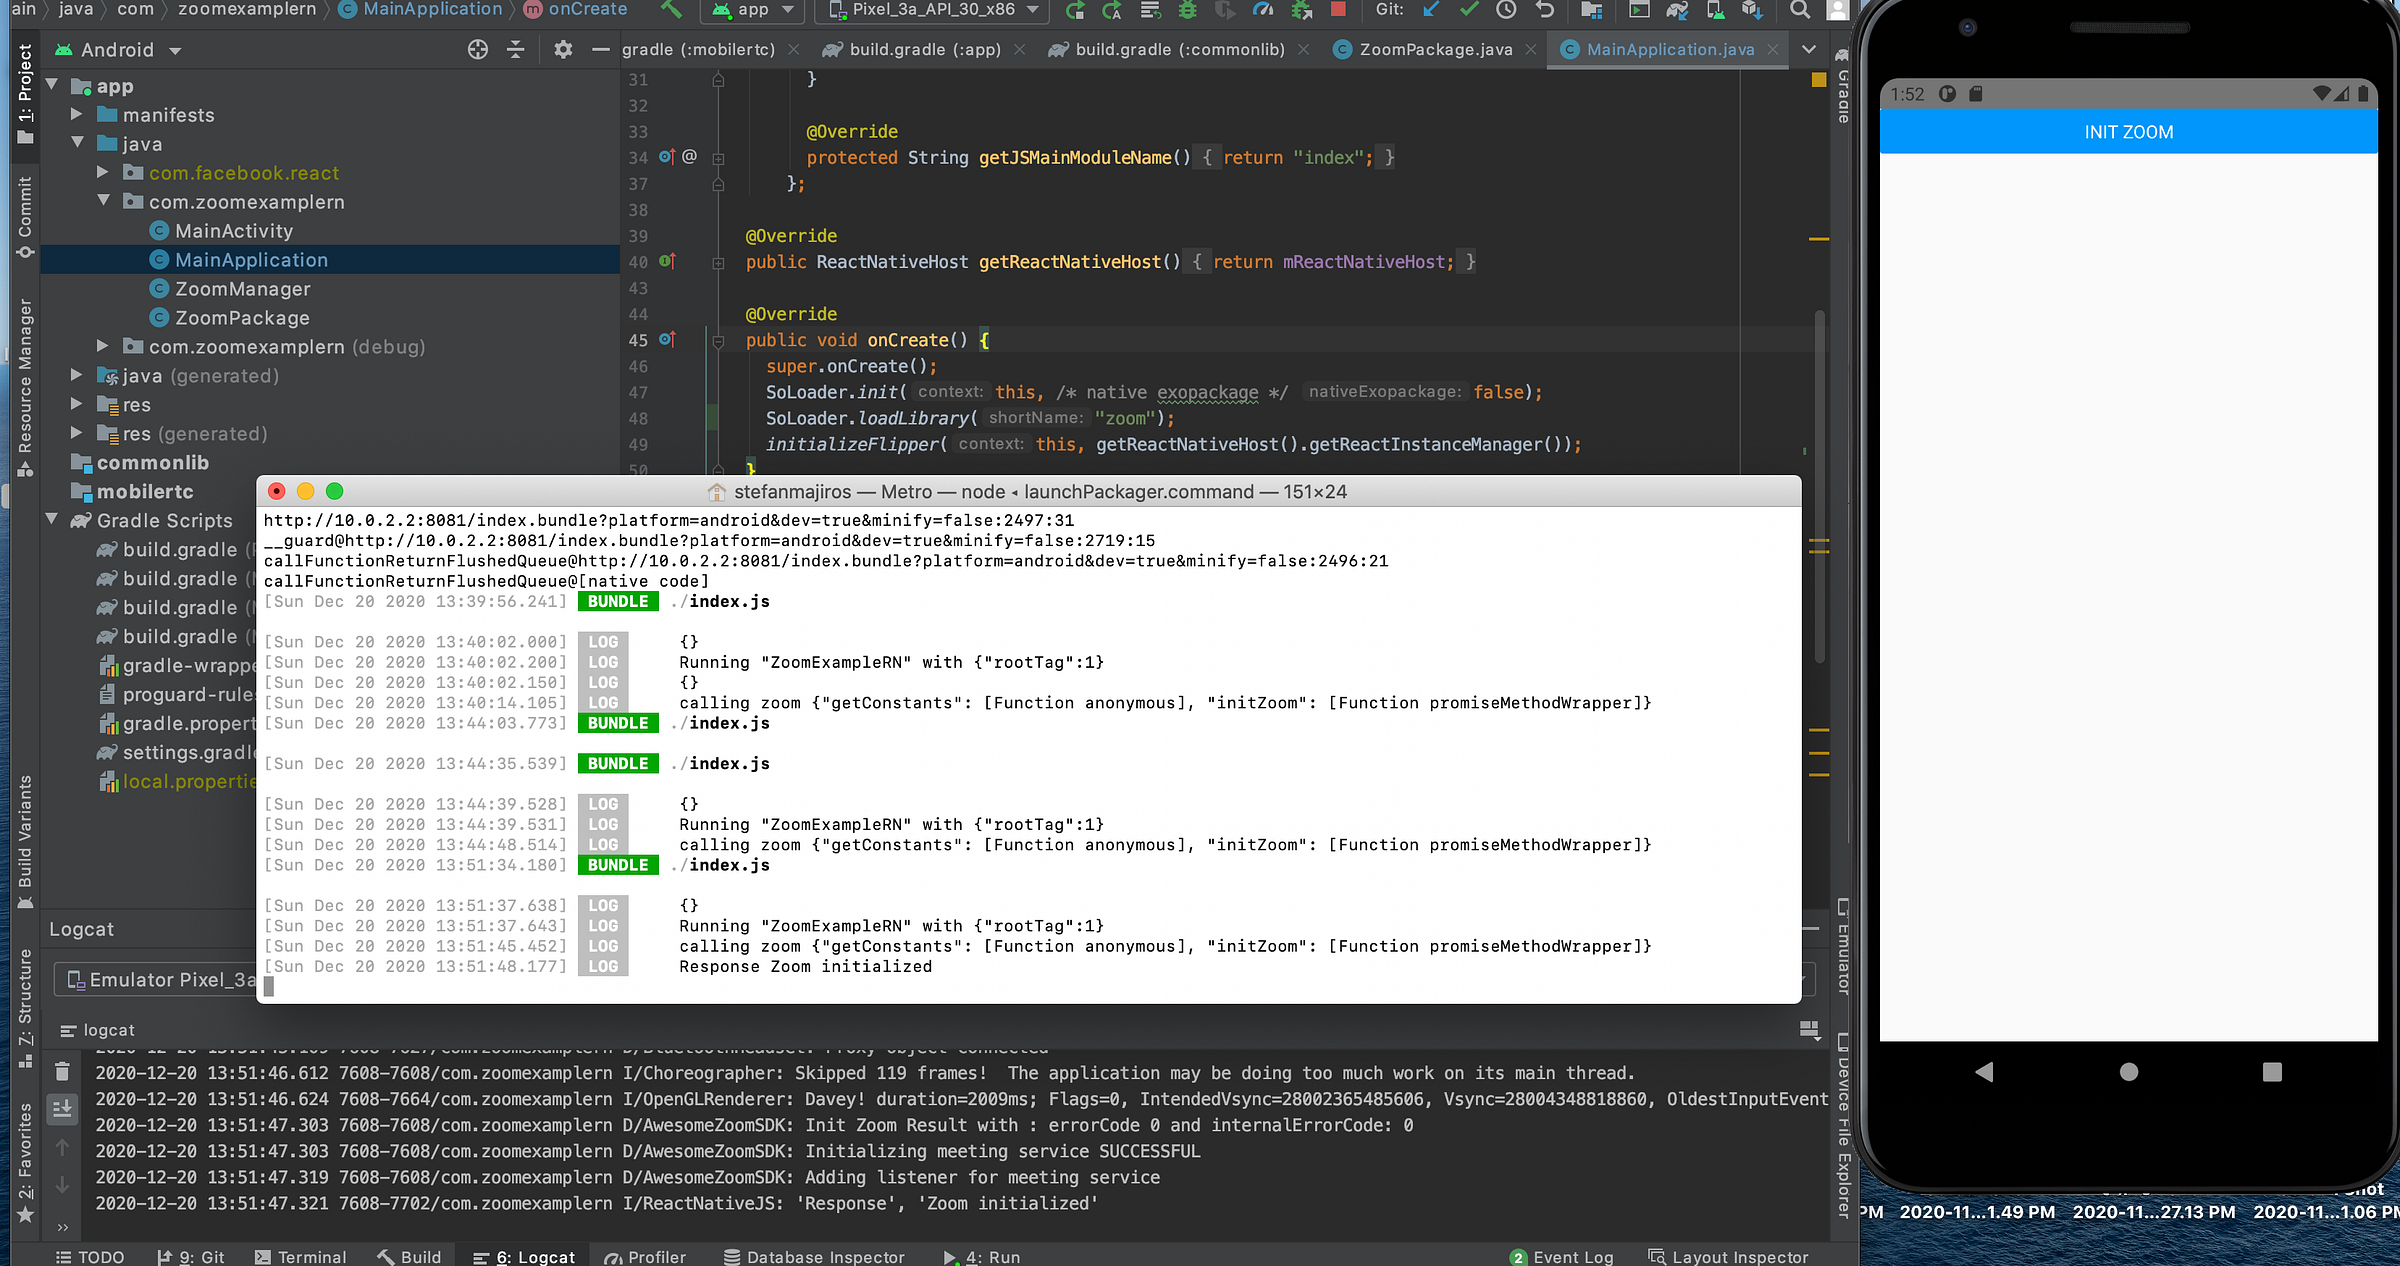
Now, let’s implement JS parts. We start with creating file, that will wrap all ZoomSDK functionality.
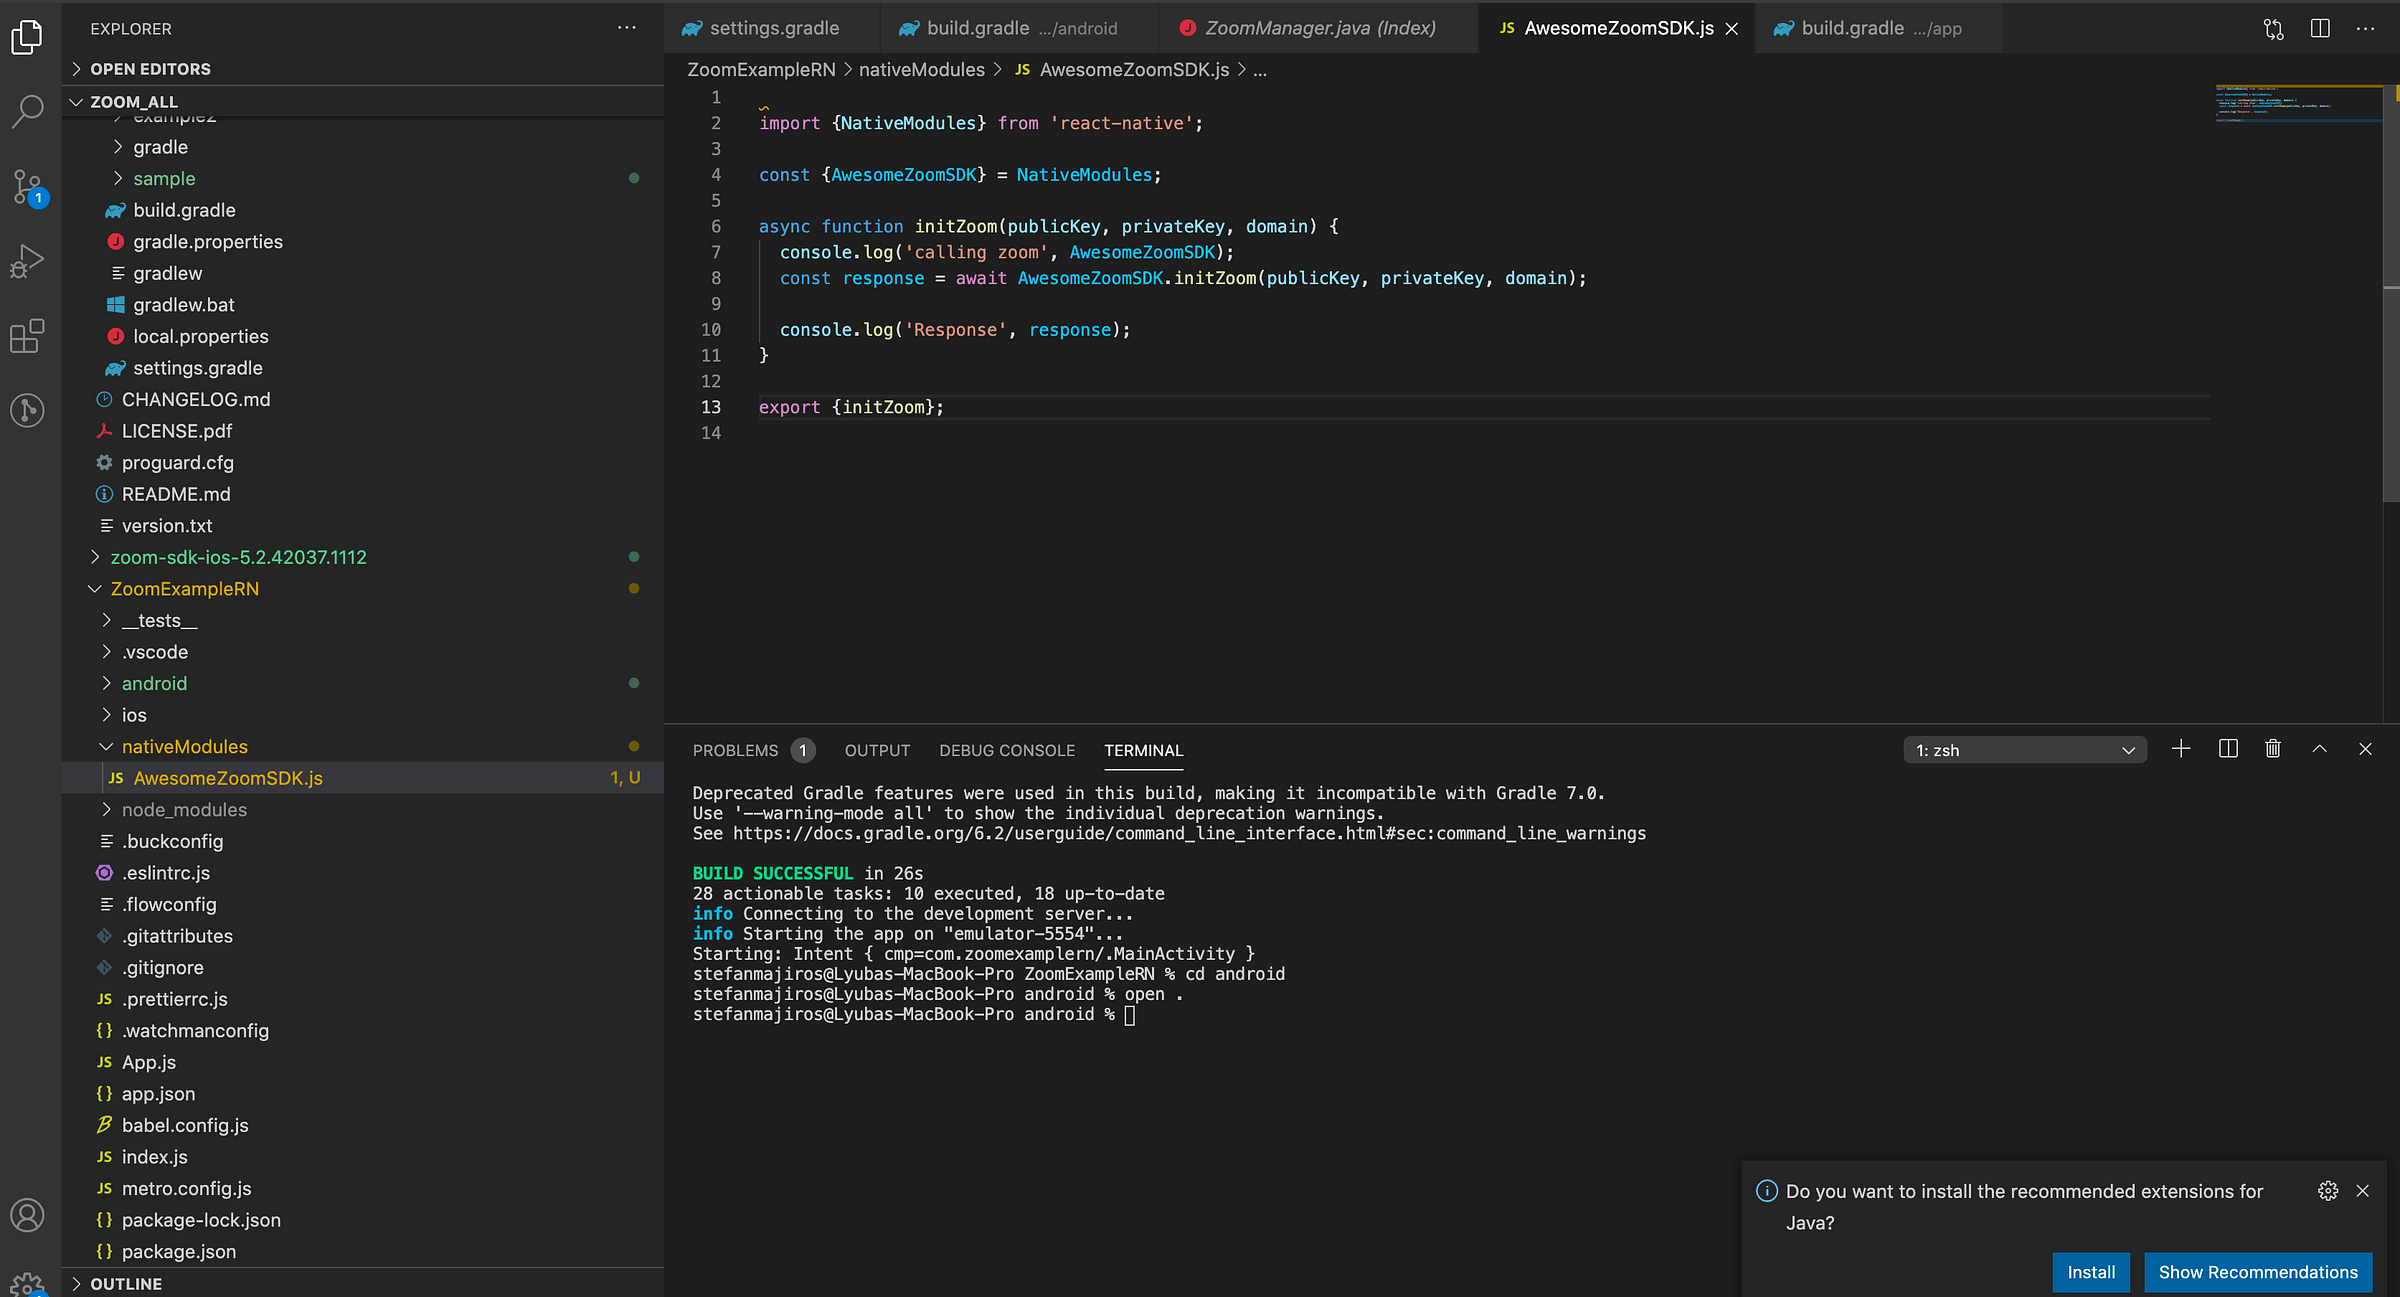
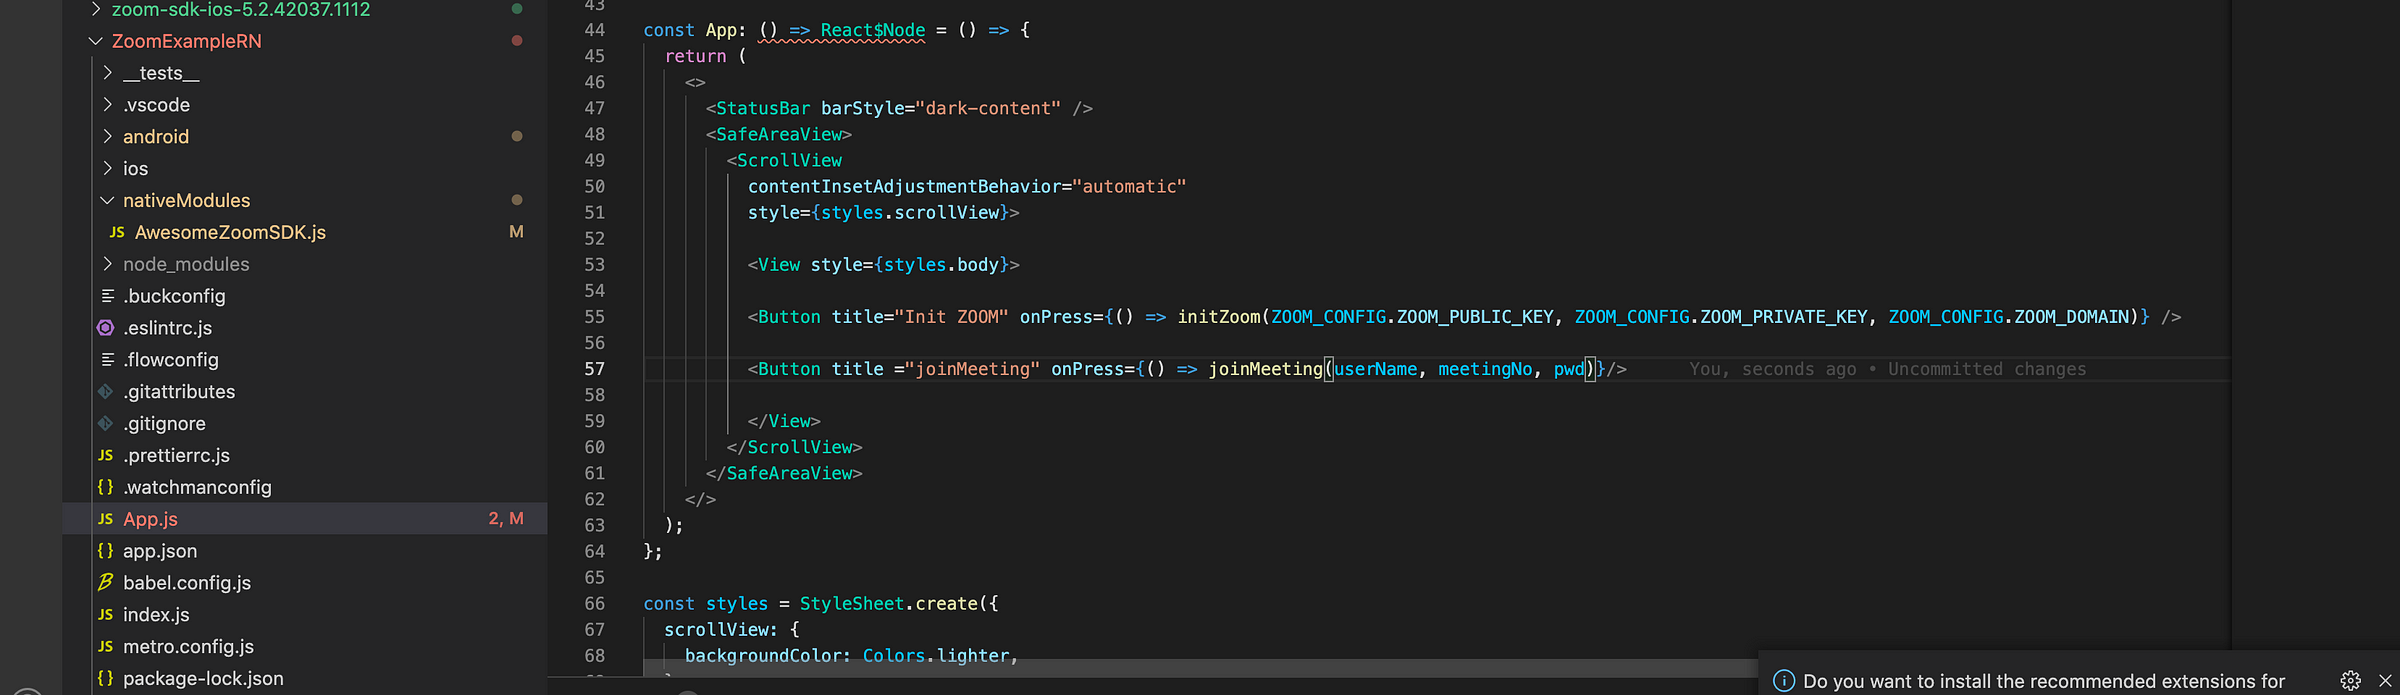
Then, we create just simple button that will call the function initZoom. Let’s test this button.
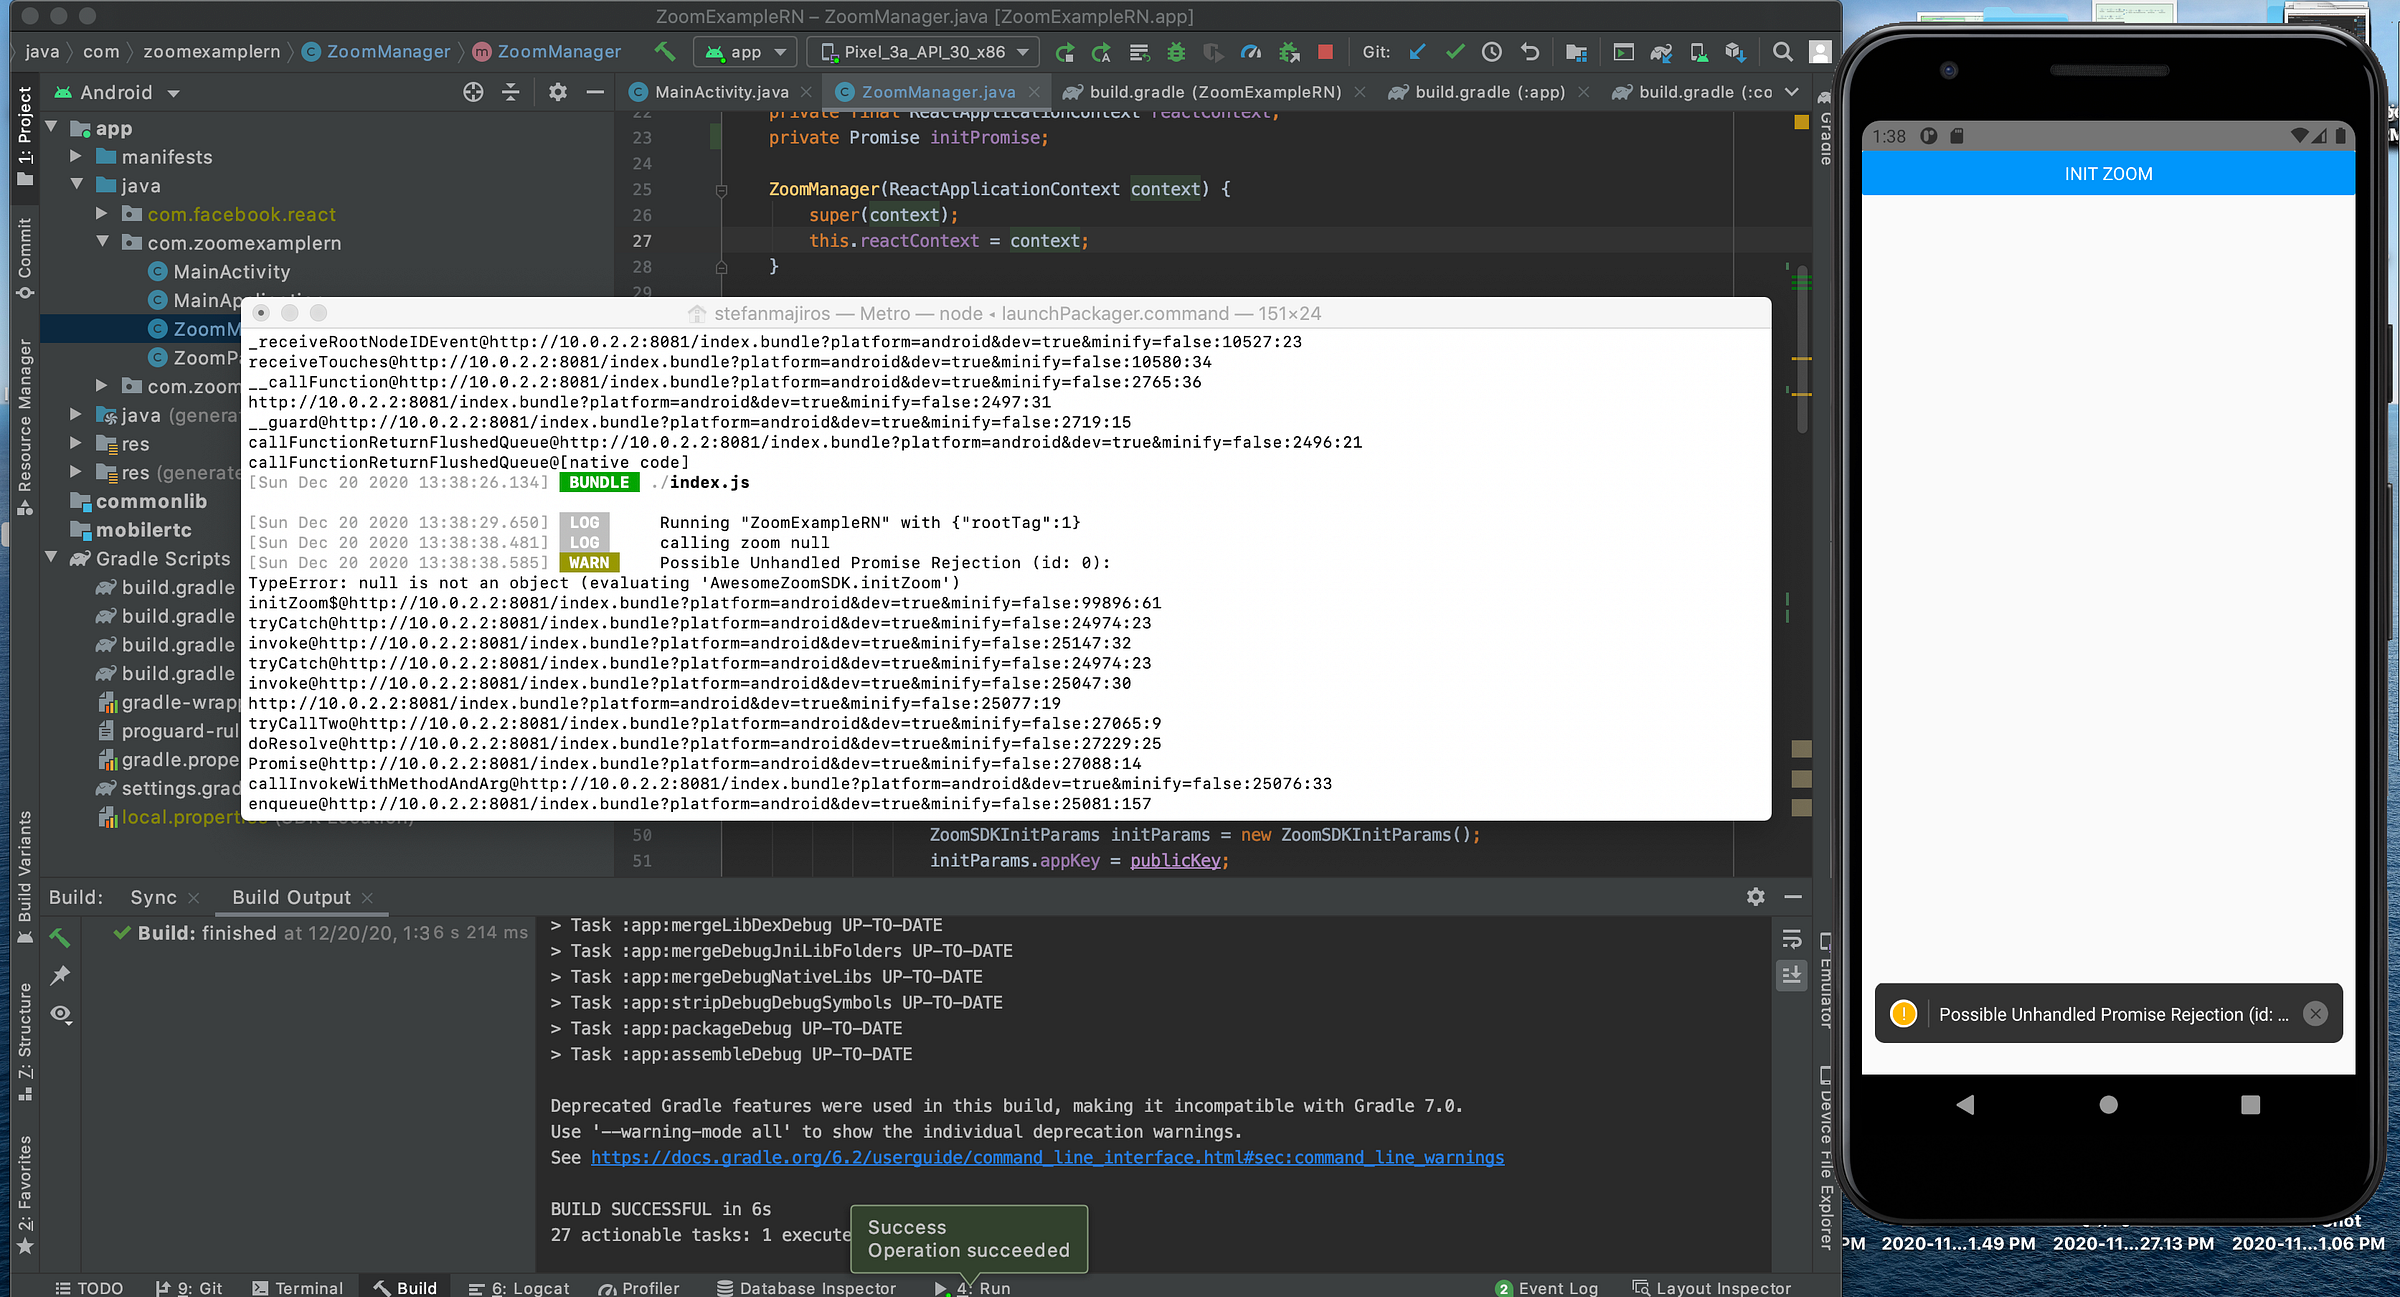
Aaa, I forgot this.
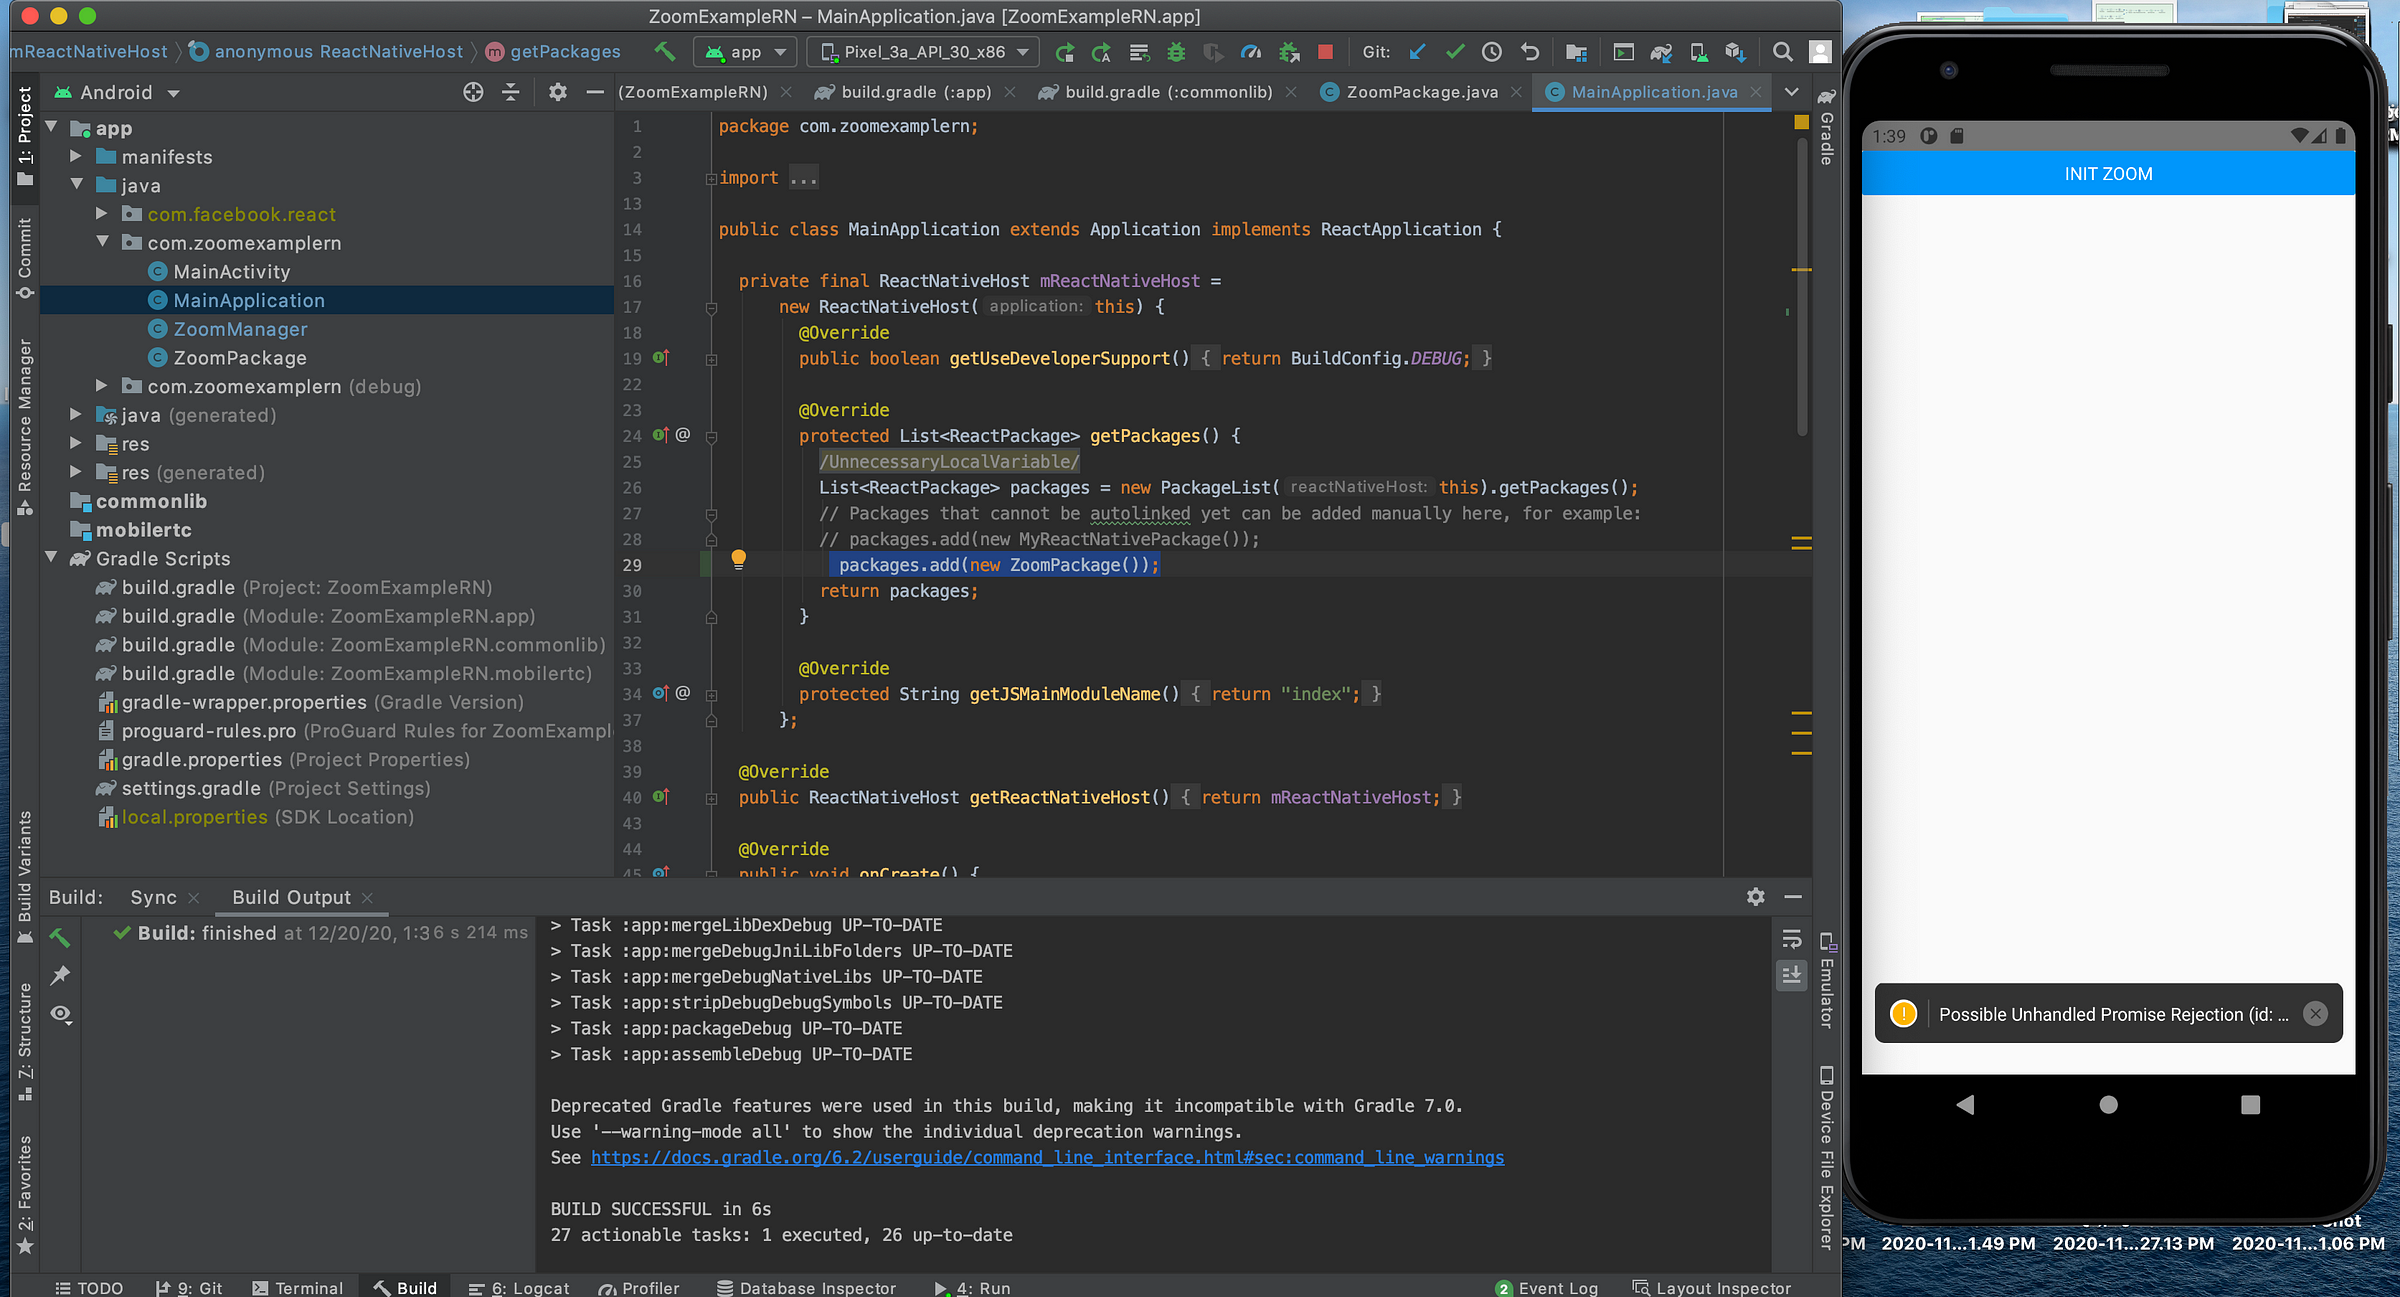
So, let’s recompile and test. Ou, now different error after clicking the button.
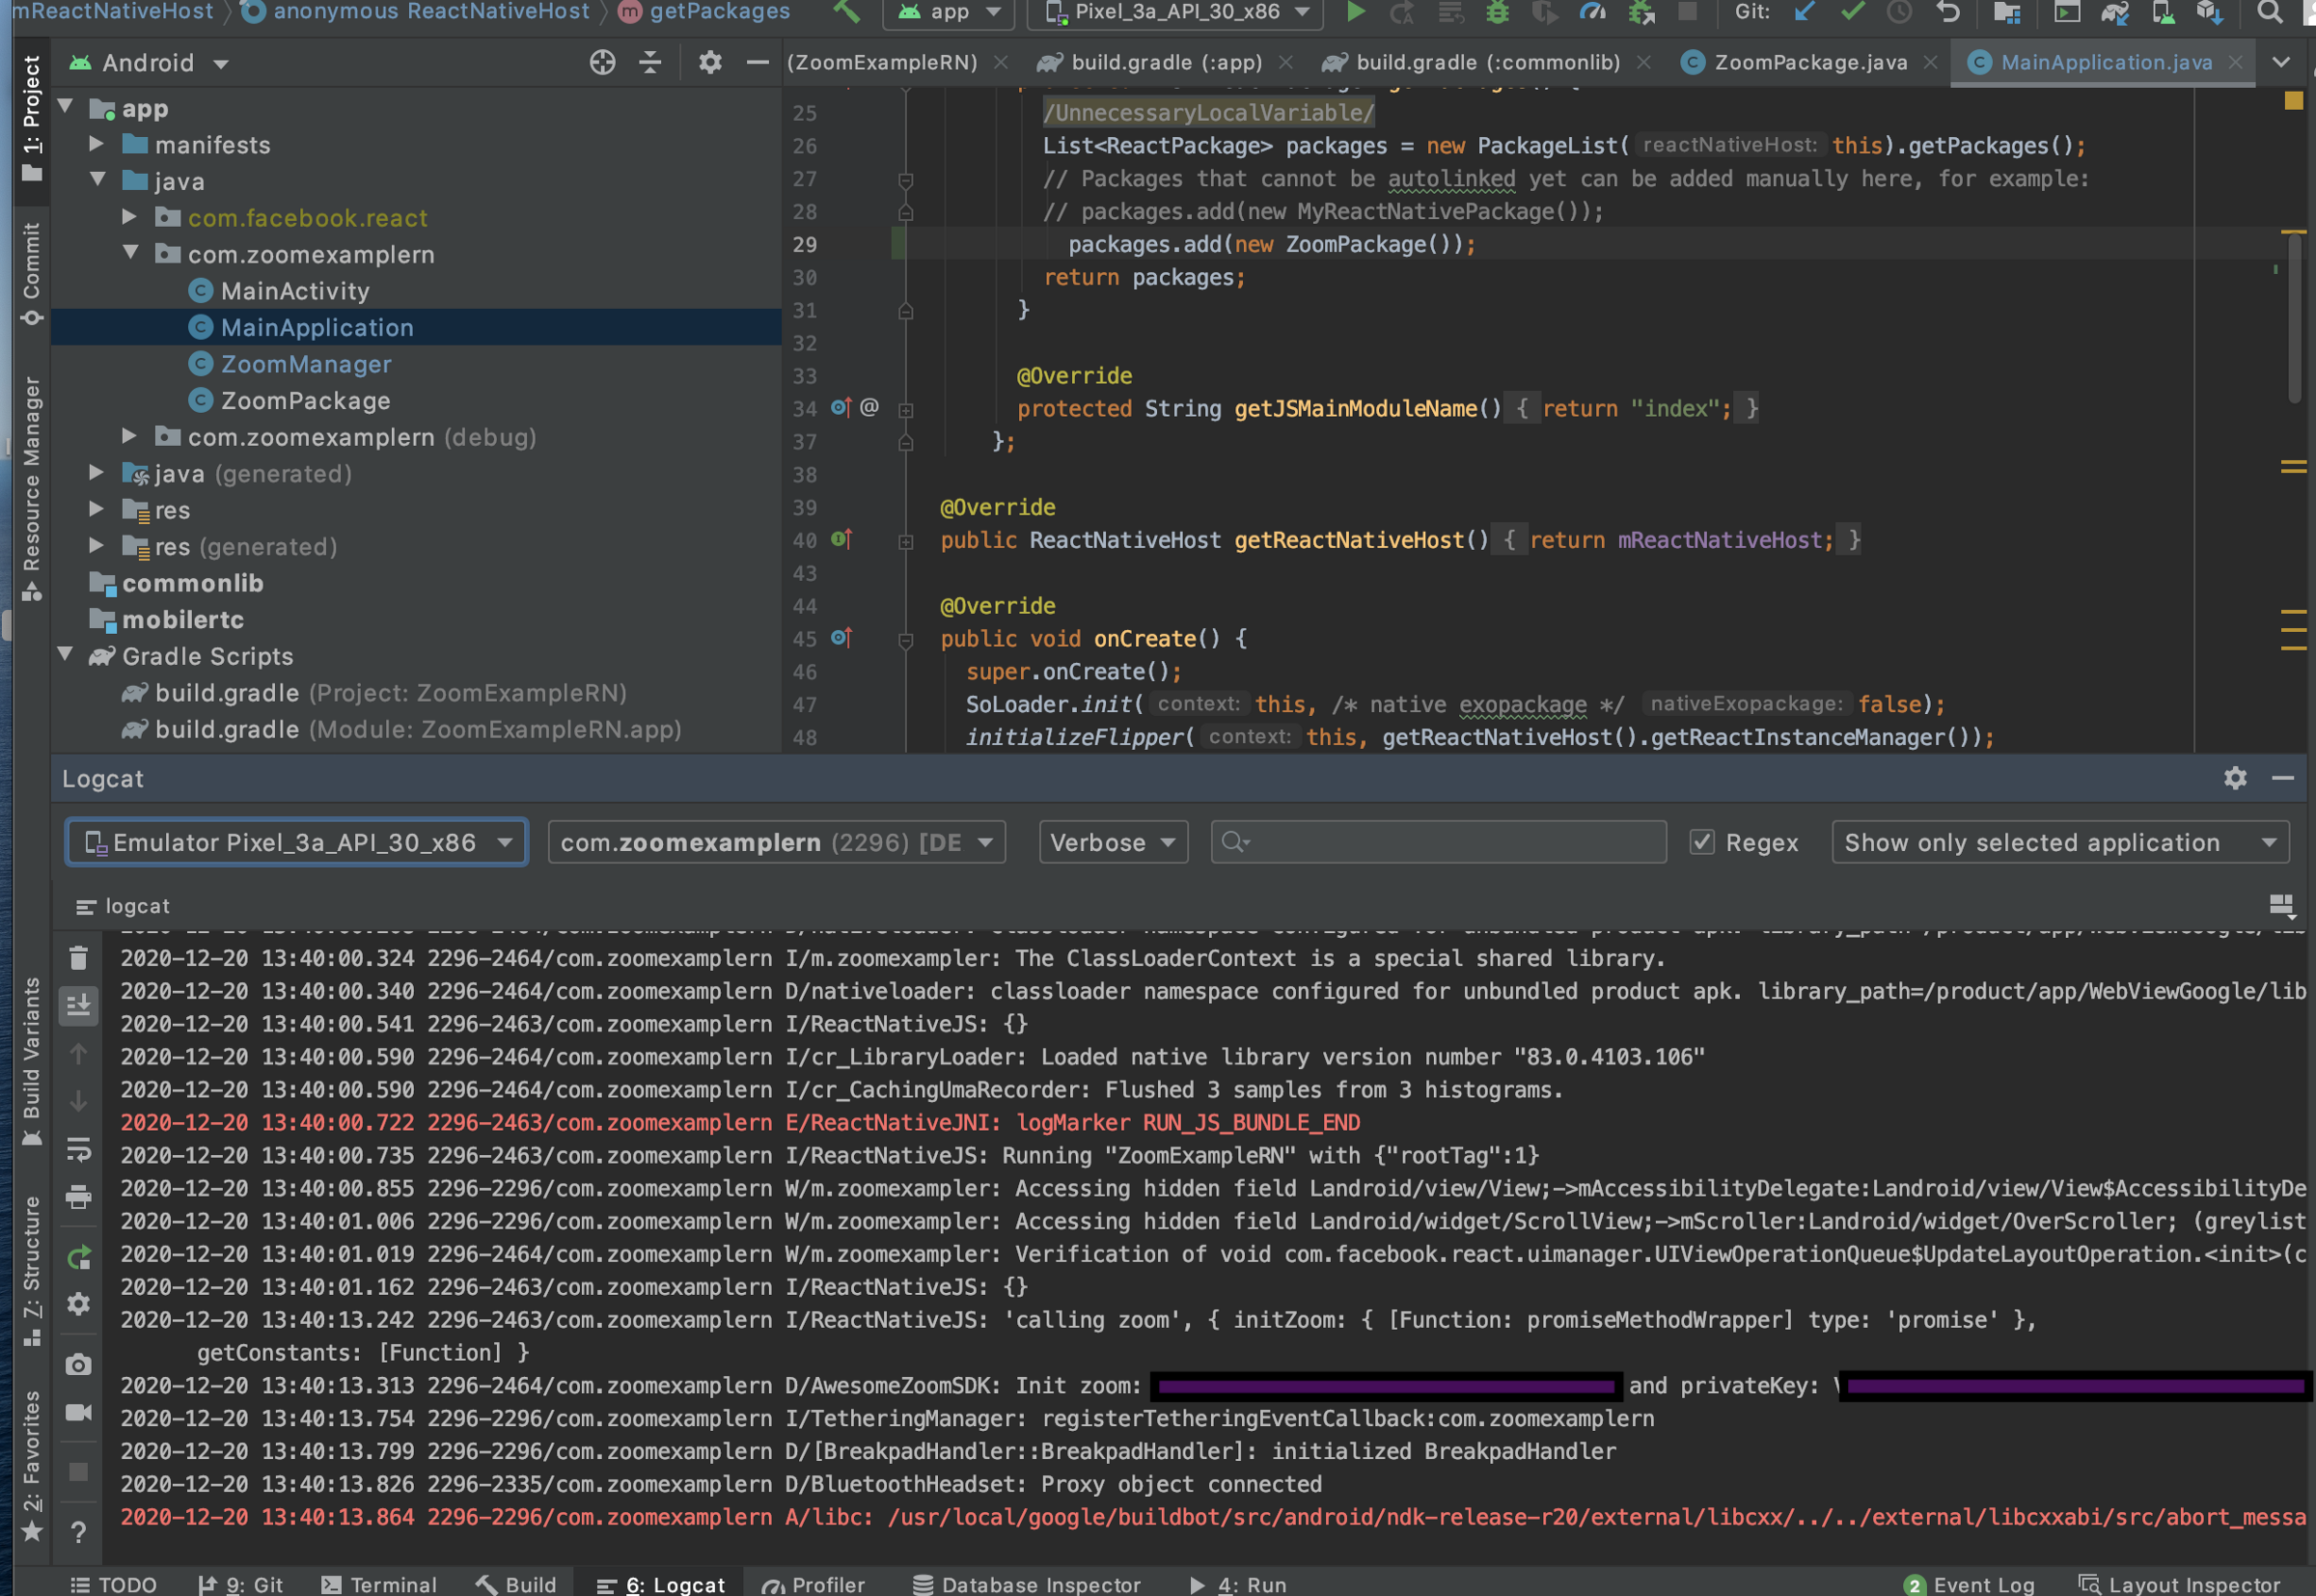
Hmm, This error looks ugly.
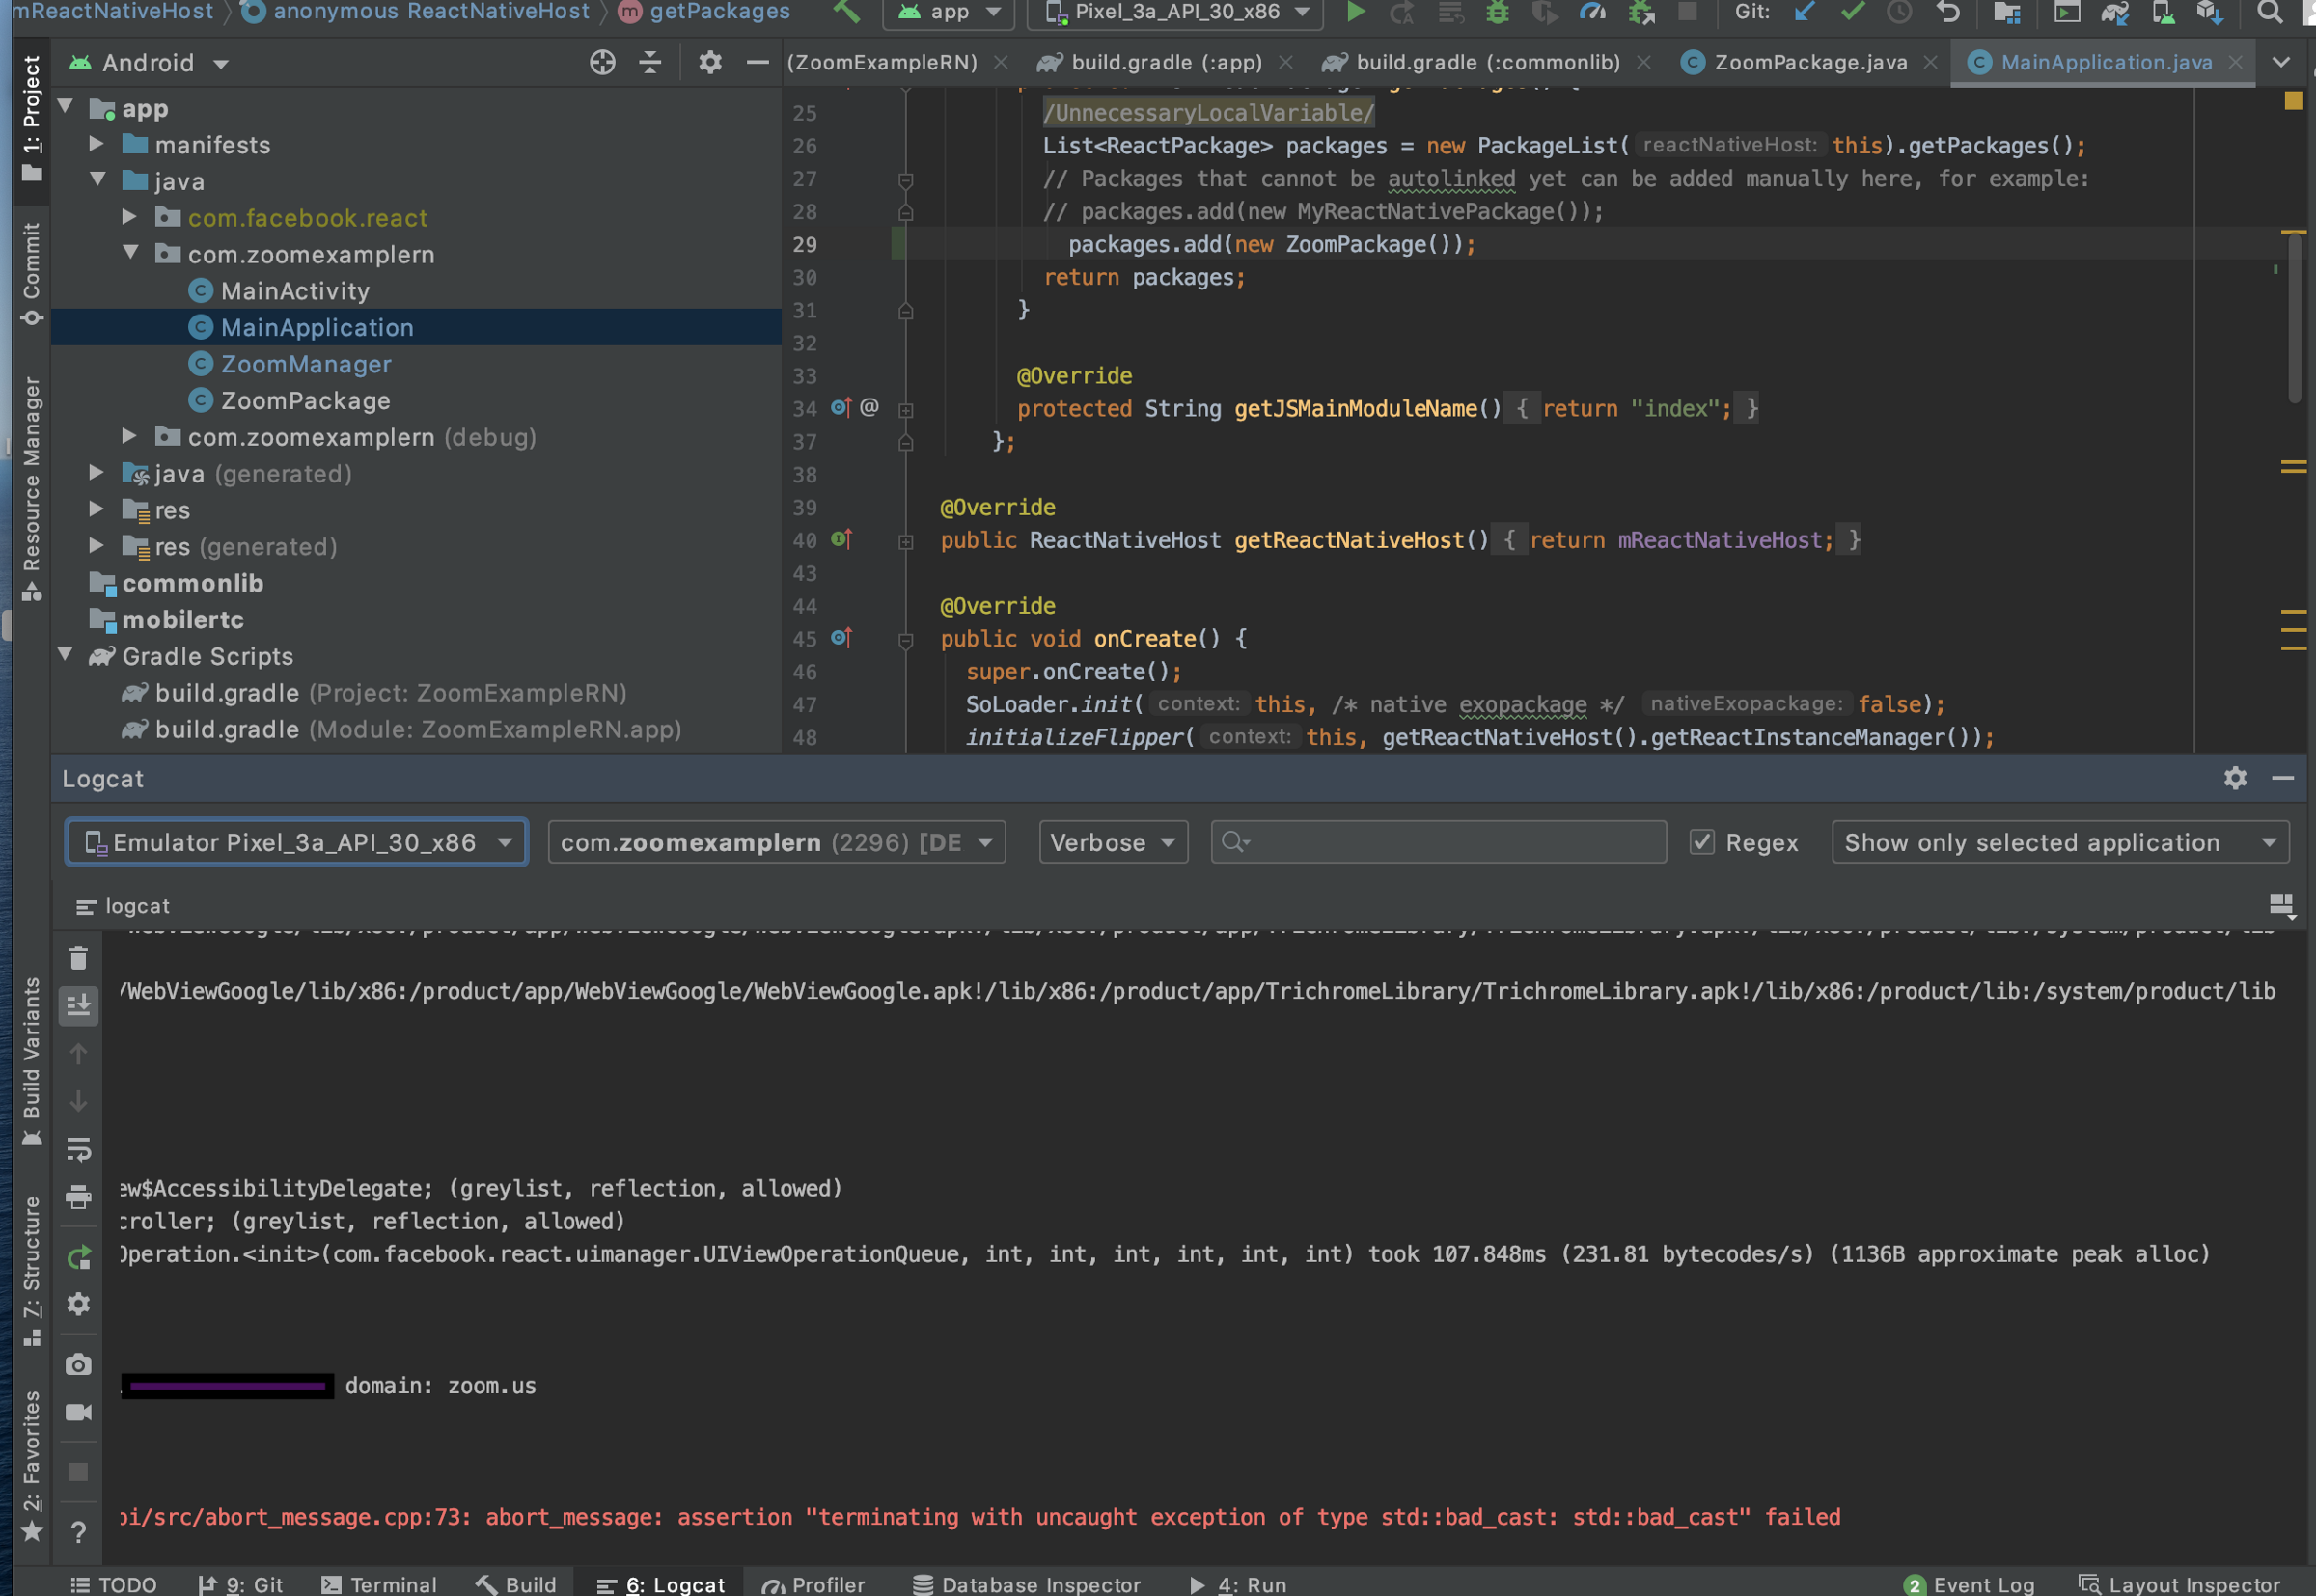
Let’s solve it by using some dark magic called SoLoader.

And it runs! We got the successful response to the JS side.
Then, let’s implement “Join Meeting” functionality.
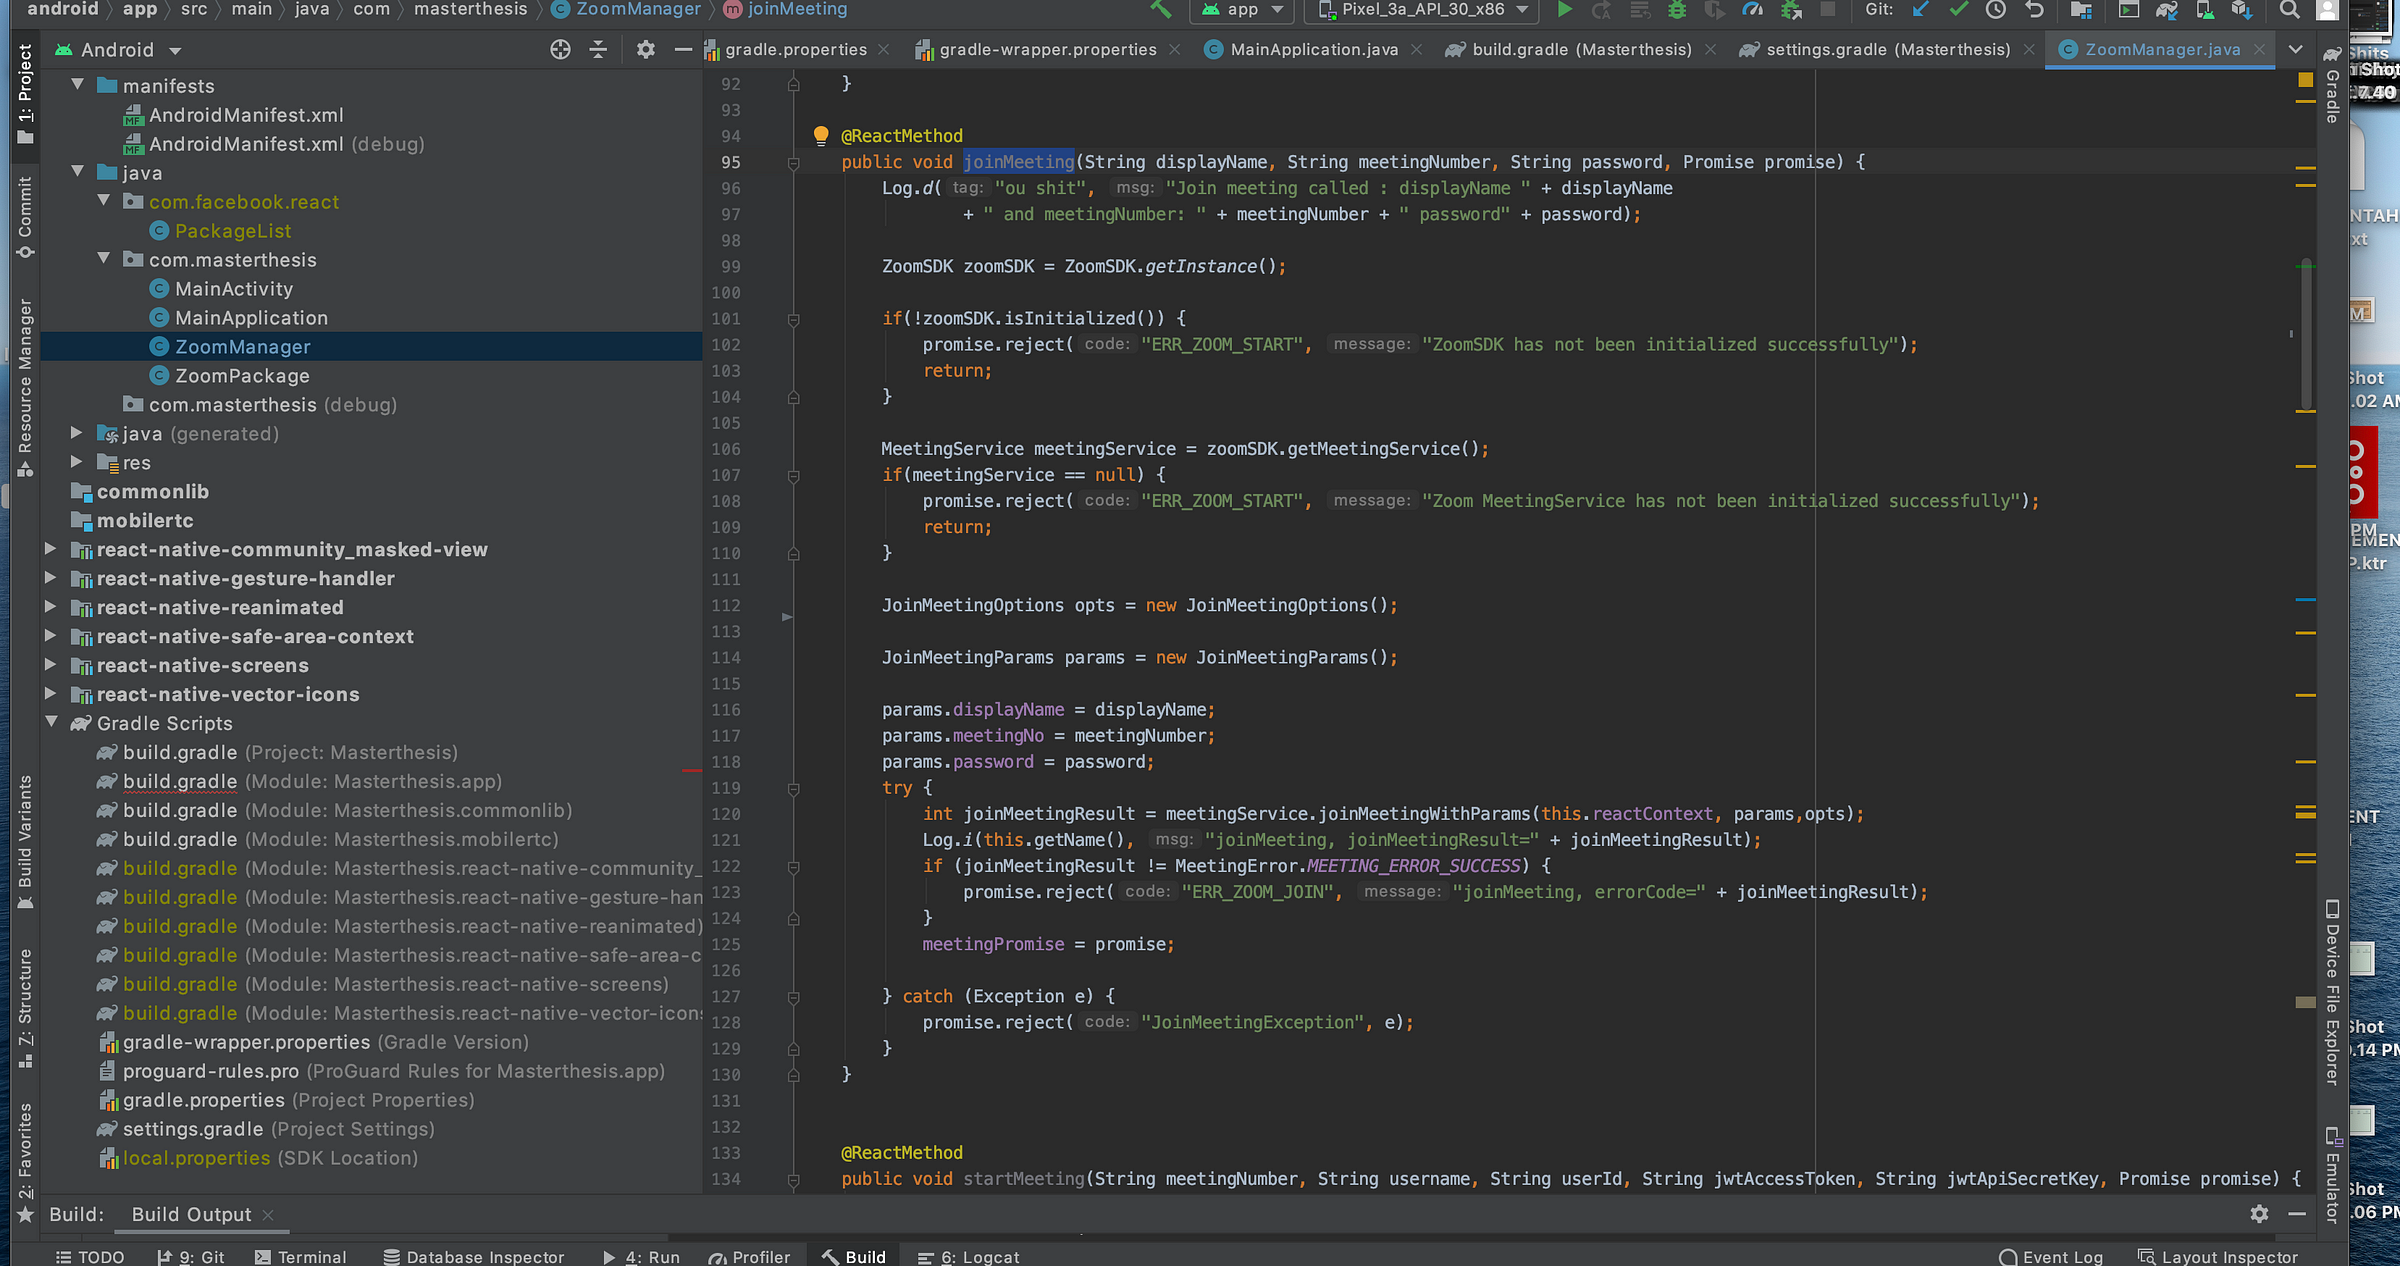
Also add the JS part.
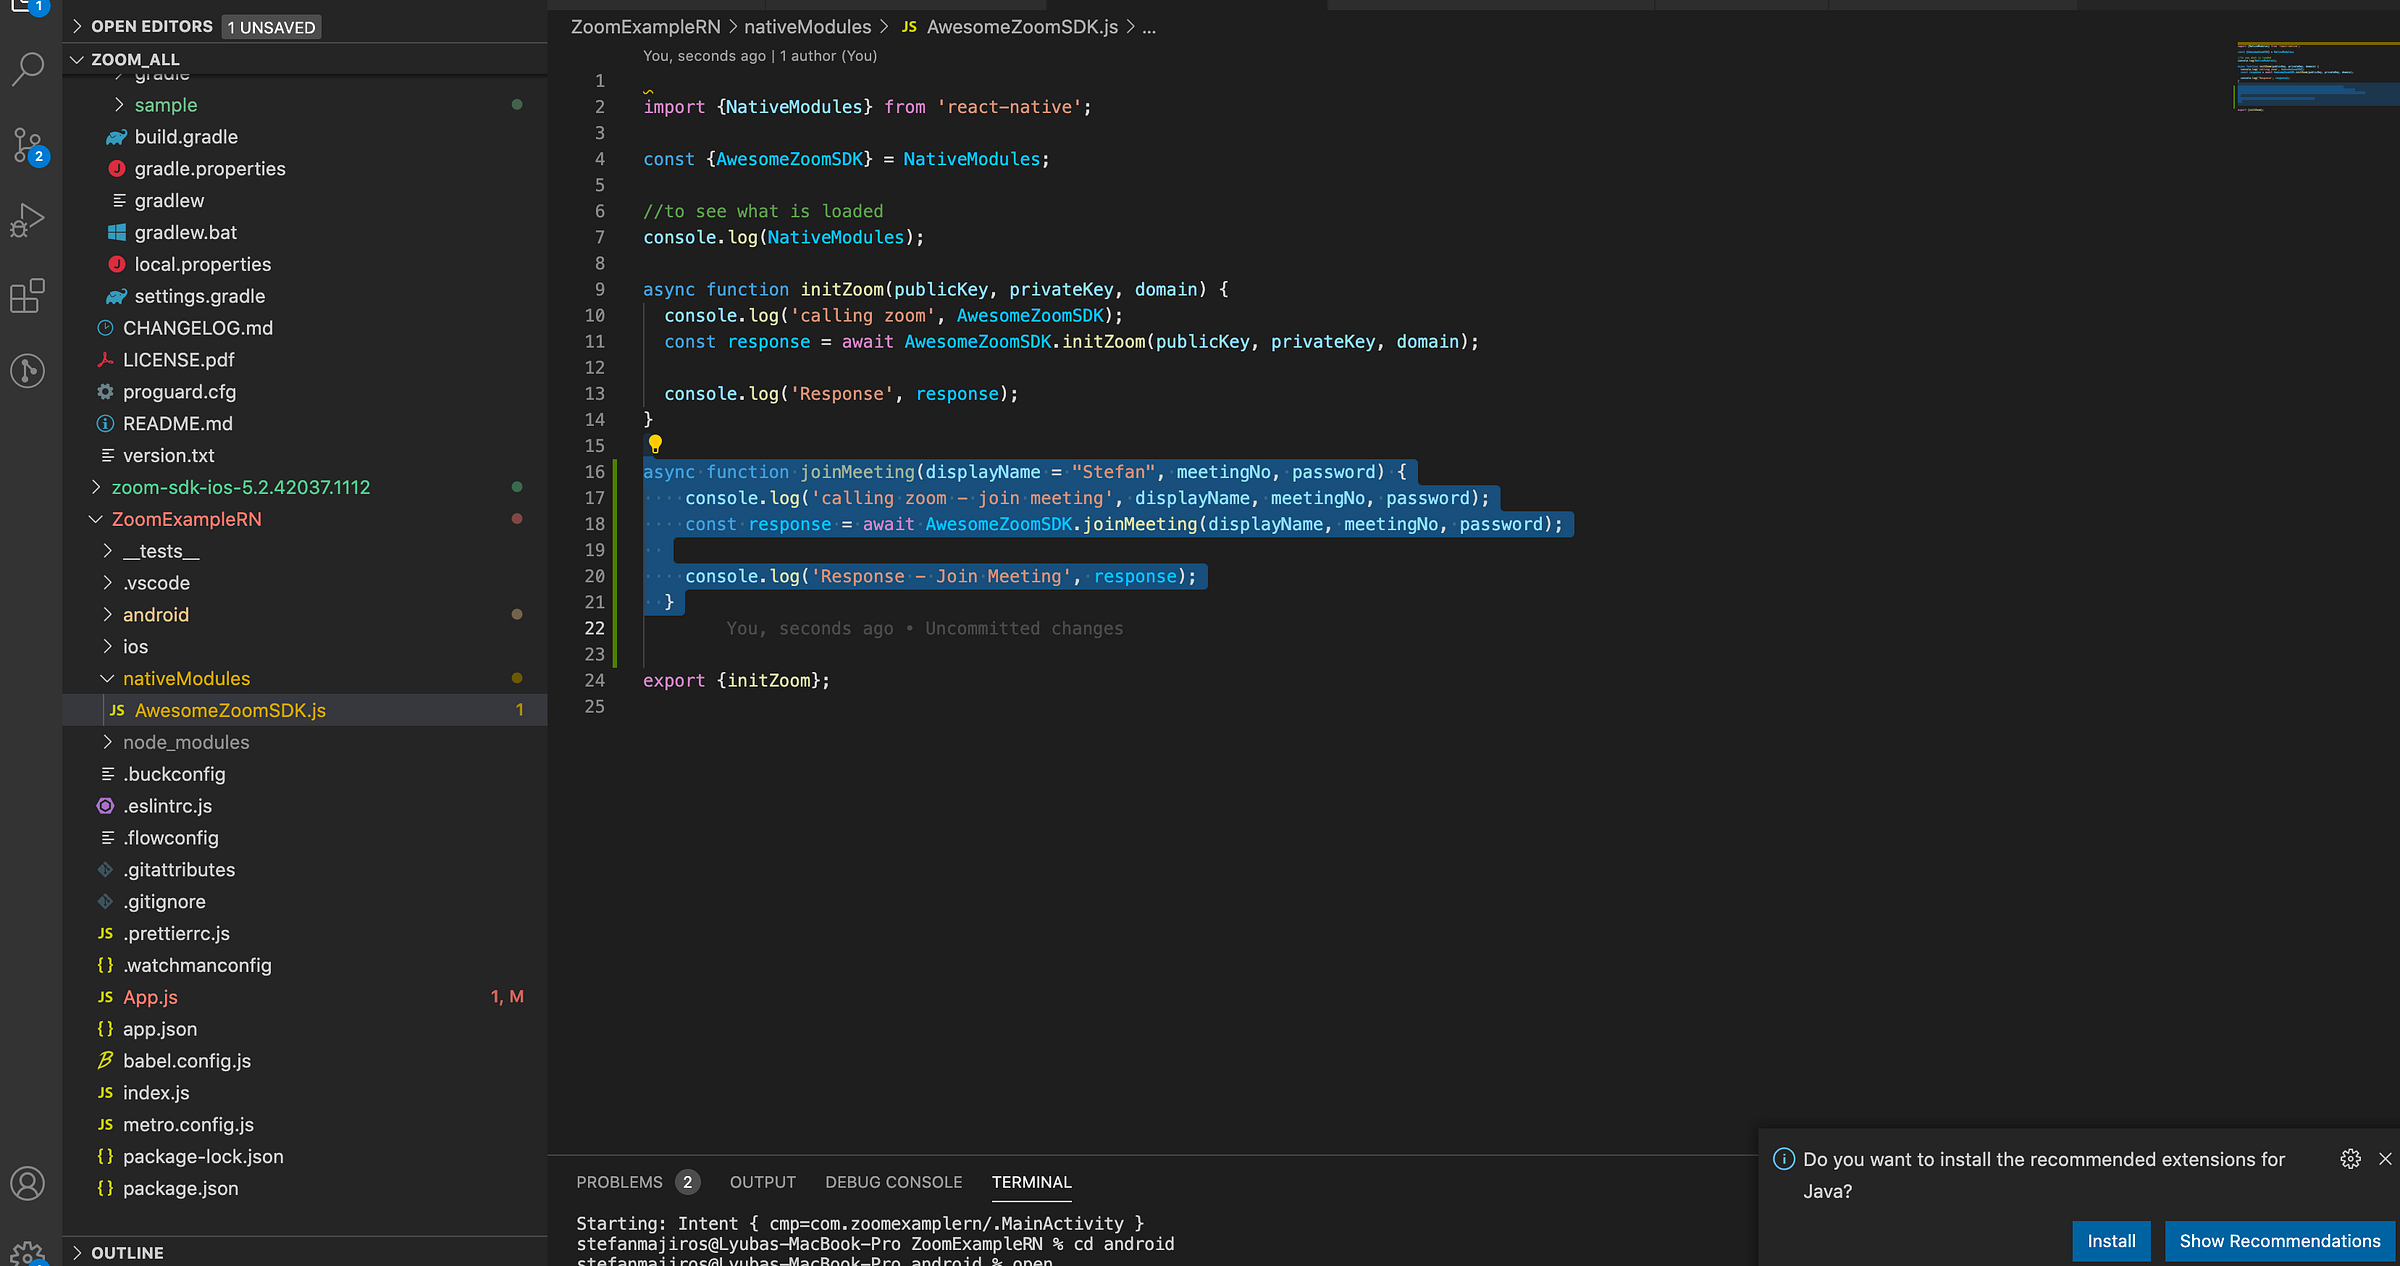
And another button, to test it.
And voila, now we have joined the meeting with ZOOM.

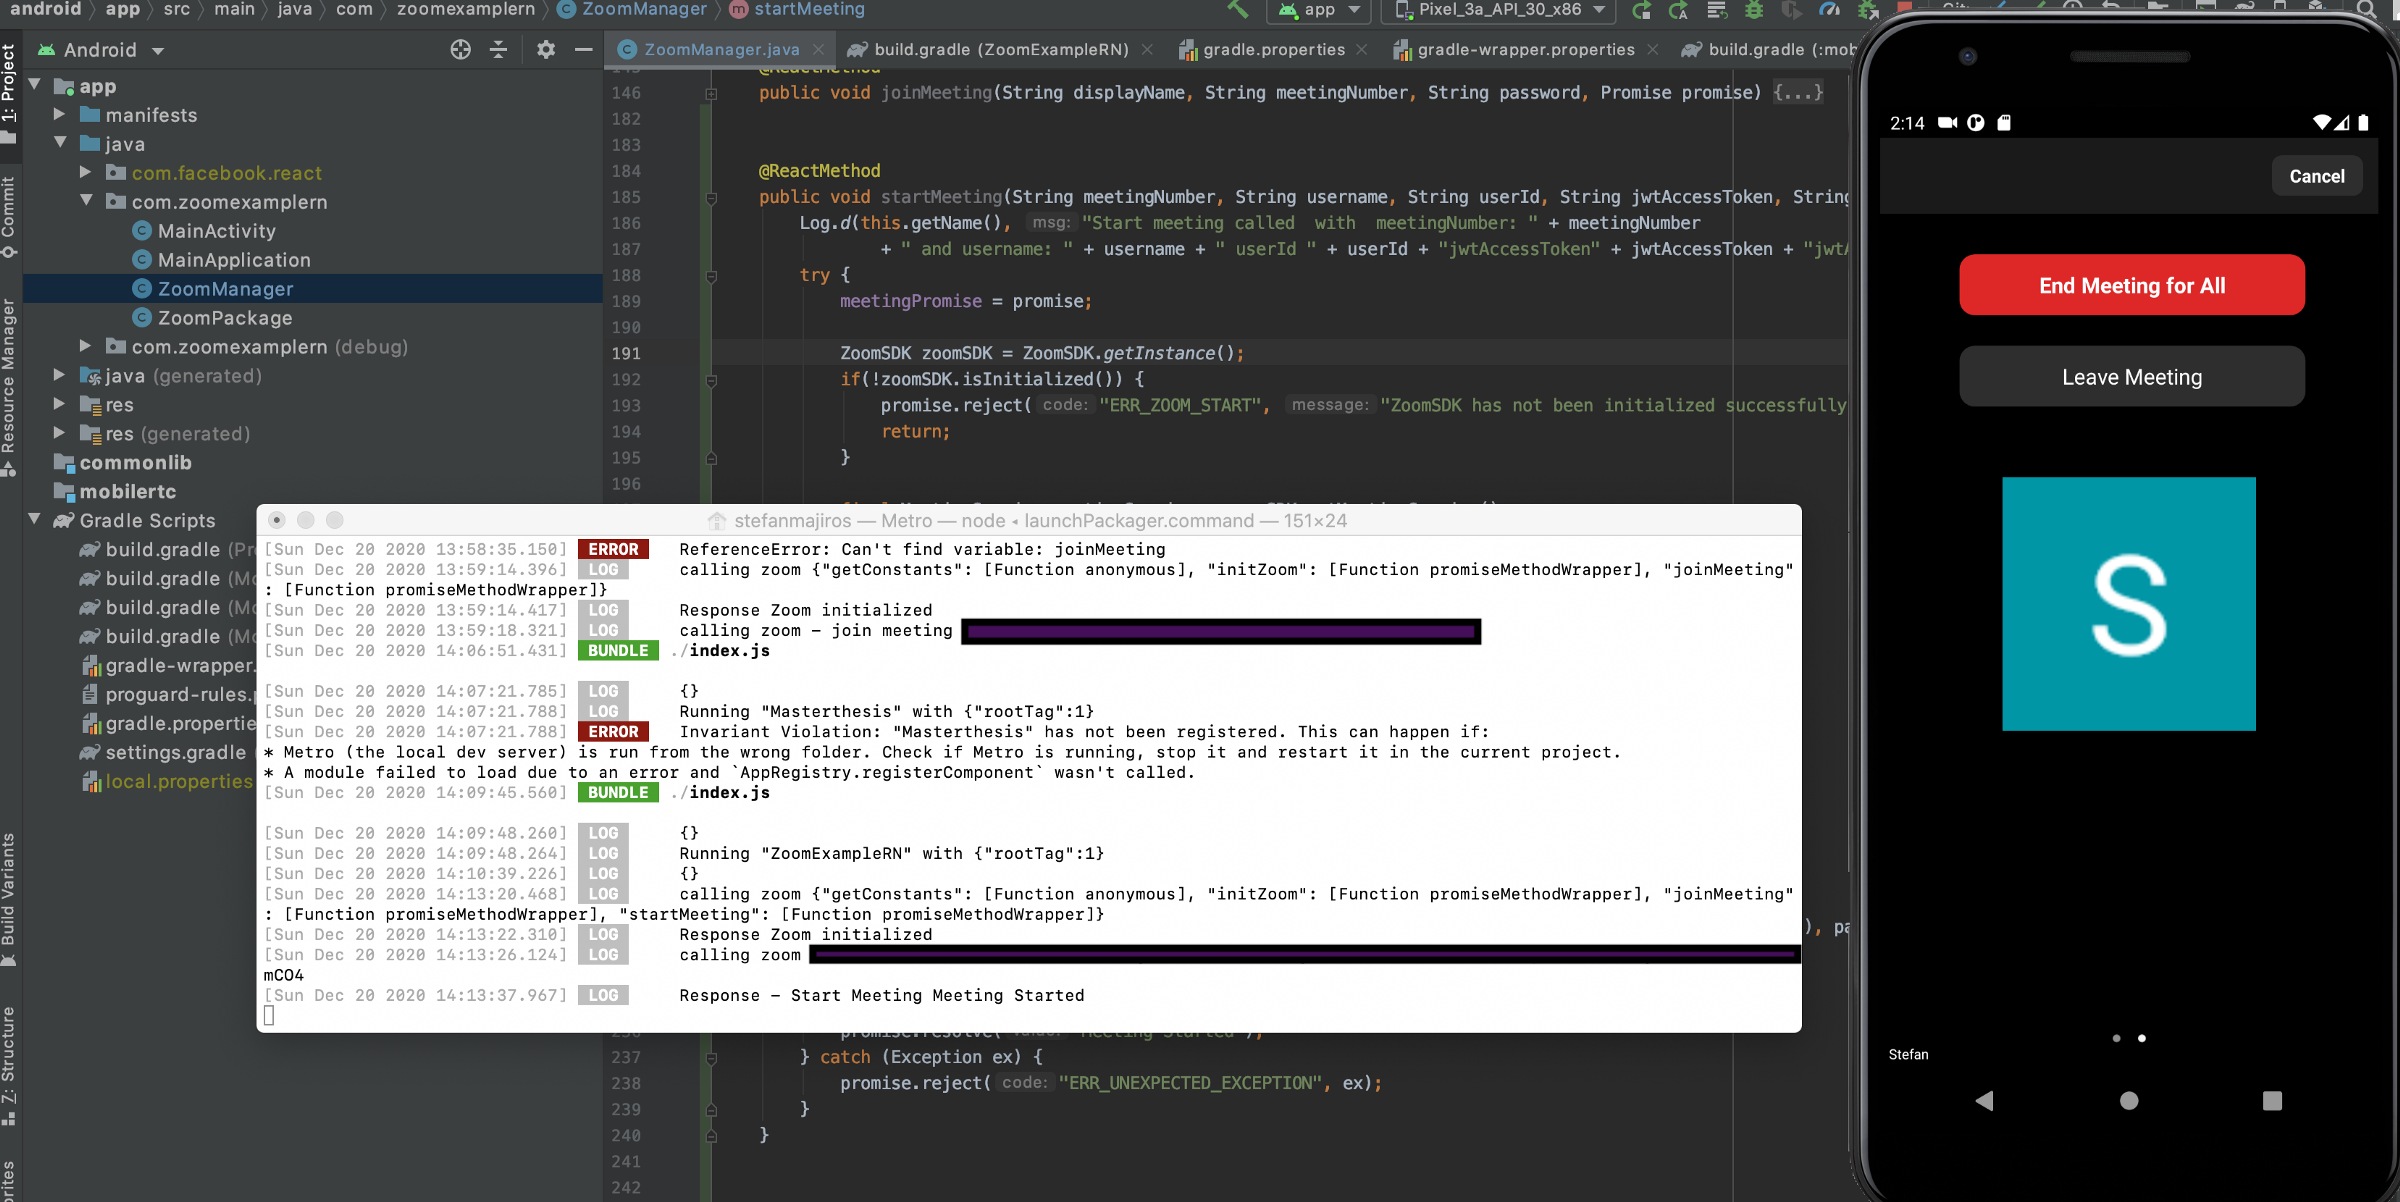
To test it, you can launch your Zoom Desktop app. Btw, zoom uses concept of the waiting room, so you will need to approve new participants. But this can be customized in settings.
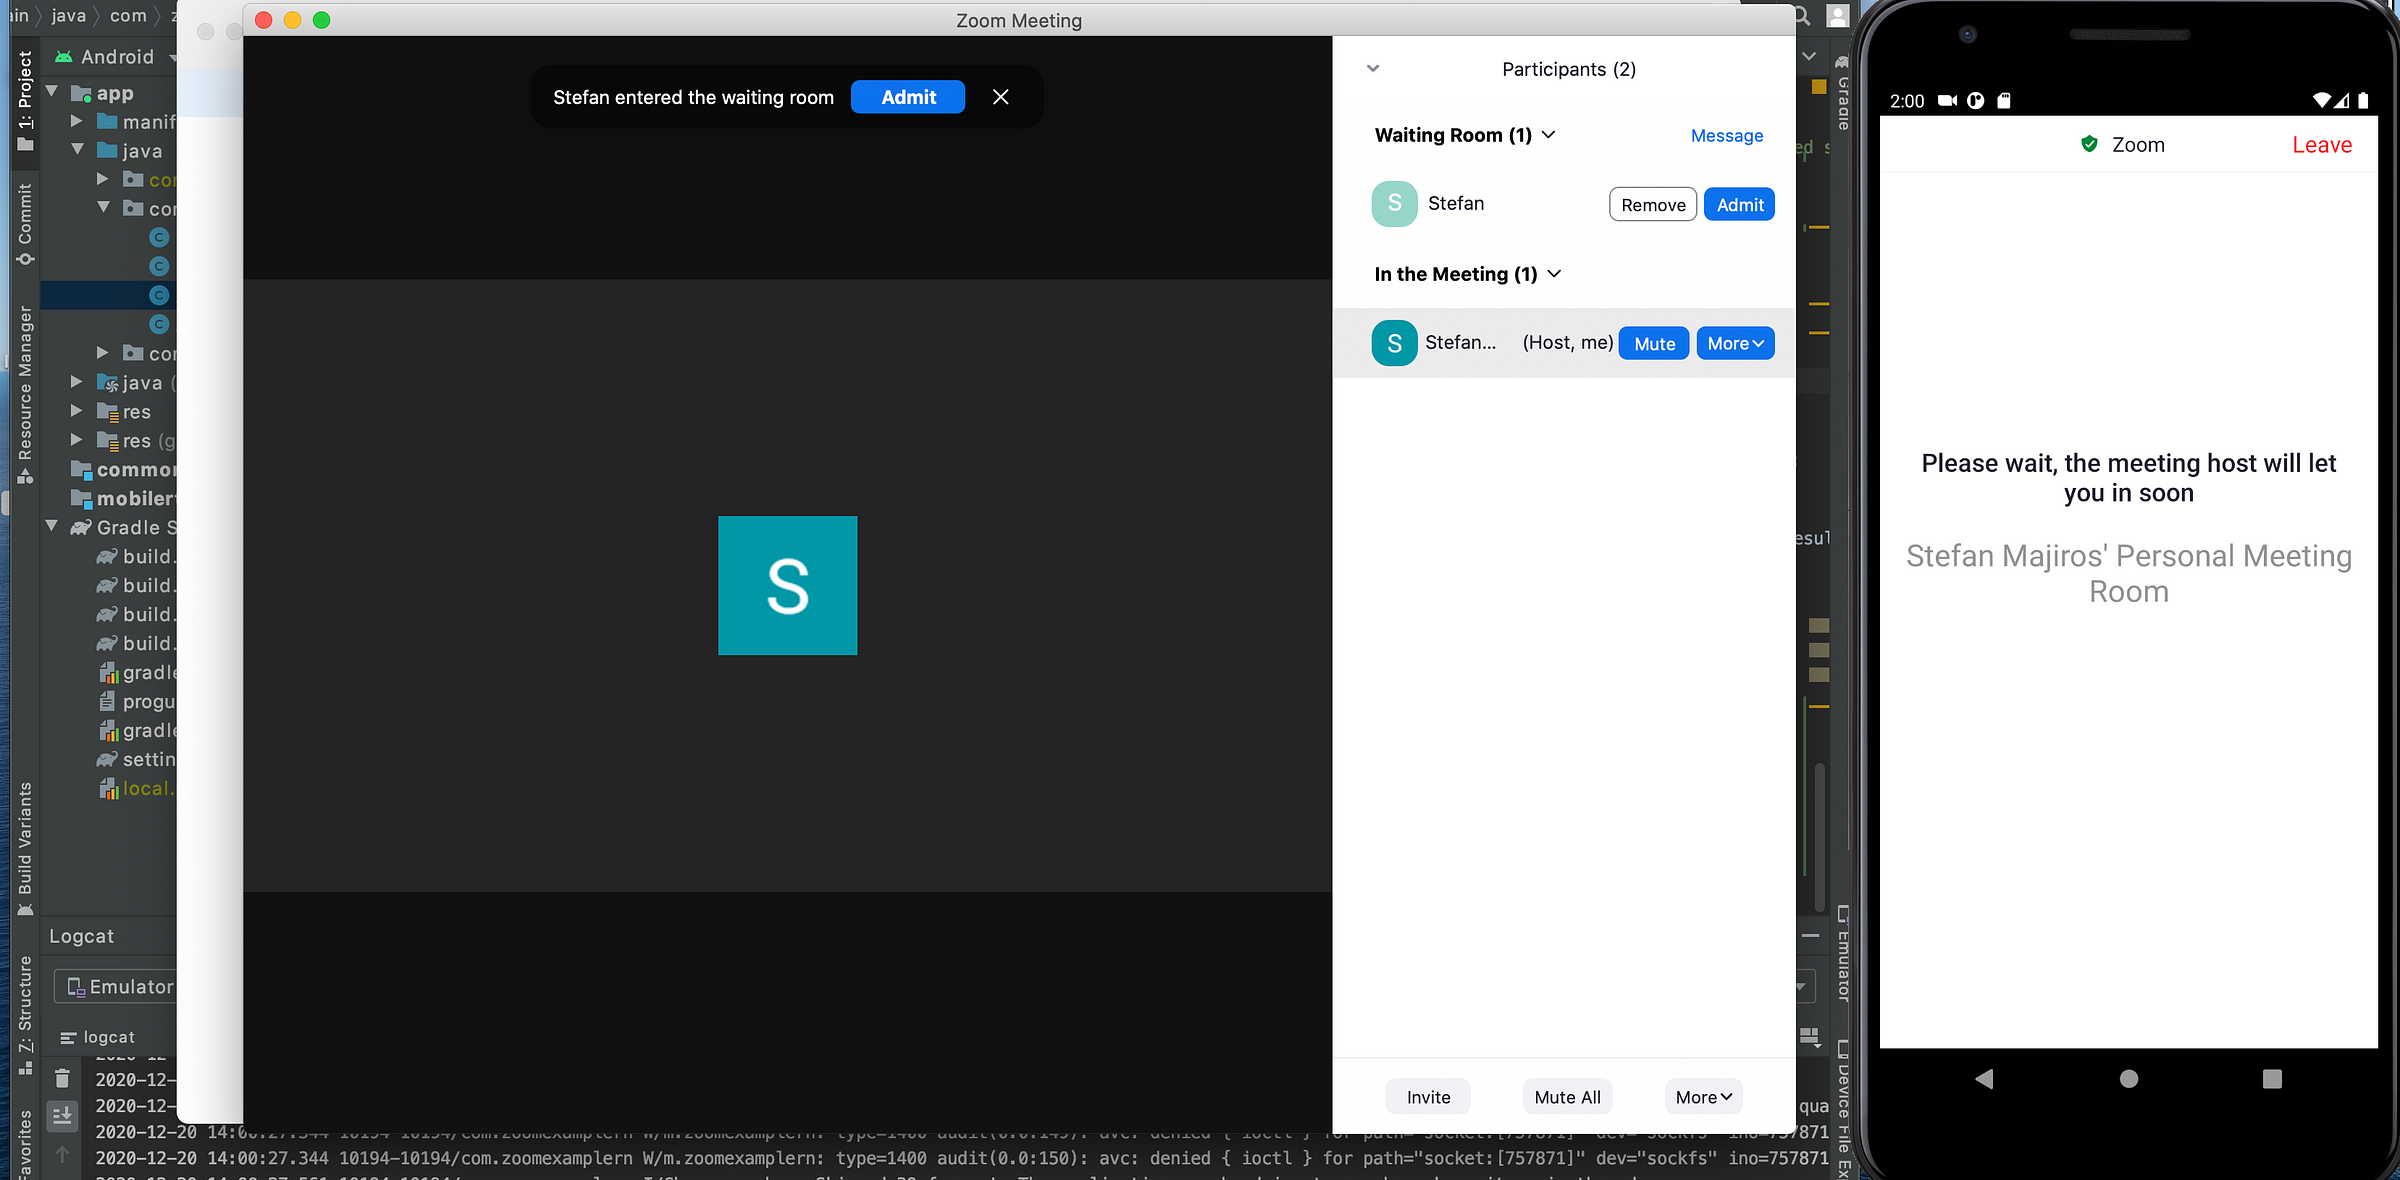
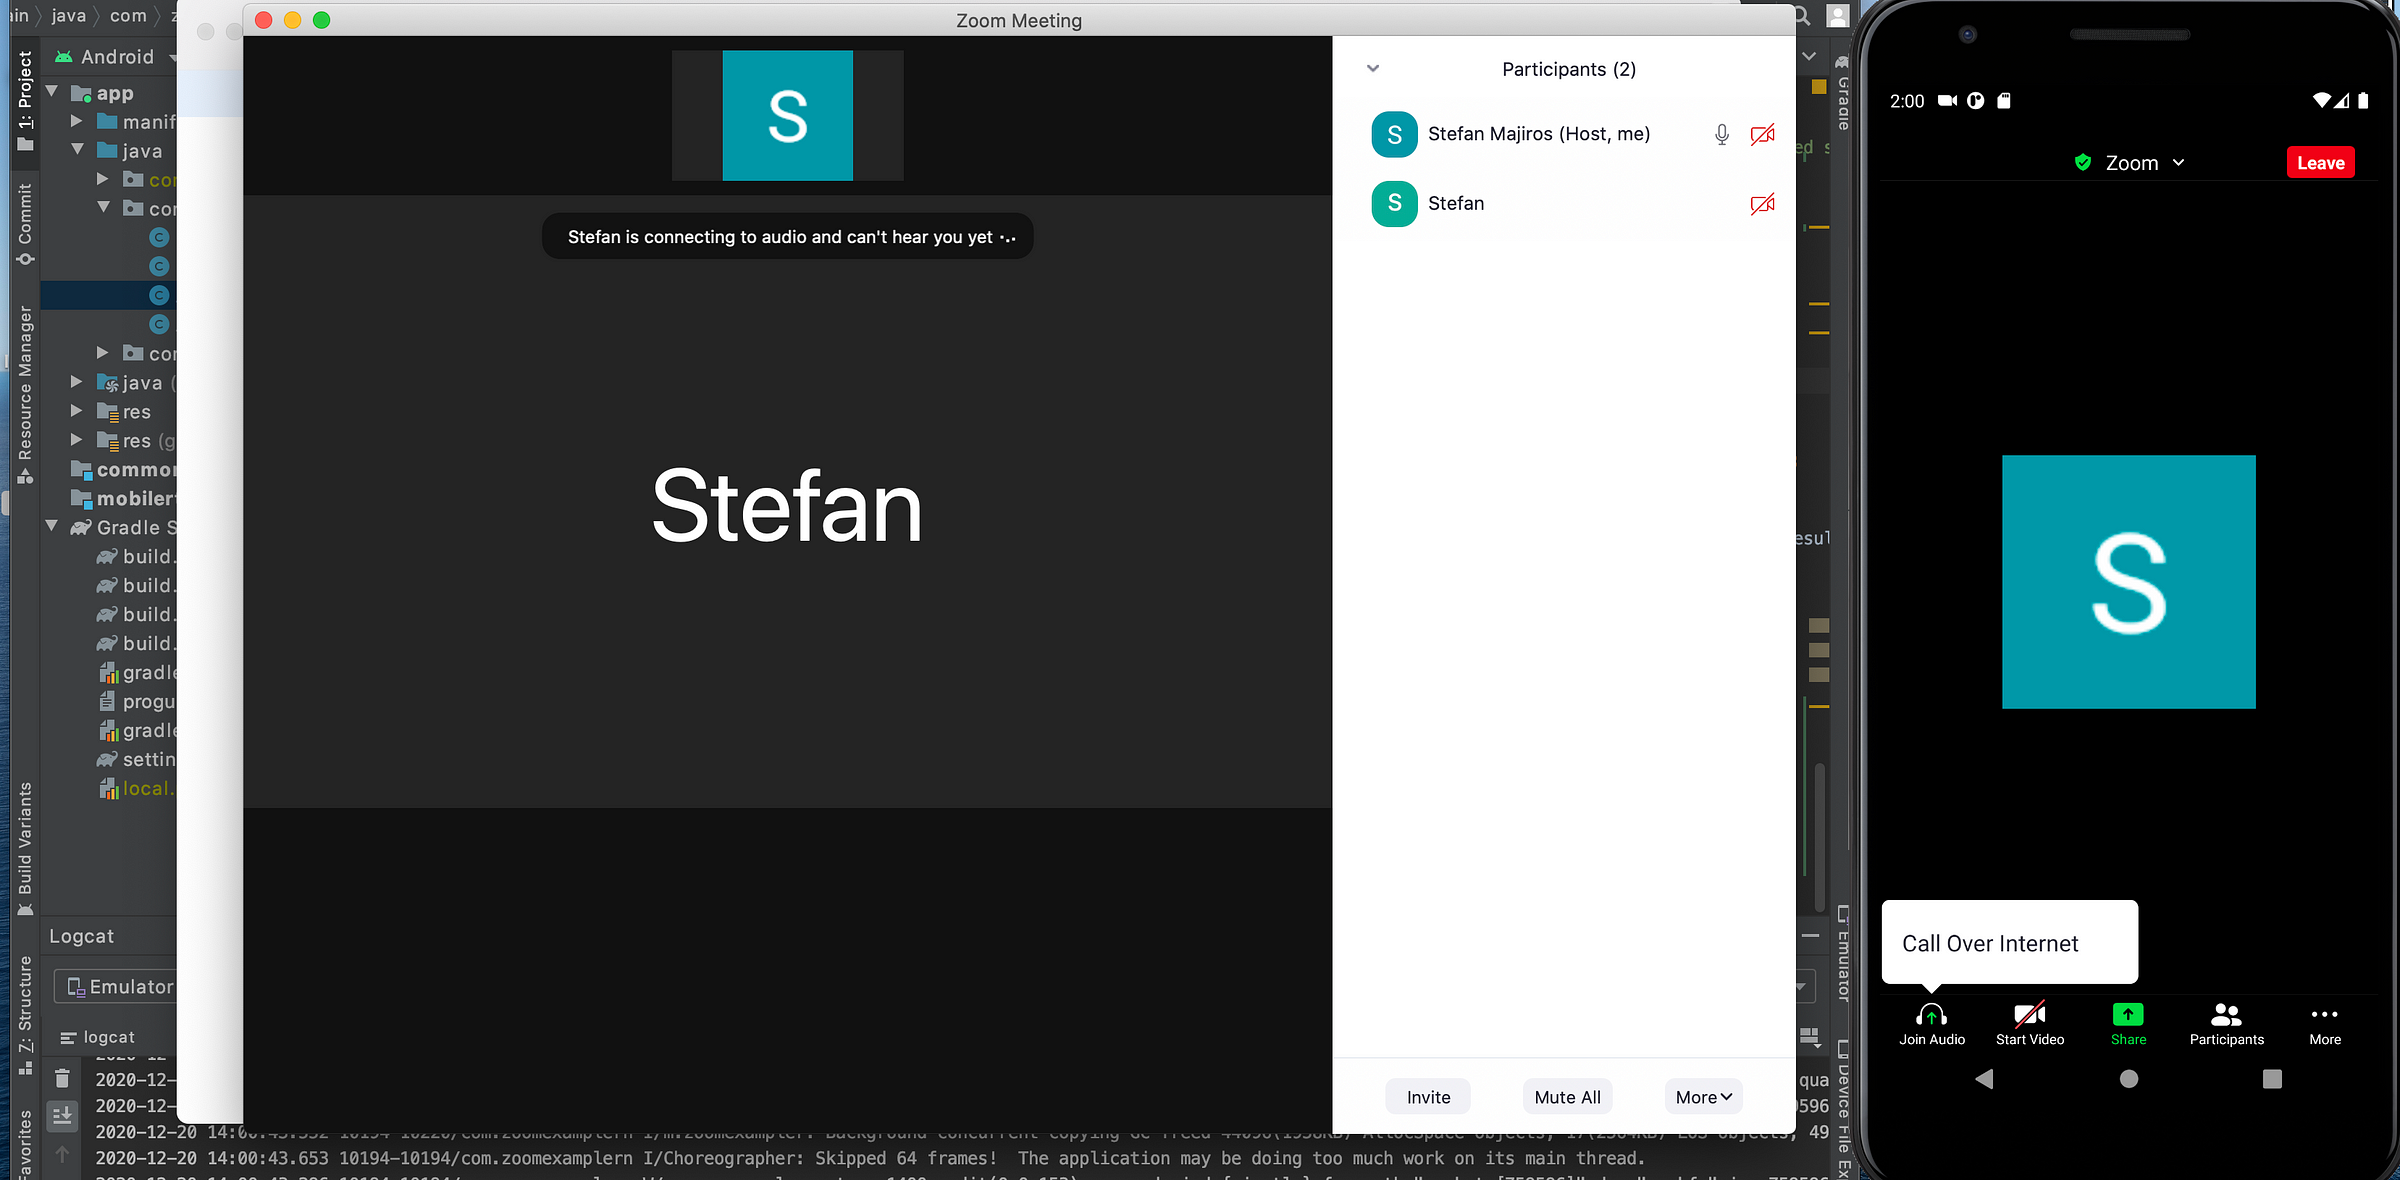
After approving the user in waiting room, now we can call each other.
2x Me. 2 times Stefan Majiros.Wonderful.
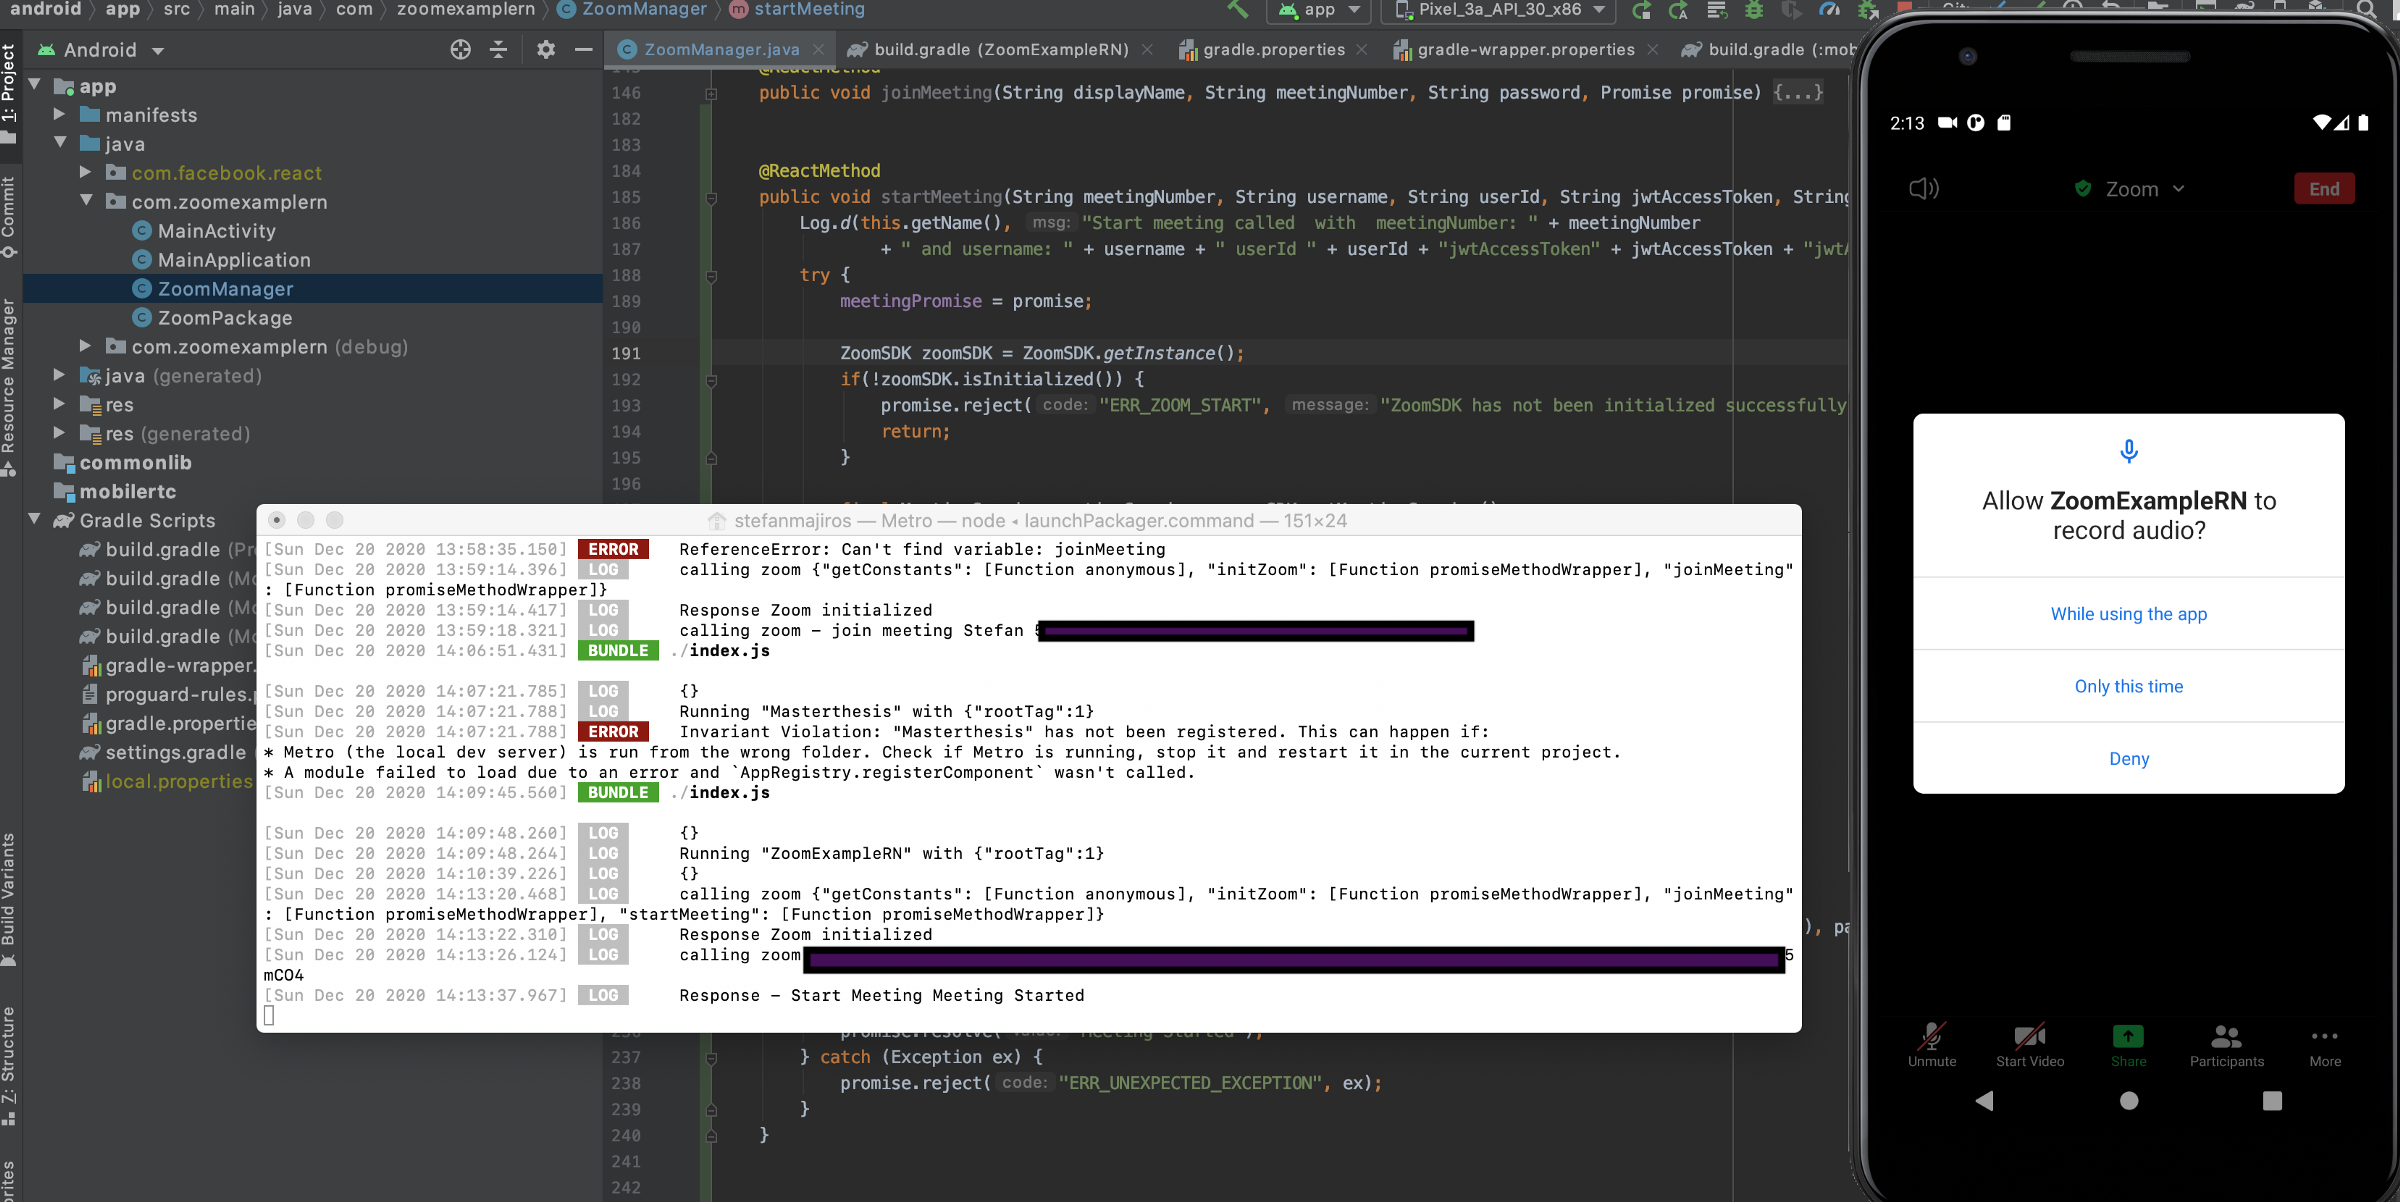
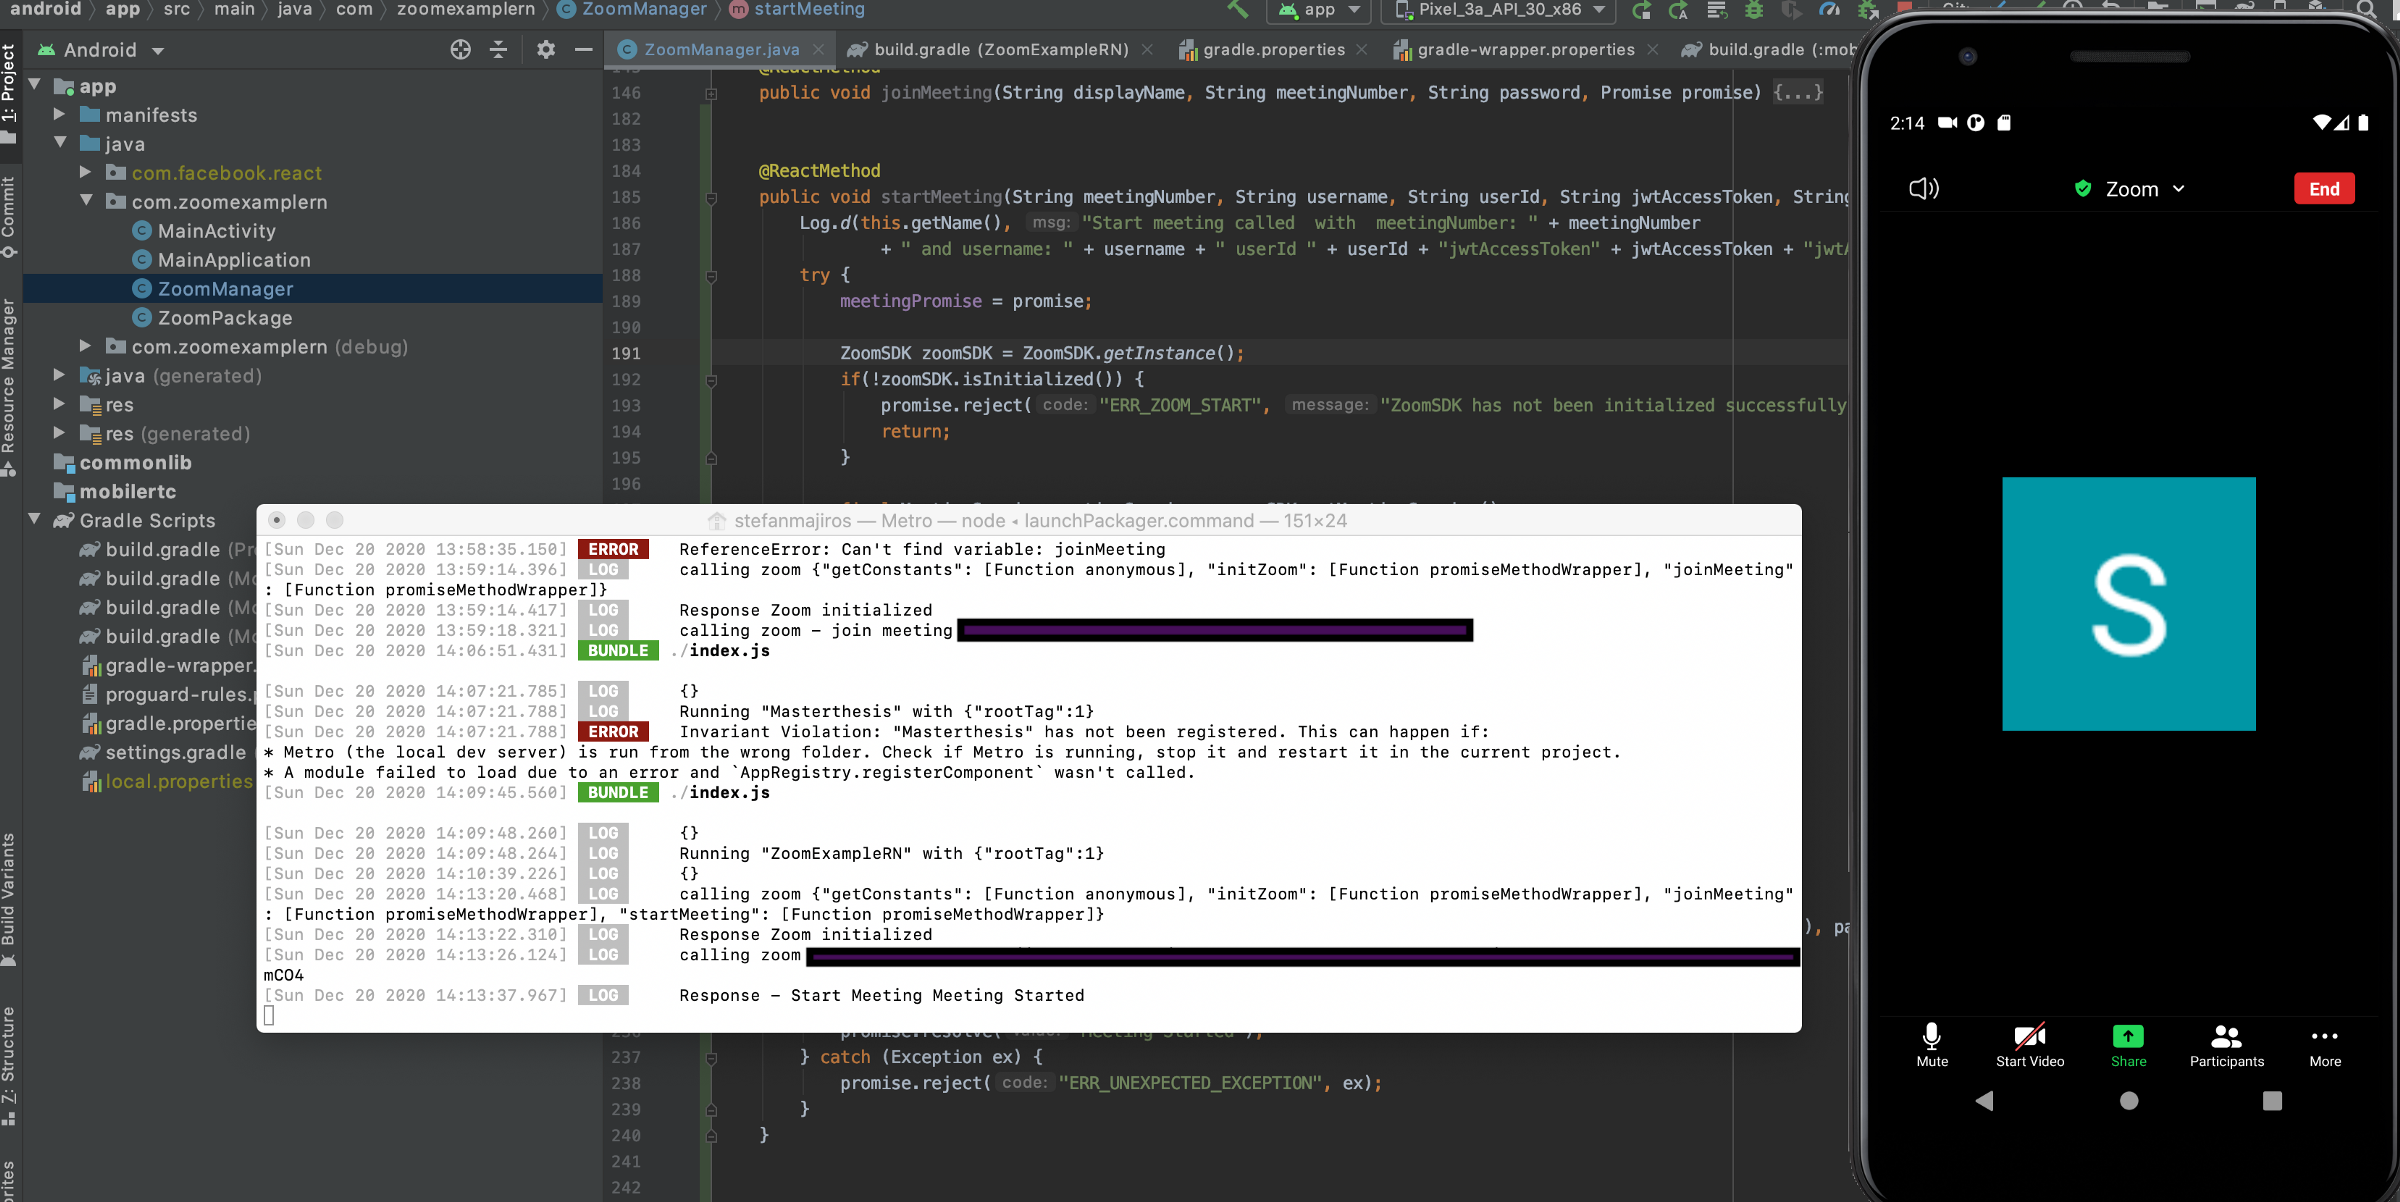
Then, let’s add “Start meeting” functionality.
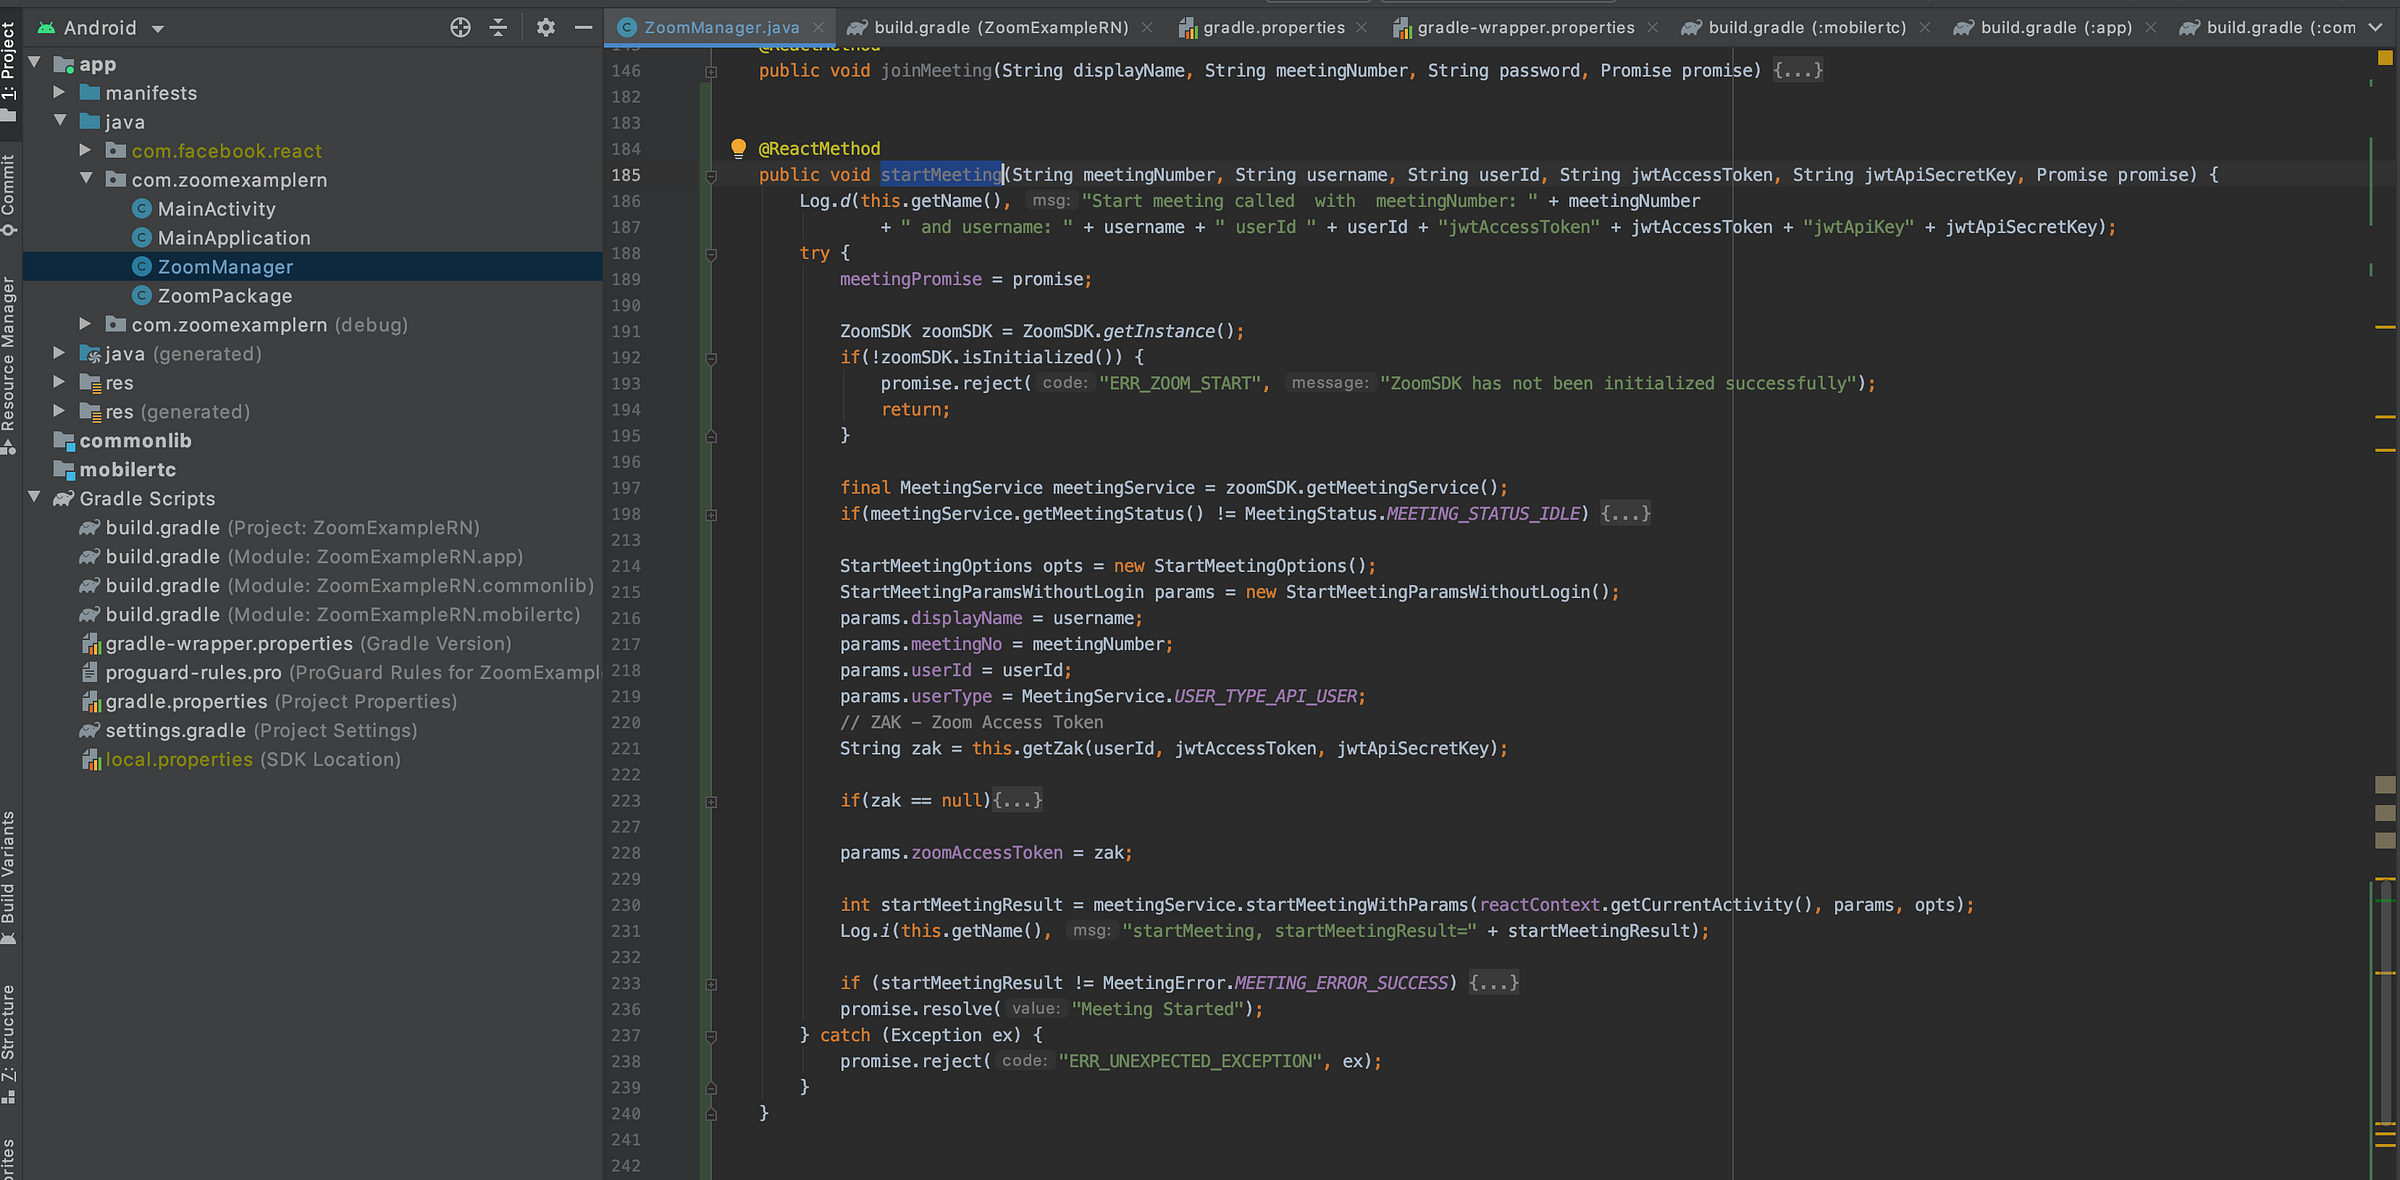
Again, let’s add JS part.
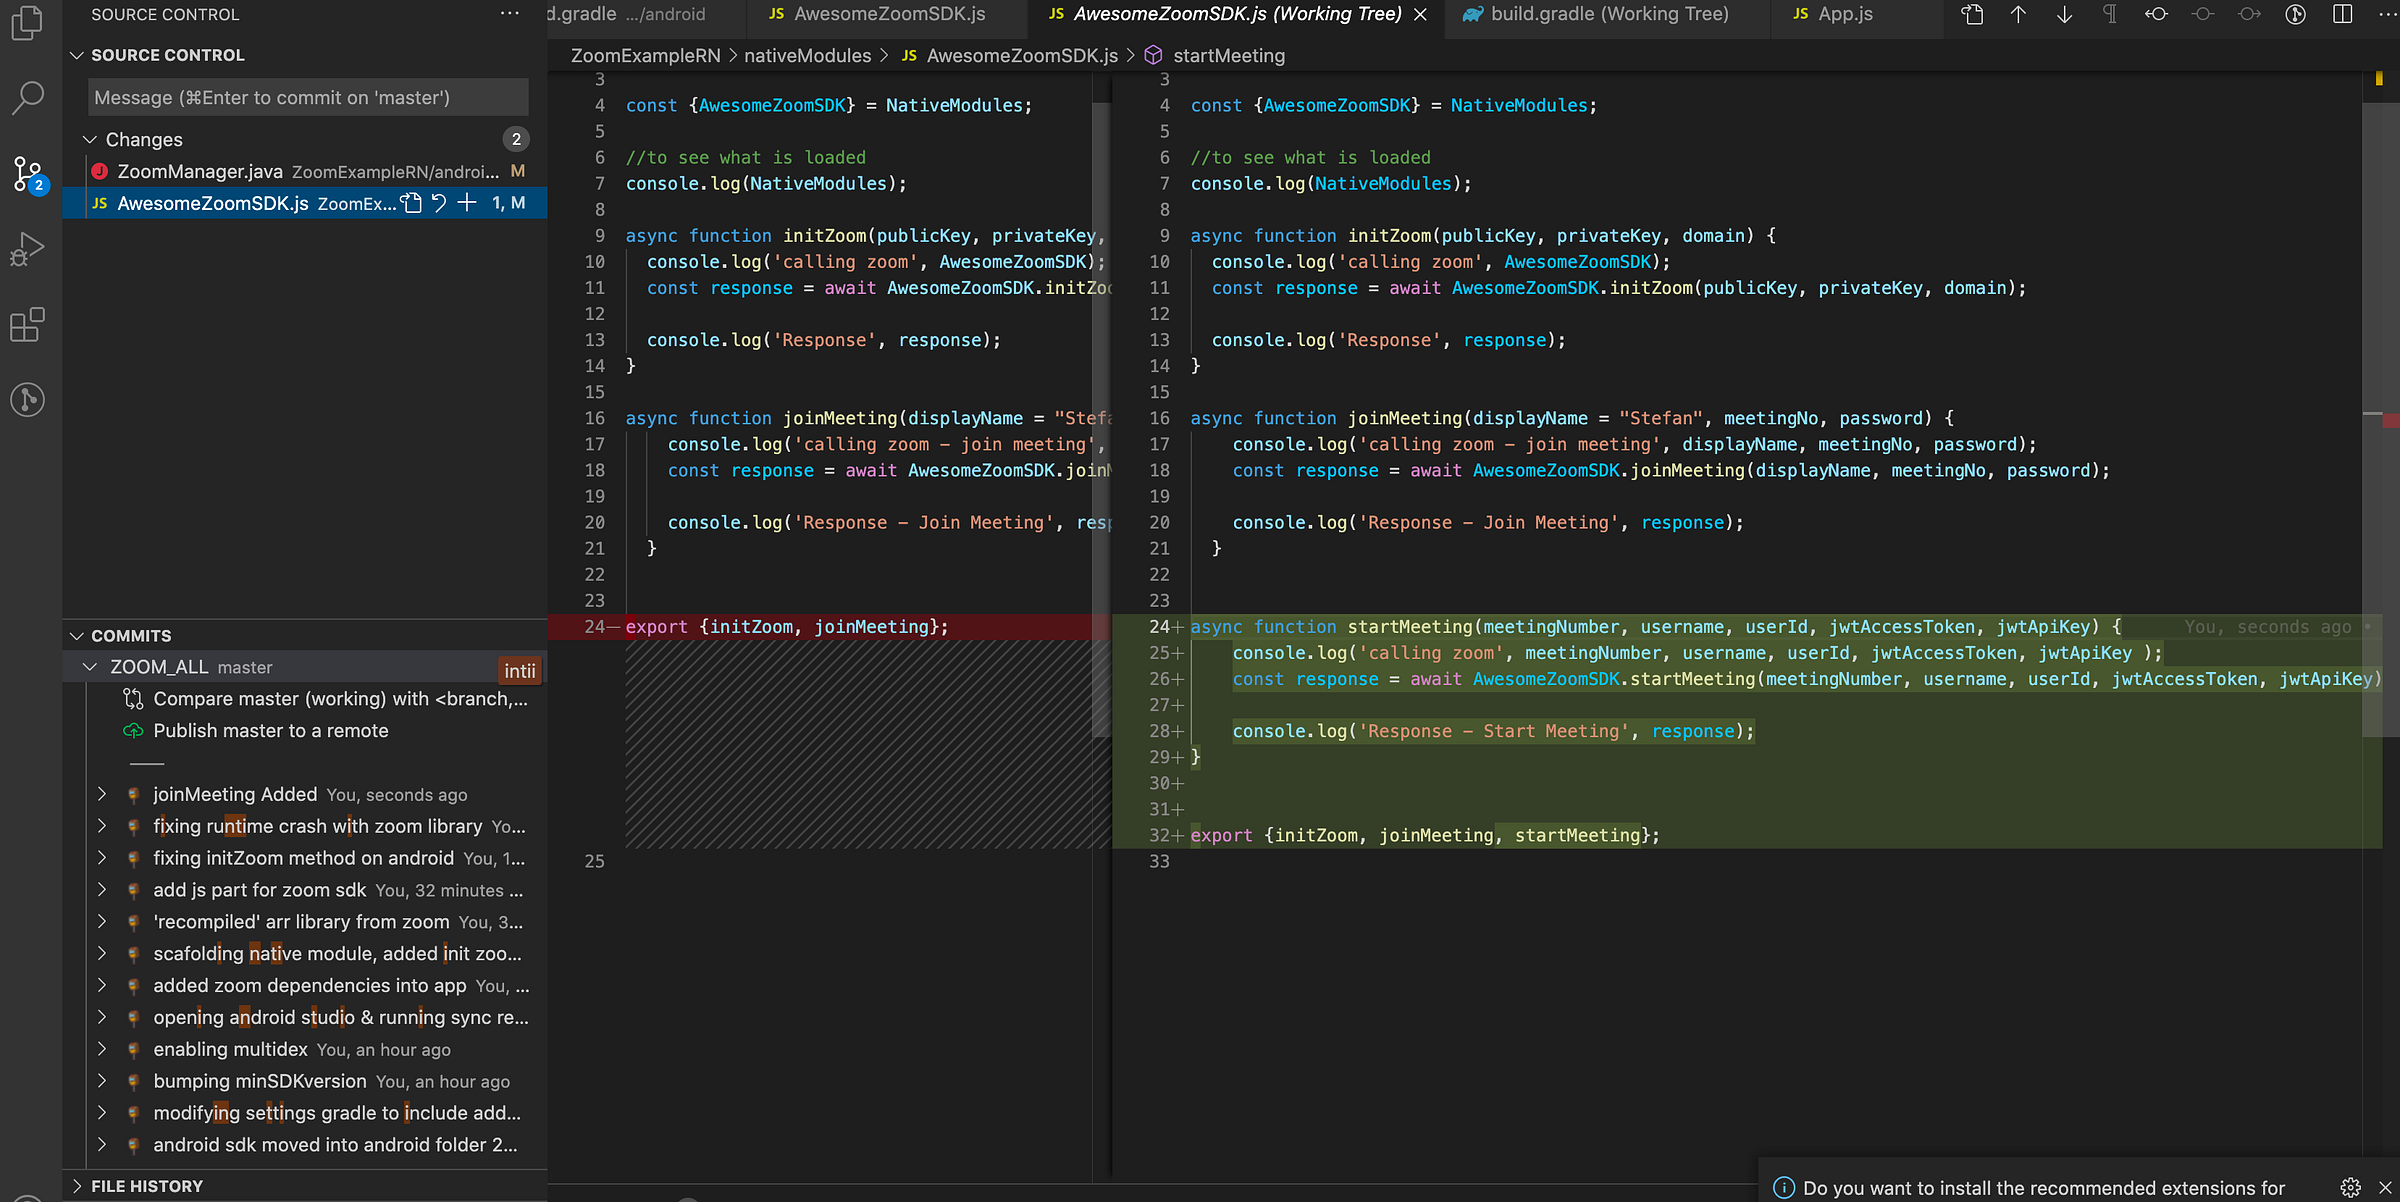
Another button… Boring.
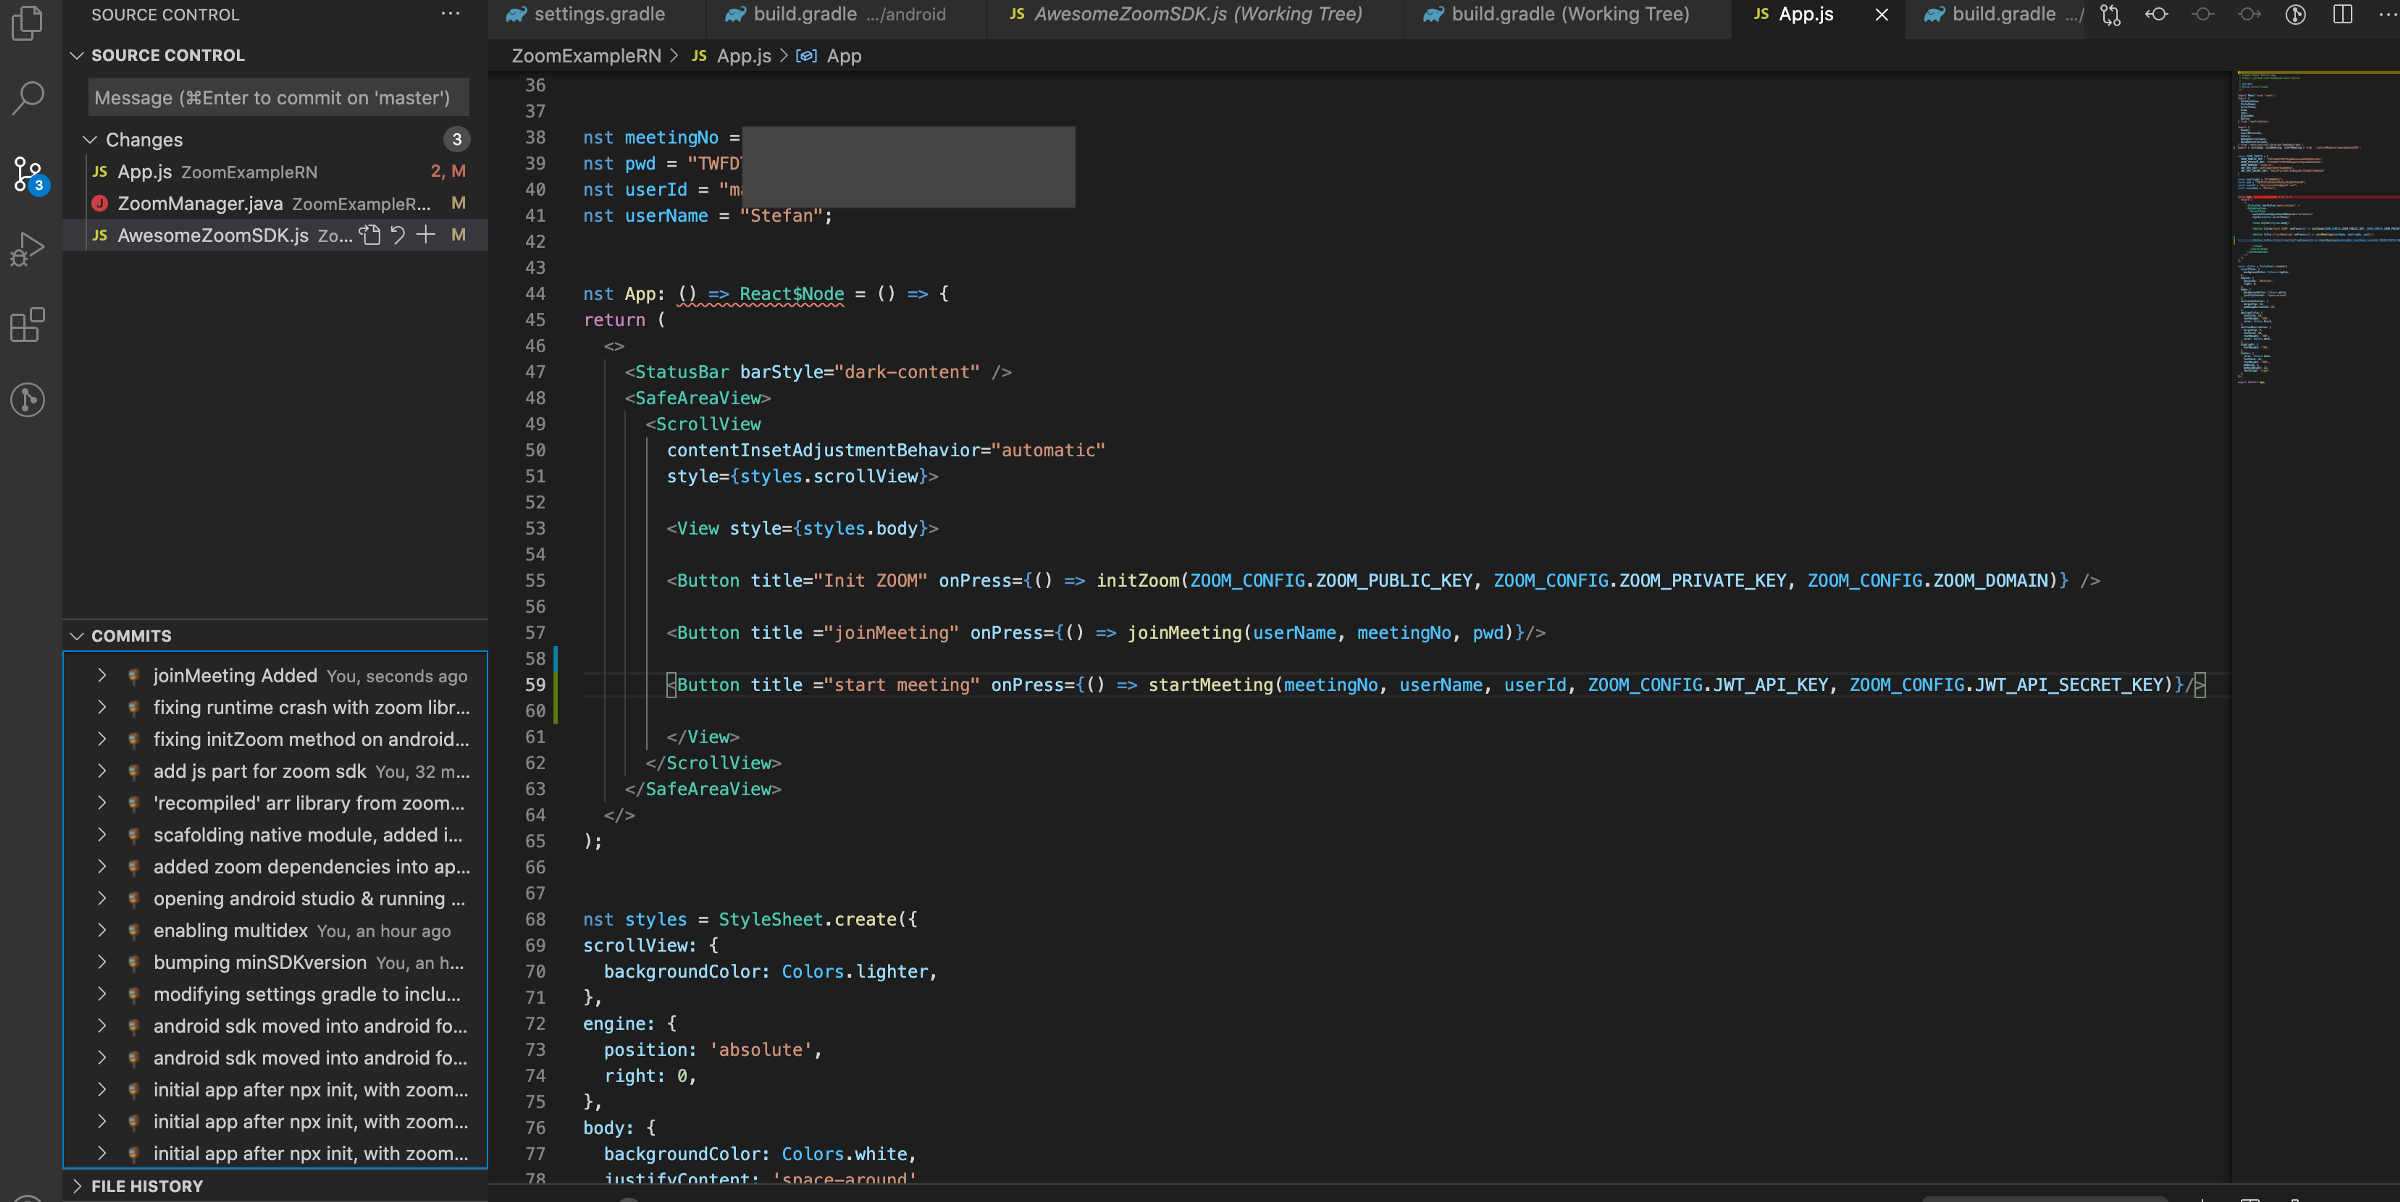
And now you can even start Zoom meeting from your device.
Btw, did I mentioned that Zoom SDK UI can be customized ?
Looking for iOS ? Link is in the start of this article.
Bitbucket repo: https://bitbucket.org/majirosstefan/zoom-react-native-example/src/main/
Thanks for reading.