
In this blog post we will setup nightly builds for React Native apps built with MS AppCenter using serverless NodeJS Azure Function, shell scripts and environment variables.
Motivation
The motivation behind implementing nightly builds is purely upon you, but in general, you can setup async (nightly) execution of mobile penetration / security tests, generate and mail to yourself code coverage reports, track up startup time, React Native bundle size etc.
Usage in teams
I used nightly build flow to run e2e tests written with Cavy in Appcenter and to generate test-coverage report and mail it to myself. As I am working mostly solo as freelancer these days, I do not publish new releases so often, and then e2e tests could be run in relatively async way at night. However, if you are working in a team of more developers, and you release new version with higher cadency, then it (maybe) makes sense to put something else in nightly builds or not use async DevOps pipelines at all.
What is this about
In short, we will use MS AppCenter REST API documented by OpenAPI specification (link here). We will call endpoint responsible for triggering build from NodeJS app, that will be hosted as serverless Azure Function (but feel free to use AWS Lambda or any other provider) - I only used Azure Functions, as I am already paying to Azure for AppCenter builds. Finally, we will configure cron expression (timer) to trigger custom build flow periodically, at some time at night.
AppCenter and Multiple Environments, Configurations
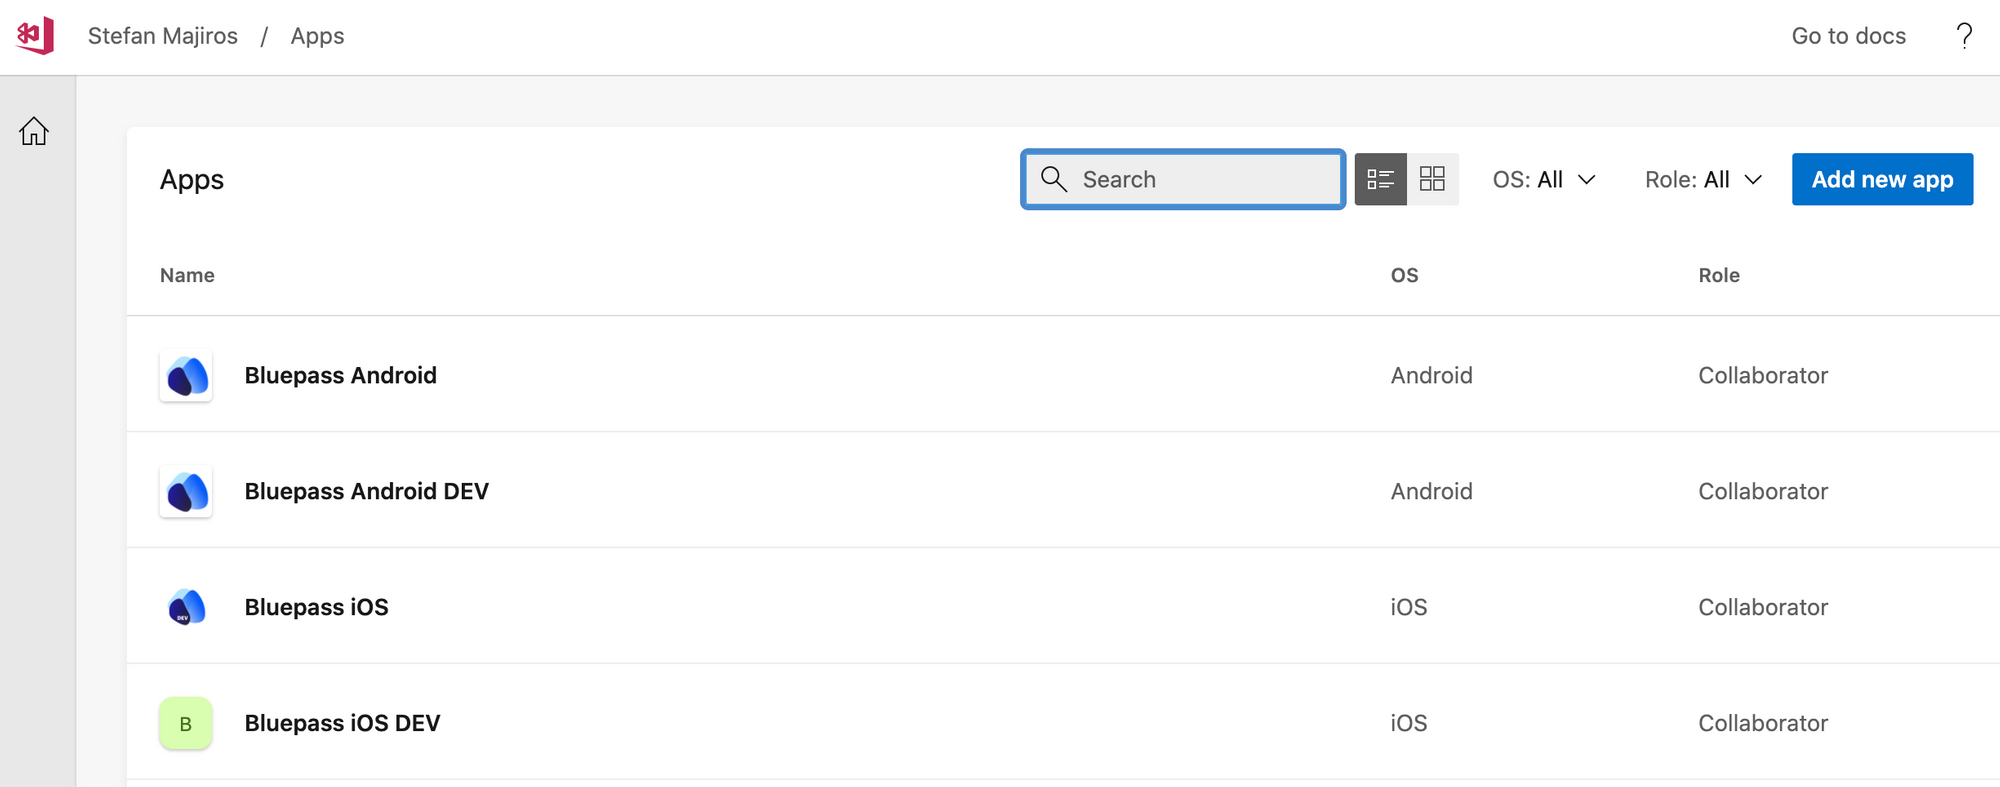
As you may already find out, AppCenter is not quite optimal tool when you need to handle multiple environments in single app. Although you can modify some parts of the app with shell-scripts I recommend you to create separate apps using web UI and then share configuration between them.
To handle multiple environments with MS AppCenter (e.g. staging and prod environments), you would need to create 4 apps in AppCenter: staging for Android, staging for iOS, prod for Android, prod for iOS.
Just for an example, here is how it would look like:
Branching model
All 4 apps are hosted in single repository with 2 branches (staging, and prod). Each branch uses different build variables / build configuration.
NOTE: If you intend to publish these apps to share them with testers, do not forget to create corresponding apps for each app variant in Appstore and Google Play.
Night / "Async" Builds
As I mentioned in the start of this blog post, some steps could be run asynchronously (nightly) to the actions executed on the remote repository.
Regardless if you want to use async or sync DevOps flows, in MS Appcenter you would need to either:
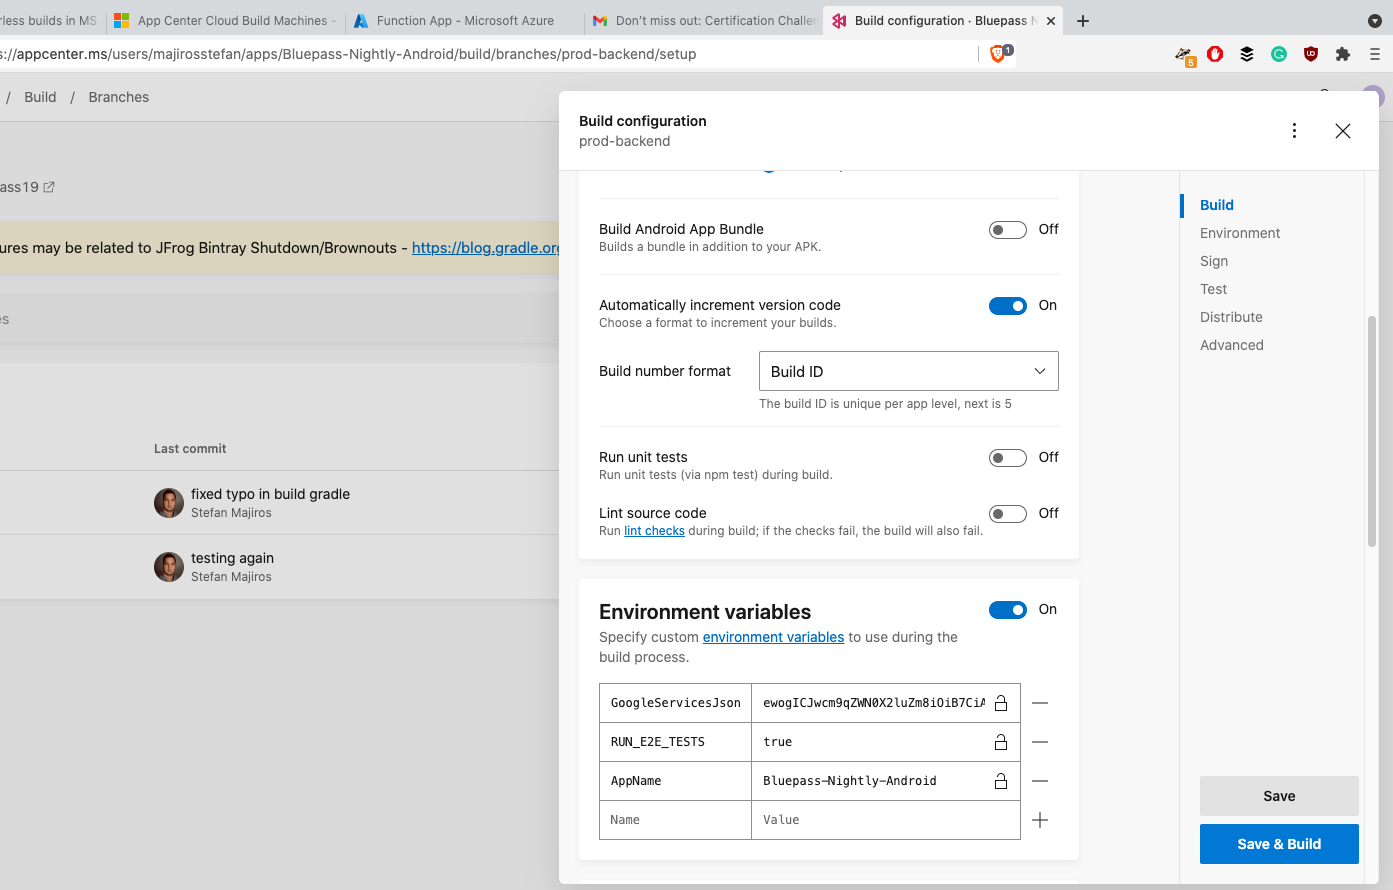
- create another Git branch and then just setup environment variables such as "RUN_E2E_TESTS=true".
- or create another app pair in MS AppCenter (that's what I've chosen) Then, again, you just need to setup environment variables such as "RUN_E2E_TESTS" to "true".
This is all just because so far, I did not discover a way to access data passed in REST build trigger. It seems we can pass additional parameters to AppCenter API such as {"runMyCustomSteps": "true"} in the body of POST request (see API details few lines below) but then I could not access that data in build pipeline scripts.
On the other hand, to bend build pipeline as you wish, you can also use pretty unconventional workarounds:
- rely on time when build runs - e.g. if the build is running at 2:30 AM, you could run it with different settings - just remember, that this approach does not work in globally distributed teams with people living in different timezones
- use special naming for commits on which e2e / custom build flow should be executed (I am also not 100% okay with that, but it would work)
Nightly builds setup
After short introduction let's setup async/nightly builds and write some code.
Step 1: Call MS AppCenter build trigger endpoint
To schedule build, AppCenter uses URL below (to see more , take a look at OpenAPI here):
URL: https://api.appcenter.ms/v0.1/apps/{owner}/{appName}/branches/{branch}/builds
METHOD: POST
HEADERS: X-API-TOKEN # Authentication token - see image below
BODY: # {"sourceVersion": "string", "debug": true} - as I mentioned, data passed in this object seems not to be accessible in shell scriptsThe process to generate access token that will be used in HTTP headers (X-API-TOKEN) is very easy and straightforward:
Then you need to choose, when you want to execute custom shell scripts. These are supported build scripts that uses name of the phase in which they are executed (written in order they are executed):
- appcenter-post-clone.sh - e.g you can use it to check if environment variables are set
- appcenter-pre-build.sh - e.g. to inject secrets / 'echo' environment variables in the app source code
- appcenter-post-build.sh - e.g. to publish source maps and build symbols (to have nice stacktrace for minified or obfuscated code during analyzing crashes)
To use these scripts, you just need to create file with the same name in the root folder in your app project and then write few bash/scripts. Following environment variables could be accessed in these build scripts by default (see more details here):
APPCENTER_BUILD_ID #The unique identifier for the current build
APPCENTER_BRANCH #Name of the branch that's being built from
APPCENTER_SOURCE_DIRECTORY #Location of the source code on the build machine
APPCENTER_OUTPUT_DIRECTORY #Location where the build results are stored in
APPCENTER_TRIGGER #What triggered the build, was it manual or continuous by pushThe example of shell script, for example to run e2e tests from appcenter-pre-build.sh could look like this:
#!/usr/bin/env bash

#put following in the end of the file

# if is null or empty string
if [ -z ${RUN_E2E_TESTS+x} ]; then
    echo "E2E are not turned on for this build.";
    exit 0
fi

# if RUN_E2E_TESTS is not empty, run E2E tests - e.g. using appium, cavy, espresso, etc.here
cavy run-ios

# then run test coverage report in different script
source "${APPCENTER_SOURCE_DIRECTORY}/scripts/coverageReport.sh"

# or execute static security analysis - or any additional steps - it is totally up to you
Finally, you just need to set RUN_E2E_TESTS environment variable to true using web UI:
Just a quick note, builds for Android and iOS React Native apps run on macOS machines.
Step 2: REST Call from NodeJS (Javascript) app
The process of calling MS AppCenter REST endpoint from NodeJS is relatively straightforward with Axios:
/* eslint-disable prettier/prettier */
const axios = require('axios');

const makeUri = (owner, appName, branch) =>
  `https://api.appcenter.ms/v0.1/apps/${owner}/${appName}/branches/${branch}/builds`;

module.exports = async function (context, myTimer) {
  if (myTimer.isPastDue) {
    console.log('Scheduling builds');
    const owner_iOS = process.env['owner_iOS'];
    const appName_iOS = process.env['appName_iOS'];
    const branch_iOS = process.env['branch_iOS'];

    const ownerAndroid = process.env['owner_Android'];
    const appNameAndroid = process.env['appName_Android'];
    const branchAndroid = process.env['branch_Android'];

    const iOS_uri = makeUri(owner_iOS, appName_iOS, branch_iOS);
    const android_uri = makeUri(ownerAndroid, appNameAndroid, branchAndroid);

    console.log('URI', iOS_uri, android_uri);
    await doRequestSafe(iOS_uri);
    await doRequestSafe(android_uri);
  } else {
    console.log('Skipping scheduling builds');
  }
};

async function doRequestSafe(uri) {
  try {
    let response = await axios.post(
      uri,
      {isDebug: false},
      {
        headers: {
          'X-API-Token': process.env['AppCenterApiToken'],
        },
      },
    );
    console.log(response);
  } catch (error) {
    console.log(error);
  }
}
As you can see, I am relying on environment variables (to not embed any secrets in the source code) and I also used format supported by Azure Functions.
Step 3: Writing Azure function
To write Azure functions in VS Code, you need to install Azure Functions VS Code extension first and after you need to login into Azure by clicking on the bottom bar. To do that you also need to have an Azure Account (I recommend you to sign in using web browser first).
Here is how you can create project and your first Azure Function in just a few seconds:

Then, just paste the code that calls AppCenter build trigger REST endpoint (code above, from Step 2). That's all for this step.
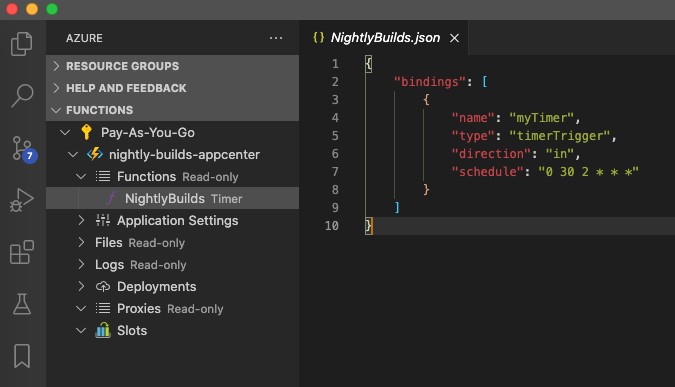
Step 3: Schedule periodical execution using Cron-like format
If you want to modify cron expression from the executed steps, just open your function inside Azure Functions extension and enter your new cron format into "schedule" property.
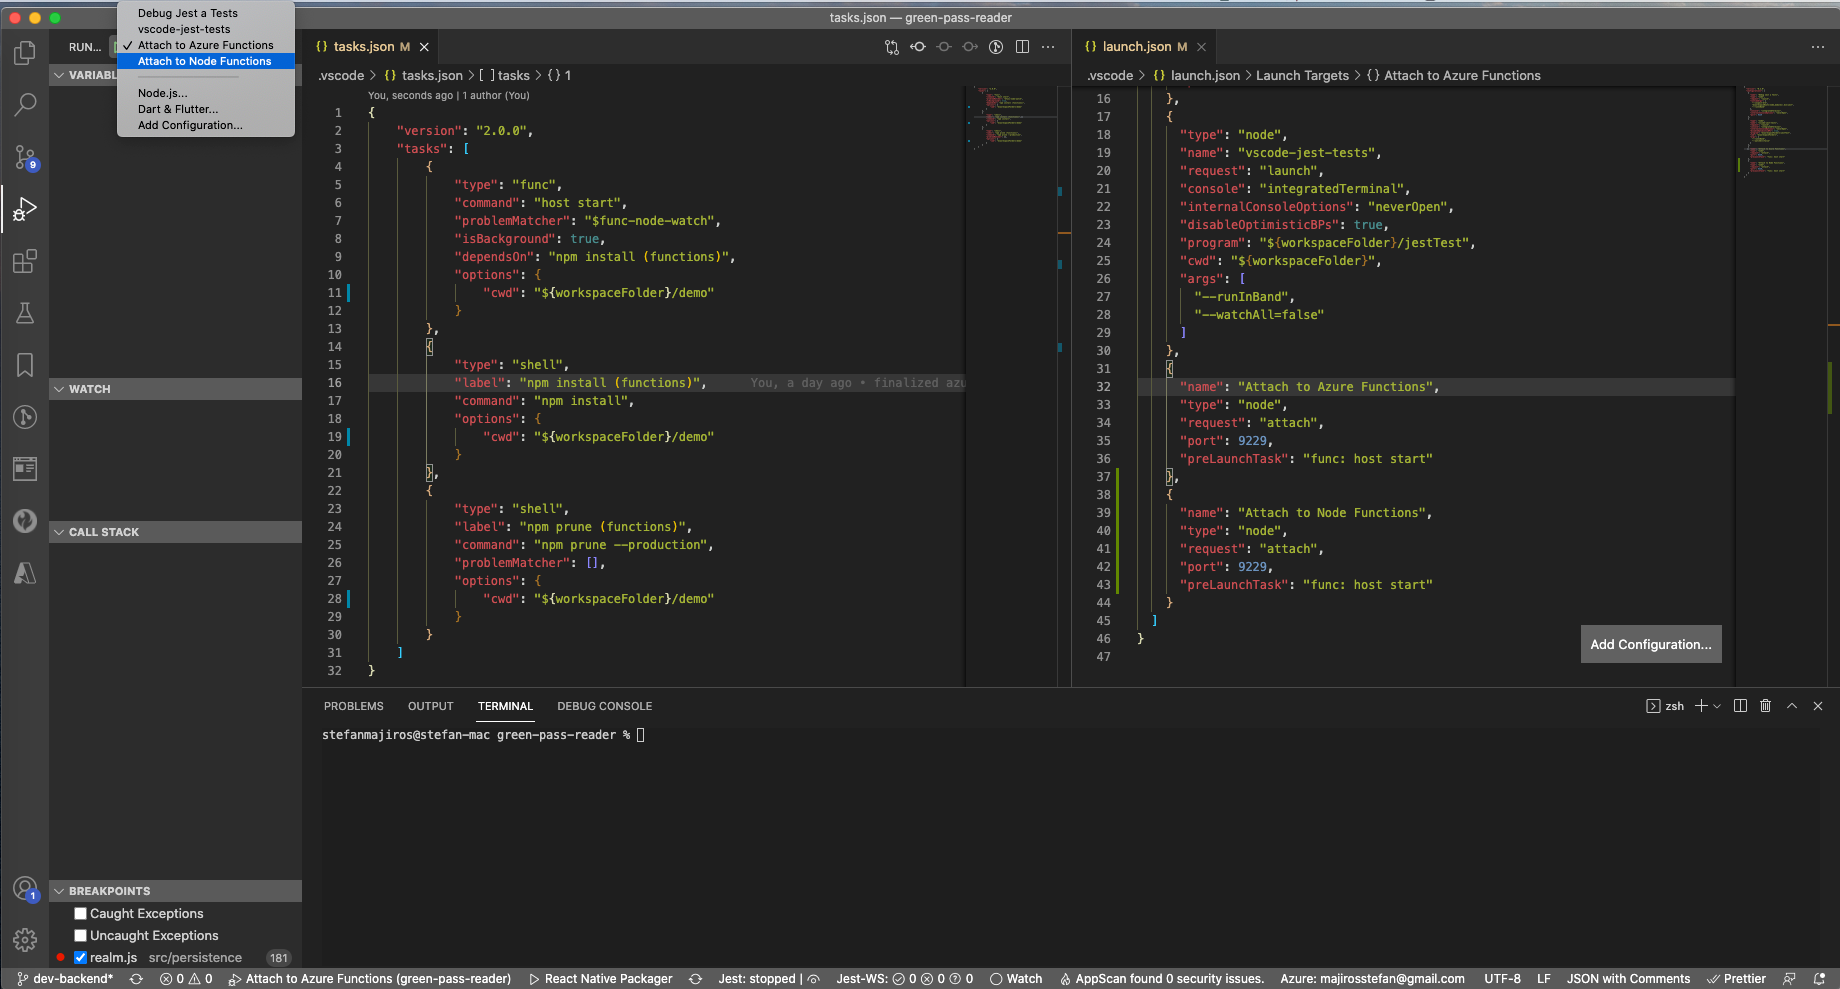
Step 4: Run app locally
To run function locally, open the debug tab and select configuration Attach to Node Functions. You can rename it to "Attach to Azure Functions" by editing launch.json file. If run selected debug configuration, VS Code will use commands defined in ./vscode/task.json to install dependencies and launch function locally.
If you did everything right, you should see following output in the console:
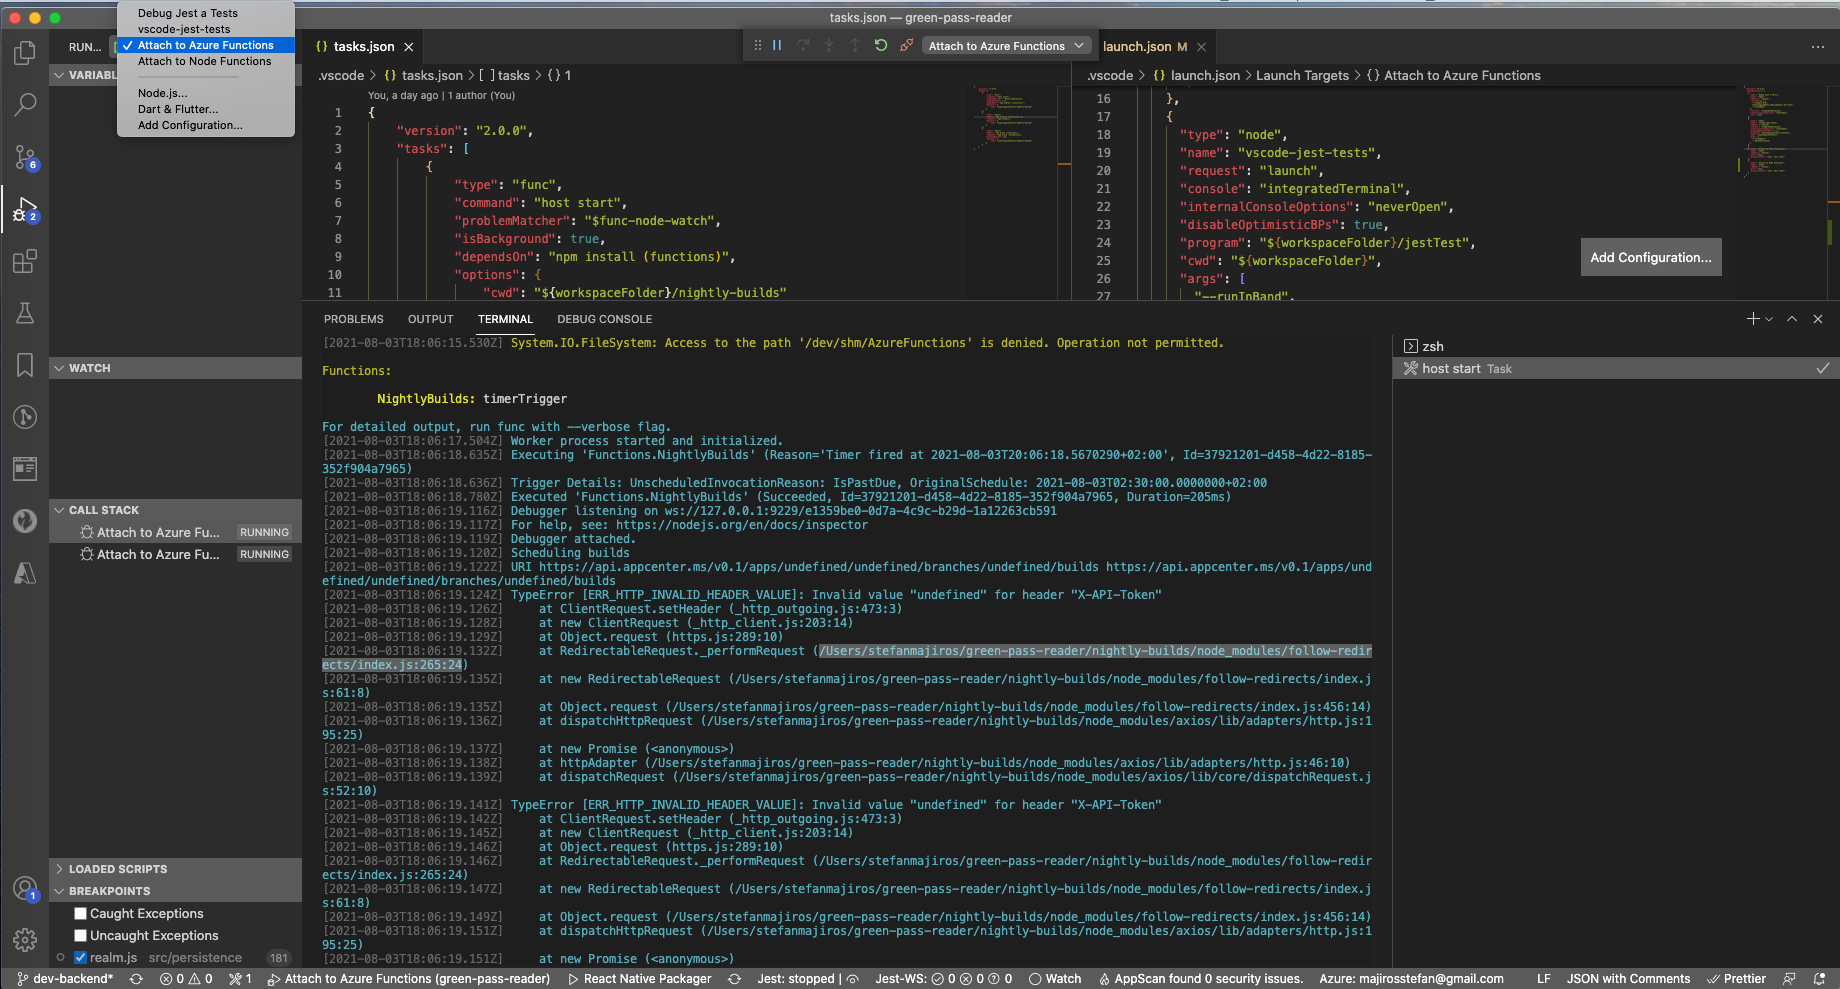
As you can see, execution fails, as I did not define required environment variables. If you want to set these environment variables locally, you can also type these values into local.settings.json and then just restart the app (and execute the function). Just remember, that you should not commit this file in the remote repository and that's why it is placed in .gitignore.
Now your function should run without any error (but always check console output for that):
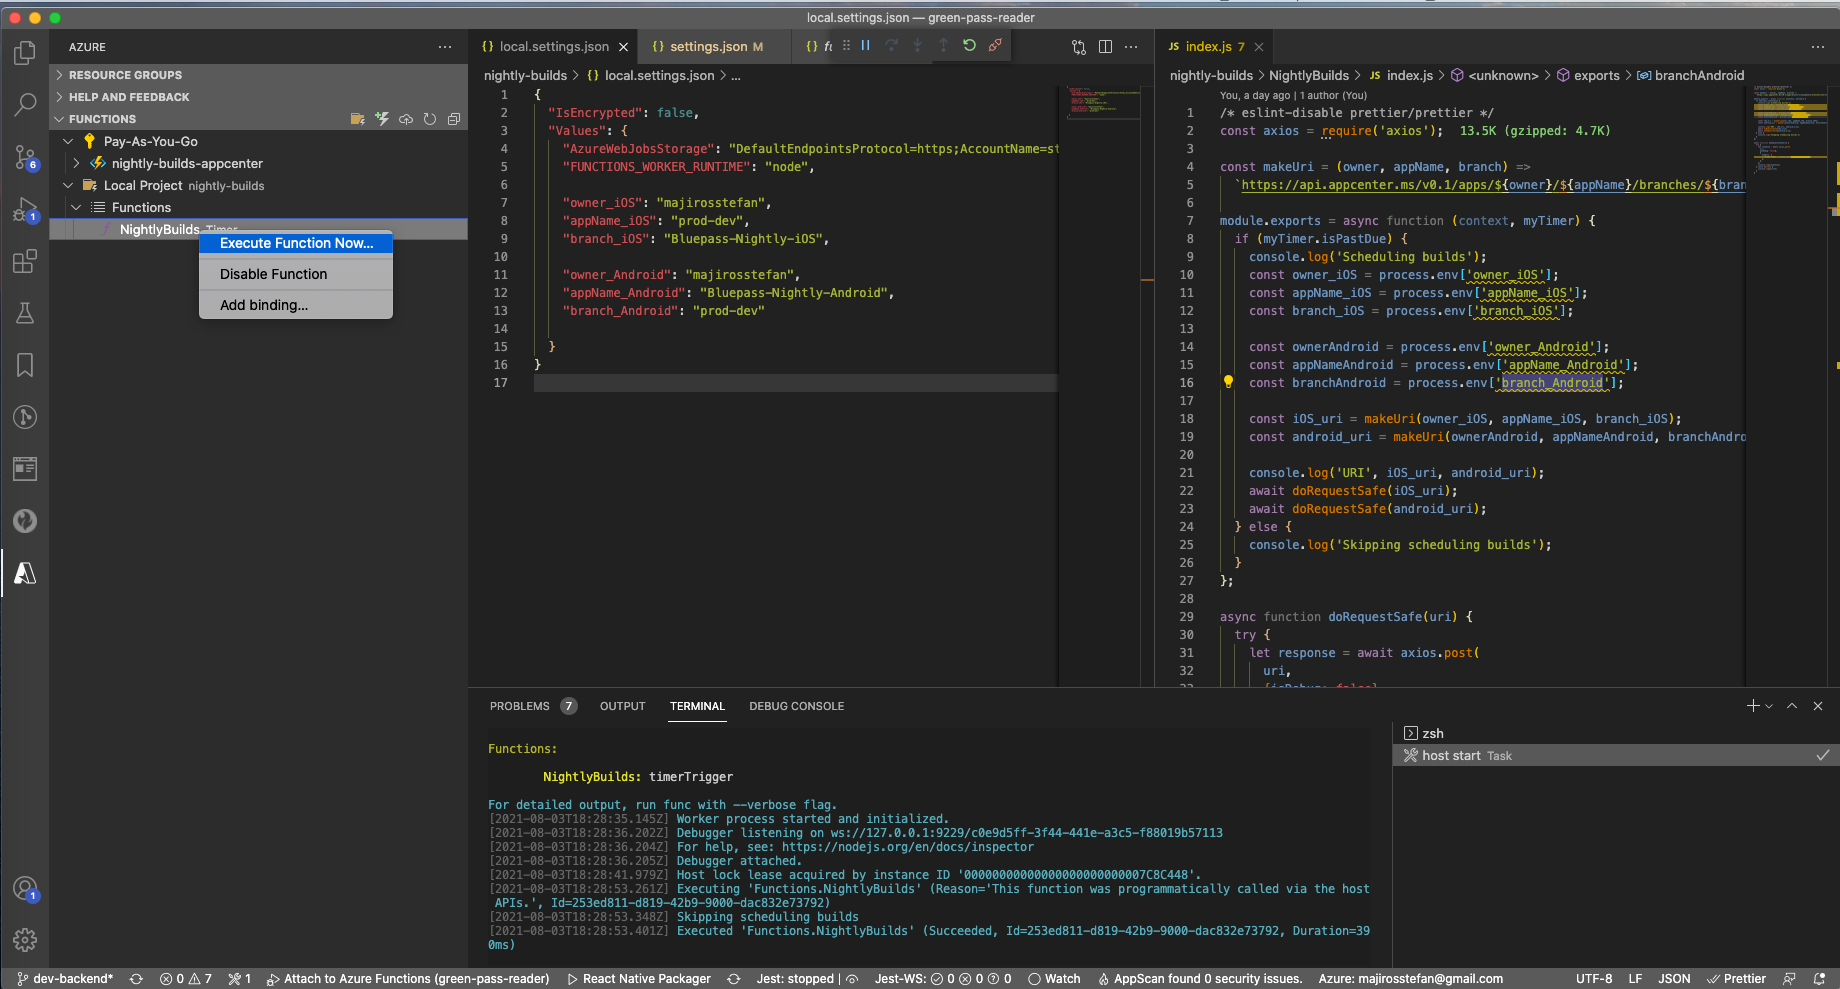
If your function did not run automatically, right click on your function (take a look at pic in Step 3), and choose "Run this function now".
Creating Environment Variables From URL
If you are interested how I found the values for these variables, remember that I created additional pair of apps in Appcenter for nightly builds (both for Android, and iOS). Then I opened one of these apps (build section) and took a look at the URL in web browser that looked like this:
"https://appcenter.ms/users/majirosstefan/apps/Bluepass-Nightly-iOS"
Based on example URL above
- "majirosstefan" - is the owner_iOS property,
- and appName_iOS is the Bluepass-Nightly-iOS.
Then you only need to type branch_iOS which is name of branch you will build with Appcenter (I have setup prod-env branch to be built at night, that why I am using that value).
Then, you need to repeat these steps for Android variant of your app.
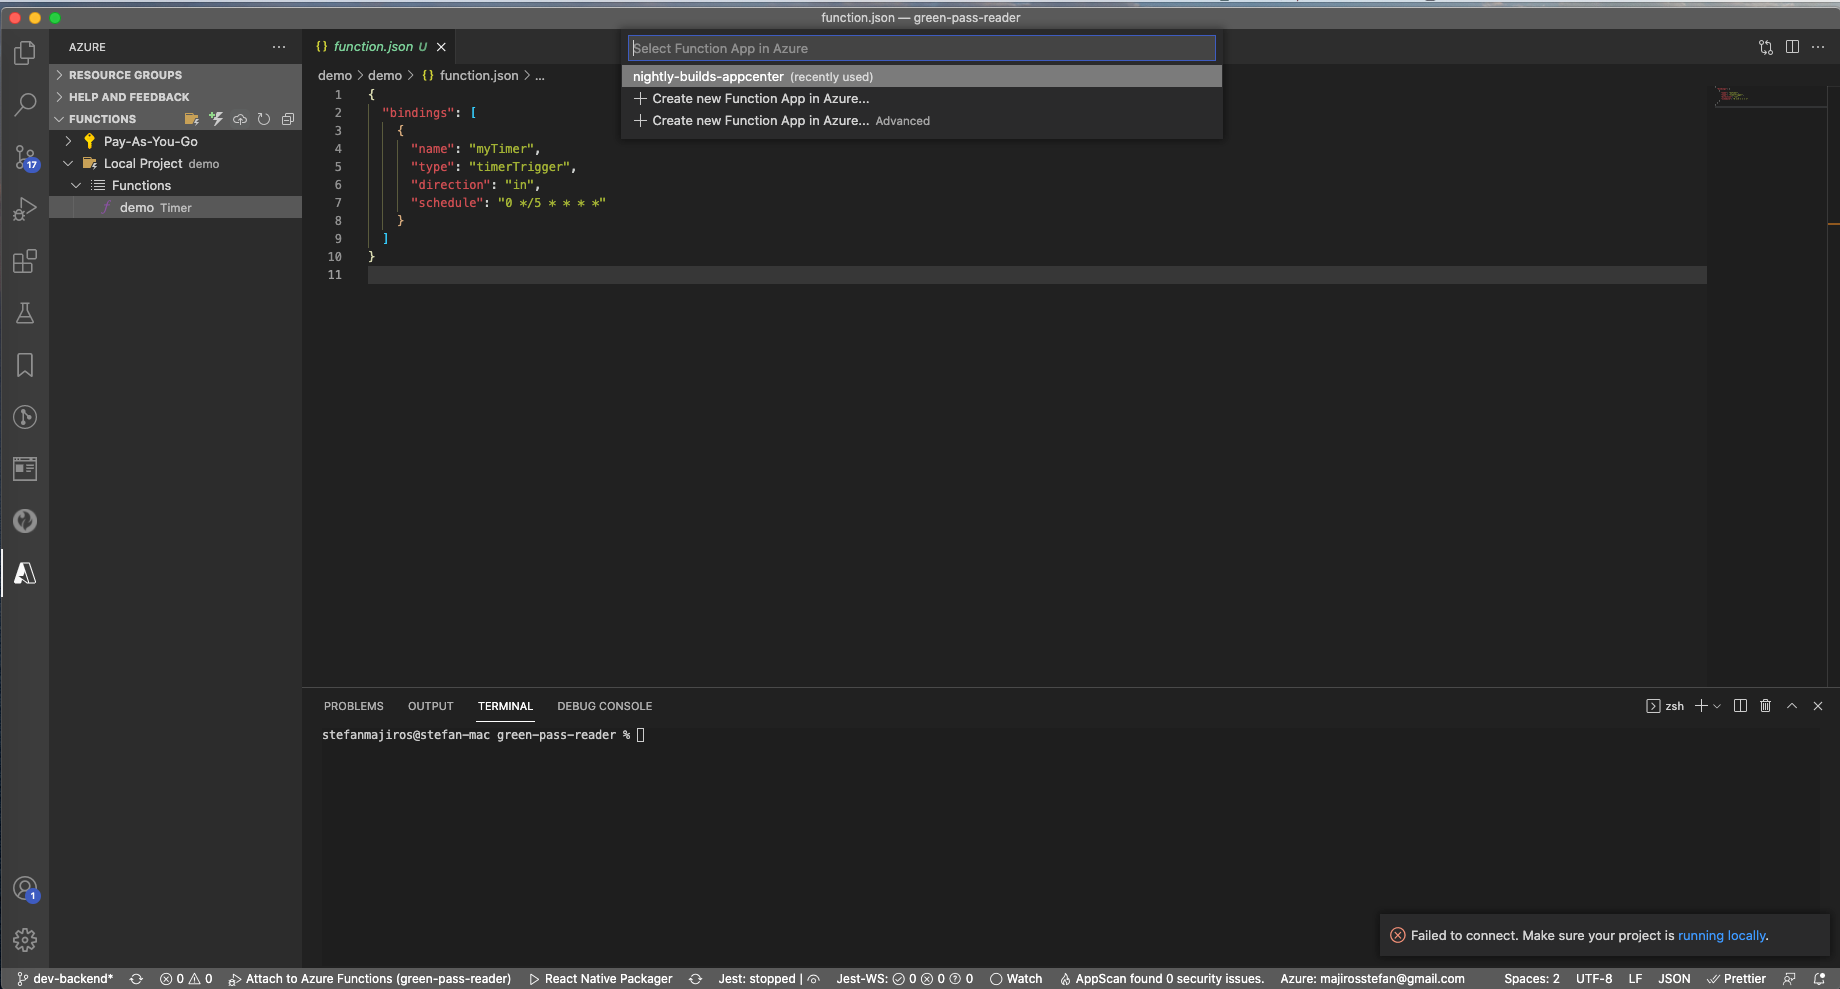
Step 4: Deploy Function to Azure
Deploying function to the Azure is very simple - just click on the cloud icon in the left sidebar, then choose existing app in Azure or create new if you wish (you would need to select Node version and region if creating new function). Then just wait few minutes.
Step 5: Inject App Secrets into Azure
The last step is just adding environment variables to Azure function, which is also quite easy and quick. Few clicks, and everything is set up - just do not forget to click on Save in the end.
Take a look at how it is done, after you open portal.azure.com:
You can also deploy variables defined in local.settings.json (so you would not need to type them manually) by using Azure CLI command with --publish-local-settings flag, if you had installed Azure func CLI (but that is out of scope of this tutorial)
func azure functionapp publish Function_App_Name --publish-local-settingsSummary
This was tutorial about how to setup nightly builds using Azure Functions, Appcenter and environment variables that use different build logic. I covered writing and deploying Azure function together with writing basic shell scripts. Hope this will help you to add more Async DevOps pipelines in your projects!
Hi, I am Stefan Majiros, serverless and React Native freelancer. You can follow me on Twitter (@stefanmajiros), or hire me for your project using https://stefan-majiros.com where you could schedule 30min video call with me to consult your project - for free.